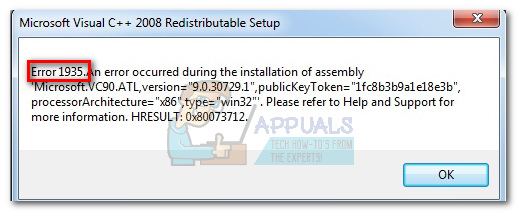
Fix: Error 1935 Visual C++
The “error 1935 Visual C++” might occur if the Microsoft .NET framework or the Visual C++ Redistributable package is damaged or missing, Trustedinstaller service refuses to start when called by the installer, or if the Windows Module Installer service is disabled. Another rare but valid culprit that will trigger this issue is the system transaction log (after a failed installation) – it will display this error until the log is cleared.
This particular error usually occurs when installing a Microsoft Visual C++ Redistributable package or a version of SQL Server.
If you’re currently struggling with this particular issue, there is some good news. We managed to identify quite a few of successful fixes that have managed to help users that were in a similar situation as you. Below you have a collection of methods that were confirmed to work by at least one user. Please follow each potential fix in order until you manage to resolve the “error 1935 Visual C++” error.
Method 1: Using the System Update Readiness Tool (Windows 7 only)
As it turns out, the error might also occur because of an inconsistency with the Windows Store servicing. A glitched Windows servicing store might prevent you from installing Windows updates, service packs and utilitarian software with enhanced permissions like Visual C++ Redistributable packages.
Some users have managed to easily resolve the “error 1935 Visual C++” error, by using the System Update Readiness Tool to automatically resolve inconsistencies with the Windows Store servicing.
Note: This first method is only applicable to users who are encountering the “error 1935 Visual C+” issue on Windows 7. If you’re not on Windows 7, jump straight to Method 2.
If you’re on Windows 7, download the System Update Readiness Tool for Windows 7 from this Microsoft official link (here). Keep in mind that the tool is quite large, so it might take a while for the download to complete.

Once the tool is downloaded, run the installer and let it scan your system in order to repair the store servicing inconsistencies. If not prompted to restart at the end, do it on your own. At the next system startup, see if the issue is resolved. If it isn’t, continue troubleshooting with Method 2.
Method 2: Repairing the Microsoft .NET Framework installation
The “error 1935 Visual C++” might also occur if the Microsoft .NET installation on this computer is damaged or corrupted. Some users have managed to resolve the issue by reinstalling Microsoft .Net Framework and then reinstalling the software that was showing the “error 1935 Visual C++” error.
Follow the steps down below to reinitiate the Microsoft .NET Framework installation in order to repair it:
- Press Windows key + R to open a Run window. Type “appwiz.cpl” and hit Enter to open Programs and Features.

- In Programs and Features, click on Turn Windows features on or off from the leftmost pane.
 Note: If prompted to confirm via the administrator password, type it and hit Enter to continue.
 - Uncheck the box next to Microsoft .NET Framework 3.5.1 and hit Next to disable it.
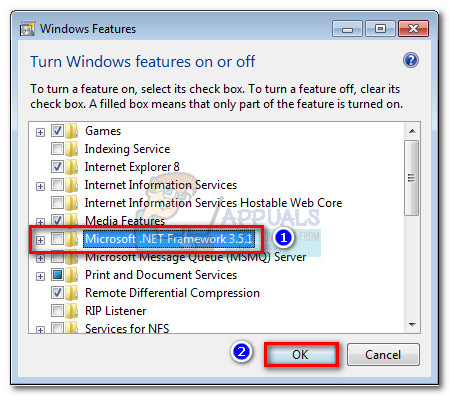 Note: If you’re on Windows 8 or Windows 10, disable .NET Framework 3.5.
 - Restart your computer and in order to apply the changes, then return to the Windows Features screen via step 1 and step 2.
- Re-enable Microsoft .NET Framework 3.5.1 (or NET Framework 3.5) by enabling the checkbox next to it and hitting OK.

- Restart your computer again and see if the issue has been resolved by re-installing the software that was showing the error.
If you’re still seeing the “error 1935 Visual C++“, move down to Method 3.
Method 3: Enable Windows Modules Installer from Services
Some users have managed to resolve the issue after discovering the Windows Module Installer was disabled. If this is the cause of the “error 1935 Visual C++” issue, you will be able to resolve the problem by changing the Startup type of Windows Module Installer to Manual or Automatic.
Note: The Windows Module Installer enables the installation, modification, and removal of Windows updates and a few other optional components (including Visual C++ Redistributable packages). You might be shown the “error 1935 Visual C++” because this service is disabled. Although the default state of the Windows Modules Installer is Manual, there are some utility 3rd party programs that will disable this service in order to boost the system’s performance.
Follow the steps below to check if Windows Modules Installer is disabled and enable it if needed:
- Press Windows key + R to open a Run command. Then, type “services.msc” and hit Enter to open the Services window.

- Navigate through the list of services and find Windows Modules Installer. When you find it, right-click on it and choose Properties.

- In the General tab of Windows Modules Installer Properties, see which Startup type is currently active. If the Startup Type is set to Disabled, change it to Manual and hit Apply to confirm your changes.
 Note: You can also set the Startup Type to Automatic but this will run the service at every startup, even when it’s not needed.
 - Reboot your computer and see if you’re able to install the software without the “error 1935 Visual C++“. If you’re still seeing it, move over to Method 4.
Method 4: Clearing the transaction log
This issue might also occur when the Windows file system transaction log has become corrupt after installing a particular piece of software. This transaction log is used to recover files whenever a file error occurs. Some users have been able to resolve the “error 1935 Visual C++” issue by clearing the transaction log and re-opening the installation executable.
Follow the guide down below to clear the transaction log and resolve the “1935 Visual C++” error:
- Open an elevated Command Prompt. To do this, access the Start bar, search for “cmd“, then right-click on Command Prompt and choose Run as Administrator.

- In the elevated Command prompt, run the following command and press Enter:
fsutil resource setautoreset true C:\
 Note: Keep in mind the command above assumes that the C:\ drive is your OS volume. If you installed Windows on a different partition, change the letter accordingly.
 - Reboot your computer and open the software installation that is triggering the “1935 Visual C++“.
If you’re still seeing the “1935 Visual C++” error, move over to the final method.
Method 5: Force-starting the TrustedInstaller service
The “error 1935 Visual C++” is also known to appear when the TrustedInstaller service refuses to open when called by certain installers. Some users have been able to bypass the error message by forcing the TrustedInstaller service to start right-before opening the installation executable.
To do this, open a Run window (Windows key + R) and type/paste “C:\Windows\servicing\TrustedInstaller.exe“. Hit Enter to open the TrustedInstaller.exe. This might appear unnecessary as it doesn’t do anything visible, but it will force the TrustedInstaller process to open.

Immediately after performing the step above, open the installer of the application that is showing the error and see if you’re able to complete the installation process. If you’re not, continue with the steps below.
It is possible that TrustedInstaller cannot be called to complete the installation because it does not appear in the service list. We can right this wrong by changing its register value to active using Registry Editor. Here’s the complete guide to doing this:
- Press Windows key + R to open a Run command. Then, type “regedit” and hit Enter to open the Registry Editor window.

- In Registry Editor, navigate to HKEY_LOCAL_MACHINE > SYSTEM > CurrentControlSet > Control.

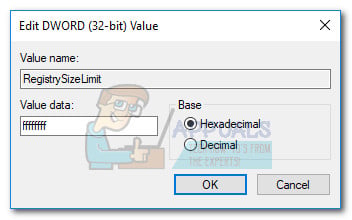
- From the right pane, double-click on the RegistrySizeLimit key to open the Edit DWORD Value dialog box.
 Note: If you aren’t able to identify the key for RegistrySizeLimit, you’ll need to create one yourself. Do this by right-clicking anywhere in the right-pane and selecting New > Dword (32-bit). Name the newly created DWORD value to “RegistrySizeLimit“, then open it by double-clicking.

- In the Edit Dword (32-bit) Value screen set the Base to Hexadecimal and enter “ffffffff” in the Value Data box. Then, change the Base to Decimal and verify that the Value data is “4294967295“. If it holds a different value, change it manually to the value specified above and hit OK.
- Once the RegistrySizeLimit key is successfully created with the required values, close Registry Editor and reboot your computer.
- Once your system boots back up, open an elevated Command Prompt. To do this, access the Start bar, search for “cmd“, then right-click on Command Prompt and choose Run as Administrator.
- In the elevated Command Prompt, type “SFC /SCANNOW” and hit Enter to initiate a system-wide scan to find and repair system files.

- Once the SFC scan is complete, re-install the program that was giving you issues and see if the “1935 Visual C++” error is resolved.