How to Fix Error 0xc000007b “Application was unable to start correctly”
The 0xc000007b error primarily occurs due to corrupted or missing Dynamic Link Library (DLL) files, which applications require to function properly. DLL files may become corrupted as a result of malware infections or interference from third-party antivirus software. Applications load DLL files into RAM to facilitate various functionalities, such as graphics and audio.

Additionally, this error might occur if you downloaded an application or game from a non-official source, or if you have 32-bit DLL files on a 64-bit Windows system.
| 🚫Occurs When: | Launching Programs |
| ✅Best Solution: | Solution 5 |
| 🔍Caused by: | Corrupted DLL(s) |
| 👾Symptoms: | Unable to launch application |
DLL files can be utilized by multiple applications simultaneously. They were created to minimize the amount of code necessary for an application to execute essential features, such as graphics rendering and audio processing. Although these files are bundled with Windows components, in the event of corruption, you can automatically download them by installing the VC runtime.
1. Install the VCRedistributables
If encountering the corrupted DLL files, it’s recommended to reinstall all versions of Microsoft Visual C++ since they comprise various DLL files serving different operational purposes for applications. To restore corrupted DLL files, you have two options: reinstall components that contain DLL files or download a specific DLL file and replace the corrupted one.
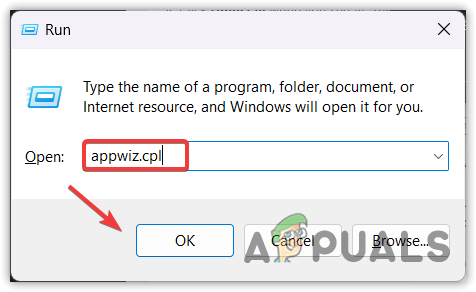
- Press Windows + R keys together to open the Run dialog box.
- Type appwiz.cpl and click OK to open the ‘Programs and Features’ window.
- Right-click on each Microsoft Visual C++ entry and choose Uninstall.
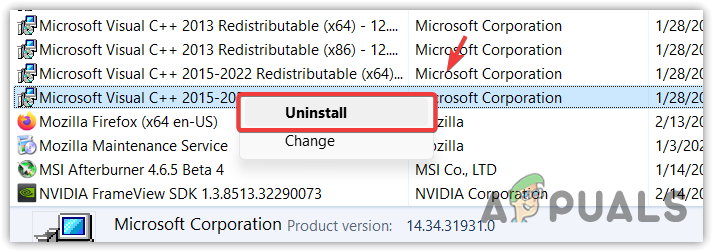
- Confirm by clicking Uninstall in the VC runtime uninstaller dialog.
- Repeat for all Microsoft Visual C++ versions listed.
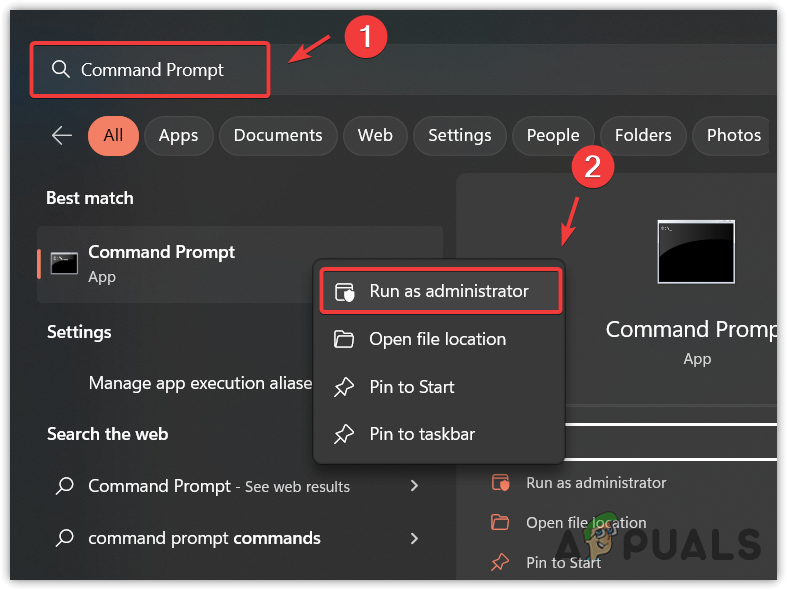
- Next, press the Windows key and type Command Prompt.
- Right-click on the result and choose Run as administrator.
Running Command Prompt as administrator - In the command prompt, type the following command to clear the component store:
Dism.exe /online /Cleanup-Image /StartComponentCleanup
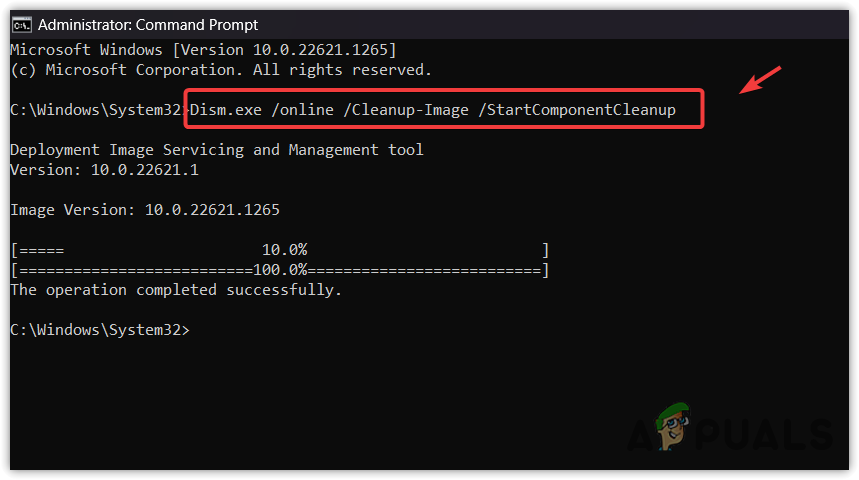
Running the DISM Cleanup Image Command - After completion, close the command prompt and download the ZIP file containing all versions of the Microsoft Visual C++.
- Extract the content of the ZIP folder using a utility such as WinRar.
- Navigate to the resulting folder and execute the Install_all batch file to install all released versions of Microsoft Visual C++.
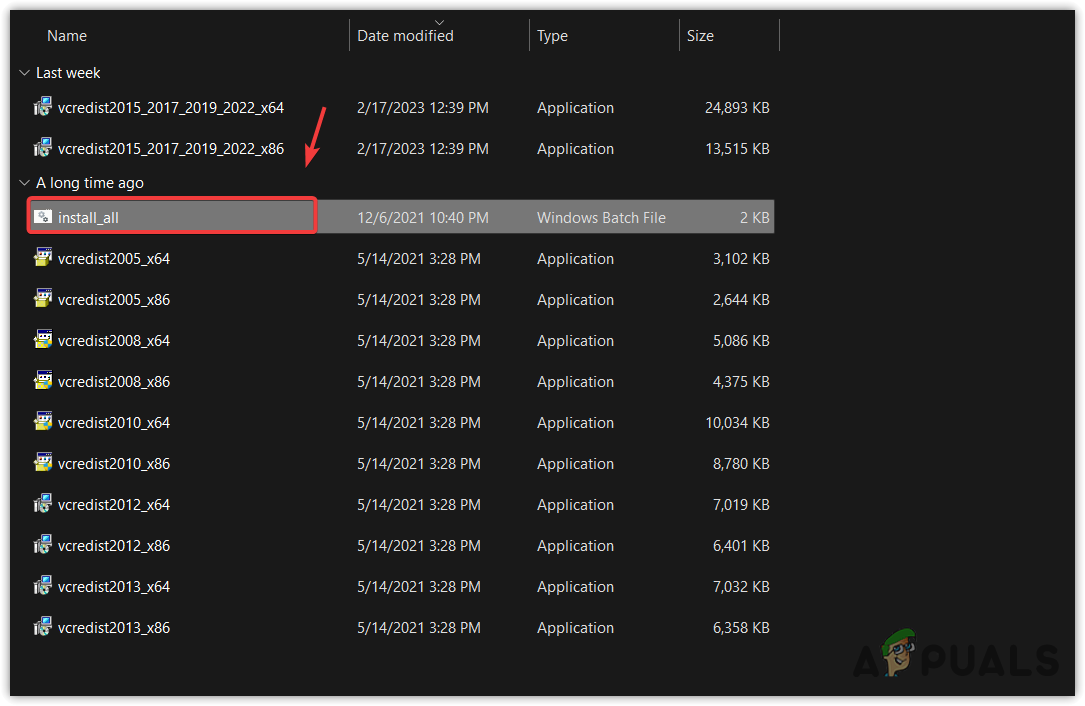
Installing Microsoft Visual C++ Components - Restart your computer after installation and attempt to open the application or game to verify if the error has been resolved.
2. Install the DirectX Module
DirectX is a collection of APIs utilized for handling tasks related to multimedia, particularly game programming and video, on Microsoft platforms. Games developed using DirectX help programmers to make their software hardware-challenging. When DirectX components become corrupted, a 0xc000007b error might show up when launching a game or application.
Let’s install the DirectX module to overwrite any corrupted DLL files.
- Download the DirectX installer from the official Microsoft website.
- Run the downloaded installer and follow the on-screen instructions to complete the installation.
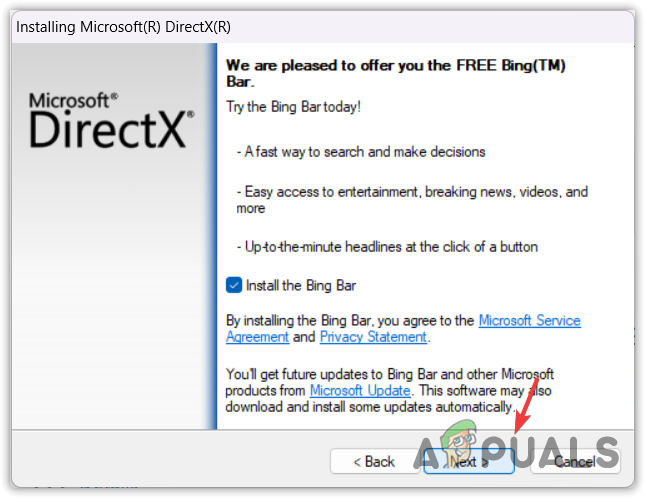
Installing DirectX - After finishing the installation, try to open the affected game or application to see if this resolves the error.
3. Install the .NET Framework
The .NET Framework provides a runtime environment for many applications, offering services like memory management and security. At the same time, if an application dependent on a specific version of the .NET Framework can’t access or find the necessary components within the system, this can cause the 0xc000007b error.
By installing or updating the .NET Framework, you makes sure that all the necessary resources are in place, potentially resolving the error and smoothing your application’s run-time process.
- Press the Windows key and type Windows Features.

Navigating to Windows Features - Select Turn Windows features on or off from the displayed results.
- In the Windows Features dialog, check the boxes for .NET Framework 3.5 and .NET Framework 4.8 Advanced Services.
- Click OK to install these features.
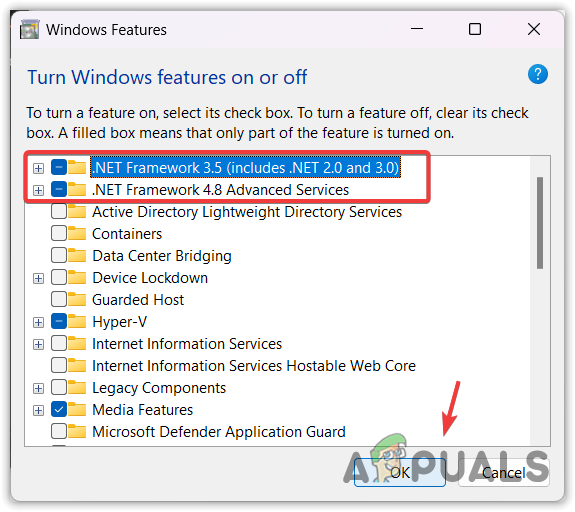
Installing .NET Framework 3.5 and 4.8 - Once the installation is complete, try opening the application or game that was giving the error to check if the problem has been resolved.
4. Find the Corrupted DLL file using Dependency Walker
Dependency Walker is a utility that can help you identify the specific DLL files that may be causing the error in your application or game. By pinpointing the problematic file, you can replace it with a fresh, non-corrupted version.
- Download Dependency Walker from the official source or a trusted software repository.
- Extract the downloaded archive using a file extraction tool like WinRAR or 7-Zip.
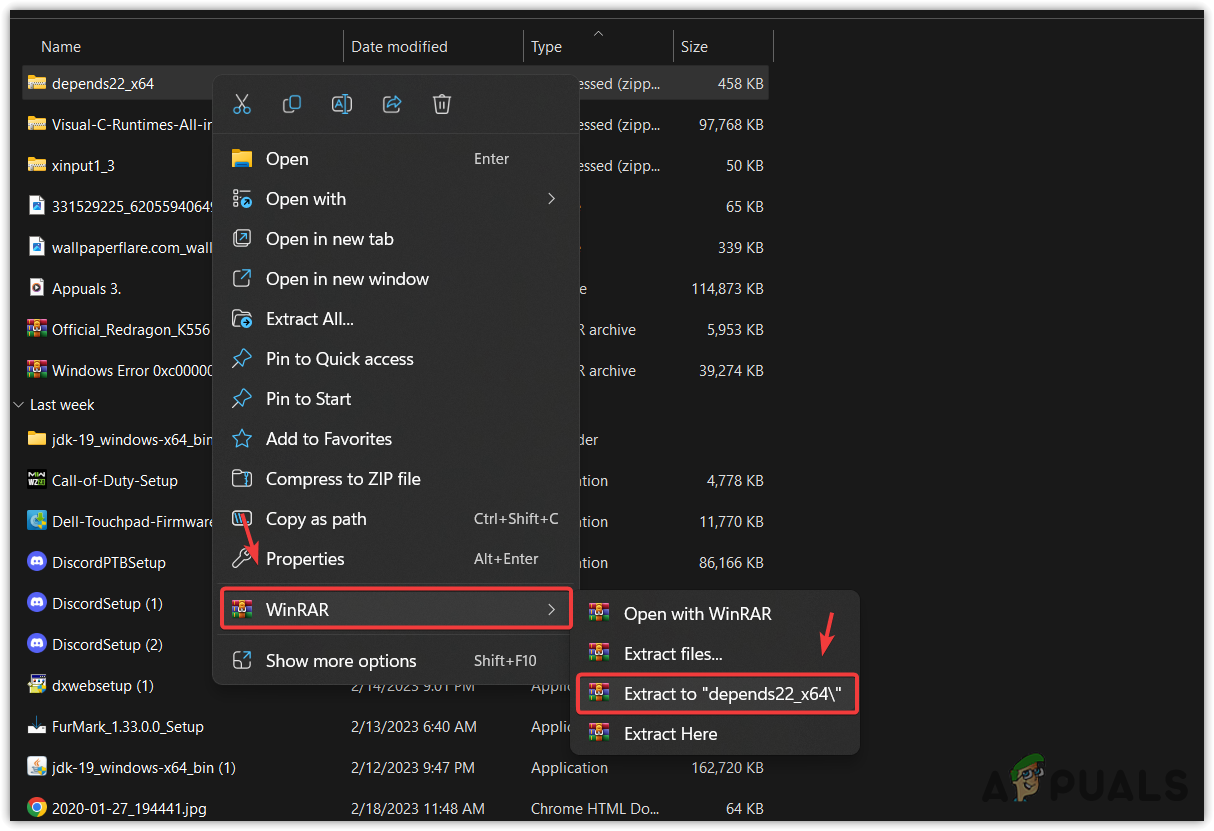
Extracting the ZIP folder - Navigate to the extracted folder and execute Dependency Walker.
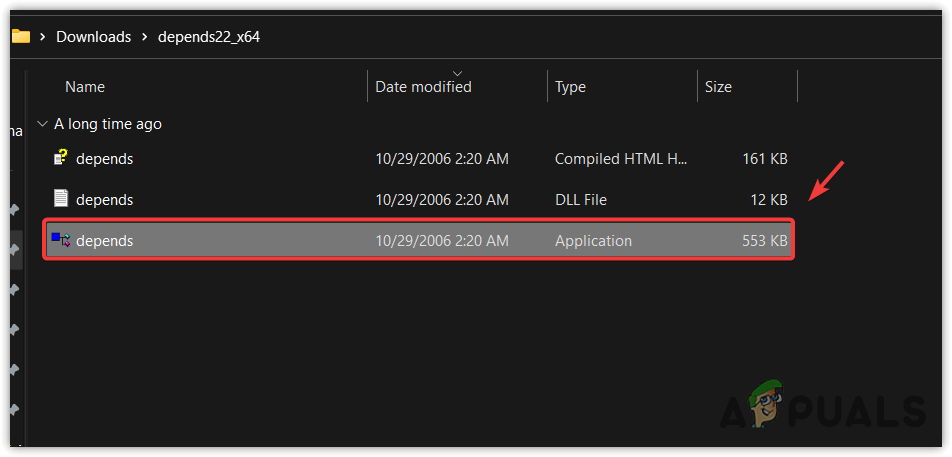
Running Dependency Walker application - Select Open from the File menu and locate the application’s executable (.exe) file.
- Open the .exe file and review the listed modules to identify the problematic DLL file.
Note: For your application to run correctly, your DLL files must match your operating system’s build (64-bit vs. 32-bit).
Identifying a corrupted DLL file - For the specific DLL file your need, visit the dll-files.com website.
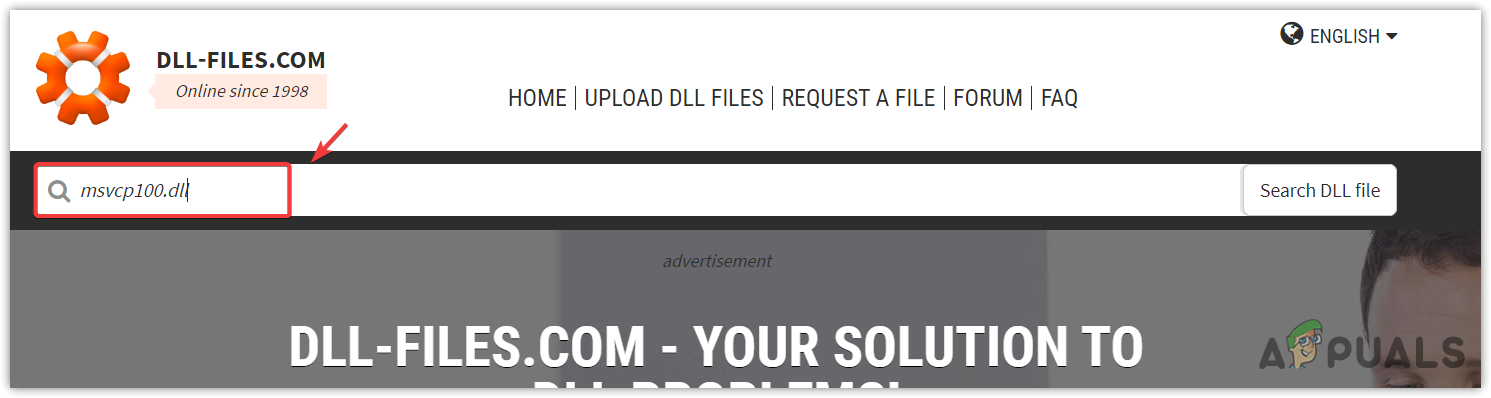
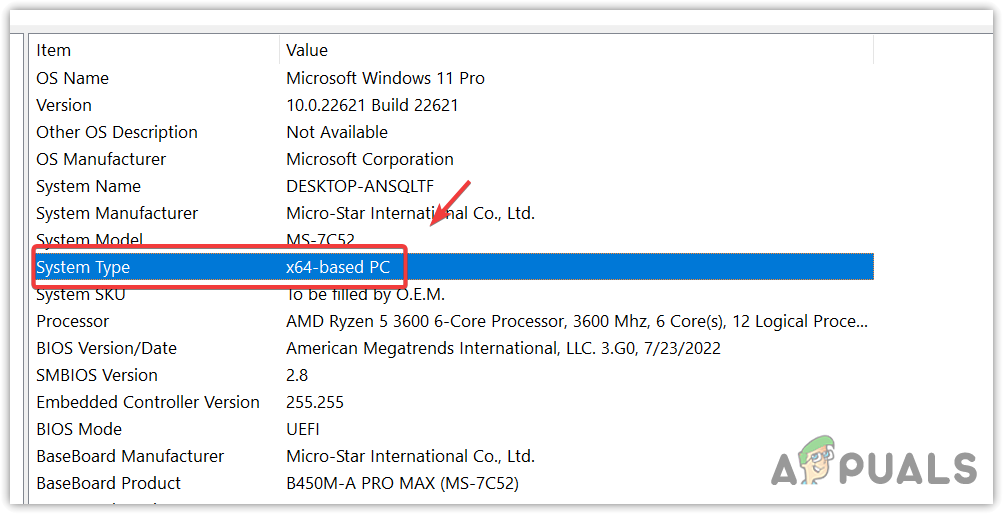
Searching for the DLL file - Choose between 32-bit and 64-bit versions of the DLL file according to the build of your operating system. To identify your Windows architecture, use the Win + R keyboard shortcut to launch the Run dialog, type msinfo32, and press Enter. Then, refer to the System Type field in the window that opens.
Determining Windows OS architecture - After downloading the correct version of the DLL file, extract the contents of the ZIP file.

Extracting the downloaded DLL file - Copy the extracted DLL file and navigate to the System32 directory (C:\Windows\System32).
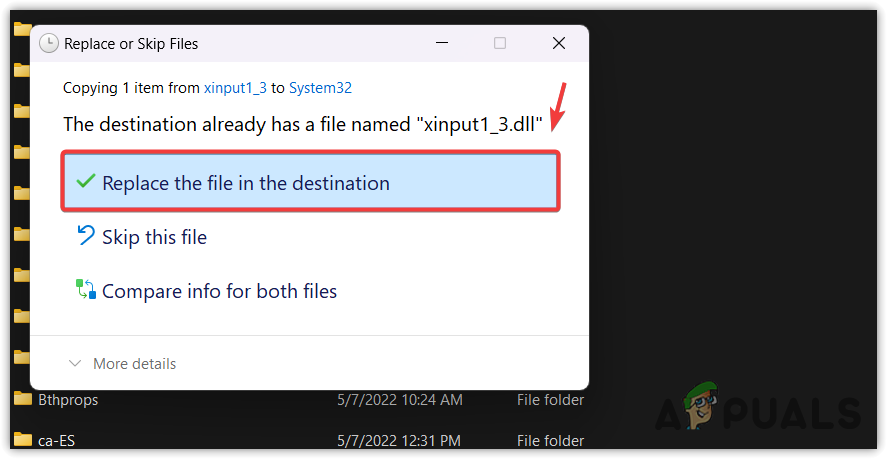
- Paste the file into the directory. If prompted to replace an existing file, select Replace the file in the destination.
Replacing the corrupted DLL file with the new one - Relaunch the related game or application to verify if the error has been resolved.
5. Restore the Corrupted DLL Files
Generally, the 0xc000007b error is linked with specific commonly used DLL files, and you can attempt to replace them to fix this issue. One of the main reasons behind this error is usually the xinput1_3.dll file. If this file gets compromised by malware, the game or application cannot use it for its designated purpose, leading to the error message in question.
Follow the provided link to download a folder containing the common DLL files often required by Windows or applications to run correctly.
Applications and games rely on DLL files for functionality. If the error continues to occur after replacing the Windows DLL files, consider replacing the DLL files of the application or game.
- After downloading the folder, extract its contents using WinRAR or a similar extraction tool.
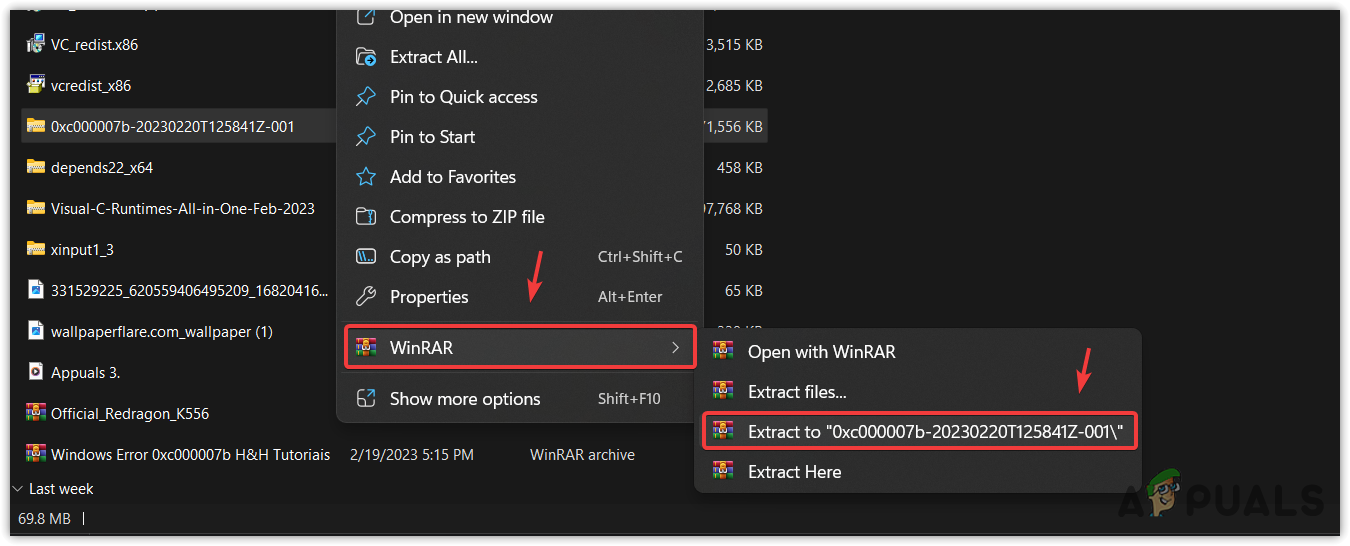
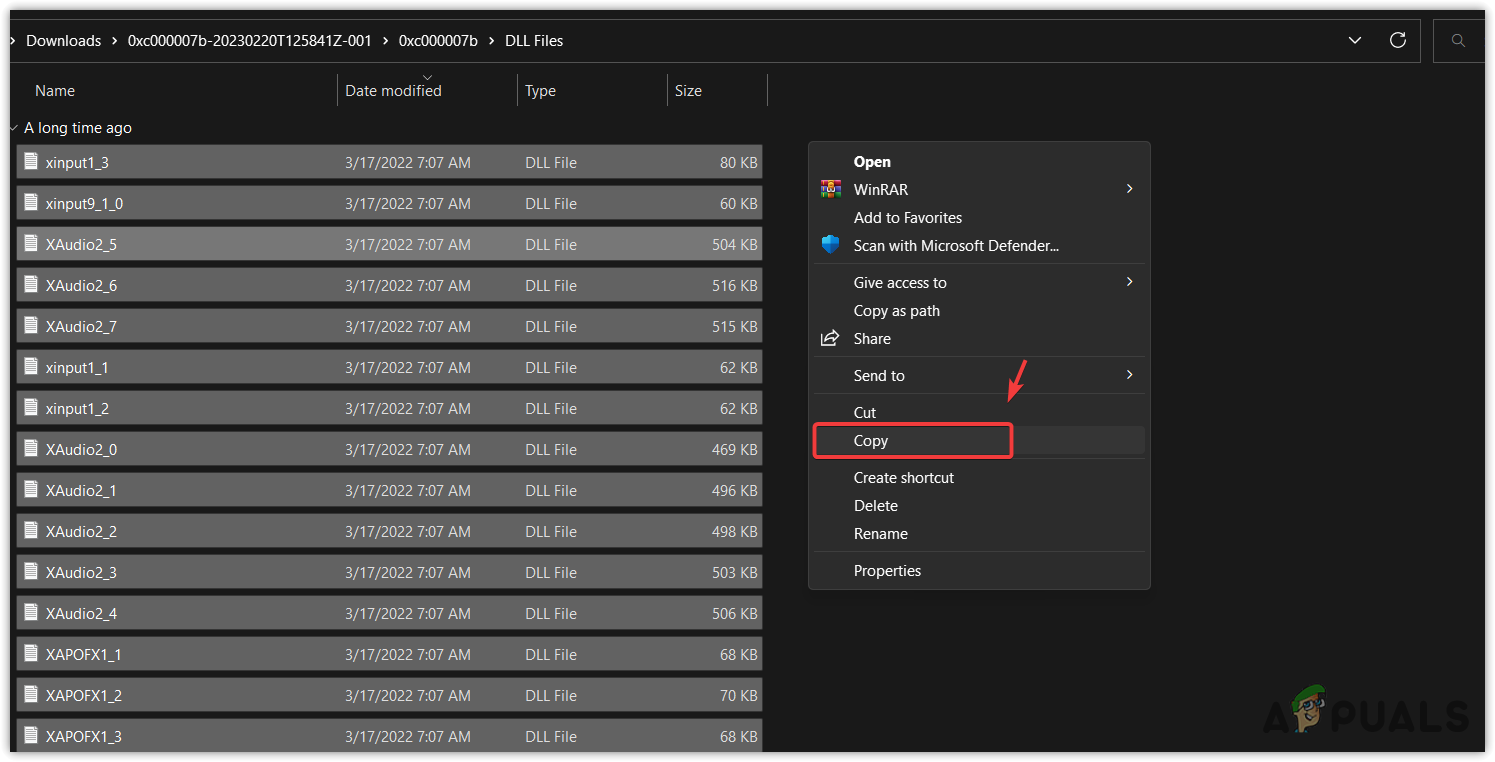
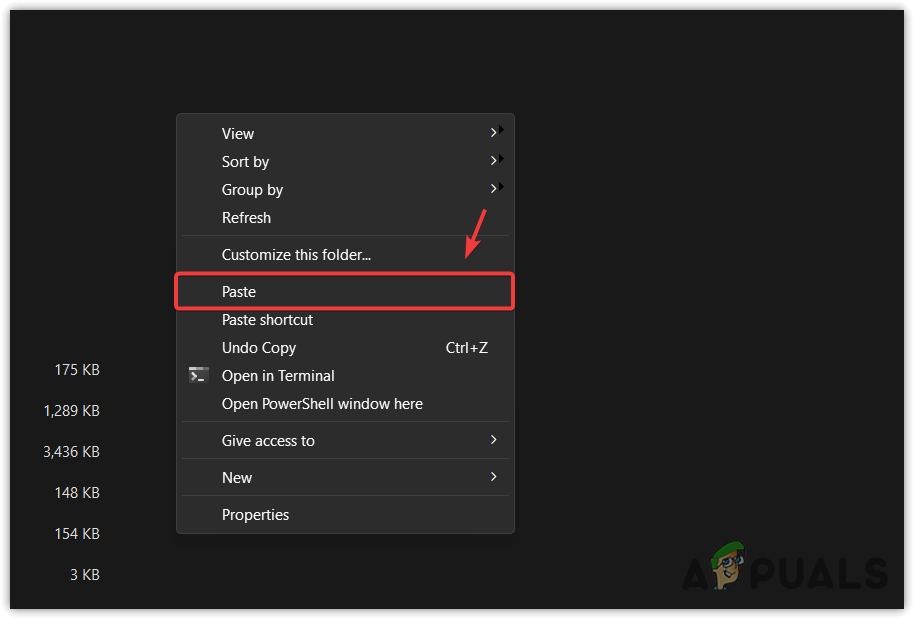
Extracting the DLL files folder - Open the folder, select all DLL files (Ctrl + A), and copy them.
Copying DLL files - Navigate to the System32 directory and paste the copied files, agreeing to overwrite existing files if prompted.
C:\Windows\System32
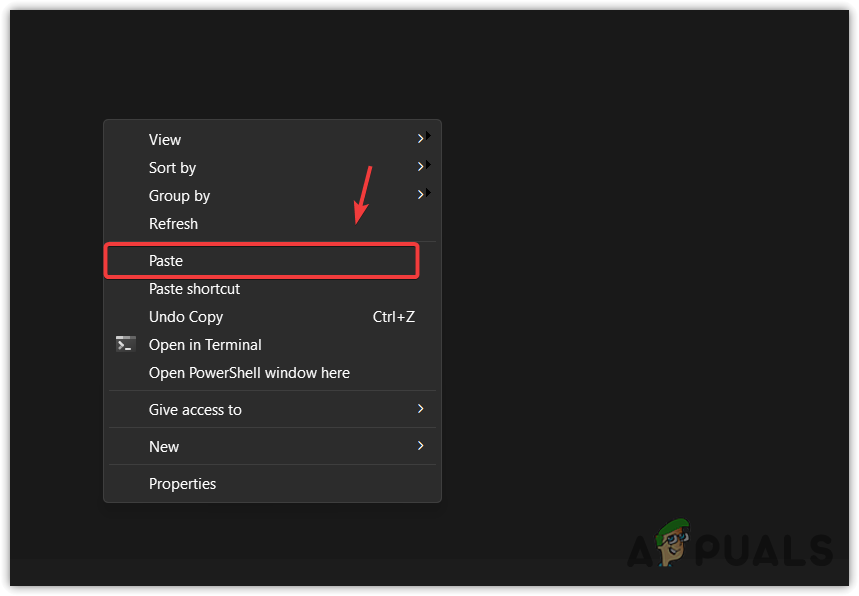
Pasting DLL files into the System32 directory - Try starting the application. If the error remains, proceed to the following steps.
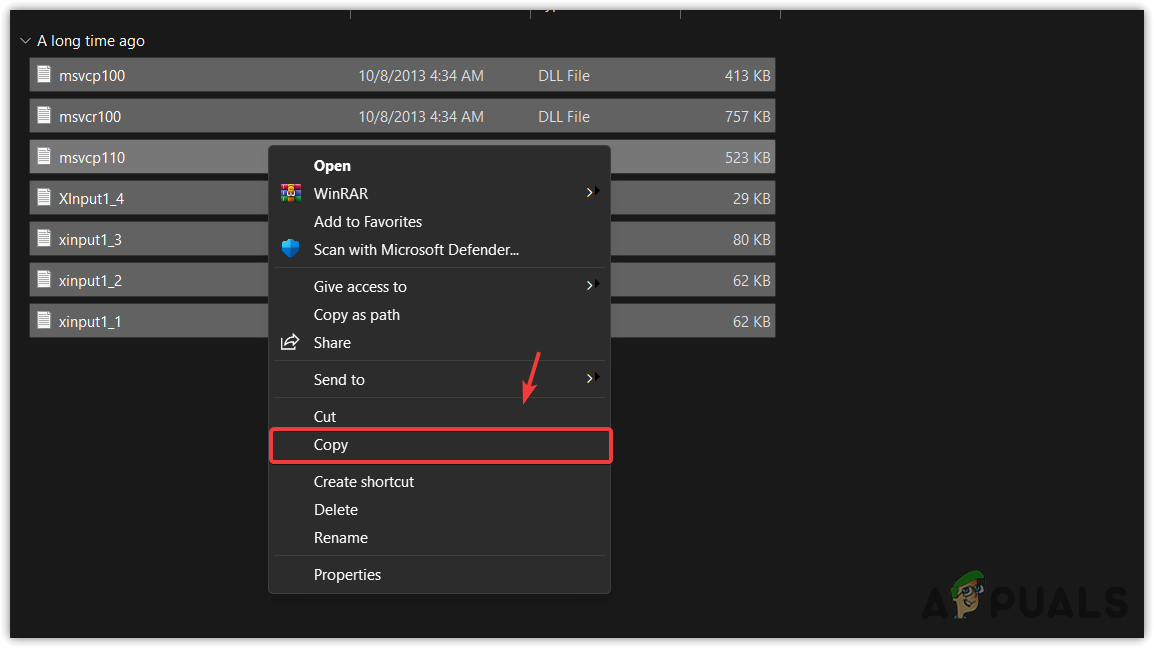
- Return to the extracted folder of DLL files, and this time navigate to Solving Error choosing between the ’64’ or ’32’ folder based on your OS architecture.
- Copy the DLL files from there, right-click the game’s desktop shortcut, and choose Open File Location. Alternatively, directly navigate to the game directory.
Accessing the in-game folder for DLL files - Paste the DLL files into the game folder and attempt to start it afterwards.
Pasting DLL files into the game folder
6. Reinstall the Affected Application
If none of the above resolves the error, it’s possible that the application’s DLL files are irreparably corrupted, potentially due to malware or as a side effect of aggressive antivirus software. Reinstalling the application in question should fix any DLL issues causing the 0xc000007b error.
- Navigate to the Windows Settings and then Apps.
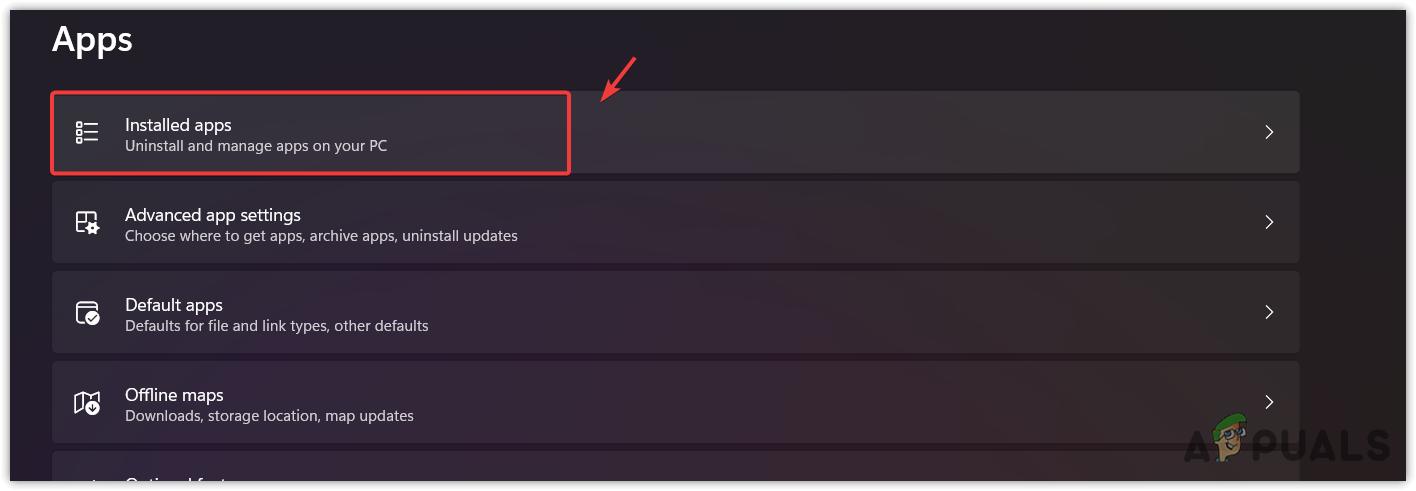
Navigating to Installed Apps settings - Find and uninstall the problematic app or game from the Installed Apps list.
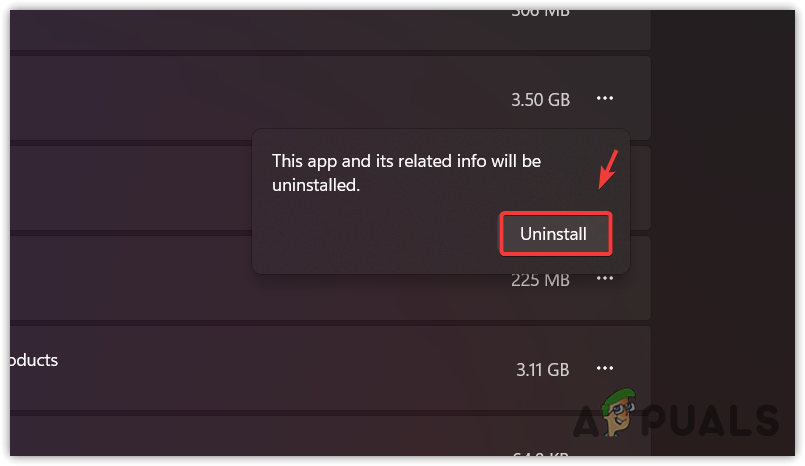
Uninstalling the application causing issues - Follow the on-screen steps to complete the uninstallation.
- After uninstalling, download the latest version of the application from its official website and proceed with installation.
- Check if the freshly installed application runs without displaying the error.
7. Update Windows
Sometimes, simply updating Windows can rectify the corrupted DLL files, as the process checks and replaces protected system files. If your Windows OS is missing any critical updates or components, like specific Microsoft Visual C++ or .NET Framework versions, updating Windows could install the necessary files to fix the error.
- Press the Windows key, type Check for updates, and hit Enter.
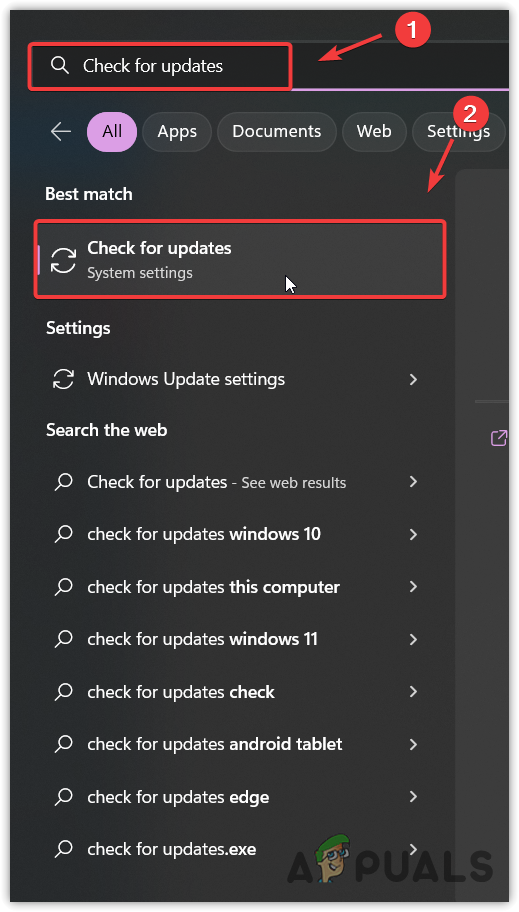
Opening Windows Update settings from Start Menu - In the Windows Update settings window, click the Check for updates button.
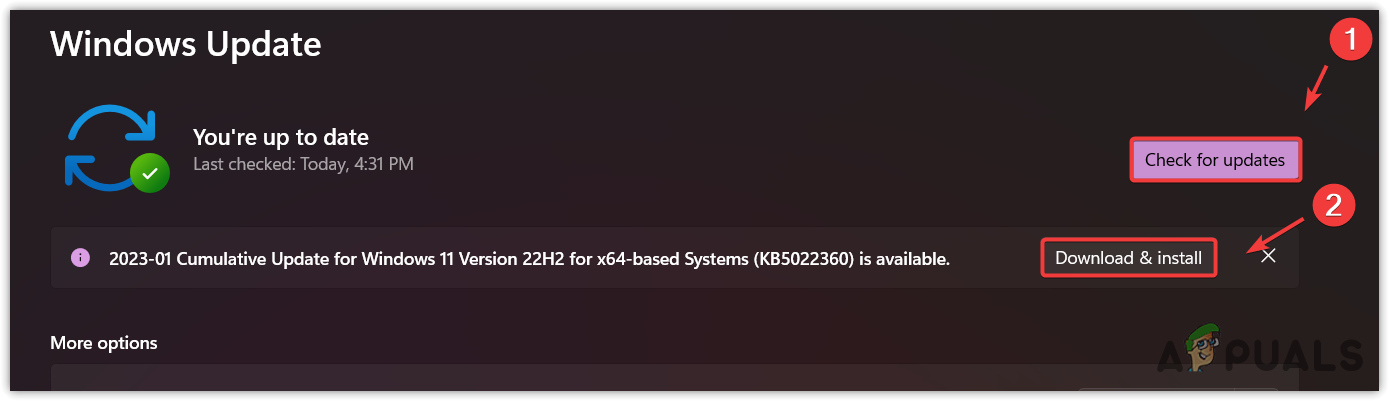
Installing pending Windows Updates - If updates are available, download and install them. You may need to restart your PC to complete the installation.
- After the update, try launching the application or game again to see if the error has been resolved.
8. Run the System File Checker
This built-in Windows utility goes through your PC’s core system files, finding out corruptions, especially within critical DLL files. By using this tool, you command it to detect, and smoothly patch up the digital fractures that could be appearing as the error, potentially restoring your system to its optimal, error-free state.
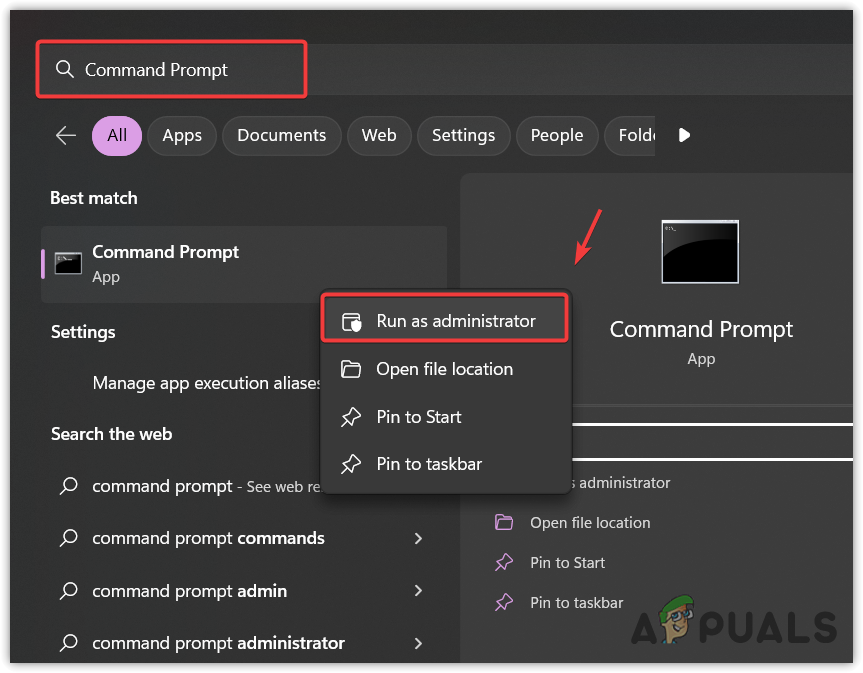
- Press the Windows key, type Command Prompt, right-click on the result, and select ‘Run as administrator‘.
Running Command Prompt as administrator - In the Command Prompt, enter the following command and press Enter to start the system scan:
sfc /scannow
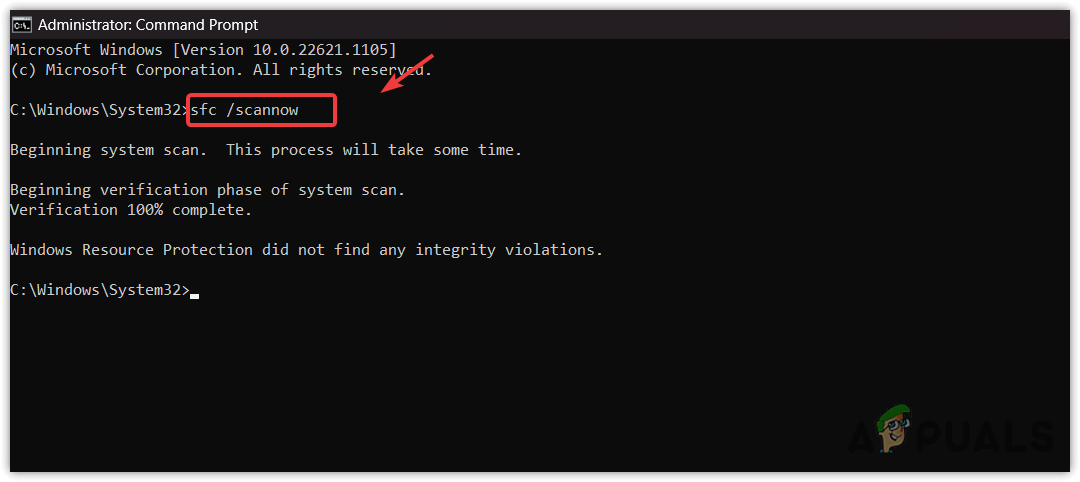
Running system file checker to restore DLL files - Wait for the process to complete. The SFC tool will repair any detected corrupted files and display a summary of actions taken upon completion.
- Once completed, launch the application or game in question to test whether the error has been eliminated.
9. Use a System Restore Utility
The System Restore utility can revert your system’s state to a previous point in time where a restore point was created and everything was functioning properly. This is dependant on having an appropriate restore point available.
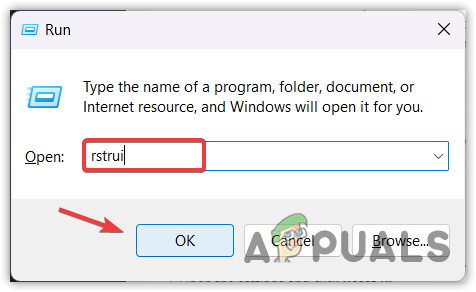
- Press Win + R to open the Run dialog-box.
- Type rstrui and click OK to launch the utility.
Opening System Restore Settings - Follow the prompts in the System Restore wizard, selecting a suitable restore point when prompted.
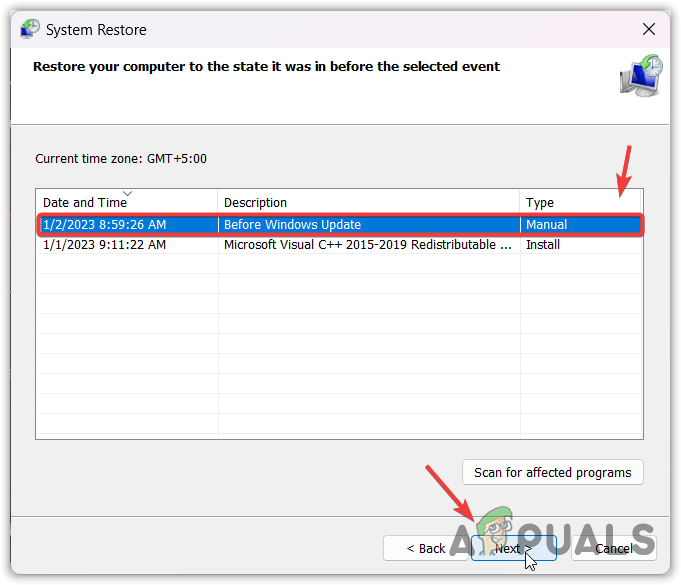
Selecting a restore point - Once the restore process is completed, check whether the application or game starts without errors.
10. Reset or Reinstall Windows
If none of the previous steps have resolved the issue, the last resort is to either reset or reinstall Windows. Reinstalling Windows is a clean start and often eliminates persistent errors. A reset provides a similar outcome but can preserve your personal files if you select Keep My Files.
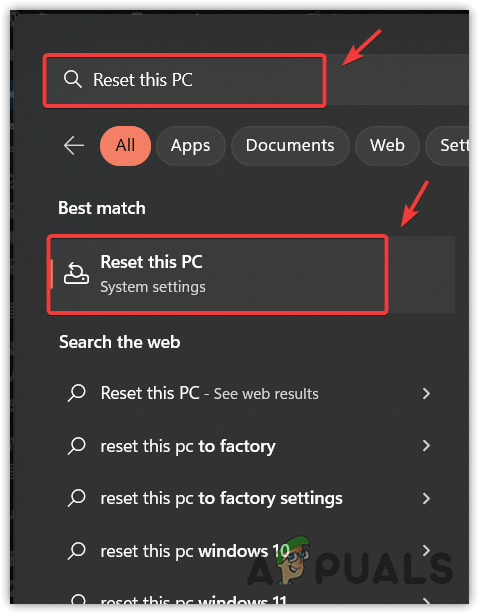
- Using the Start Menu, type Reset this PC and select the option from the search results.
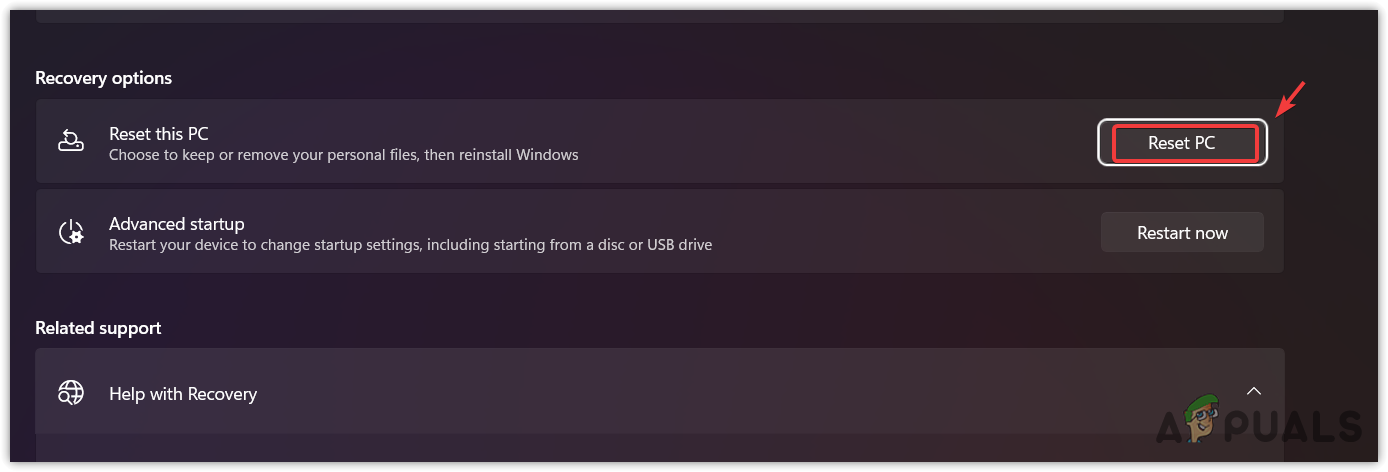
Opening System Reset Settings - Click on the Get started button under the Reset this PC section.
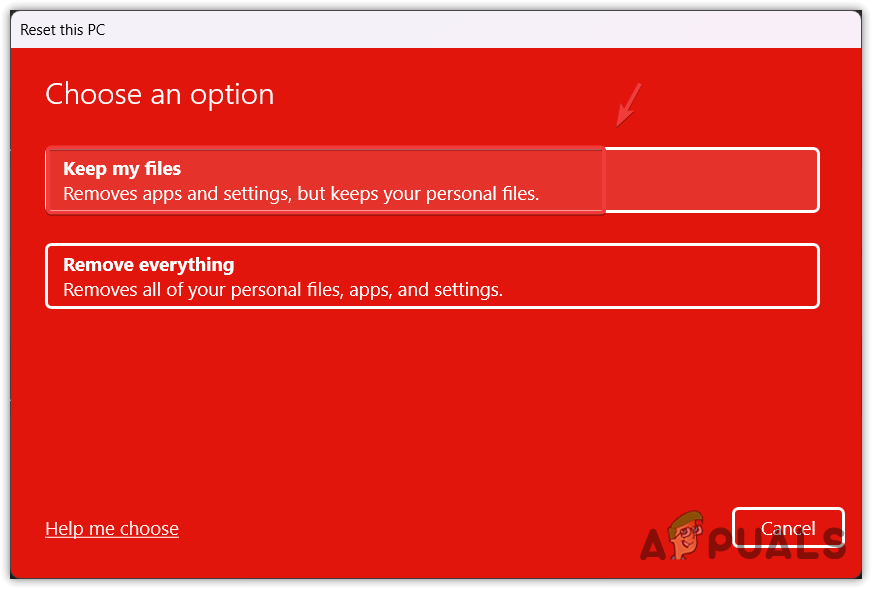
Proceeding to Reset PC - Select Keep my files, and then choose Cloud download or Local reinstall, depending on your preference.
Opting to keep personal files - Follow the instructions to complete the reset process—your PC will restart, and reset operations will begin.
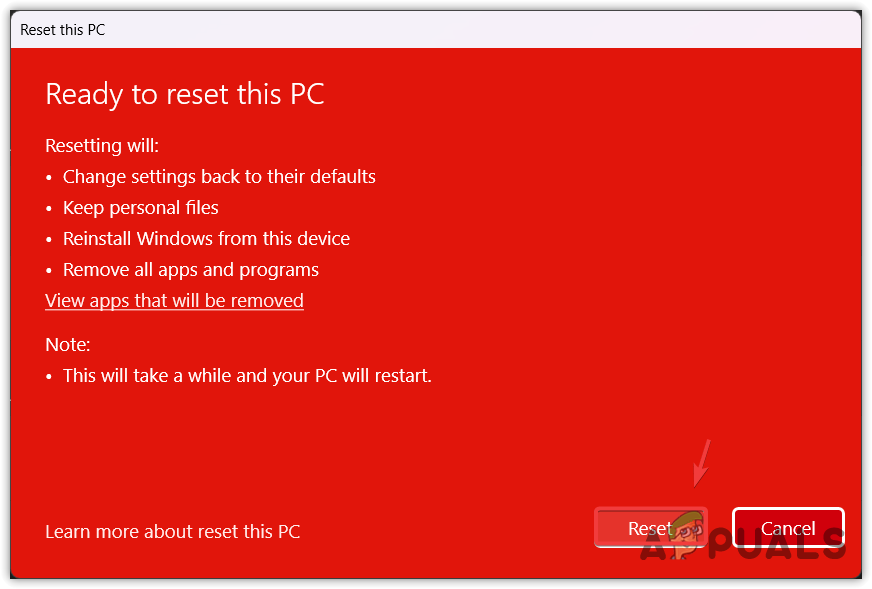
Resetting Windows - After the reset, the 0xc000007b error should no longer appear when launching applications or games.
Thank you. It worked.