Fix: Error 0x80071771 on Windows
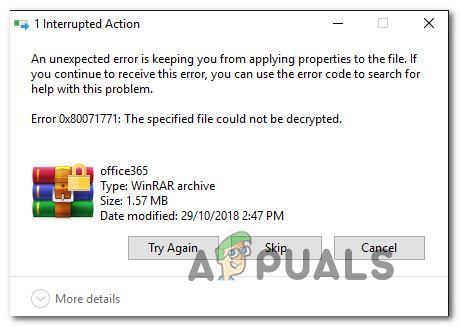
Some users are getting the 0x80071771 error when trying to open or handle a file on Windows 10. This is typically reported to occur after the user has upgraded to the latest Windows version from an older version. The error message is sometimes accompanied by the message “The specified file could not be decrypted“.
What is causing the 0x80071771 error?
We investigated this particular issue by looking at various user reports and the repair strategy that affected users have been using to resolve the problem.
As it turns out, this particular error code is mostly encountered when the user tries to access a file that was previously created and encrypted on a different computer.
This particular error message is mostly associated with files that have been encrypted with the Encrypting File System (EFS). This is a Windows built-in encryption that is widely being used to encrypt files and folders to protect them from unwanted access.
This encryption system was designed to keep your confidential data from being accessed by threats or attacker with access to your computer. The thing is, once the file is encrypted, a certificate is required in order to access it from a different device. Because of this, an encrypted file can only be accessed on the machine that is was encrypted with no additional operations.
With this in mind, there are two ways that you can access an encrypted file on a different computer:
- By decrypting a file before moving it to a new computer.
- By moving the encrypted file to the new computer along with the certificate or encryption key.
If you’re currently looking for a way to resolve the 0x80071771 error, this article will provide you with a couple of troubleshooting steps. Chances are not every method featured below will be applicable to your scenario.
Because of this, we advise you to follow the methods in the order that they are presented in and disregard those that can’t be replicated. You should eventually stumble upon a method that will resolve the issue for you.
Method 1: Obtaining full permission to access the file
One way that might allow you to access the encrypted file is to give yourself full permission to access the system files and then follow one of the internal decrypting methods to unlock the files. But keep in mind that this method will not work in those scenarios where the file was originally encrypted on a different machine.
You’ll need to follow the steps below on the computer where the file was originally encrypted. Upon completing them, you will be able to move the file and open it on a different computer without encountering the 0x80071771 error.
Several affected users have reported that they were able to resolve the 0x80071771 error by following the steps below. Here’s what you need to do:
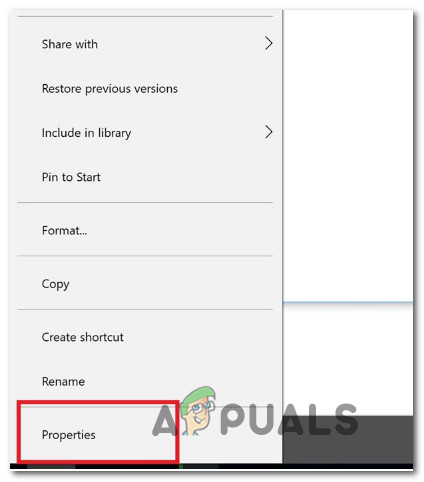
- Inside File Explorer, right-click on the drive letter that you’re encountering the issue with and choose Properties.
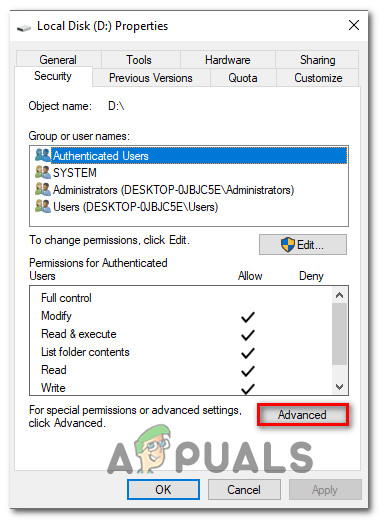
Accessing the Properties screen of the affected drive - Inside the properties screen, go to the Security tab and click the Edit button (near To change permissions, click Edit).
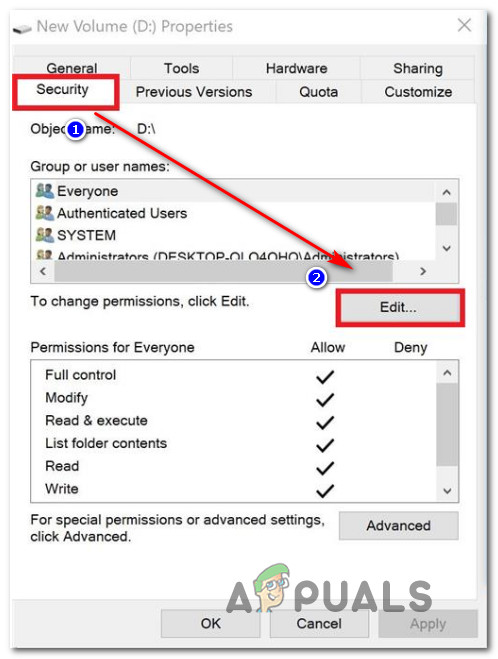
Changing permissions from the Security tab - From the security tab, click the Add button under Group or user names.

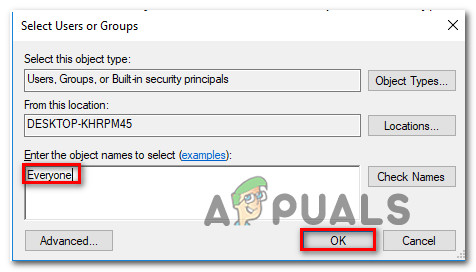
Adding more permissions to the volume - Inside the Select Users or Groups window, type Everyone in the box under Enter the object names to select (examples) and click Ok to save the changes.
Adding the Everyone group to the permissions for the volume drive - Once you return to the Permissions window, select the Everyone group and put all checkmarks to the allow box under Permissions for Everyone.
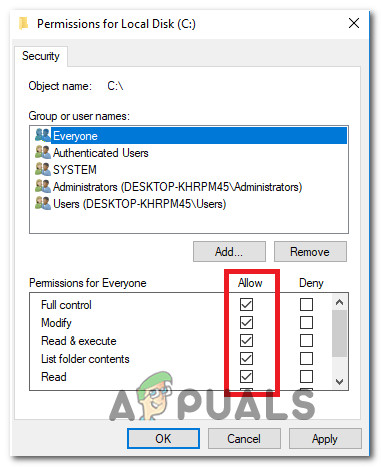
Allowing Full Control for the Everyone group - Hit Apply to save the changes. Next, return to the Security tab in the Properties of the affected volume, but this time click the Advanced button (associated with Special permissions or advanced settings)
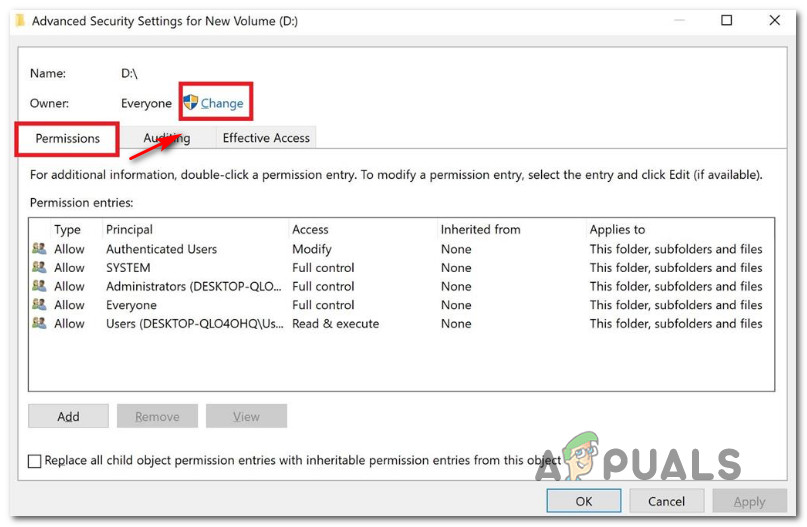
Accessing the special permissions menu of the affected drive - From the Advanced Security Settings window, go to the Permissions tab and click on Change.
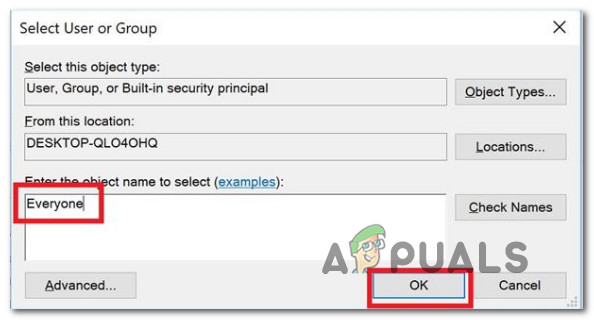
Changing the default owner - Then, from the Select User or Group window, type Everyone under Enter the object name to select and hit Ok to save the changes.
Adding the Everyone group to Special Permissions - Next, make sure to check the box associated with Replace owner on subcontainers and objects.
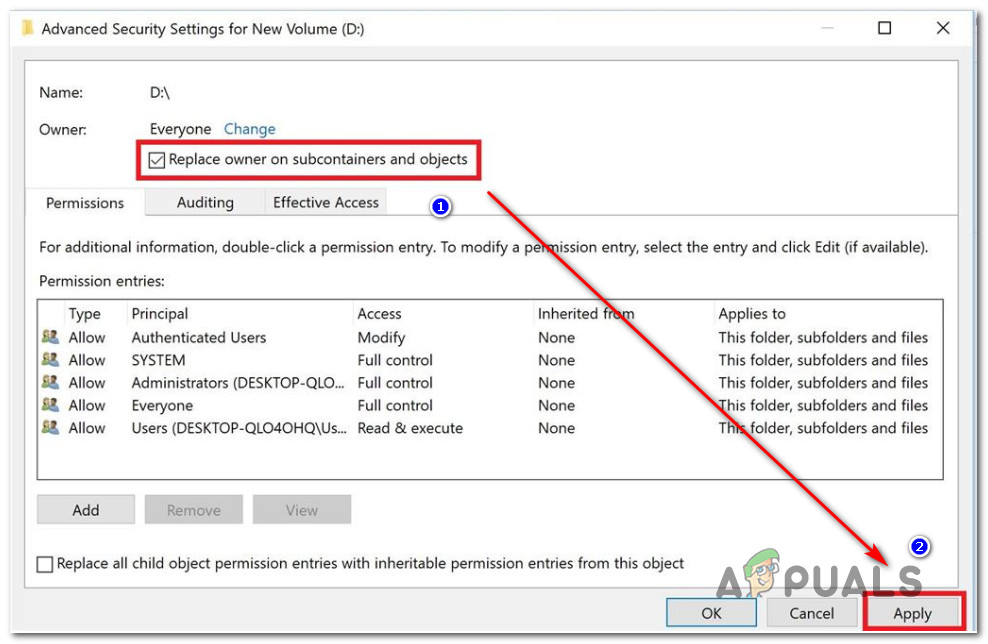
Replacing the owner on sub containers and objects - With the owner as Everyone, go to the Auditing tab and click on Add.
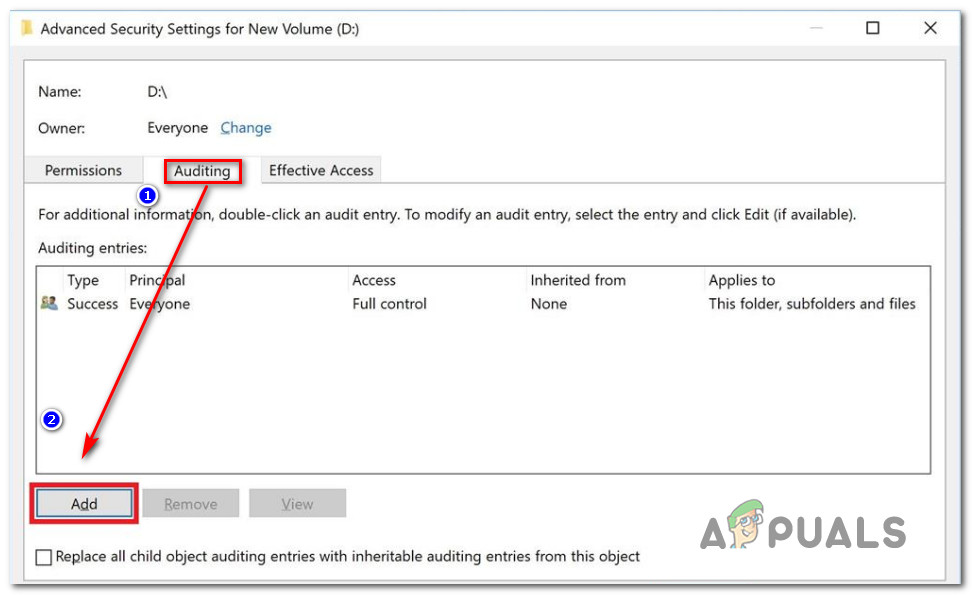
Accessing the Auditing tab of the affected drive - Under the Auditing Entry for the affected volume, select Everyone as Principal, then go to the Basic permission section and check the box associated with Full control. Finally, click Ok then Apply to save the changes.
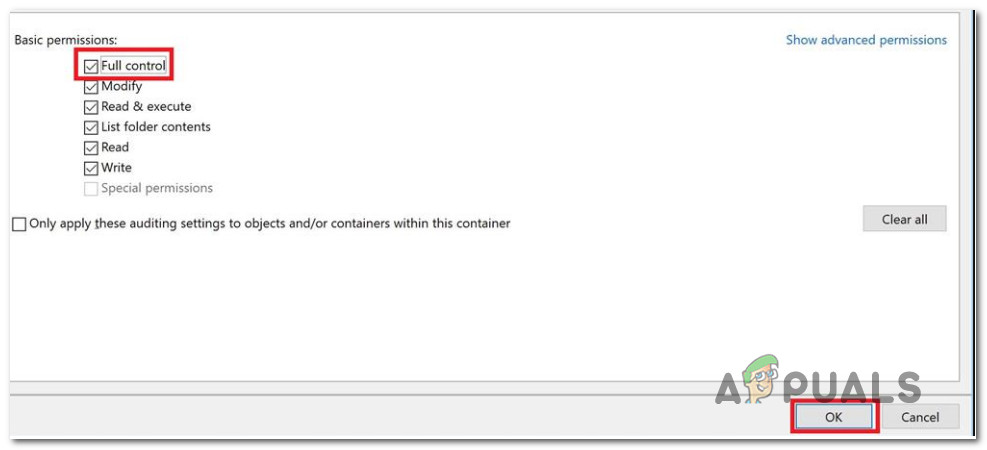
Establishing Full Control over the Basic Permissions
After completing the steps above, your computer just obtained full permissions to access the file. Next, follow the steps below to use an elevated Command Prompt to decrypt the file:
- Press Windows key + R to open up a Run dialog box. Then, type “cmd” and press Ctrl + Shift + Enter to open up an elevated Command Prompt. When prompted by the UAC (User Account Control), click Yes to grant administrative privileges.

Running CMD as an admin - Once you arrive into the elevated Command Prompt, type the following command to decrypt the file that was previously showing the 0x80071771 error:
cipher /d “full path of file with extension”
Note: “full path of file with extension” is obviously a placeholder. You need to replace it with the actual file path. For example: C:\Users\madro\Desktop\appuals\0x80071771.jpg. - Try to open the file and see if the error has been resolved.
If you’re still encountering the 0x80071771 Error – “The specified file could not be decrypted” issue when trying to open the file, move down to the next method below.
Method 2: Importing the EFS File Encryption Certificate + Key in Windows 10
The only way that will allow you to open an encrypted file (EFS file) on a different computer is to import it along with the certificate and key. Any individual app that doesn’t have the appropriate file encryption key will not be able to open it.
But in order for this method to be applicable, you need to have access to the computer that was used to encrypt the file and export the key + certificate. Here’s a quick guide on how to do this:
Exporting the EFS Certificate + Key
- Press Windows key + R to open up a Run dialog box. Then, type “certmgr.msc” and press Enter to open the Certificates Manager utility.
- Inside the Certificates Manager utility, select Certificates from the left-hand pane and click on Personal. Then, move over to the right-hand side panel and double-click on Certificates.
- Right-click on the Certificate that you need to import to the new computer and choose All Tasks > Export.
- Click Next on the first screen and choose Yes, export the private key at the next screen.
- Select Personal Information Exchange – PKCS #12 and make sure that the boxes associated with Include all certificates in the certification path, Export all extender properties and Enable certificate privacy are checked. Then, hit Next to proceed to the next screen.
- Set a password for the PFX file and confirm it. Make sure to leave the encryption to TripleDES before clicking Next again.
- Hit the Browse button and set a location where you want the PFX file to be saved. Then, click Next once again.
- Finally, click Finish to complete the process.

The steps below will show you how to import the PFX file that is used for your file encryption certificate and the key used with the EFS on a different computer. There are two different methods that you can use to import that certificate + key.
Both methods will work for any version of Windows 10, so follow whichever one is more convenable to your current situation:
Option One: Importing EFS File Encryption Certificate and key via PFX file
- Once you retrieved the PFX file from the first computer, move it to the one where you’re encountering the 0x80071771 error on.
- Once the PFX file has been moved to the new computer, right-click on it and choose Install PFX.
- Under Store Location, choose Current User and hit Next to proceed.
- Make sure the correct PFX file is selected from the File to Import window and click Next once again.
- In the next screen, enter the password that you used when you encrypted the file under the Password field. Then, check the boxes associated with Mark this key as exportable and Include all extended properties.
- Next, select the toggle associated with Automatically select the certificate store based on the type of certificate and click next once again.
Note: You might also see a Security warning if Windows cannot validate the certificate. If this happens and you trust the origins of the file, click Yes to confirm. - Click Finish to confirm the importing process. At the final prompt, click Ok to apply the final confirmation.

Option Two: Importing EFS File Encryption Certificate and key via Certificates Manager
- Press Windows key + R open up a Run command. Then, type “certmgr.msc” and press Enter to open up the Certificates Manager.
- Once you’re inside the Certificate Manager utility, go to the left-hand pane and right-click the Personal folder (under Certificates – Current User).
- Then, select All Tasks and choose Import to bring up the importing wizard.
- At the first screen, make sure that Current User is selected and click Next to proceed.
- From the next screen, click the Browse button and navigate to the location of the PFX file that you’re trying to import. Then, click Open and select Next once again to proceed further with the importing wizard.
- In the next screen, type the password of the PFX file and make sure that the boxes associated with Mark this key as exportable and Include all extended properties are checked.
- Next, select the toggle associated with Automatically select the certificate store based on the type of certificate and click Next once again.
- Hit Finish to complete the importing process, then Click Ok at the final prompt.


Pour une clé EFS qui a été formaté, comment le récupérer ?
Sachant que le dossiers crypté se trouve sur un autre disque dur branché dans le même ordinateur (tour).
Vos solutions, comme sur CMD pour l’utilité cipher sont uniquement des clés non perdu en formatage.