Fix: Error 0x800701E3 on Windows 7, 8.1, 10
Several users are encountering the 0x800701E3 when performing a hard disk / SD card operation that involves copying or moving files on a Windows computer. In most cases, the issue is reported to occur when the user tries to move files from one hard drive to another. Other users report that the issue is occurring when they try to clean install Windows 10 or a different Windows version. Looking at the status code, the 0x800701E3 error DEVICE_HARDWARE_ERROR, “The request failed due to a fatal device hardware error.”
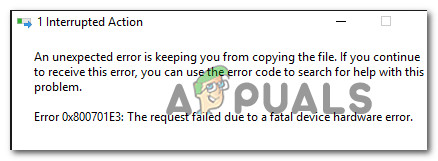
What is causing the 0x800701e3 error code?
Unfortunately, this particular issue is associated with a serious hardware problem that usually can’t be fixed. Most of the time, the issue is a surefire sign that the drive is failing. Upon seeing this message, your first stop should be to recover as much data as possible before it’s not too late.
Update: As it turns out, the error message might also be caused by a failing peripheral like a SATA cable or an SD card adapter. You might also see a false positive if you get this error while trying to clean install a Windows version from an installation media creating through unofficial channels.
But even if the 0x800701e3 error is an obvious sign that the drive is failing, we managed to find a few workarounds that will allow you to circumvent the error message and complete the data transfer.
Since not every method will be applicable to your scenario, we advise you to follow the potential workarounds in the order that they are presented and skip the ones that are not applicable to your scenario.
Method 1: Dealing with bad sectors
If you’re seeing the 0x800701E3 error when trying to clean install a Windows version, it’s probably because your HDD contains too many bad sectors. There are a couple of built-in utilities that are capable of fixing bad sectors to some degree.
Some affected users have reported that they were able to complete the installation without the 0x800701E3 error after performing CHKDSK and SFC scans on the affected drive. Here’s how to do this:
- Start your computer and press any key to boot from the installation media while the prompt is showing.

Press any key to boot from installation media - At the initial Windows installation screen, click on Repair your computer.
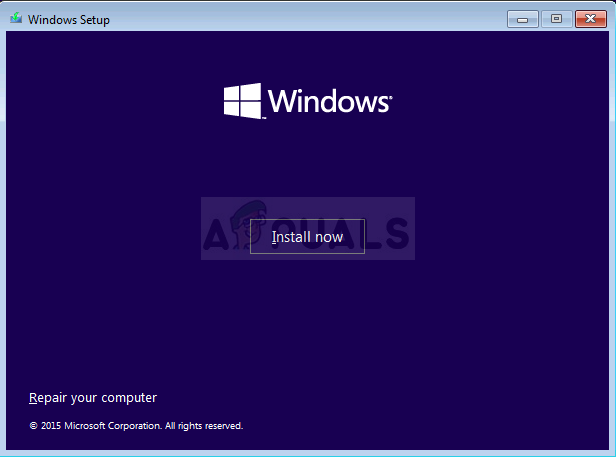
Choosing Repair your computer from Windows Setup - Inside the Advanced Options menu, go to Troubleshoot and then click on Command Prompt.
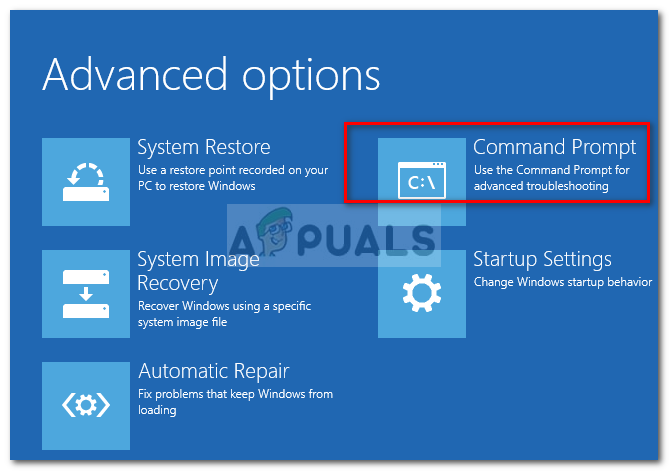
Opening Command Prompt - In the Command Prompt, type the following command and press Enter to run a CHKDSK scan on the affected drive:
chkdsk /f X:
Note: X is simply a placeholder. Replace it with the letter of the affected drive.
This scan will scan and repair missing or corrupted system files.
- Once the CHKDSK scan is finished, type the following command and press Enter to run an SFC (System File Checker) scan:
sfc /scannow
Note: This command will scan all protected system files and replace corrupted files with a cached copy.
- Once the second scan is finished, try to clean install the Windows version again and see if the process manages to complete without the 0x800701E3 error.
If this method was not applicable or didn’t resolve the issue, move down to the next method below.
Method 2: Disabling Secure boot
Some affected users have reported that the 0x800701E3 error was no longer occurring during a clean installation of Windows after they disabled Secure boot from UEFI/BOOT.
Secure boot is an industry standard that was developed by the biggest manufacturers in the PC industry to ensure that the PCs are using software exclusively from Original Equipment Manufacturers (OEM). However, this security feature is known to create problems with installation media created outside of the official channels (using Rufus and other similar software).
Here’s a quick guide on disabling Secure boot:
- Press the Setup (Boot key) repeatedly after powering up your machine (during the initial bootup sequence).
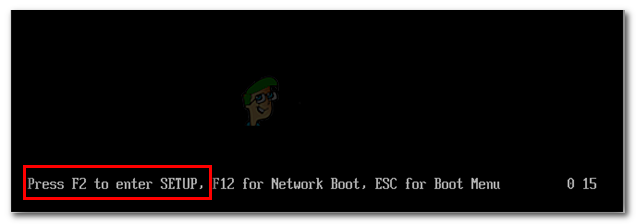
Press the BIOS key during the startup procedure Note: Most of the time, the Setup key is visible on the screen during the initial screen. But you can also search online for your particular Setup key or press typically keys that are used for this purpose: Esc key, F keys (F1, F2, F3, F8, F12) or Del key.
- Once you gain entry into your BIOS menu, look for a setting named Secure Boot and set it to Disabled. The exact name and location will be different from manufacturer to manufacturer, but typically, you’ll find it inside the Security tab – you might also find it inside the Boot or Authentication tab.
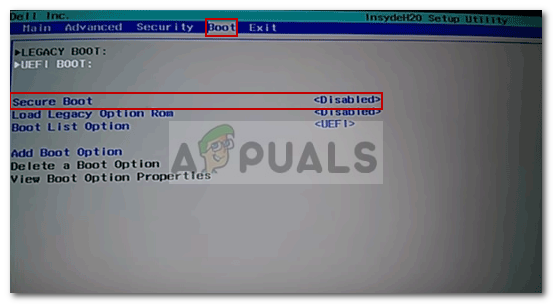
Disable Secure Boot - Save the changes and exit your BIOS settings. Then, try to clean install Windows again and see if you’re still getting the 0x800701E3 error.
If you’re still seeing the same error message or this method wasn’t applicable to your current scenario, move down to the next method below.
Method 3: Changing the connection cable/card adapter
This error is typically indicative to an electronic problem inside the hardware/ SD card enclosure. However, there are some cases where the issue was actually caused by a peripheral like a SATA cable or an SD card adapter.
If possible, change the connectivity cable / SD card adapter and check if the issue is still occurring.
In the event that this method is not applicable to your current scenario, move down to the next method below.
Method 4: Retrying the operation over & over again
If the data you are trying to copy or move is very important, you might be able to recover bits and pieces by retrying the process over and over again.
And instead of copying / moving all the files at once, try to move the data separately and see if you are successful.
Several affected users have reported that they were able to gradually copy the data that was previously failing with the 0x800701e3 error by copying data individually and retrying multiple times until the transfer was successful.
But keep in mind that this method is only effective with failing SD cards. And even then, it will only work as long as whole sections of the chip inside are not failing.
If this method is not applicable, move down to the next method below.
Method 5: Using a third party software to recover data
There are a few specialized software that will help you recover data in cases where traditional transfer attempts fail. Most of this software is designed to try different coping strategies, retry and skip the blocks that are beyond transferable.
We tried different free recovery software and we can recommend any of the following:
But for the sake of keeping things simple, we’re going to feature a recovery guide with Unstoppable Copier since it’s widely regarded as the most reliable recovery feature out of the bunch. Here’s how to use it:
- Visit this link (here), select your Windows version and hit the Download button to commence the download of the installer.

Downloading Unstoppable Copier’s installer - Open the installation executable and follow the on-screen prompts to complete the installation of Unstoppable Copier.
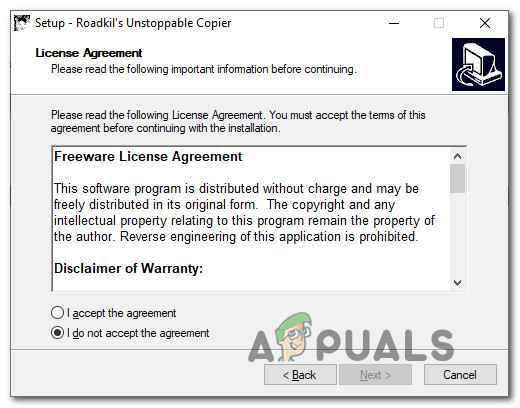
Installing Unstoppable Copier - Once the installation is complete, launch Unstoppable Copier and agree with the End User Licence Agreement.
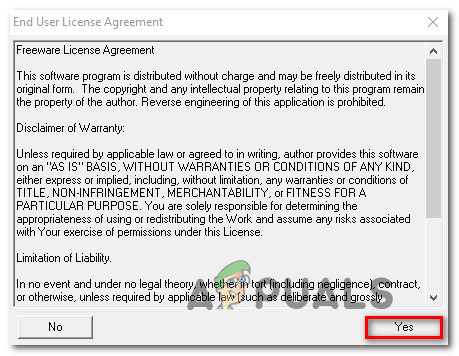
Accepting the User Agreement - Inside Unstoppable Copier, go to the Copy tab and set the failing drive as the Source. Then, set a healthy drive as the Target. Then, simply hit the Copy button to commence the transfer.

Transferring data with Unstoppable Copier Once the process has been commenced, the program will automatically try different transferring strategy and ignore bad sectors that can’t be recovered. When the process is finished, navigate to the Target location and see if you managed to recover your data.


