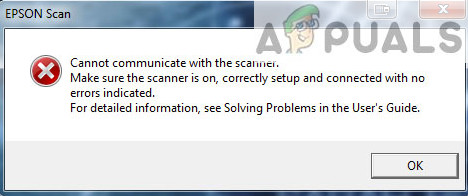
How to Fix Epson Scan “Cannot communicate with the Scanner”?
When the error “Epson Scan cannot communicate with the scanner” happens, it usually stops the user from scanning documents, even though the device seems connected. This error means the computer cannot connect with the scanner, often because of setup or connection issues.
The most common reason is old or missing drivers, but other reasons may include wrong network settings, firewall blocking, or incorrect USB connections. In this article, we will discuss different solutions to solve this problem.
1. Run Scanner Software with Administrative Privileges
Giving the scanner software administrative rights can help overcome system limits that stop it from accessing needed resources. Most operating systems block certain tasks for safety reasons, and scanning, which connects external hardware to the system, often needs higher permissions. Running the software as an administrator lets it do its job without problems, helping to fix communication issues between the scanner and the PC.
- Right-click on Epson Scan and select “Properties”.
- Go to the “Compatibility” tab and check “Run this program as an administrator”. You can also try compatibility mode if needed.
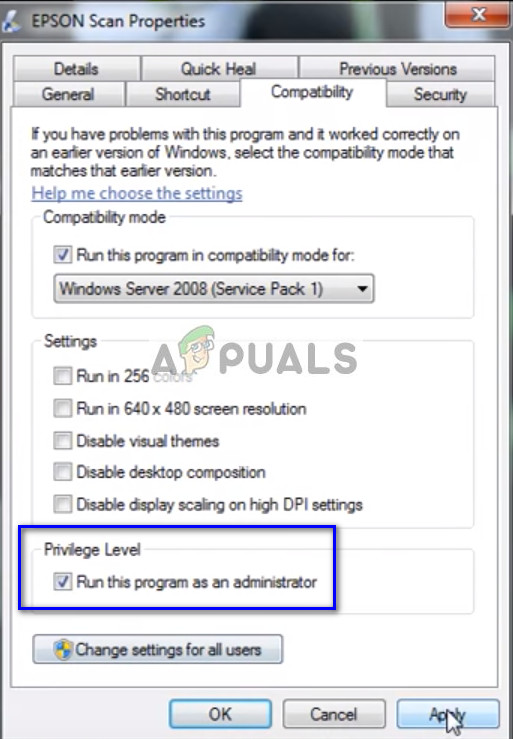
- Click Apply to save changes and exit. Turn off your scanner, disconnect the USB or network cable, wait a few minutes, then set it up again. Check if scanning works successfully.
2. Fix Wireless Connection
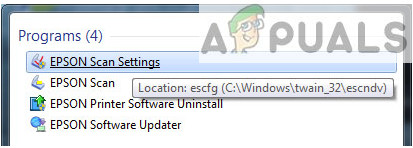
To address communication errors, ensure your computer and scanner have a stable wireless connection. If the IP address changes or is incorrect, the scanner might not be detected. Update the IP address in the Epson Scan settings to help your computer connect directly with the scanner, allowing scanning to potentially work more smoothly.
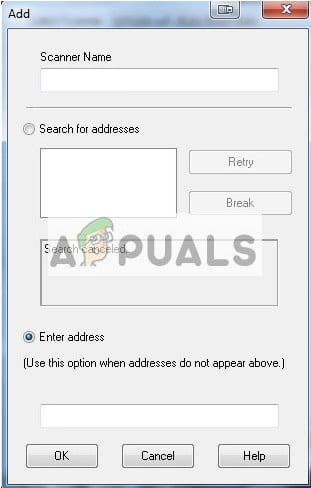
- Open Epson Scan Settings from a shortcut or by searching in Windows.
- In Scan Settings, click Add under Network Scanner Address and select the correct scanner.
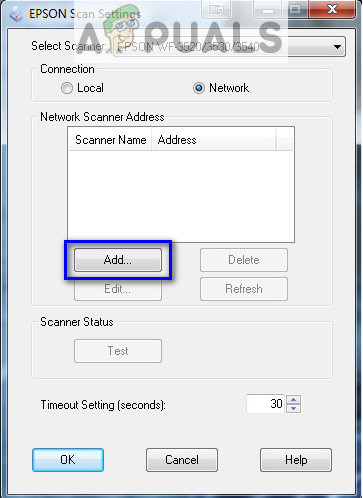
- Navigate to the command prompt, and get the correct address to insert into the Enter address field.
- Click the Windows icon, type “cmd”, and open the application.

- In the command prompt, type “ipconfig” and press Enter. Copy the “Default Gateway” field.
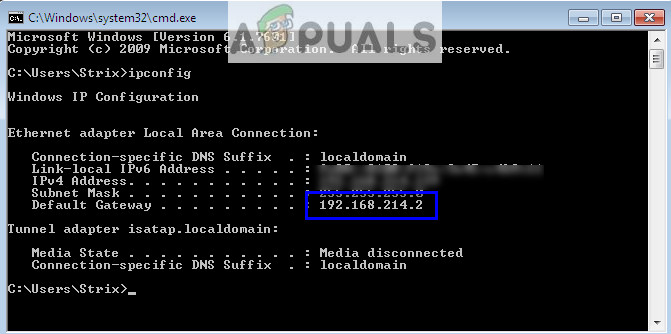
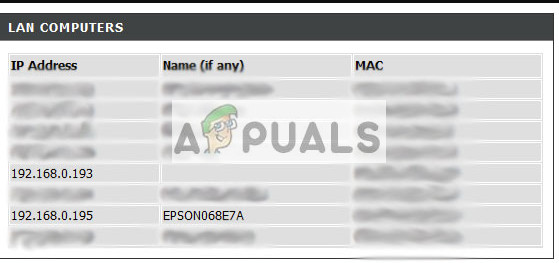
- Enter this default gateway into your browser to access your router. Check the list of attached devices to find your scanner’s IP address. Enter it into the browser to view its properties.
- Return to the Scanner application, input the scanner’s address, and press Apply. If successful, the scanner will be added and ready for use.
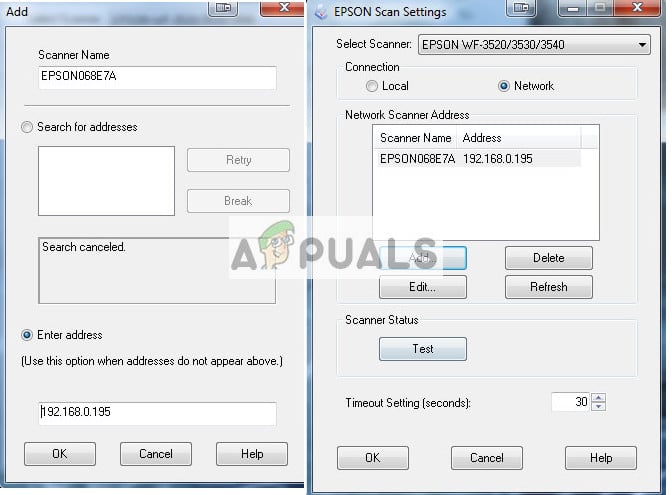
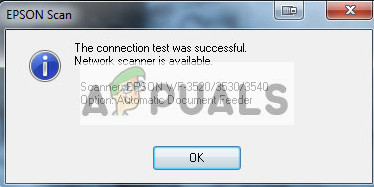
- Optionally, press the “Test” button to check the connection.
3. Use a Shorter USB Cable
If you’re having communication issues with your Epson scanner, try using a shorter USB cable. Longer cables can lead to signal interference or data loss, affecting the scanner’s connection to your computer. A shorter cable can reduce these disruptions and may stabilize the connection.
4. Restart Shell Hardware Detection
The Shell Hardware Detection service helps your computer detect devices like scanners and printers. If there’s a problem with this service, your scanner might not be detected. You can try restarting the service and reconnecting the scanner to see if that helps.
- Press Windows + R, type “services.msc” in the dialog box, and press Enter.
- Find “Shell Hardware Detection”, right-click it, and select “Properties”.
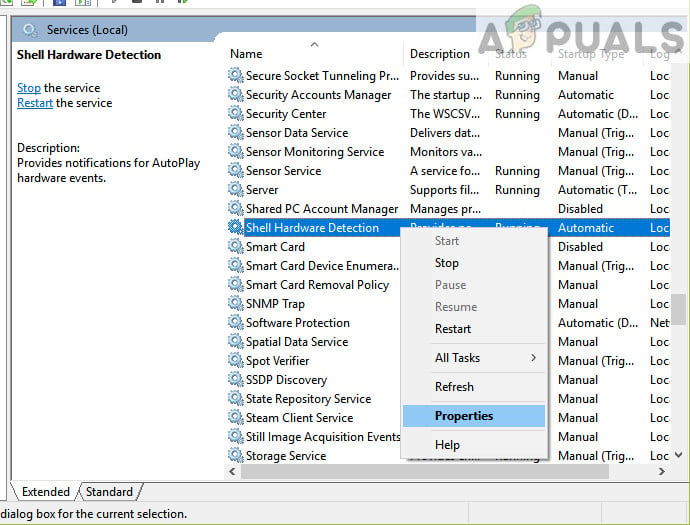
- Ensure the startup type is “Automatic”. Close the window, right-click the service again, and select “Restart”.

- Unplug your scanner, wait a few minutes, then reconnect it. If the issue was with Shell Hardware Detection, your computer should recognize the scanner.
- Repeat the process for the Windows Image Acquisition Service.
5. Turning off Password Protected Sharing
Password-protected sharing increases network security by requiring a password for access but can block scanner connections on the same network. Turning off this feature can help the scanner connect more easily. If this works, you can re-enable it later if needed. Also, make sure Printer Discovery is active so the scanner is recognized properly.
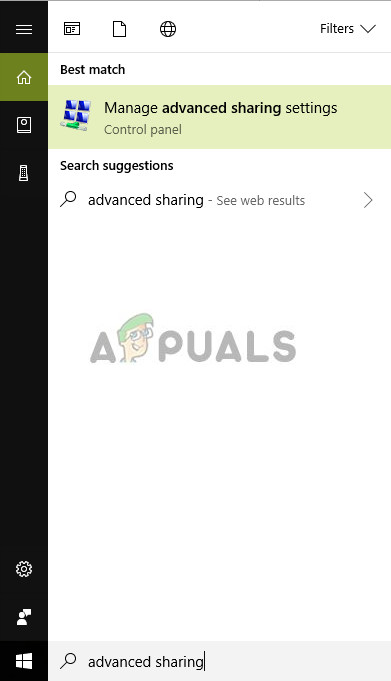
- Press Windows + S, type “advanced sharing” in the dialog box, and open the application.
- Select Private and check “Turn on file and printer sharing”. Repeat this for Guest or Public networks.

- Go to All Networks and disable password-protected sharing by selecting “Turn off password protected sharing”.
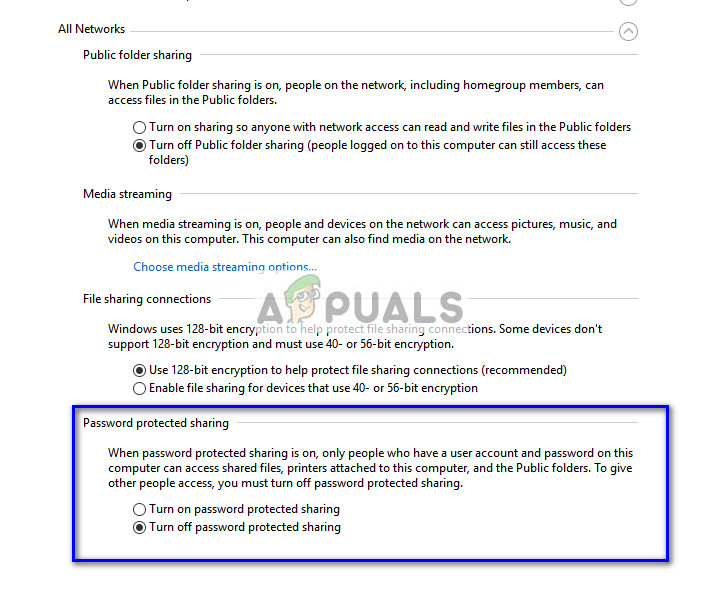
- Click Save Changes. Disconnect your scanner, wait a few minutes, then reconnect it. Check if the scanner utility works properly.
6. Change from LPT1 to USB 001 Virtual Printer Port
Older technology, like Line Print Terminals (LPT), was once used for connecting printers and scanners to computers. Today, USB connections are more common. Changing the printer’s port from LPT to USB might help, especially for users who have encountered scanner issues after upgrading to Windows 10.
- Press Windows + R, type control.exe in the dialog box, and press Enter.
- In the Control Panel, select “Large icons” from the top-right dropdown, then click “Devices and Printers”.
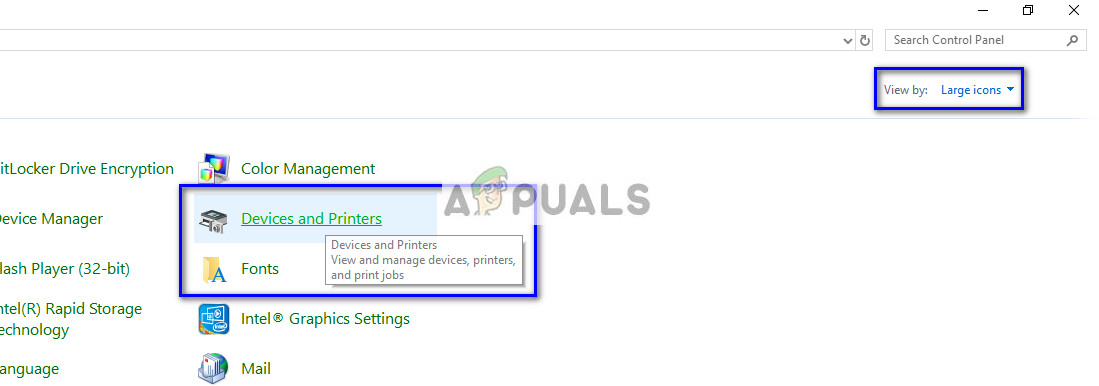
- Right-click your printer and choose “Properties”.
- Select the “Ports” tab and change from “LPT1” to “USB 001”.
- Unplug your scanner, wait a few minutes, then reconnect it. Check if the scanner utility works without issues.
7. Reset Windows Image Acquisition (WIA) Service
The Windows Image Acquisition service is important for capturing images when you scan documents on your computer. It allows graphics software to work with devices like scanners. If there’s a problem with this service, it can disrupt scanning or cause errors. Resetting the service can often fix these issues without updating the drivers
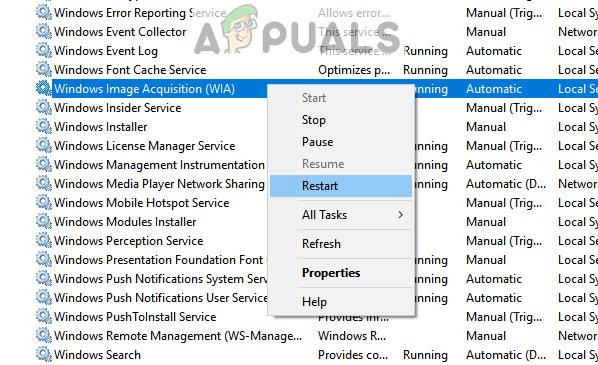
- Press Windows + R, type “services.msc” in the dialog box, and press Enter.
- Find “Windows Image Acquisition” in the list, right-click on it, and select “Restart”.
- Unplug your scanner from your computer. Wait a few minutes, then plug it back in. Check if the scanner works properly.
8. Update Scanner Drivers
If none of the previous solutions work, try updating the scanner drivers. Visit the manufacturer’s website and download the latest drivers for your specific scanner model. You can find the model number on the front of the device or its packaging.
Using outdated or incorrect drivers can cause communication issues between your computer and the scanner, leading to errors or malfunctions. Updating to the latest drivers can improve compatibility and functionality, which may resolve these problems.
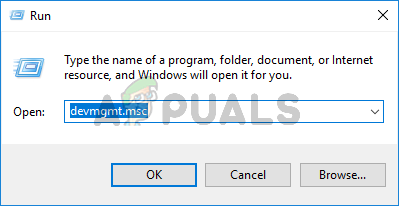
- Press Windows + R to open the Run dialog. Type “devmgmt.msc” and press Enter to access Device Manager.
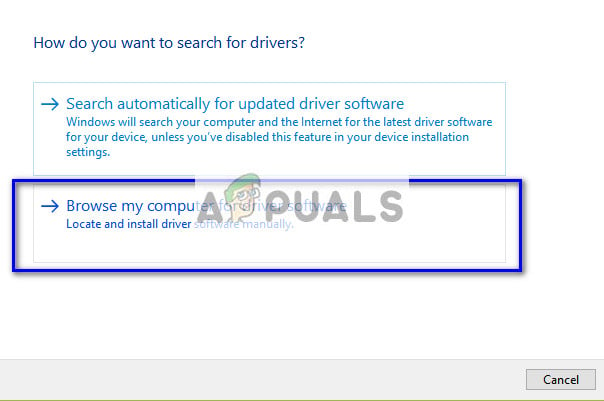
- Find “Imaging devices”, right-click your scanner, and select “Update driver”.
Note: If your scanner is built into your printer, update the printer’s drivers by checking under ‘Print Queues’. - In the update dialog, choose “Browse my computer for driver software”.
- Use the browse button to locate the downloaded driver file and update it.
- Restart your computer and see if the issue is resolved.


Thank you for the Solution #1. My scanner back to work !!!
I had tried Resetting WIA, Uninstalled and reinstalled the scanner drive, it didn’t work. But Running Scanner Software with Administrative Privileges works 🙂