Fix: DXGI_ERROR_DEVICE_REMOVED
The error “DXGI_ERROR_DEVICE_REMOVED” usually occurs when your graphics card isn’t able to run on your computer properly. The computer momentarily loses contact with the graphics card; hence the error.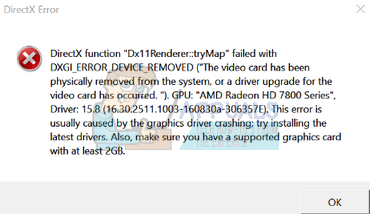
This error spawns due to a number of different reasons for example when you are overclocking your computer, when your graphics card heats up and disables itself for a split second, or when the game you are running isn’t able to synchronize with the graphics card. This issue usually occurs when playing games like Battlefield, Arma, Crysis, etc. We have listed down a number of different workarounds available to fix this issue. Take a look.
Solution 1: Switching off Anti-Aliasing
In computer graphics terminology, antialiasing is a software technique for diminishing jaggies (stair type lines which are supposed to be smooth). Jaggies usually come into existence when the monitor doesn’t have enough resolution to produce a smooth line. Antialiasing reduces the prominence of these jaggies by surrounding the stair steps with intermediate shades of the color.
Graphics software use this technique to further enhance the quality of the output display. However, many users reported that this caused many problems and was the responsible for the error message. We can try disabling antialiasing and check if this makes any difference in our case.
- Right-click on any empty space on your desktop and select “Nvidia control panel”.
- Click on “Manage 3D settings” using the left navigation pane. Now turn each antialiasing settings to “Off”. In this case, the mode is set to ‘Application-controller’. Change that to “Off” to override all external settings.
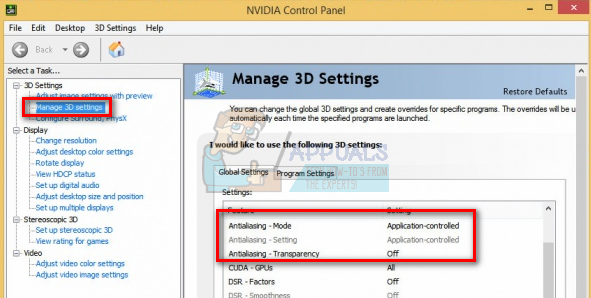
- Press Apply to save changes and reboot your computer. Now check if the problem got solved.
Note: We have demonstrated how to perform this solution according to Nvidia graphics hardware. You can do the same with other graphics cards.
Solution 2: Switching off ShadowPlay
Nvidia ShowPlay (Also known as Nvidia Share) is a hardware-accelerated screen recording utility present in its GeForce Experience application. It has a lot of recording features such as configuring to record the screen a time behind, hence providing the user a lot of flexibility.
Despite its benefits to players, ShadowPlay doesn’t come without its tolls. It has a great impact on your GPU as it has to constantly record the screen while also provide resources for the game to run smoothly. Many users reported that disabling ShadowPlay fixed their problem. We can try disabling it and check if the error message pops again in the future. If it still does, feel free to revert the changes.
- Open Nvidia GeForce Experience application as an administrator.
- Navigate to the ‘General’ tab using the navigation pane present at the left side of the screen. Turn “Share” off by clicking the switch in front of it (ShadowPlay is also known as Share). Press Apply to save changes and exit.
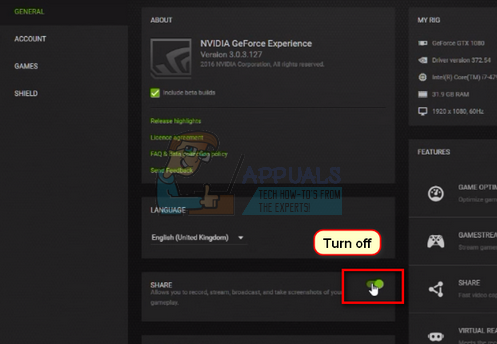
- Reboot your computer and check if the problem at hand got solved.
Solution 3: Checking Hardware and Configuring Cooling Settings
Your GPU requires being cooled constantly so it doesn’t damage itself. It heats up when it is processing data or your game. You should change your GPU’s cooling setting to at least 70%. If the error message still pops up, try increasing the cooling setting and check again. It is possible that the GPU is overheating, hence the error message.

Before you proceed with changing the cooling settings, clean out all the fans on your computer and ensure that a good passage of air is being provided to the computer and GPU. If you have your computer in a closed location, bring it out to a more open area where it can easily take in the air required for cooling. In some graphics hardware, the cooling settings also refer to GPU Fan Speed.
Solution 4: Disabling Overclocking
Much modern hardware nowadays allows the user to overclock their GPU/CPU for enhanced performance on their machine. Overclocking means performing short bursts of high computation before returning back to normal to be cooled again. Whenever the processing unit performs high computation, its temperature increases accordingly. Overclocking occurs again when the processing unit has been cooled enough.
If you have overclocking enabled, you should try disabling. Many users reported that overclocking caused their game to cause the error message. Make sure that overclocking is disabled from your BIOS too before running the game again.
Solution 5: Running DirectX Setup
DirectX is a collection of application programming interfaces for handling tasks related to multimedia especially gaming. It is used extensively to run high-end games with maximum performance to ensure that the end users get the highest quality.
DirectX may already be installed on your computer but it is possible that it isn’t updated to the latest version. You can download the package from Microsoft’s official website. Furthermore, you should also ensure that you have the latest versions “vcredist” (visual studio redistributables) and .NET framework installed on your computer.
Solution 6: Adding a Registry Key (TDR)
TDR checks periodically if your graphics hardware is responding as expected. If the graphics hardware doesn’t respond to TDR within two seconds, Windows automatically assumes that the hardware is hung and forces it to “re-initialize itself”. This is done to prevent the whole computer from freezing itself like it used to do in the past.
We can try adding a new value to your registry related to TDR and check if this solves the problem at hand. If it doesn’t, feel free to revert the changes by deleting the key.
Note: Registry editor is a powerful tool. Changing keys which you have no knowledge of can hamper the performance of your computer or even render it unusable. Backup your registry before moving on to the solution just in case.
- Press Windows + R, type “regedit” and press Enter.
- Navigate to the following path using the left navigation pane:
HKEY_LOCAL_MACHINE > SYSTEM > CurrentControlSet > Control > Graphics Drivers
- Once in the target location, right-click on any empty space at the right side of the screen and select ‘New > DWORD (32-bit) Value’.
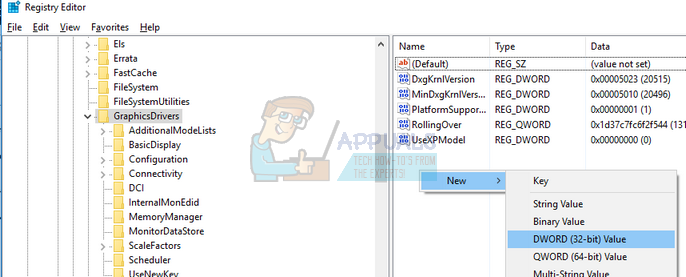
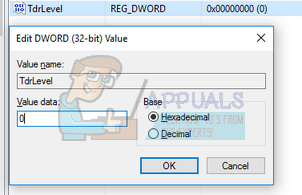
- Set the new name as “TdrLevel” and set the value as “0”. Press OK to save changes and exit.
- Restart your computer and check if this solves the problem.
Solution 7: Using MSI Afterburner/NVIDIA Inspector (For Advanced Users Only)
Another workaround which worked for a lot of the users was reducing the core clock cycles and increasing the cooling capacity using MSI Afterburner. You can also enable the settings “Start with Windows” and “Start Minimized” to ensure that it keeps running in the background. You should also reduce the power limit and reduce the temperature limit using the Afterburner.
You can also download Nvidia inspector and change the overclocking settings. Reduce the power limit to around 70% and the temperature limit to 65%. If this doesn’t work, you can always work your way down until you touch a safe enough value.
Note: This solution is for advanced users only. Users who have no idea about this should move ahead with the other solutions.
Solution 8: Updating Graphics Software
If all the above solutions don’t work, we can try updating the graphics driver. It may be possible that your graphics driver is not properly configured or is outdated. We need to completely delete all driver files before we install the new driver, therefore, we need to use the utility Display Driver Uninstaller. You can download the utility over the internet easily.
- After installing Display Driver Uninstaller (DDU), launch your computer in safe mode. You can learn how to boot your computer into safe mode by reading our article on it.
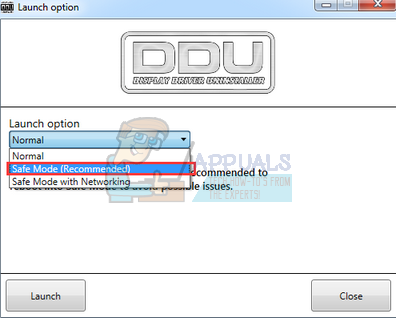
- After booting your computer into safe mode, launch the application which was just installed. Choose the option Safe Mode.
- After launching the application, select the first option “Clean and restart”. The application will then automatically uninstall the installed drivers and restart your computer accordingly.

- Boot your computer into normal mode and launch the application. Open the “Drivers” tab and click the button “Driver Download”. Enter your specification on the right side of the screen and click “Start search” for the application to search for the optimal drivers for your computer.

- After the driver is updated, restart your computer and check if the problem got solved.
Note: Here we have seen how to install the Nvidia drivers using GeForce Experience application to download them. Alternatively, you can download the drivers from the official website and install them using the device manager. Same goes for other graphics hardware