How to Fix Developer Mode package failed to install. Error code 0x80004005
The 0x80004005 error is an unspecified error that can appear in a huge number of scenarios. The error indicates that certain extra components, that are needed by the OS in order to enable additional features for debugging, are not installed automatically. You may get it when trying to install Bash, you may get it when you want to enable developer mode and install it, because there is no defined cause that may be the root of this issue. It won’t leave your device useless, however if you need the developer options, or Bash, this may be a dealbreaker.
However, for the aforementioned issues, especially if you get this error when trying to install Developer Mode, there are a couple of solutions that have been reported to work, and you can continue using your device afterwards.
Method 1: Manually install Developer Mode
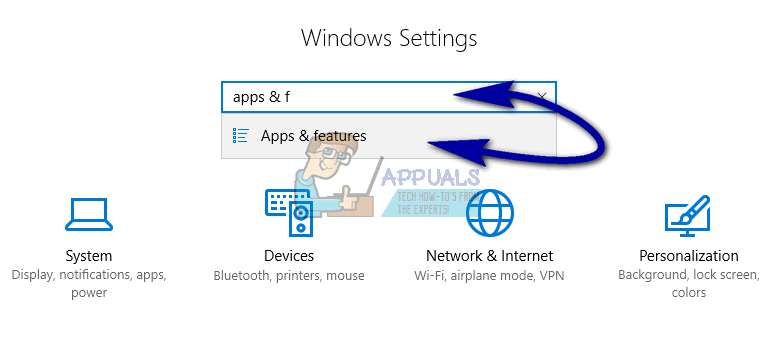
This is the easier of the two steps, and it manually installs the Developer Mode on your device, after which you can continue using the features. The first step is to open the Settings app, by pressing the Windows key on your keyboard and typing Settings, then clicking on the result.

Once inside, search for and open on Apps & features
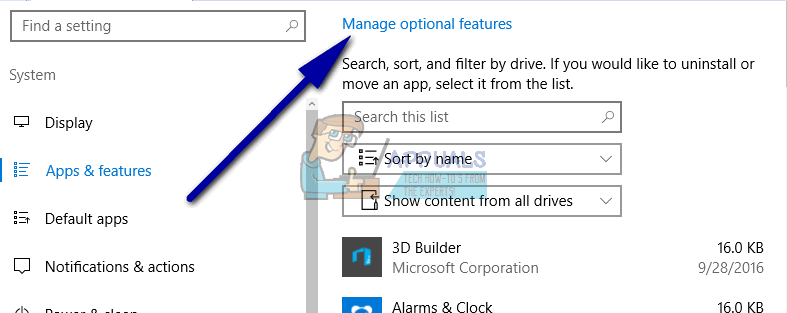
and choose Manage Optional features at the top.
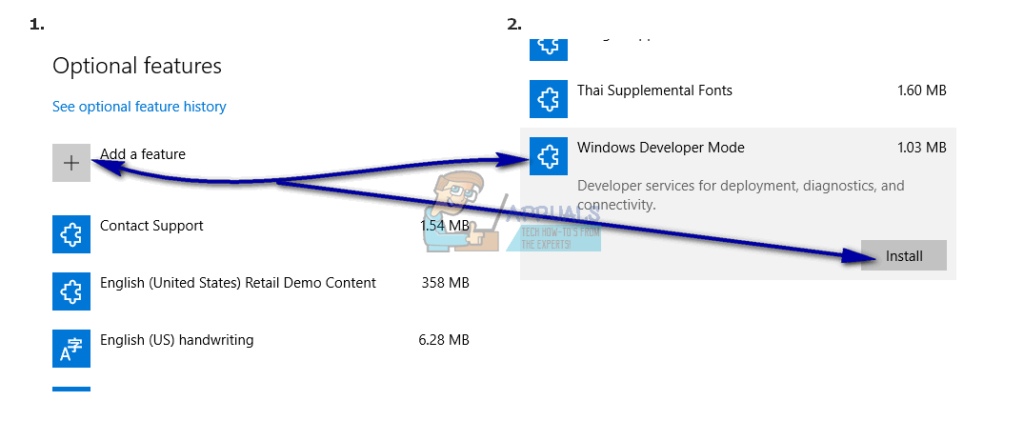
Click on Add a feature, and select the Windows Developer Mode package. Install it, and reboot your PC.
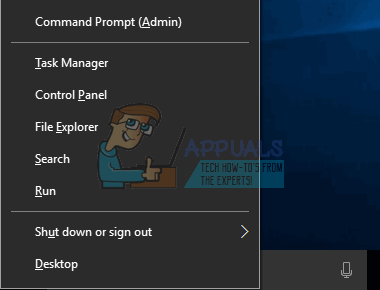
When you’re done with this, launch an Elevated Command Prompt by pressing simultaneously Windows and X on your keyboard, and selecting Command Prompt (Admin) from the menu.
Once inside, you should run the following command:
sc config debugregsvc start=auto

When the command is done, return to the For Developers page, by pressing the Windows key on your keyboard and typing For Developers. The error code may still be there, but you can now enable the features that you need.
Method 2: Disable the UseWUServer registry key
This is the second way to solve this issue, and you should be careful as doing something wrong within the registry may permanently corrupt your operating system. Follow the instructions word by word, and don’t skip steps, to ensure that you solve this issue without creating another one.
The first thing you should do is open a Run dialogue window by pressing simultaneously Windows and R on your keyboard. In the box, type regedit.exe and press OK, or Enter on your keyboard.
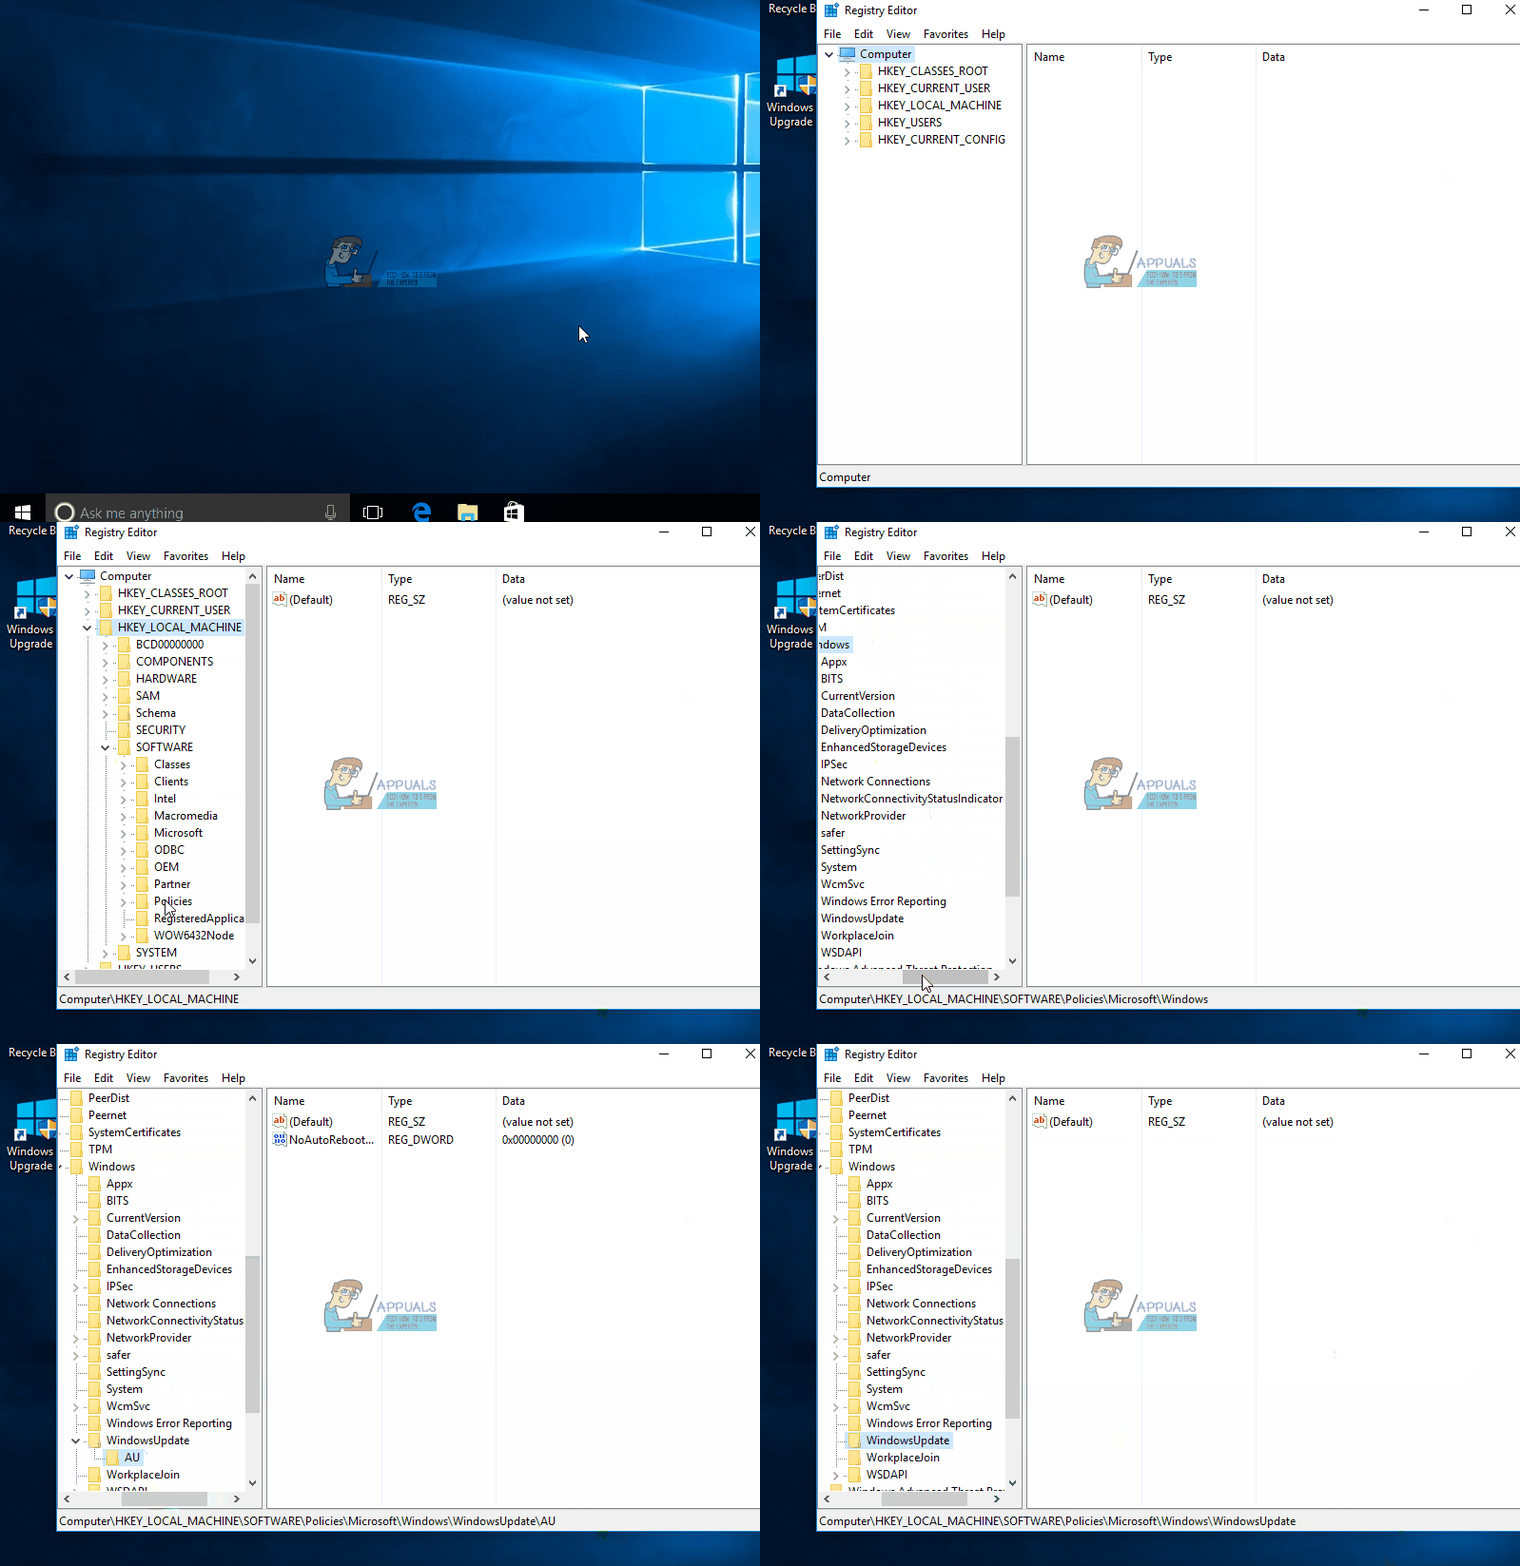
You should now be in the Registry Editor. Once inside, use the left navigation pane to go to the following key:
HKEY_LOCAL_MACHINE\SOFTWARE\Policies\Microsoft\Windows\WindowsUpdate\AU
NOTE: Before editing, right-click the parent folder and select Export, in order to create a backup of the keys you will be editing.
Inside the folder, edit the UseWUServer and set its value to 0, or delete the entire AU folder.
It should be done after 10-15 minutes if you’d rather accelerate the process, you can open an Elevated Command Prompt (as described in the previous method), and use the following commands, pressing Enter after each one to execute it:
net stop wuauserv
net stop bits
net stop cryptsvc
net start wuauserv
net stop bits
net stop cryptsvc
Close the Command Prompt after this, and when the process is done, you shouldn’t be facing this issue anymore.
While some people may not be at all bothered by this issue, certain others will find that it prevents them from a number of things on their computer. If you’re one of them, follow the methods described previously and you should get rid of it in no time.