Fix: Destiny Error Code Vulture
The Vulture error code is just one of the many error codes related to the buggy overall performance of the game. There are always quite a few factors which need to be aligned if you want to see the game running properly which include the servers, the service of the console you are using, Blizzard, Bungie…
Vulture is affecting players individually which means it’s usually the account which is being targeted and not the specific PC or network. Bungie has reported that the error may be with the Xbox Live server status or even the status of your Xbox Live or PSN membership. Check out the answers below to see some of the solutions and workarounds.
Solution 1: Keep Trying to Connect
Sometimes the servers are to blame, especially if they become too crowded, resulting in various weird error codes. Even Bungie has suggested to users that they should try reconnecting for a couple of minutes before trying to fix the error code in other ways.
Additionally, there are plenty of users who confirmed that being patient paid off and they were soon able to continue playing the game normally.
Sometimes it’s simply the servers which are going under maintenance and sometimes there is a problem with the account users are using to play the game. You can always check the status of various servers for any of the platforms available by clicking on the links below:
- PlayStation Network Status: https://status.playstation.com
- Xbox Live Status: https://support.xbox.com/xbox-live-status
- Blizzard Support: https://eu.battle.net/support/en/help
Solution 2: Restart Your Console
This solution has helped quite a few people deal with their Vulture error code and this solution is quite a general method for fixing almost all Xbox-related issue. Naturally, this method can only be applied to users playing Destiny on Xbox.
However, make sure all of your games are synced online and backed up since this process may end up deleting them from your local Xbox One memory. There are two ways to delete the cache on Xbox One and reset your console completely:
- Press and hold the power button at the front of the Xbox console until it shuts down completely.
- Unplug the power brick from the back of the Xbox. Press and hold the power button on the Xbox several times to make sure there is no remaining power and this will actually clean the cache.
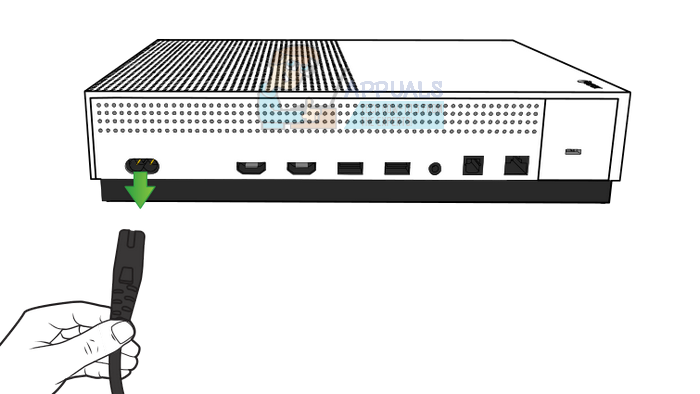
- Plug in the power brick and wait for the light located on the power brick to change its color from white to orange.
- Turn the Xbox back on as you would do normally and check to see if the Vulture error code still appears when you start Destiny or Destiny 2.
Alternative for Xbox One:
- Navigate to your Xbox One settings and click on Network >> Advanced Settings.
- Scroll down to Alternate Mac Address option and choose the Clear option which appears.
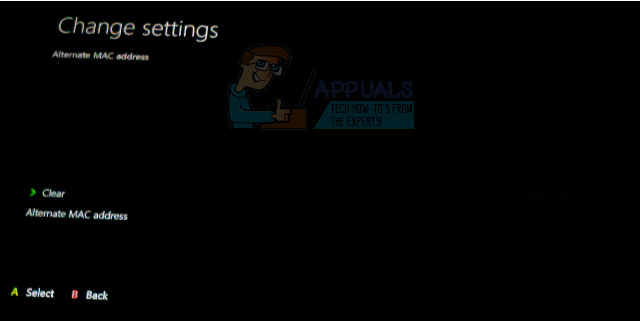
- You will be prompted with a choice to really do this as your console will be restarted. Respond affirmatively and your cache should now be cleared. Open Destiny or Destiny 2 after the console has restarted and check to see if the Vulture error code still appears.
If you are using a PlayStation 4 to play Destiny, make sure you follow the instructions below to hard reset your PlayStation 4 since PS4 does not possess an option to clear the cache:
- Completely turn off the PlayStation 4.
- Once the console is completely shut down, unplug the power cord from the back of the console.
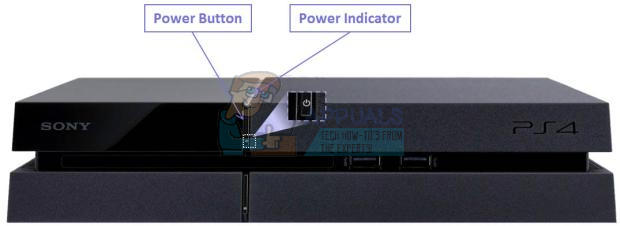
- Let the console stay unplugged for at least a couple of minutes.
- Plug the power cord back into the PS4 and turn it on the way you normally do.
Solution 3: Delete Your Account from Your Xbox and Redownload it
Deleting your account from your Xbox is something you should be careful about since plenty of users have reported that they almost messed up their profiles when doing so. However, there is an easy way to avoid any problems when it comes to removing your account.
This fix is aimed for Xbox users so make sure you follow the instructions and check to see if the Vulture error keeps on appearing.
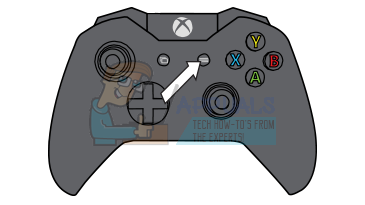
- 1 Go to the Home screen of your Xbox One and press the Menu button on your controller.
 Select Settings. You can also say Xbox, go to settings from any screen, but you’ll need a controller once you’re on the Settings screen.
 - Scroll to the right. Under OTHER PEOPLE, select the Remove accounts option.
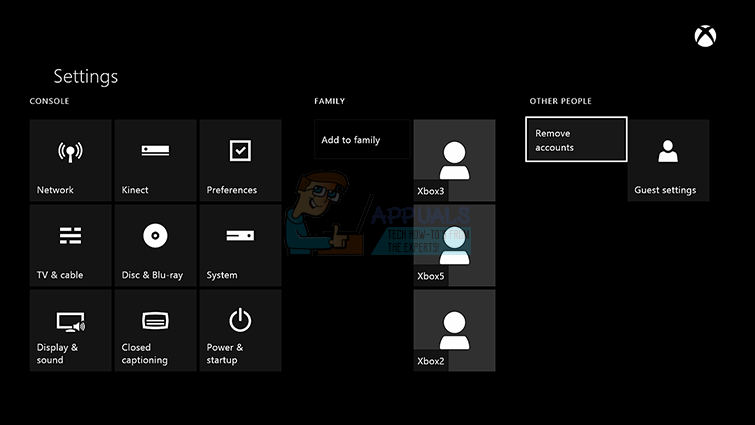
- Select the account that you want to remove, and then select Choose this person. Click the Remove from this Xbox to confirm your choice.
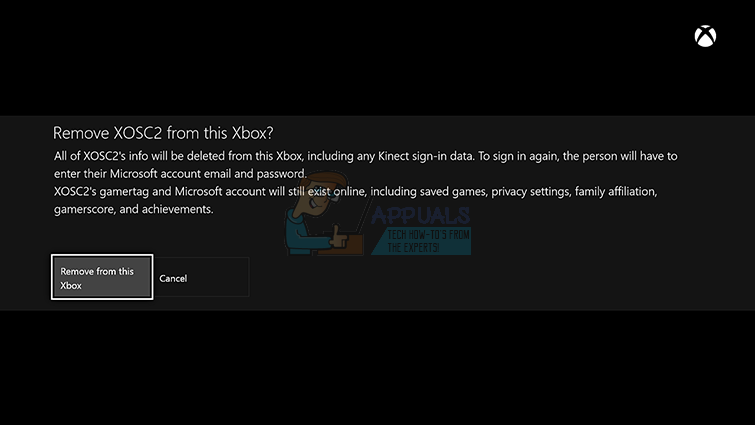
- When you’re finished, select Close
After you have successfully removed your profile from your Xbox One, it’s time to redownload it to see if everything is working. Follow the steps below.
- Press the Xbox button to open the guide.
- Select your gamerpic in the upper-left corner of the screen, move all the way down and select Add new.

- Enter the email address for the Microsoft account that you want to add, and then select Enter. .
- If you’ve forgotten which email address is associated with your Microsoft account, see the Lost Account Solution.
- Enter the password for your Microsoft account that you want to add, and then select Enter.
- Read the Microsoft Service Agreement and Privacy Statement, and then select I Accept.
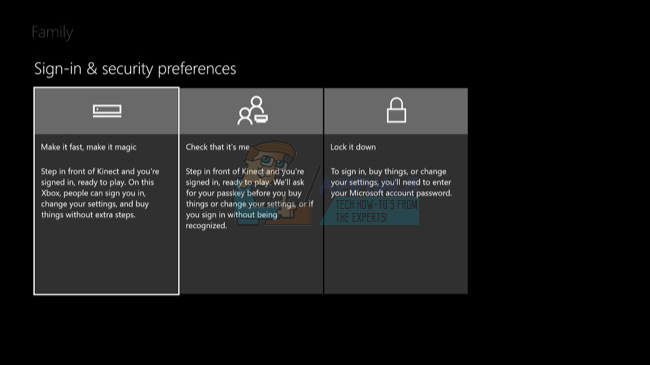
- Follow the steps to configure your Sign-In & Security preferences to add your Microsoft account to your Xbox One console.
After you have performed the steps above, it’s recommended that you perform a hard reset of your Xbox One just to make sure your profile is added without any mistakes or errors which may show wrong or corrupted data.
- Press and hold the power button at the front of the Xbox console until it shuts down completely.
- Unplug the power brick from the back of the Xbox. Press and hold the power button on the Xbox several times to make sure there is no remaining power and this will actually clean the cache.
- Plug in the power brick and wait for the light located on the power brick to change its color from white to orange.
- Turn the Xbox back on as you would do normally and check to see if the Vulture error code still appears when you start Destiny or Destiny 2.
Solution 4: Going Offline
This unusual fix seems to have helped quite a few people deal with their Destiny Vulture error codes and this fix is something that doesn’t looks so promising but it definitely worth giving this a shot since it can be done in just a few minutes.
- Press the Xbox button to open the guide.
- Navigate to Settings >> All Settings >> Network >> Network Settings >> Go offline
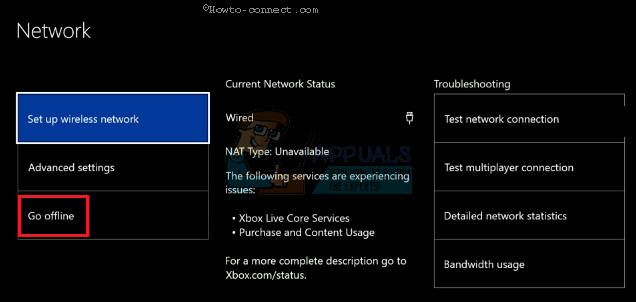
- The Go Offline option is the only way to stay disconnected if you are using a wireless connection to connect to the game. Enable this option for now.
The next step is hard resetting your console in order to apply these changes and clear the Xbox cache which should always help when handling problems like these.
- Press and hold the power button at the front of the Xbox console until it shuts down completely.
- Unplug the power brick from the back of the Xbox. Press and hold the power button on the Xbox several times to make sure there is no remaining power and this will actually clean the cache.
- Plug in the power brick and wait for the light located on the power brick to change its color from white to orange.
- Turn the Xbox back on as you would do normally.
After you start up your Xbox again navigate to the same Go Offline option and turn it off. Now that you have taken care of this, open Destiny and check to see if the Vulture error code still appears while you are trying to log in.