Fix: Data Error Cyclic Redundancy Check
USB drives, external hard drives, and your computer hard drive provides a good way of transferring or storing your valuable files. But, sometimes you might see a “Data error cyclic redundancy” error message while using one of these disks. You will encounter this message when you try to copy your files between these devices. For example, you tried to copy your data either to or from your USB drive. You might see this message if your external drive is disconnected while the files were getting copied to or from the external hard drive. Lastly, users can also experience this issue while simply trying to copy or download file to their hard drives.
The Cyclic Redundancy Error (CRC) usually indicates a hardware issue but it can be a software related issue as well. So, it can be a case of bad drive or their might be a bad sector on your drive. It can also be a port issue but that can easily be checked. On the software side, the data you are trying to transfer might be corrupt or the drive drivers can be problematic. There are a few reasons behind this error so we will go through a range of solutions to check which one works for you.
Tips
Before you dive deep into the technical solutions, here are a few things that can narrow down the culprit behind the issue.
- If the problem occurred with an external hard drive or a USB drive then try a different port. Your port might be faulty
- Try to copy to data to another drive. If you are trying to copy the data from your USB to your hard drive then try to copy in another computer. If you can’t copy the data on any drive then the problem might be with your file. This might be the case of corrupt data.
If you can’t see the drive letter
One of the methods to resolve the issue is to run Chkdsk. However, Chkdsk requires a drive letter in order to check the disk and resolve the errors. There are some users who have complained about not being able to see the drive letters which prevents them from using the Chkdsk altogether. So, here are a few things that you can try if you are having the no drive letter problem.
Connect the problematic drive to the computer. If your main hard drive is causing problems then you can use another computer and attach your hard drive as a secondary drive. Steps for this process are out of scope for this article. So, you can use some other online resources for a step by step instructions.
- Hold Windows key and press E
- Check if the drive is showing up in File Explorer
- If your device isn’t showing up then Hold Windows key and press R
- Type devmgmt.msc and press Enter
- Double click Disk drives
- Check if your connected drive is appearing in this list. If it isn’t, right click Disk drives and select Scan for hardware changes. If you see a yellow warning sign then that’s a good sign. That means there’s a driver problem. Right click your drive and select Update driver software… Now select Search automatically for updated driver software. If that doesn’t solve the issue then either right click, select Uninstall and restart the system or check for an updated driver version and update the driver.
- Now, Hold Windows key and press R
- Type diskmgmt.msc and press Enter
- Locate your disk and select it. If there is a Black bar on your drive then that means the drive is unallocated storage space. Right click your drive and select Reactivate Disk.
- Press Windows key once
- Type command prompt in the search bar
- Right click Command Prompt from the search results and select run as administrator
- Type diskpart and press Enter
- Type automount enable and press Enter
Now re-attach the problematic drive and check if the letter is showing up.
Method 1: Chkdsk
Chkdsk (pronounced as check disk) is a Windows own disk checking tool. As its name indicates, it is used to check your disk drives. The good thing about this tool is that it not only checks the disk for any errors or bad sectors but it can fix those errors as well. So, the first thing that should be on your to-do list is to run a chkdsk on your drive.
In order to run the chkdsk, you have to specify the drive letter. The drive letter should be of the drive that you want to check i.e. USB drive or your main hard drive. Now, which drive do you want to check completely depends on your situation. If you think your external drive is problematic then check that drive first. However, we will recommend to check your external drive first unless you have some evidence of your main hard drive failing. We are recommending checking your external drive first because checking and then fixing the errors takes time. There’s no point in spending several hours in checking your hard drive only to find out that the problem was with your USB drive which would have taken a few minutes.
So, here are the steps to check your chosen drive for any problems.
- Press Windows key once
- Type command prompt in the search bar
- Right click Command Prompt from the search results and select run as administrator
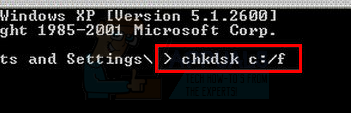
- Type chkdsk C: /f and press Enter. Note: Replace “C” with your driveletter. Hold Windows key and press E to open File Explorer. There, you should see the drive letter of the drive.
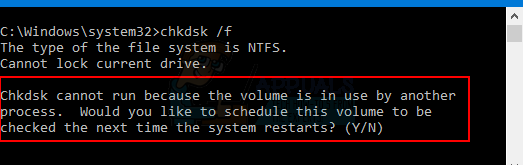
- If you see this message “Chkdsk cannot run because the volume is in use by another process. Would you like to schedule this volume to be checked the next time the system restarts? (Y/N)” then type Y and press Enter.
- Now, wait for it to finish.
Once the process is finished, you will see the results of the disk check. This should solve your issue but if the problem persist or you face any error then run the chkdsk before your Window loads.
Here are the steps for running chkdsk before logging into Windows.
- Connect your USB recovery drive or Installation disc to the computer
- Restart your computer
- Press any key when it says Press any key to boot from device…
- If it doesn’t say that then you might have to change the boot order from the bios. Do that by following the given steps
- When you restart your computer, press either Esc, F8, F12 or F10 when your manufacturer’s logo appears. You can also check what button to press because it is mentioned on the corner of the screen when the manufacturer’s logo appear. The button changes from manufacturer to manufacturer.
- Once you press the button, select the BIOS setup or BIOS setup utility or Boot options This may vary depending on your manufacturer.
- If you selected the Boot options then you will be shown a few options to choose from. Select boot from USB (or CD/DVD depending on what you are using).
- If you select BIOS Setup then use the arrow keys to move to the Boot section.
- Go into the Boot order and make sure your USB recovery drive is on the top of the order
- Save the changes and then restart your computer
- Note: The options varies from computer to computer. Use your computer manual for accurate instructions
- Press any key when it says Press any key to boot from device…
- Choose your keyboard layout
- Select your language, time and a keyboard method
- Click Next
- On the Install Windows page, select Repair your computer.
- Click If you have Windows 7 then click Command Prompt and go to step 13
- Click Advanced Options
- Click Command Prompt
- Type chkdsk /r C: and press Enter
This should check your drive and solve any issues with it. Once the scan is finished, log into the Windows and check if the issue is resolved.
Method 2: Check Disk Utility
Windows has a Check Disk Utility as well which can easily be used from My Computer. It is actually easier to use as compared to the Chkdsk method. So, here are the steps for using this utility.
- Hold Windows key and press E
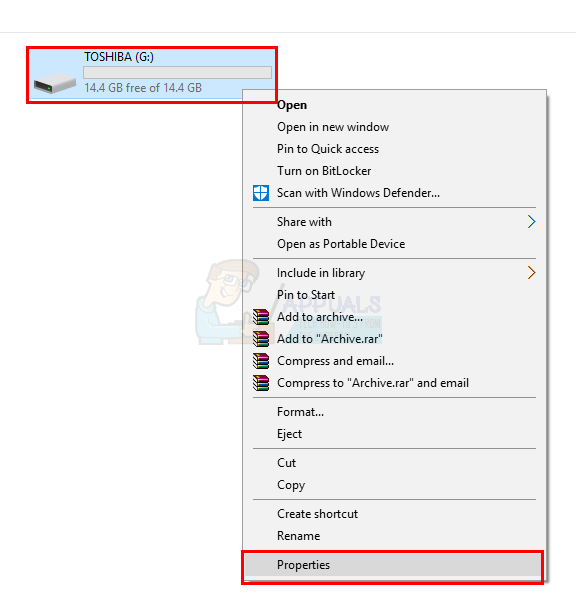
- Your drives should be showing up on the screen. Right click the drive that you want to check and select Properties
- Click Tools tab
- Click Check in the Error Checking

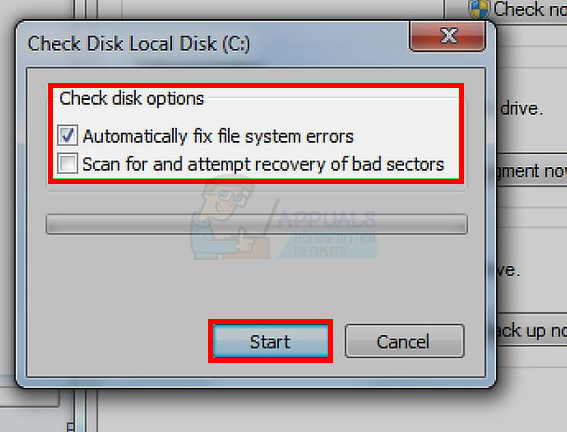
- If you see a new dialog, check the option Automatically fix file system errors and Click Start
Note: If you selected the C drive then the computer will ask you to schedule a disk check. This just means that the disk will be checked on the next start up. Click Schedule disk check. You might also see a dialog asking you to dismount the drive. This basically means that your drive is in use. So, click Force a dismount to continue.
Wait for the scan to finish. As mentioned earlier, it might take more than a couple hours. So, don’t worry if it’s taking too long. Once done, your drive should be fine and you won’t be seeing the error again.
Note: If this doesn’t solve the issue then repeat the steps from 1-4 and check the option Scan for and attempt recovery for bad sectors. Now, check the option Automatically fix file system errors and Click Start.
Method 3: Quick Format
Note: This is for people who couldn’t solve the issue or their drive is inaccessible from the chkdsk. If you have valuable data stored in the drive then this method will help you recover it.
If nothing else worked and Chkdsk hasn’t solved your issue then it’s time to do a Quick Format. If you don’t want to format the drive then don’t worry, performing a Quick Format doesn’t remove your data. To keep it simple, the Quick Format will erase the table that helps in identifying where everything is in the drive. The data that you have on the drive doesn’t get erased unless you copy something new which will replace that old data. So, your data will remain on the drive if you perform a Quick Scan and don’t copy anything new to the drive. You can then use a data recovery tool to recover the data from your drive.
So, let’s get started
Connect the problematic drive to the computer. If your main hard drive is causing problems then you can use another computer and attach your hard drive as a secondary drive. Steps for this process are out of scope for this article. So, you can use some other online resources for a step by step instructions.
- Hold Windows key and press E
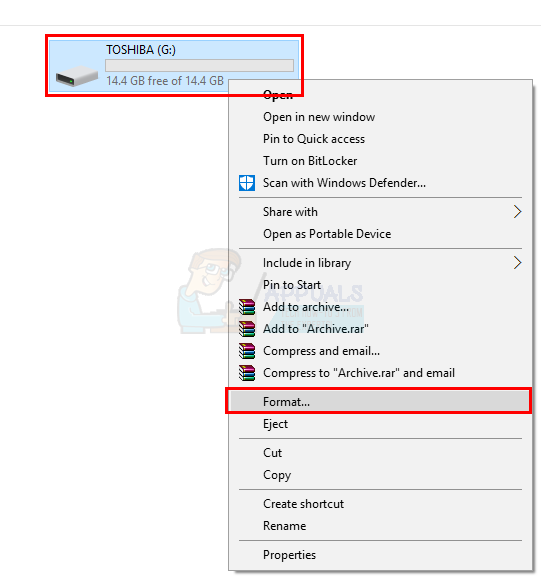
- Right click the problematic drive and select Format…
- Check the option Quick Format in Format Options section and click Start.
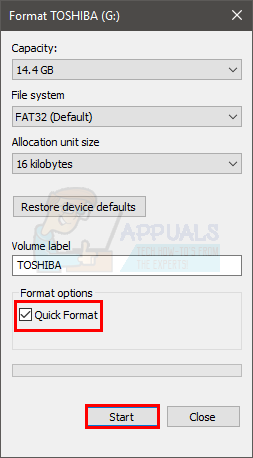
- Wait for the Quick Format to finish, this shouldn’t take long.
- Once the format is complete, it’s time to recover the data. However, you should still try to run the chkdsk to see if it works (if it wasn’t working before). Go to method 1 or 2 for detailed instructions.
- Click here to download Recuva. Recuve is a data recovery tool and it has a free version as well. Download Recuva and install it.
This should help you in recovering your data from the problematic drive. If Recuva isn’t useful or doesn’t recover all the data then contact an IT professional to help recover your files.