How to Remove a Printer That Won’t Uninstall in Windows?
Modern operating systems, including the latest iterations of Windows, strive to provide seamless integration with peripheral devices. Printers, as essential peripherals, however, sometimes pose unique challenges. Users have encountered issues ranging from driver incompatibilities to persistent difficulties when attempting to remove printer software and hardware entries from their systems.
These problems can manifest in various ways; error messages may indicate unresolved printer issues, and the typical removal processes may falter—leaving devices in limbo within system settings. Attempting to uninstall printers sometimes leads to perpetual ‘removal in progress’ indicators, while other times, printers linger in the device list even after supposed successful uninstallation.
Despite the sophistication of Windows and frequent updates, such issues persist, necessitating a set of troubleshooting methods to aid users in effectively managing and removing their printer devices. This article provides a comprehensive guide on tackling these stubborn printer removal problems across various versions of Windows.
Method 1: Remove Old Drivers From Print Server Properties
Sometimes, printer drivers can get corrupted or become incompatible after a system update, leading to issues such as the printer being stuck in a state where it cannot be removed.
To address this, users have found success in resolving printer issues by removing outdated or problematic drivers directly from the Print Server Properties. This approach can often dislodge a printer that seems permanently attached to the system, paving the way for a cleaner and more conventional removal process.
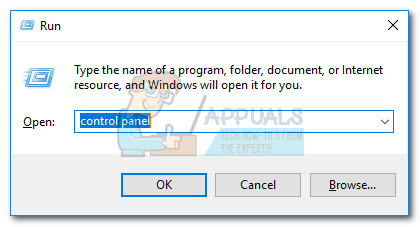
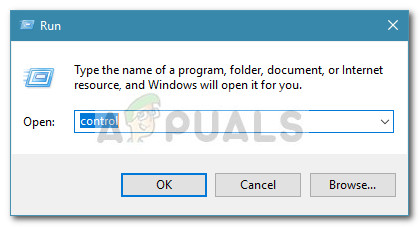
- Open a new Run window by pressing Windows key + R. Then, type “control” and press Enter to open Control Panel.
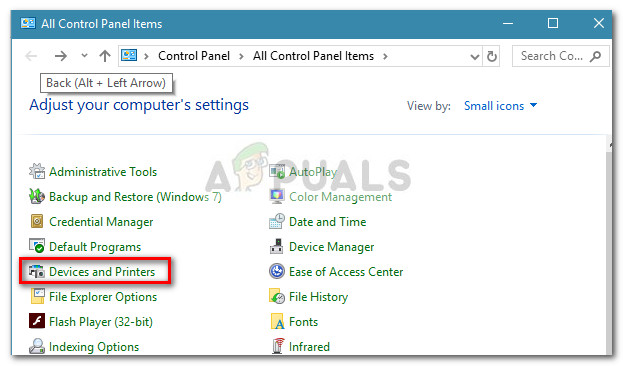
Open Control Panel - Inside Control panel, click on Device and Printers.
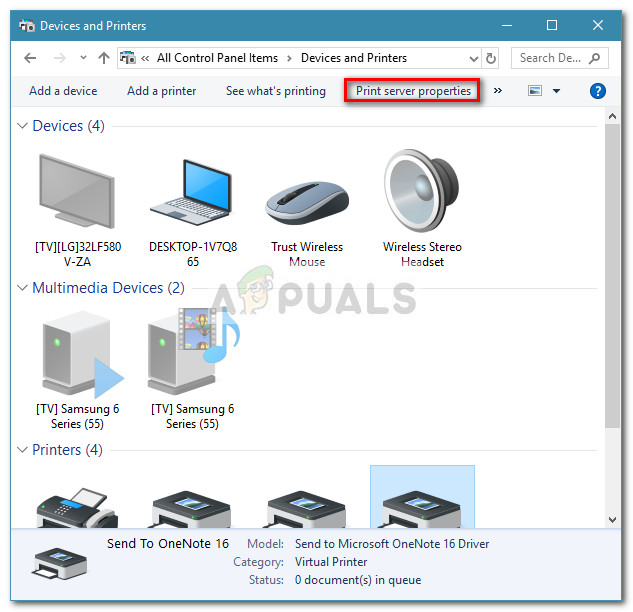
Open Devices and Printers - In the Devices and Printers window, select the printer that you are having trouble removing and click on Print server properties (top ribbon bar).
Open Print Server Properties - In the Print Server Properties window, click on the Drivers tab. Then, systematically remove any driver that belongs to the printer that refuses to uninstall by selecting it (via the Installed printer drivers box) and clicking Remove.
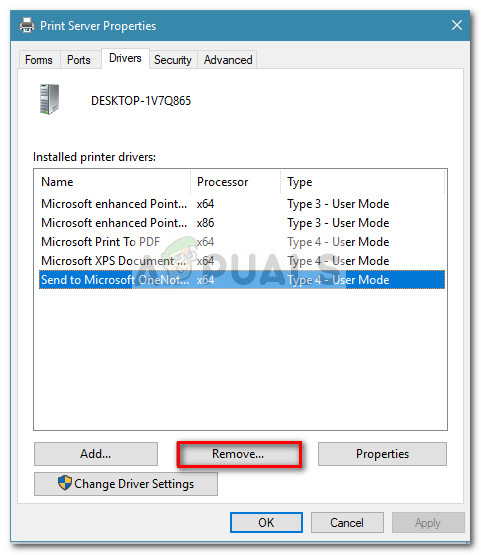
Remove the Faulty Printer’s Driver - Once the printer driver is removed, click on Apply and restart your computer.
Method 2: Remove the Corrupted Printer Registry Entries
Some users have successfully resolved their printer issues by deleting registry entries related to the malfunctioning printer using the Registry Editor.
Removing these specific registry keys and subkeys removes the corresponding printer’s configuration data, potentially fixing corruption issues. After clearing the registry and restarting the computer, many were able to remove the printer in the usual way without further complications.
- Press Windows key + R to open up a Run box. Then, type “Regedit” and hit Enter to open Registry Editor.
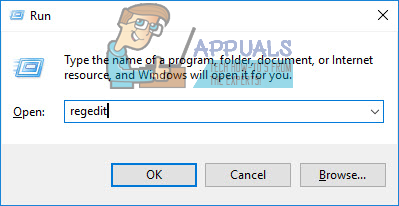
Open Regedit - Inside Registry Editor, navigate to the following location using the left pane:
HKEY_LOCAL_MACHINE > SYSTEM > CurrentControlSet > Control > Print > Printers
- In the Printers key, locate the entry associated with your the printer that you want to remove, right-click and choose Delete.

Delete Faulty Printer’s Registry Entries Once the key (and subkeys) associated with your printer has been deleted, close Registry Editor and reboot your system.
Method 3: Clear the Print Jobs Queue
Many users have encountered a scenario where a printer cannot be removed due to stuck print jobs. These pending jobs can interfere with the printer’s removal process. Clearing the spooler, which stores print commands, can often resolve this issue by removing any obstructions and allowing the printer to be uninstalled successfully.
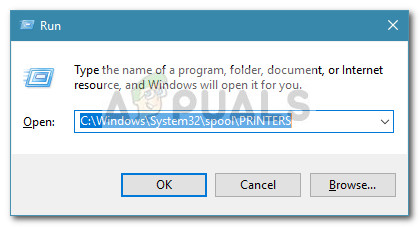
- Press Windows key + R to open up a Run box. Then, paste (or type)
C:\Windows\System32\spool\PRINTERS
in the Run box and hit Enter to open the folder holding the printing jobs.
Open C:\Windows\System32\spool\PRINTERS - Hit Yes at the UAC prompt to get permissions to edit the PRINTERS folder.
- If the PRINTERS folder is not empty, delete everything there to free up the printing queue.
- Once the PRINTERS folder is empty, try to remove (or uninstall) the printer again, then restart your computer.
Method 4: Remove the Printer from the Settings Menu
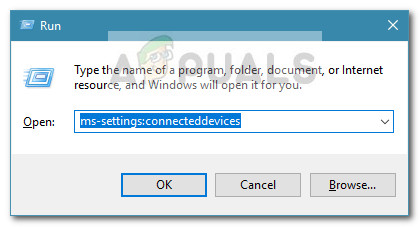
- Press Windows key + R to open up a Run window. Then, type
ms-settings:connecteddevices
and hit Enter to open the Connected Device tab of the Settings menu.
Open ms-settings:connecteddevices - In the Connected Devices menu, move over to the left pane and click on Printers & Scanners to expand the list. Now, click on your printer to expand the drop-down menu, then click on Remove Device.
- Hit Yes to confirm the removal of the device at the next prompt, then close the Settings menu and restart your computer to force the changes to take effect.
If you’re still seeing your printer listed in the Devices list at the next restart or if it continues to show “being removed”.
Method 5: Remove Printer via Control Panel
Using the legacy Control Panel interface can sometimes circumvent issues with removing a printer that persists in Windows. This method has proven effective especially after clearing old drivers through Print Server Properties, which can resolve conflicts or corruption within the printer’s installation files.
- Press Windows key + R to open up a Run window. Then, type “control” and hit Enter to open Control Panel.
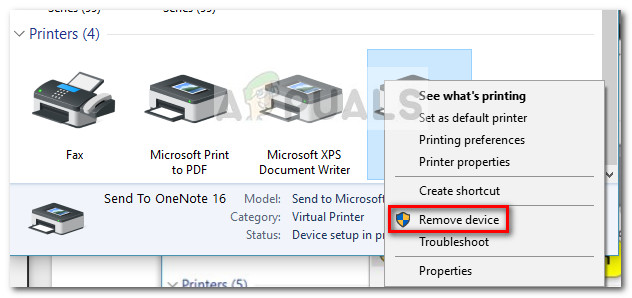
Open Control Panel - Inside Control Panel, click on Devices and Printers, then expand the Printers drop-down menu.
- Right-click on the printer that you want to remove, then select Remove Device.
Remove the Printer - Hit Yes at the confirmation prompt, close Control panel and restart your system.
Method 6: Remove the Printer via Print Management (if applicable)
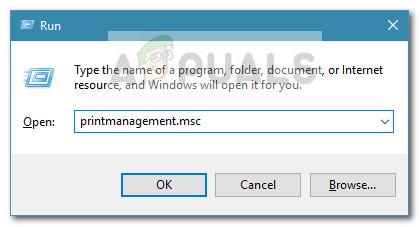
- Press Windows key + R to open up a new Run box. Then, type
printmanagement.msc
and hit Enter to open the Print Management wizard.
Open printmanagement.msc - In the Print Management window, expand the Print Servers drop-down menu and double-click on Printers to open them in the left pane.
- From the left pane, right-click on the printer that you want to remove and click on Delete.
- Click the Yes button to confirm the deletion, then close Print Management and restart your computer for the changes to take full effect.
At the next startup, see whether the printer driver has been successfully removed. If you’re still seeing listed among your other devices, move over to the other method below.
Method 7: Remove Printer via Device Manager
Removing the printer from the list of devices can also be done from Device Manager, but keep in mind that some users have reported that this method was ineffective in their case – the printer has only briefly removed from the list of devices and was back at the next startup.
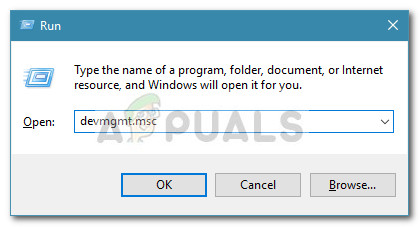
- Press Windows key + R to open a Run box. Then, type
devmgmt.msc
and hit Enter to open Device Manager.
Open devmgmt.msc - In Device Manager, expand the Print queues drop-down menu, right-click on our printer and choose Uninstall Device.
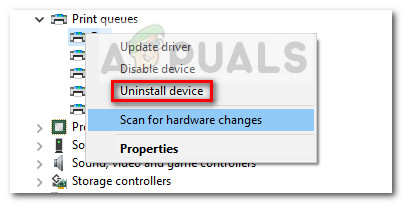
Uninstall the Faulty Printer in Device Manager - Close Device Manager and make sure you disconnect the printer cable from the PC, then restart your computer.
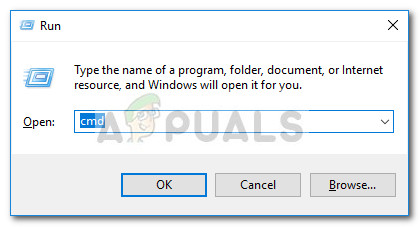
Method 8: Remove the Printer via Command Prompt
Some users have finally managed to remove the printer using an elevated Command Prompt. This method will require you to get a little technical, but it has the potential of succeeding where other methods failed.
Note: The following procedure will not be successful unless you do the command in an elevated Command Prompt.
- Press Windows key + R to open up a new Run box. Then, type “cmd” and hit Ctrl + Shift + Enter and click Yes at the UAC (User Account Control) prompt to open an Elevated Command Prompt.
Open Command Prompt - In the Elevated Command prompt, type or paste the following command and press Enter to see a list with all your printers that are currently active:
wmic printer get name
- Open a Notepad or a similar text editor and make a note of the exact name of the printer that you want to remove.
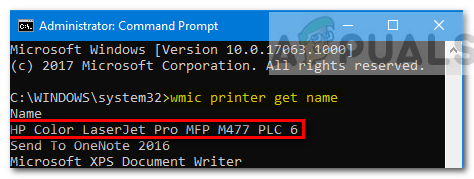
Note Down Exact Name of the Faulty Printer - Type the following command and press Enter to remove the printer from your Windows computer:
printui.exe /dl /n "Name of Printer"
Note: Keep in mind that the Name of Printer is just a placeholder for the name that you previously noted down at step 3. Replace the placeholder with the actual name of the printer that you want to remove. The result should look like this:
Remove-Printer -Name "Canon IP1188 Inkjet Printer"
To verify if this method was successful, close the elevated Command Prompt and restart your computer. At the next startup, see whether your printer is still among the devices list. If it is, move over to the other methods below.
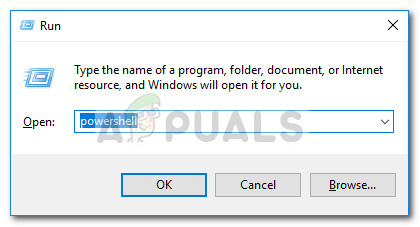
Method 9: Remove the Printer Using PowerShell
Some users have successfully managed to remove the stubborn printer that was refusing to go away on Windows by using PowerShell. While this method will require you to get a little technical, it’s reportedly more efficient than the majority of methods that are done through a graphical interface.
- Press Windows key + R to open up a Run box. Then, type “PowerShell” and press Ctrl + Shift + Enter and hit Yes at the User Account Control prompt to open an elevated Powershell window.
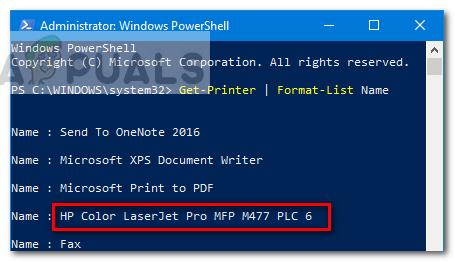
Open PowerShell - In the Elevated PowerShell window, type or paste the following command and press Enter to get a list of all your active printers:
Get-Printer | Format-List Name
- Open notepad and copy the exact name of the printer that you wish to remove. You’ll need it briefly.
Copy the Faulty Printer Name - In the same elevated Powershell window, type the command below and press Enter.
Remove-Printer -Name "Printer name"
Note: Be mindful that “Printer name” is just a placeholder for the actual name of your printer. Replace the placeholder with the name of the printer that you extracted at step 3. The result should end up looking like this:
Remove-Printer -Name "Canon IP1188 Inkjet Printer"
- Once the command has been successfully registered, close the Elevated PowerShell window and restart your system.
At the next startup, see whether the printer device is still present in the printer’s list. If it is, move down to the next method.
Method 10: Remove the Printer From the Printers Folder
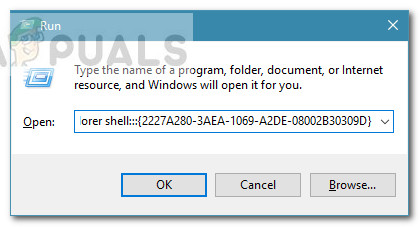
- Open a new Run box by pressing the Windows key + R. Then, paste (or type)
explorer shell:::{2227A280-3AEA-1069-A2DE-08002B30309D}in the Run box and press Enter to open the Printers folder.
Open Printer Folder - In the Printers folder, right-click on the printer that you wish to remove and choose Delete.
- Click Yes to confirm the removal of the printer, then restart your computer to force the changes to take effect.
At the next startup, see whether the printer has been removed from your computer.


Very good article Kevin.
I had a greyed-out printer in ‘Devices and Printers’ that would not uninstall due to “restrictions in effect on this computer” message.
Method 7: Remove Printer via Device Manager led me in the right direction.
I also had to select View | Show hidden devices within Device manager to show the hidden Print queue in Device Manager and then I was able to delete the print queue.
Thank you for the fix