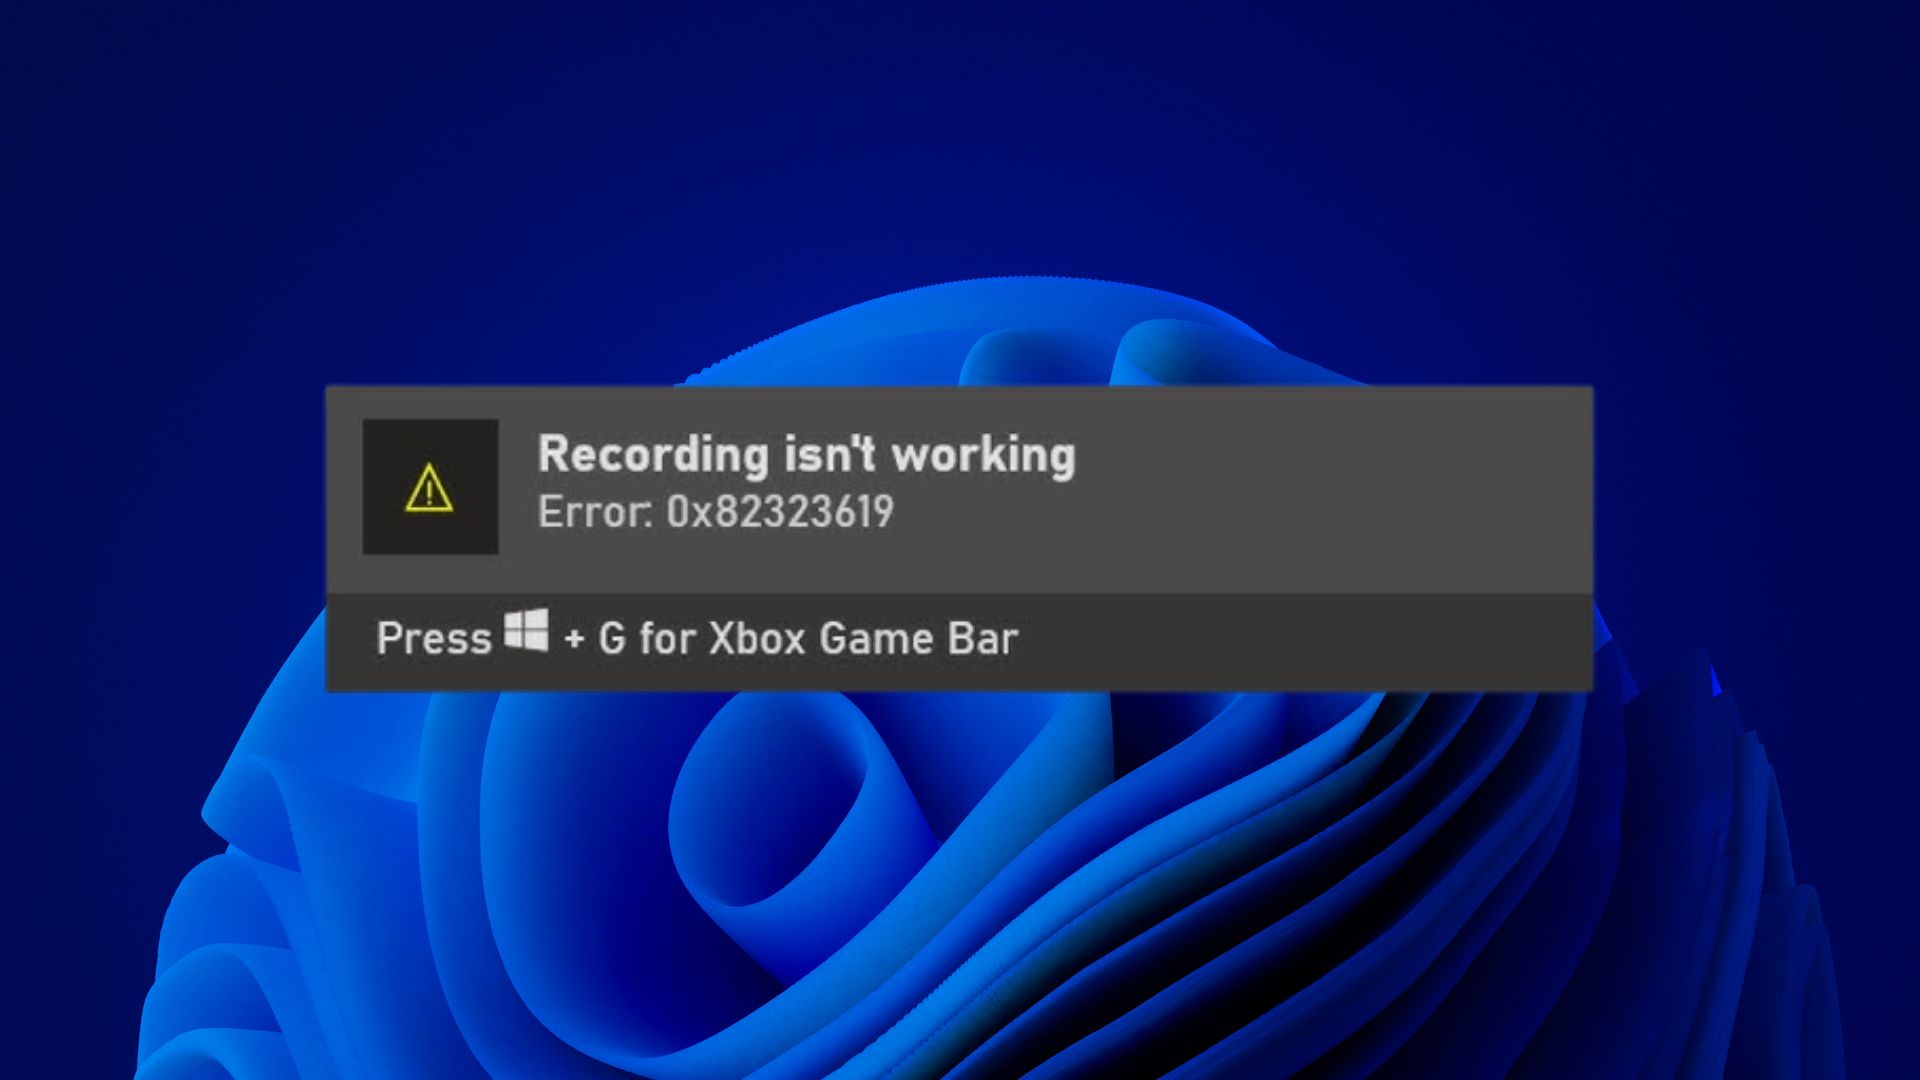
How to Fix Game Bar Error “Recording isn’t working”?
“Recording isn’t working error 0x82323619” suggests that Windows is unable to record the screen due to issues with the Game Bar or Windows itself. One of the main reasons for this problem is a lack of sufficient space, which prevents the Xbox Game Bar from recording. In addition, corrupted files or running multiple instances of the Game Bar can also cause this error.
Since the error may stem from temporary glitches or bugs, it is highly recommended to restart your computer. Doing so can help eliminate these bugs and restart essential services required for the Xbox Game Bar to operate effectively.
1. Close All Instances of Game Bar
It’s important to close all running instances of the Xbox Game Bar before proceeding with other steps. This ensures that the Xbox Game Bar functions without any conflicts from other running instances.
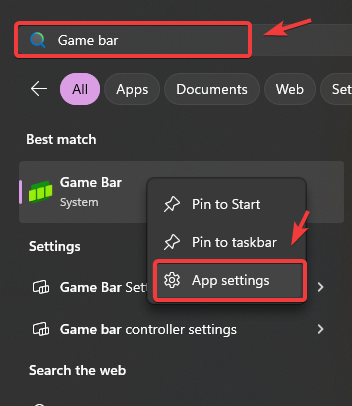
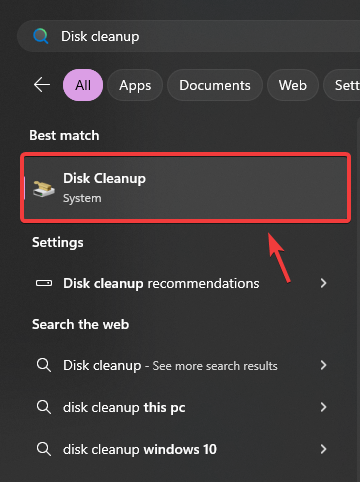
- Click the Start Menu and type Game Bar.
- Right-click on the Game Bar and select App Settings.
- Scroll down to find the Terminate option.
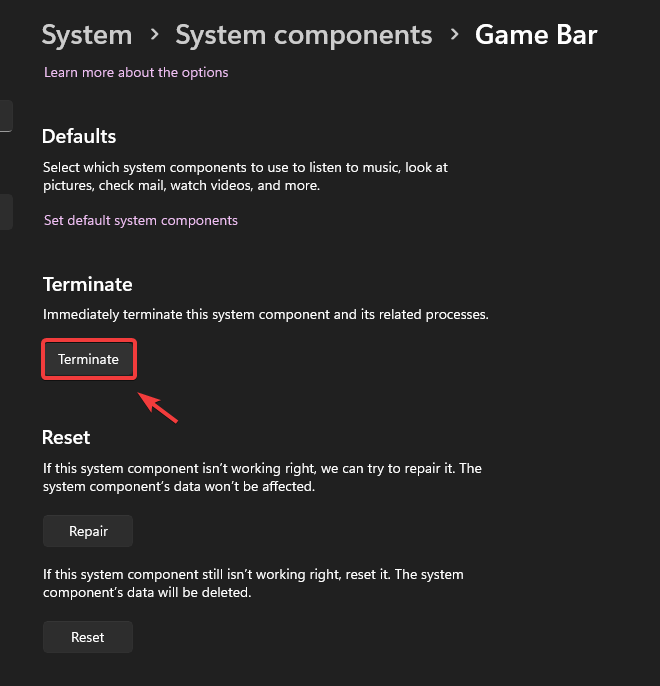
- Click Terminate to close all instances of the Game Bar.
2. Clear Your Storage
Having enough space where the Xbox Game Bar saves recordings is crucial for storing new captures. Without adequate space, the Game Bar won’t record as it requires available storage. Hence, ensure your computer has sufficient space to avoid the error.
- Open Windows Explorer by pressing Win + E.
- Select This PC from the left-hand menu.

- Navigate to the C drive and free up space to accommodate future recordings.
- If deleting files is not an option, clear Temporary Files using the disk cleanup utility.
- To perform disk cleanup, click the Start Menu and type Disk Cleanup. Press Enter to run it.
- Select the drive where the Game Bar saves recordings and click OK.
- Under Files to Delete, select all files and click OK to delete them.
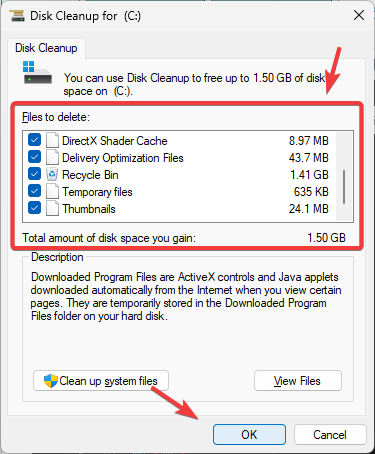
- After freeing up space, try starting the recording to see if the error is resolved.
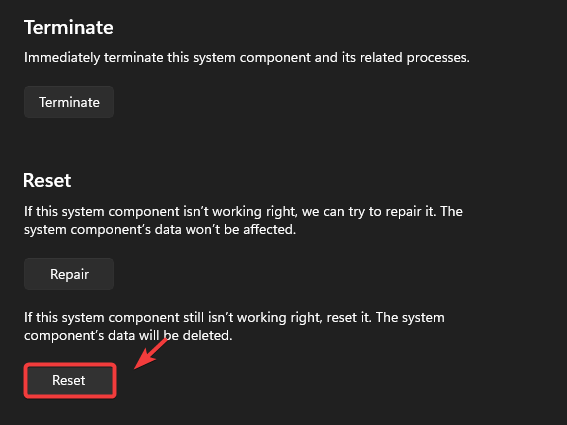
3. Reset or Repair the Game Bar
Resetting or repairing the Xbox Game Bar can help fix issues by restoring corrupted files or clearing temporary data that might interfere with its performance. Repairing the Game Bar will address minor issues without deleting app data, while resetting clears the app data and restores default settings.
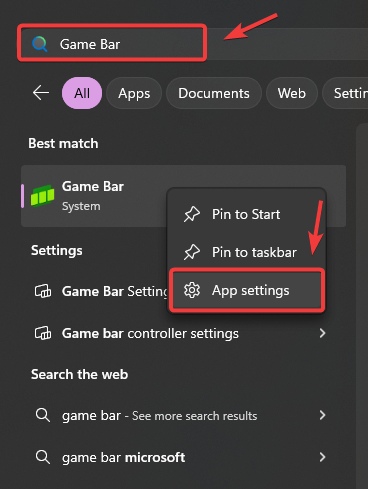
- Press Win + S to open Windows Search.
- Type Game Bar in Windows Search, right-click it, and select App Settings.
- Scroll down and click Repair.
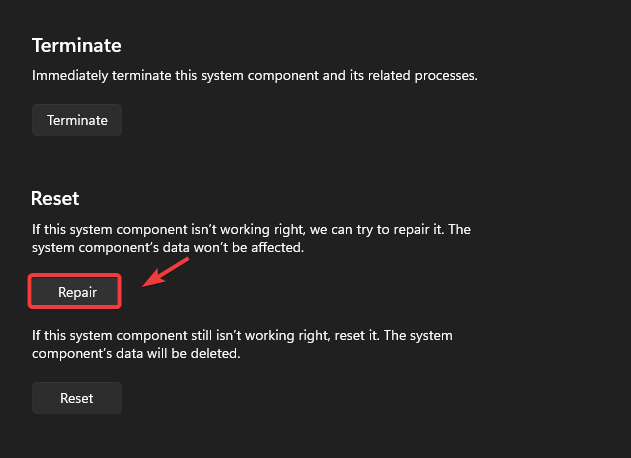
- Check if the issue is resolved. If not, try resetting the Game Bar.
4. Re-register Xbox Game Bar
Re-registering the Xbox Game Bar is similar to reinstalling the application. Since system apps can’t be reinstalled like third-party applications, Microsoft provides commands to reinstall its core system applications.
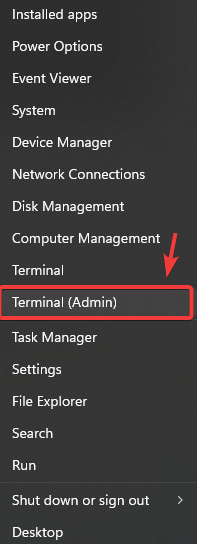
- Right-click the Start Menu and select Terminal (Admin) from the options.
- In the terminal, enter the following commands to re-register the Xbox Game Bar:
Get-AppxPackage -allusers *Microsoft.XboxGamingOverlay* | Remove-AppxPackage
Get-AppxPackage -allusers *Microsoft.XboxGamingOverlay* | Foreach {Add-AppxPackage -DisableDevelopmentMode -Register "$($_.InstallLocation)\AppXManifest.xml"}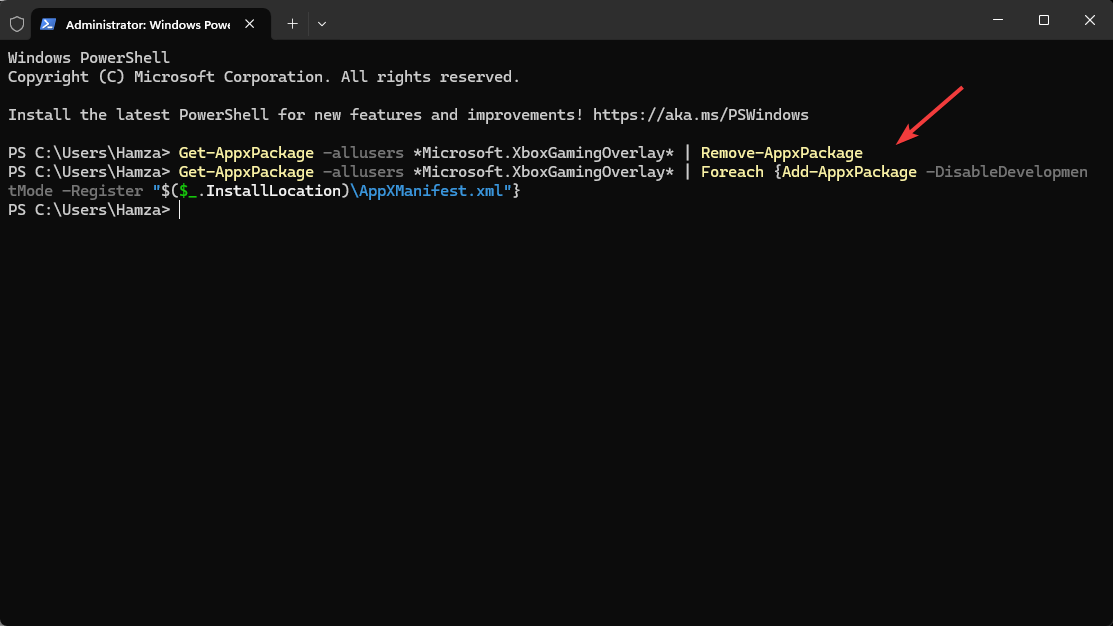
- After executing these commands, check if you can record through the Game Bar.


