Fix: Can’t Delete Partition on Windows
Deleting your hard drive partitions can sometimes tend to be really necessary, especially when you are running low on disk space. In such cases, users usually delete the volume which is not being used to free up some space for the volume that is almost full. Typically the Disk Management utility is used to delete hard drive partitions. However, there are certain scenarios in which the ‘Delete volume’ option is greyed out due to which users are not able to delete partitions.
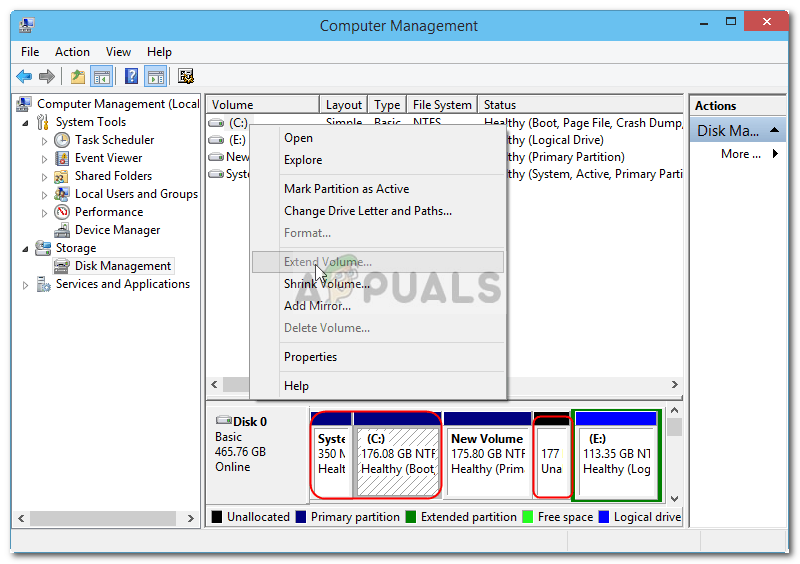
This often occurs if there is a Page file on the volume that you are trying to delete etc. Sometimes, this issue is mistaken for the problem where you are not able to delete an EFI protected partition. In this case, however, users are not able to delete NTFS file systems as well. This can be quite a hurdle to deal with, however, you can use the solutions in this article to be done with it.
What causes the ‘Delete Volume’ Option to Grey Out on Windows 10?
Well, if the ‘Delete volume’ option is greyed out for you in Disk Management on Windows 10, it can be due to the following factors —
- Page file: As we have mentioned above, one of the reasons due to which you are not able to delete the partition can be the existence of Page file on that particular volume.
- System files: If the partition that you are trying to delete has system files installed on it, you won’t be able to do so due to which the ‘Delete volume’ option is greyed out for you.
Since the error isn’t caused by too many factors, it can be easily isolated by using one or two simple solutions. Please follow the solutions down below to circumvent the issue.
Solution 1: Managing Page File on the Partition
Just like what we said earlier, you will not be able to delete a partition that has Page file on it. Page File is what stores your data when the system’s random access memory fills up. To fix this issue, you will have to do the following:
- Go to the Start Menu, type in ‘View advanced system settings’ and then open it up.
- In the Advanced tab, click on Settings.
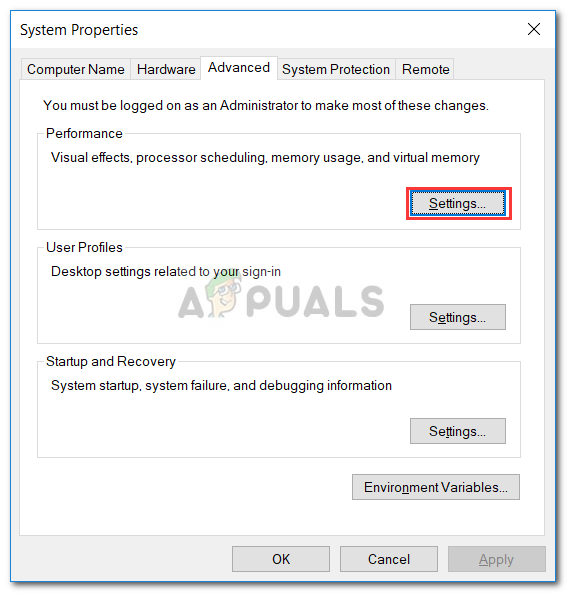
System Properties - Then switch to the Advanced tab on the new window pop up and select Change.
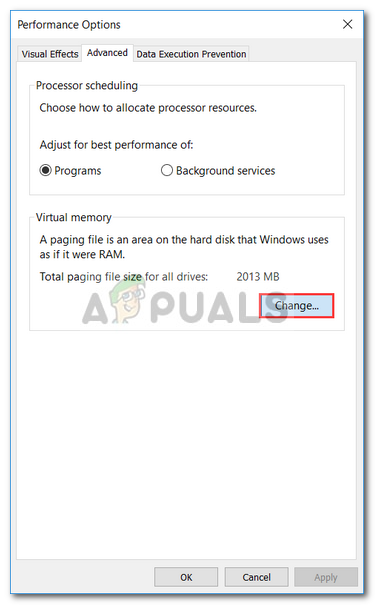
Advanced Tab – Performance Options - Uncheck ‘Automatically manage paging file size for all drives’ and then highlight the drive you want to delete.
- Select ‘No paging file’ and click Set.
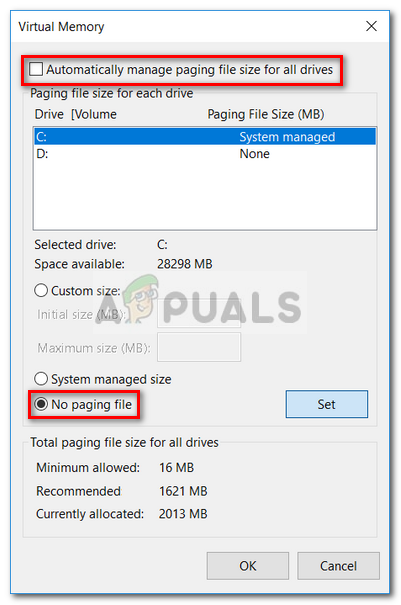
Managing Paging File - Click Apply and OK on all the windows.
- Restart your system.
Solution 2: Using Third-Party Software
If the above solution doesn’t fix your issue, you will have to delete the partition using third-party software. In this article, we will be covering the EaseUS Partition Master software to delete a partition. Make sure to download it from their official website (click here) and then install it. Once you have installed the utility, follow the given instructions:
- Launch the EaseUS Partition Master.
- Once it loads up, right-click on the partition that you want to delete and select ‘Delete’.
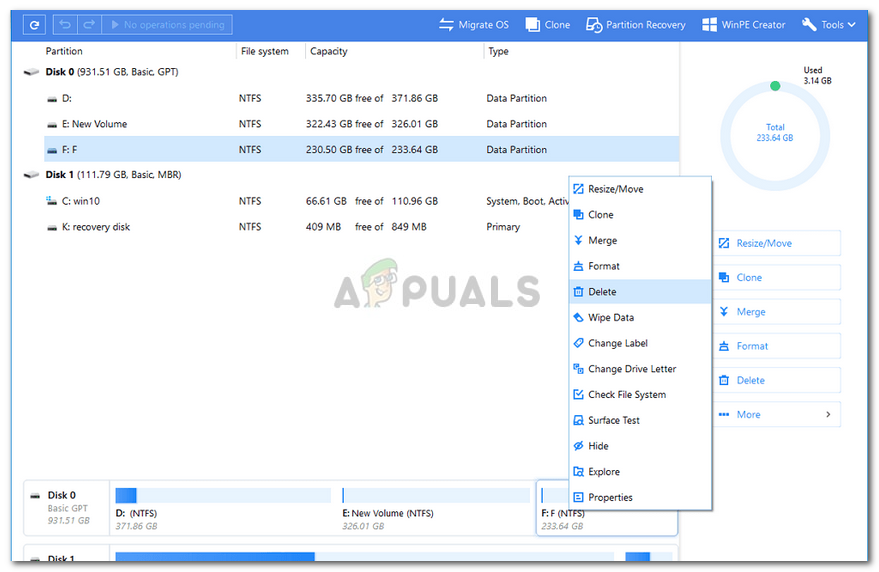
Deleting a Partition - Click OK when it asks you for confirmation.
- On the top-left corner, click Execute Operation and then hit Apply.

Executing the Operation - Your system will have to restart to begin the operation.


So I use the Solution 1 and selected to delete my Windows disk drive. Now I can’t run the computer, it says I have to install Windows or similar. When I try to reinstall Windows through the setup, I get error that I need to re-image it, but nothing works .. How to save my SSD and data on it? 🙁 tnx