Fix: Cannot Connect to WMI Provider on Windows
If you get the ‘Cannot connect to WMI provider’ error, it can be due to the removal of WMI provider due to the installation of SQL Server or the permissions of a key in the Windows Registry. Users have reported that when they install SQL Server v17.2 or later on their system, they are presented with an error ‘Cannot connect to WMI provider. You do not have permission or the server is unreachable’ message upon trying to open the configuration manager of the server.
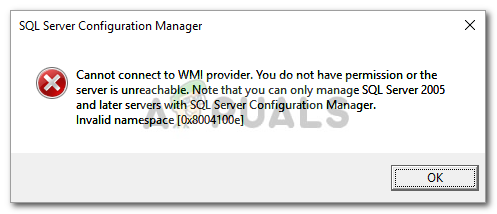
The issue seems to persist even after repairing the installation. Some users even tried to uninstall the server and install it again yet they weren’t able to get rid of the error. Fortunately, in this article, we will show you how to circumvent the said error message.
What causes the ‘Cannot Connect to WMI Provider’ Error on Windows 10?
Well, if you receive the said error message upon trying to access the Configuration Manager of the server, it can be due to the following factors —
- Windows Registry permissions: In some scenarios, the issue occurs if only the administrator account has full permissions over a Windows Registry key and the Network Service account is restricted.
- Removal of WMI Provider: There are also certain cases where the WMI provider is removed due to the installation of an SQL server instance. Such cases can cause the error to occur as well.
Before we begin, please make sure that you are using an administrator account as the solutions provided down below will require administrative privileges. If you are logged in as an administrator, you can jump into the solutions down below without any further delay.
Solution 1: Using Mofcomp Tool
As we have mentioned above, sometimes the WMI or Windows Management Instrumentation provider is removed by the installation of an SQL Server instance. WMI provider is a system process that allows the applications on your system to request and fetch information from other applications on the system. You can fix your issue by running the Mofcomp tool. Here’s how to do it:
- Press Windows Key + X and select Command Prompt (Admin) from the list to open an elevated command prompt.
- Once the administrator command prompt opens up, copy and paste the following command and then hit Enter:
mofcomp "%programfiles(x86)%\Microsoft SQL Server\number\Shared\sqlmgmproviderxpsp2up.mof
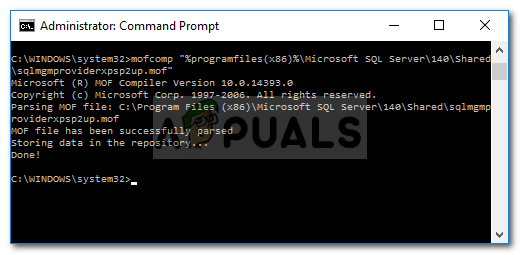
Using the Mofcomp Tool - Please make sure that you replace ‘number’ with your SQL Server version.
- Once done, press Windows Key + R to open Run.
- Type in ‘services.msc’ and press Enter.
- Search for the Windows Management Instrumentation service.
- Right-click on it and select Restart.
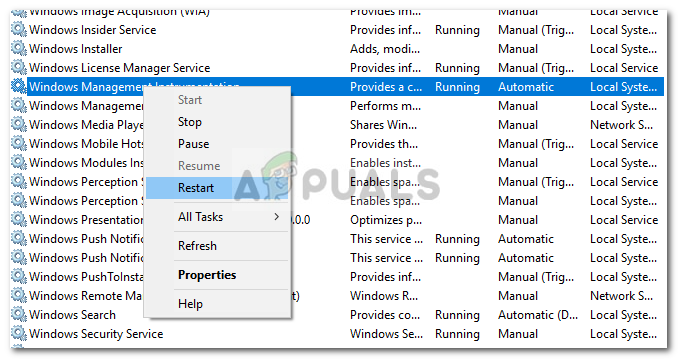
Restarting the WMI Service - Check if it fixes your issue.
Solution 2: Changing Windows Registry Key Permissions
The last workaround that you can apply to fix the issue would be to add the Network Service account to the full control permissions list of a particular Windows Registry Key. To do this, follow the instructions down below:
- Press Windows Key + R to open the Run dialog box.
- Type in ‘regedit’ and then hit Enter.
- Afterward, paste the following path in the address bar: Computer\HKEY_CLASSES_ROOT\CLSID\{73E709EA-5D93-4B2E-BBB0-99B7938DA9E4}
- Right-click on {73E709EA-5D93-4B2E-BBB0-99B7938DA9E4} and select Permissions.
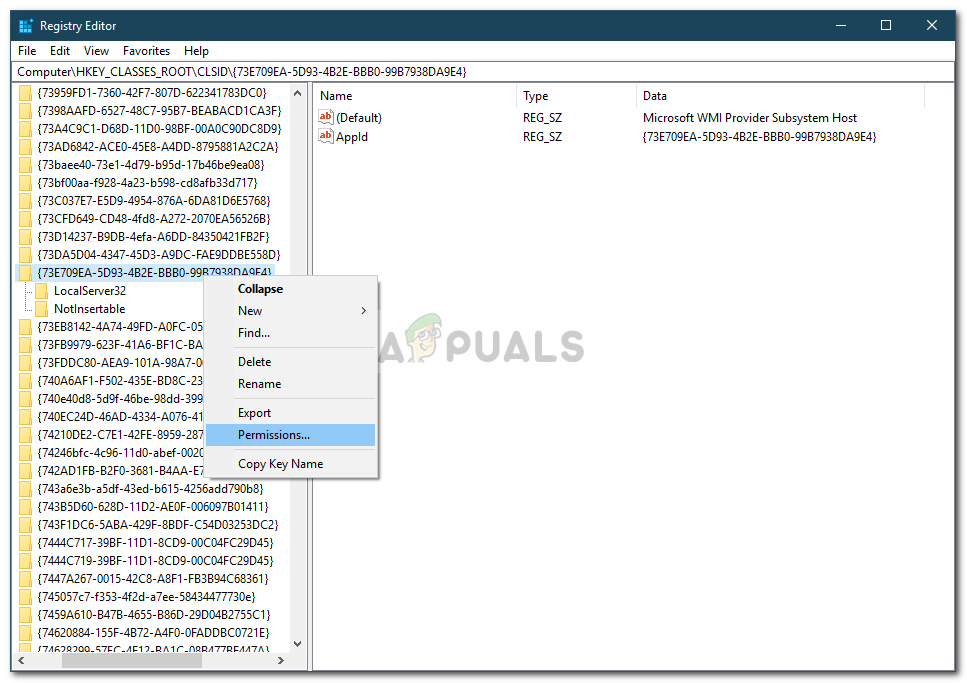
Changing Permissions - Click Add and then type in Network Service under ‘Enter the object names to select’.
- Afterward, click Check Names and then hit OK.
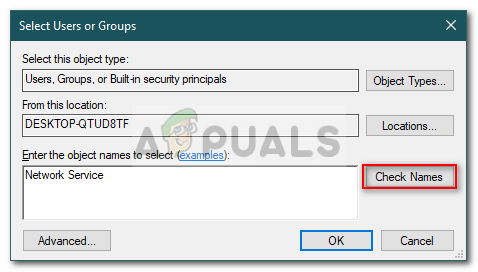
Adding Network Service Account - Highlight Network Service and make sure the Full Control box is checked.
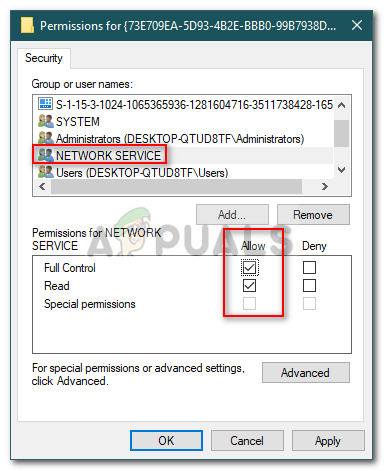
Network Service Account Permissions - Click Apply and then hit OK.
- Restart your system and see if it fixes the issue.


