Fix: Blue Screen Error ntkrnlmp.exe
NTKRNLMP stands for NT Kernel, Multi-processor version and it’s a legitimate Windows component. This system file is tasked with managing the vast majority of low-level internal files, so it can be regarded as one of the most important Windows files.
BSOD (Blue Screen of Death) crashes frequently get attributed to ntkrnlmp.exe when Windows users check the memory Dump file related to the crash. However, this does not mean that the ntkrnlmp.exe file is causing the issue – it’s merely an indicator that ntkrnlmp.exe was dealing with bad data at the time of the crash.

Although the BSOD trigger is fairly hard to identify, there is a shortlist of culprits that are known to trigger this error:
- Incompatible or outdated graphics drivers are causing the BSOD.
- Problem is caused by one of the latest Windows updates.
- The crash is caused by two non-identical RAM sticks. Corsair and a few other products are notoriously known for varying timings, thus encouraging a BSOD crash to happen.
- A ntkrnlmp.exe related BSOD crash if often linked with a bad power adapter that is causing voltage issue when the PC switches from a stress state to idle.
- C-states and EIST are enabled in BIOS and are causing the issue when the PC is idle.
- The issue is caused by a corrupted RAID controller driver.
If you’re currently struggling with this issue, there are a few fixes that you can try, but you have to be prepared for some extensive troubleshooting steps. Below you have a collection of solutions that have successfully enabled Windows users to stop receiving BSOD crashes related to ntkrnlmp.exe. Please follow each method in order until you find a fix that works for your scenario.
Method 1: Reinstall your graphics card driver
Some users managed to resolve the problem after updating their video card drivers. Newer Windows versions automatically install the drivers needed for your graphics card through WU (Windows Update). However, this is not always beneficial, as there’s a high chance that WU will not install the latest version available. With newer GPU models, this can create the grounds for a system-wide crash. There’s also the possibility that the BSOD crash is a symptom of a faulty graphics driver.
You can troubleshoot and see if this triggers the BSOD by reinstalling your graphics drivers. Here’s a quick guide on how to do it:
- Press Windows key + R, type “devmgmt.msc” and hit Enter to open Device Manager.

- Scroll down to Display Adapters and expand the drop-down menu. Right-click on the graphics driver and select Uninstall Device.
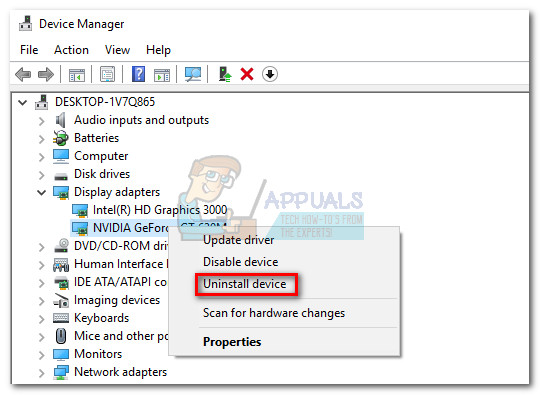 Note: You might see two different entries under Display Adapters. This usually occurs with laptops and notebooks that have both an integrated and a dedicated graphics card. In this case, uninstall both display adapter drivers.
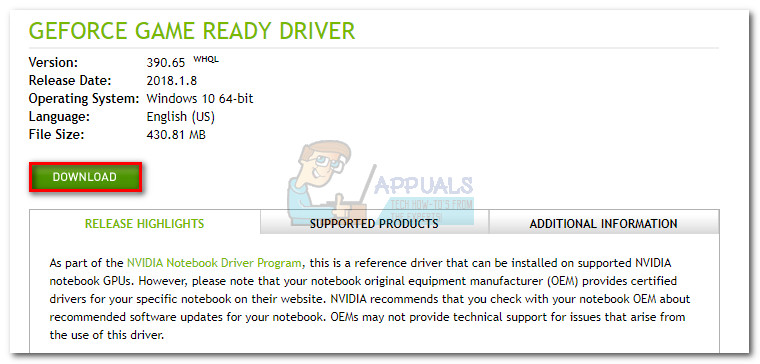
 - Download the latest dedicated graphics driver version from your manufacturer’s website. To do this, visit this link (here) for Nvidia or this (here) for ATI. Download & install the latest driver version according to your GPU model and Windows version.
 Note: Don’t worry about manually downloading the integrated graphics driver if you previously uninstalled it. Windows will automatically reinstall it at the next reboot if it’s missing.
 - Reboot your system and see if the BSOD crash repeats. If it does, move to Method 2.
Method 2: Disable CPU or GPU overclocking
The BSOD crash related to the Ntkrnlmp executable is a fairly common occurrence on overclocked PCs. Some users encountering this issue have managed to fix the problem by removing or reducing their clocked frequencies.
Note: Overclocking is the action of increasing a component’s clock rate in order to make it run at a higher speed. This process is usually applied on CPUs and GPUs, but other components can also be overclocked. If you aren’t sure if your system is overclocked, it most likely isn’t.
If you’re currently overclocking anything, reset the frequencies to default and see how your system reacts to the change. If the crashes stop, gradually tone-down the custom clocked frequency until you reach a stable state and the BSOD crashes stop.
Keep in mind that this method only refers to those who overclocked components manually (from BIOS or a dedicated utility). If your PC uses a manufacturer-provided technology that automatically boosts the CPU frequencies on demand (Intel’s Turbo Boost or equivalent), do not disable it as it won’t make any difference.
Method 3: Disable C-states and EIST from BIOS
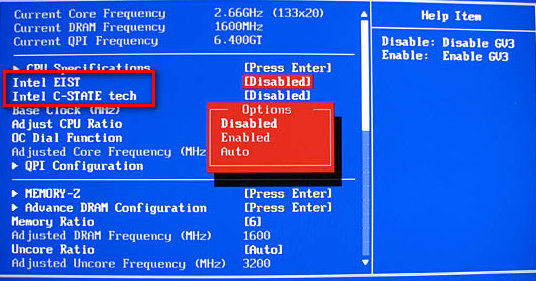
Regardless of your PC’s architecture, your OS is likely using C-state and EIST (Enhanced Intel SpeedStep Technology) to save energy when the CPU is in idle mode. It does this by altering the CPU voltage during idle times or in other low-load circumstances. Depending on your CPU model, this can result in an insufficient voltage (undervoltage) that will trigger a random BSOD. This scenario is likely if you experience crashes several hours after you open your PC or when it’s not doing anything.
You can test this theory by disabling the two technologies from your BIOS. However, depending on your motherboard, the exact steps will be different. On most BIOS versions the two settings are located in Advanced menu > CPU configuration > CPU Power Management. Then, set them both to disabled and save your configuration.
If the BSOD crashes are still happening with C-state and EIST disabled, return to BIOS, re-enable both and move to the method below.
Method 4: Troubleshooting non-identical RAM sticks
As it turns out, a BSOD crash related to ntkrnlmp.exe is far more common on computers with non-identical RAM sticks. Keep in mind that having two RAM sticks from the same manufacturer doesn’t necessarily mean they are identical (frequency-wise).
Note: Corsair sticks are notoriously known for varying timings (having different speeds), thus encouraging a BSOD crash.
If you two unmatching RAM sticks installed on your system, take one out and see if the crashes are still happening. If the BSOD crash doesn’t happen with a lone RAM stick, it virtually proves there’s some sort of incompatibility caused by the way your motherboard deals with the presence of multiple, non-identical RAM sticks. If that’s the case, you can fix this issue by investing in a proper dual-channel RAM kit.
In the event that you only have one RAM stick, you can check it for any malfunction by using a software called Memtest. To make the whole process easier, follow the step-by-step instructions provided in this article (Your computer has a memory problem).
If you determined that your RAM stick/s are functioning properly, move to the method below.
Method 5: Investigating an inadequate PSU or AC adapter issue
BSOD errors are often linked with insufficient PSU (power supply) capacity or a faulty AC adapter. As it turns out, some users managed to stop the BSOD crashes related to ntkrnlmp.exe by changing the power adapter or upgrading to a more powerful PSU.
PC Users
If you recently upgraded one of your hardware components on your PC, it’s entirely possible that the PSU is having a hard time keeping up with new the power consumption. Keep in mind that most PSUs will not be able to deliver the output power that is written on the label.
If you suspect that this is the cause of your BSOD crashes, try to run your machine with the bare minimum components to reduce the power consumption as much as you can. You can remove the dedicated sound card (if applicable), cut the power from your DVD drive and start the machine with only one stick of RAM. Also, if you have an SLI / CrossFire setup, start your PC with only one connected GPU.
In the event that the crashes stop while you run your machine with the minimum components, there’s a high chance that your PSU is to blame. But before you go ahead and buy a new supply source, use a power supply calculator like this one (here) to see if the current PSU is under the minimum requirements for your rig. If it is, it’s probably worth it to invest into a more powerful PSU.
Laptop/Notebook users
If you’re experiencing the BSOD crashes on a laptop/notebook, you’ll need to check your AC adapter. Some laptop users have fixed the error by replacing the AC adaptor. You can test this theory by only using the battery – charge the battery fully while the laptop is shut down and remove the power cable before you power it on.
If there are no BSOD crashes while the power cable unplugged, you can probably assume that the AC charger is fluctuating the voltage and causing the crash. This typically happens with generic AC adapter brands and is far more likely on proper OEM charger. But before you buy a new charger, you can confirm that it’s the culprit by using a voltmeter/multimeter to test if the AC is outputting the advertised voltage consistently.
If you determined that the PSU/AC adapter is not the cause of your issue, move to the next method.
Method 6: Troubleshooting for a WU issue
Some users have managed identified Windows Update as the culprit for the BSOD crash related to ntkrnlmp.exe. This typically happens if the installation of a driver (installed through WU) is interrupted by an unexpected shutdown.
If you’re suspecting WU as the culprit, start by making sure that you have installed all drivers scheduled to update through WU. If your system is dealing with a driver botched by WU, the following procedure might force an override and stop the BSOD error:
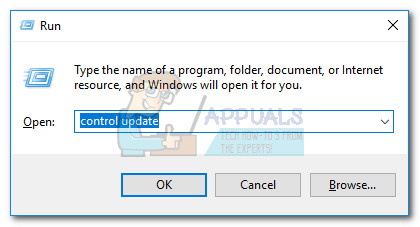
- Press Windows key + R to open a Run window. Type “control update” and hit Enter to open Windows Update.
- In the Windows Update tab, click the Check for updates button and install any available updates.

- Once all available updates are installed, reboot your system and see if the issue is resolved. If it isn’t, follow the instructions below.
Using System Restore to fix the BSOD crash
A BSOD crash related to ntkrnlmp.exe can turn out to be a symptom of a broken/corrupted Windows update component. If you are unable to update through WU (updates failing or no new updates available for a long time), it’s worth it to do a system restore to a previous point from where the update component was working properly.
Note: System Restore is a recovery tool that allows you to reverse certain changes that were made to your operating system. Think of it as an “undo” feature for the most important parts of Windows.
Here’s a quick guide to doing a system restore to a previous point:
- Press Windows key + R to open a Run command. Type rstrui and hit Enter to open System Restore.
- Hit Next in the first window and then check the box next to Show more restore points. Select a restore point prior to when the update component started malfunctioning and click the Next button.

- Hit Finish and then click Yes at the next prompt to start the restore process. When the restore is complete, your PC will automatically restart. Once your OS is restored to a previous version, see if the BSOD crashes have stopped.
Thank you for this article! Method 3 seems to have fixed the issue on my Dell XPS15 9500 where it would reboot due to a ntkrnlmp error.