Fix: Audio Enhancements Problem
The error “Windows has detected that audio enhancements for the following device are causing problems” is known to happen when your operating system detects multiple new audio output devices. This behavior occurs mainly because the audio enhancement that was previously set up is incompatible with the new device. This is a well-known bug in those Windows 10 builds that don’t have the Fall Creator’s Update.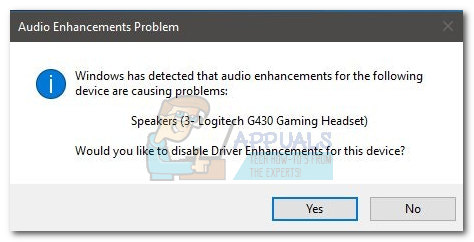
Typically, the audio enhancements issue is encountered when users try to access the Sound Settings in Control Panel or every time the primary audio device is re-selected. However, some users have reported getting this error randomly or when adjusting certain sound settings (bass boost, treble boost, etc).
What are Audio Enhancements?
Microsoft and most third-party vendors are shipping audio enhancements packages designed to allow you to get the best possible sound from your hardware. However, depending on your configuration, you might find that these audio enhancements are causing various audio and sound problems if you have more than one sound output device. In some cases, users have reported that their system does not output any sound while audio enhancements are active – this typically happens on configurations that use a dedicated sound card.
How to fix Audio Enhancements problem
Users encounter the audio enhancements prompt should not be overly concerned about it, unless there’s an underlying issue caused by this error message. Most sound cards (integrated or add-ins) have these so-called “enhancement” features. If your sound card has rich functions and capabilities, it might prompt you to disable the built-in Windows audio enhancements so that it can use the ones provided by the dedicated sound card drivers. Test for any unexpected effects by hitting Yes at the prompt – you can always go back and re-enable audio enhancements from sound settings if anything goes wrong (see Method 4).
However, if you lose sound whenever the “Windows has detected that audio enhancements for the following device are causing problems” error pops up, clicking Yes at the prompt will not be enough.

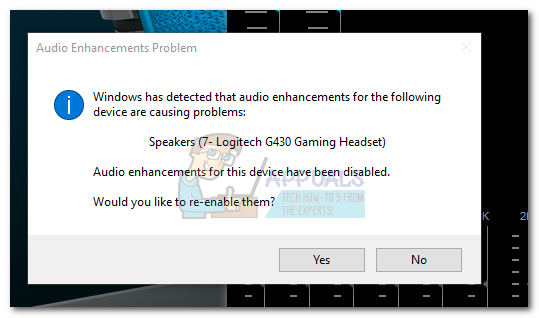
Note: There’s also another variation of this error message where users are prompted to re-enable audio enhancements instead of disabling them. This typically happens when the user has previously disabled audio enhancements from Control Panel and then ended up connecting an audio output device that is configured to use audio enhancements. In this particular case, hitting Yes at the prompt will most likely prevent the error message from appearing again. In the event that this prompt is re-appearing after hitting Yes, follow Method 4 to manually re-enable audio attachments.
If you’re currently struggling with the Audio Enhancement Problem prompt, there are a few viable fixes that users have successfully used to remove the error message. If you’re constantly bothered by the message or you find that is causing underlying problems with your system, follow the methods below to troubleshoot the issue. Please start with the first method and work your way down until you find a viable solution for your situation.
Method 1: Update to Fall Creators Update 1709 (Windows 10)
This particular issue started getting a lot of attention in the first year after Windows 10 launched. As it turns out, the issue was related to a bug that automatically disabled audio enhancements every 5 minutes or so, continually prompting the Audio Enhancement Problem window.
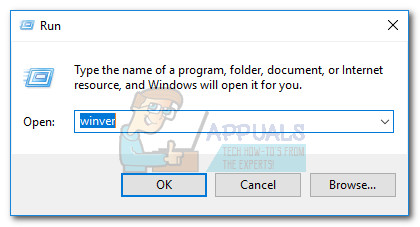
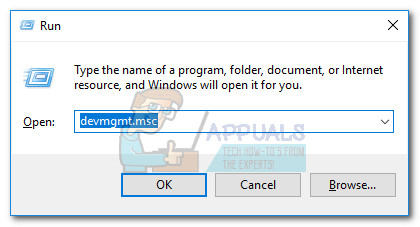
Fortunately, this particular bug was addressed by Microsoft with the Fall Creators Update (build 1709). Let’s start our troubleshooting quest by making sure this particular bug is fixed. Check if you have the Fall Creators Update by opening a Run window (Windows key + R), typing “winver” and hitting Enter.
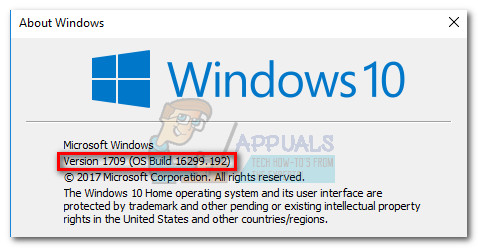
In About Windows, check which version you currently have. If your Windows build is older than 1709, follow through with the steps below in order to apply the Fall Creators Update. If you already have build 1709, skip to Method 2.
Open a Run window (Windows key + R), type “control update” and hit Enter to open Windows Update. In the Windows Update screen, click on Check for updates and wait until the updates are downloaded. You will be prompted to restart once the Fall Creators Update is ready to install.

Once the Creators update is applied and your system rebooted, use your system normally and see if the prompts have stopped appearing. If they are still appearing, move to Method 2.
Method 2: Update / Reinstall the audio driver
It’s not uncommon for this issue to be caused by an incompatibility between your audio drivers. This is even more likely if you have multiple audio output devices. When Windows detects multiple new audio output devices, it might enable Audio Enhancements on a device that is not compatible with this feature. If that’s the case, updating or reinstalling the audio driver should only enable audio enhancements for those devices that are compatible with it. Here’s a quick guide to doing this:
- Press “Windows key + R” to open a Run window. Then, type “devmgmt.msc” and press Enter to open Device Manager.
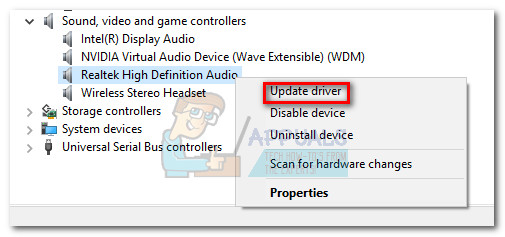
- In Device Manager, scroll down and expand Sound, video and game controllers. Next, right-click on your sound driver and select Update driver (Update driver software).
 Note: Depending on your PC configuration, you might find multiple drivers under Sound, video and game controllers. If you have a dedicated sound card, right-click on the driver associated with it. If you’re using an onboard sound card, right-click on the generic audio driver.
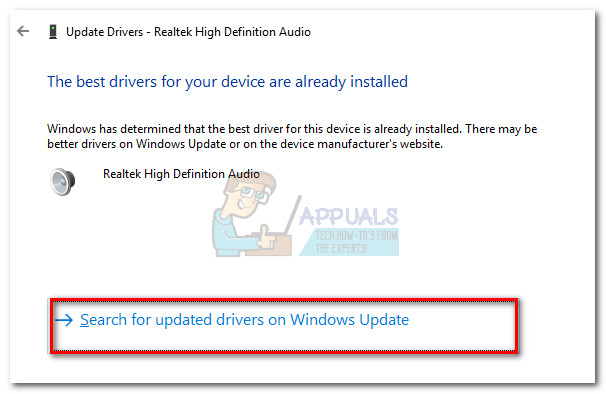
 - Click on Search automatically for updated driver software and see whether your sound driver get’s updated. If it doesn’t find a newer version, you can also use WU to search by clicking on Search for updated drivers on Windows Update.
 Note: If the search manages to identify a newer audio driver version, follow the on-screen prompts to apply the update. If not, continue with the steps below to re-install the audio driver.
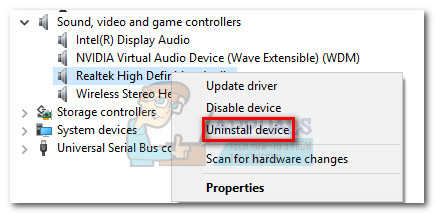
 - Return to Sound, video and game controllers in Device Manager, right-click on the audio driver and choose Uninstall Device.
- Once the driver is uninstalled, reboot your computer to force Windows into reinstalling the missing audio driver. If the driver doesn’t install automatically (very unlikely), visit this link (here) and download the latest version of the High Definition Audio driver.
- Install the High Definition Audio driver to your system, and see whether the issue has been resolved. If you’re still seeing the same annoying prompts, move over to Method 3.
Method 3: Using Windows Troubleshooter
If the first two methods didn’t make a difference, let’s see if the built-in Windows troubleshooter manages to identify the problem. To be fair, the built-in troubleshooter doesn’t have the best reputations when it comes to solving common Windows errors, but some users have reported that troubleshooting for Hardware and Devices was effective in removing the Audio Enhancements Problem error indefinitely. Here’s a quick guide to using Windows Troubleshooter on Hardware and Devices:
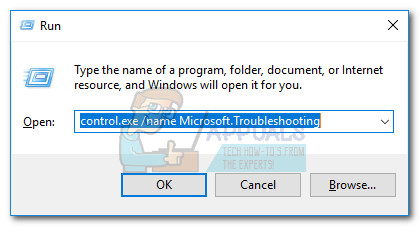
- Press Windows key + R to open a Run window. Paste “control.exe /name Microsoft.Troubleshooting” in the Run box and hit Enter to open Troubleshooting.
- In the Troubleshoot window, scroll down to Hardware and Devices and hit Run the troubleshooter.

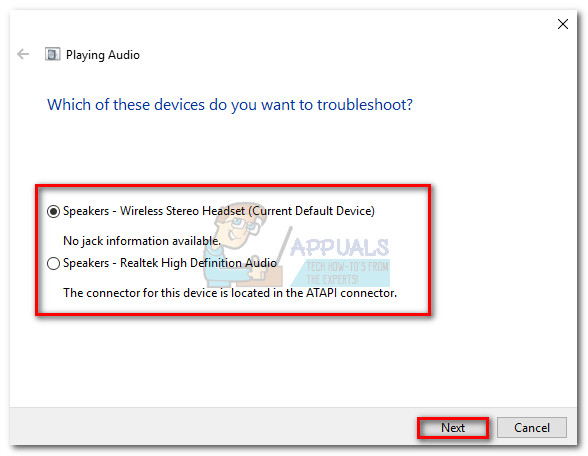
- Wait until the initial investigation is complete, then select the device that is causing the annoying prompts and hit Next. The issue is very common with the generic audio driver, so if you don’t know which device is causing the issue, start with Realtek High Definition Audio and then repeat the steps with the other options.
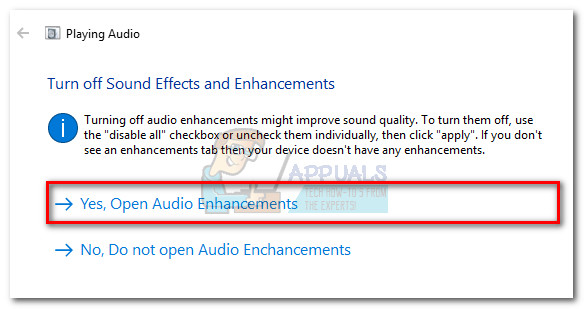
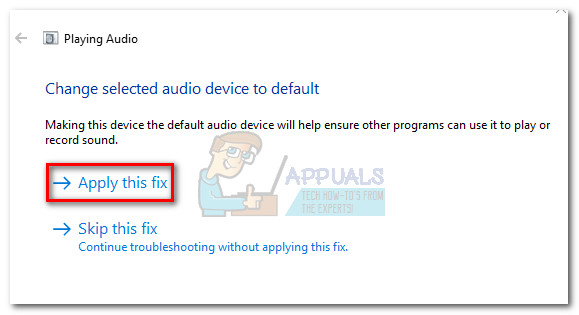
- If the troubleshooter manages to identify a problem related to Audio Enhancements, you’ll be prompted to open them. Click on Yes, Open Audio Enhancements.
- Once you’re redirected to the Speakers Properties window, check the box next to Disable all sound effects and hit Apply.
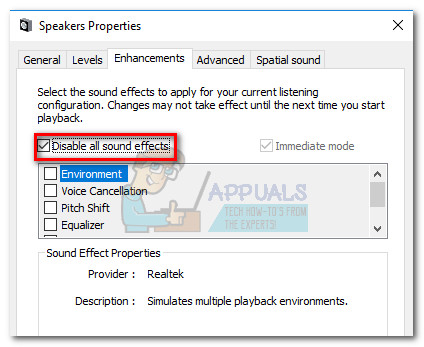 Note: This menu might look a little different, depending on your sound card driver. Your screen might show Disable Audio enhancements instead of Disable All Sound effects.
 - Once enhancements have been disabled, return to the Windows Troubleshooter window and click on Apply this fix.
- Use your PC normally and see whether the issue is still happening. If it does, move down to the final two methods.
Method 4: Manually Enabling / Disabling Audio enhancements
Some users have reported that the enhancements have remained active (or deactivated, depending on the error message) despite them hitting Yes on in the Audio Enhancements Problem window. As it turns out, there are situations where Windows will not enable/disable the enhancements if the Yes button is clicked. Others have reported that the change is only temporary and the change is reverted when the next Audio Enhancements Problem prompt appears.
To solve this particular issue, users must access the Enhancements menu manually and apply the change themselves. Here’s a quick guide to doing this:
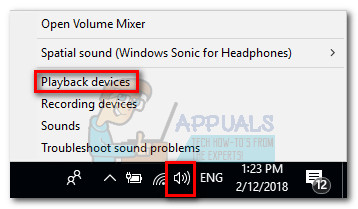
- Right-click on the sound icon (bottom-right corner) and choose Playback Devices.
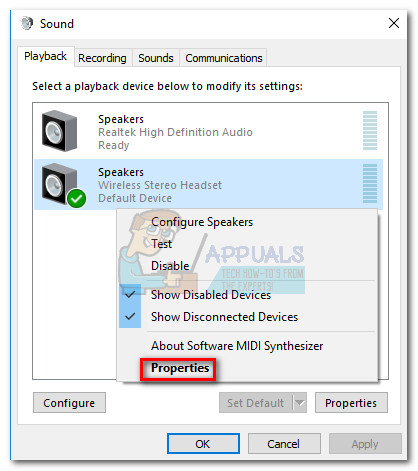
- Right-click on your default playback device and choose Properties.
- Go to the Enhancements tab and check/uncheck the Disable all enhancements box and hit Apply to confirm your changes.
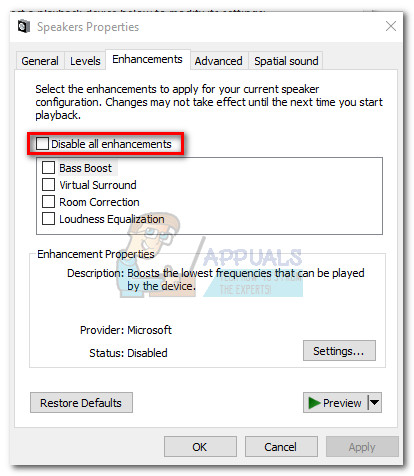 Note: If the error prompt is about disabling audio enhancements, make sure the box is checked. Else, make sure the Disable all enhancements box is unchecked.
 - Use your PC normally and see if the issue is resolved. If you’re still seeing the prompt, move down to the final method.
Method 5: Use Windows restore point
If all the methods above have failed, consider using a System Restore point from back when you weren’t bothered by this Audio Enhancements Problem prompt. Keep in mind that this method might not be applicable if the recovery tool doesn’t have a restore point that is old enough.
Note: System Restore is a recovery tool that allows you to reverse certain changes that were made to your operating system. Think of it as an “undo” feature for the most important parts of Windows.
Here’s a quick guide to doing a system restore to a previous point:
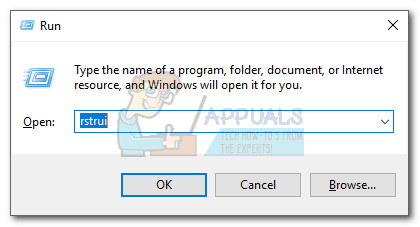
- Press Windows key + R to open a Run command. Type rstrui and hit Enter to open System Restore.
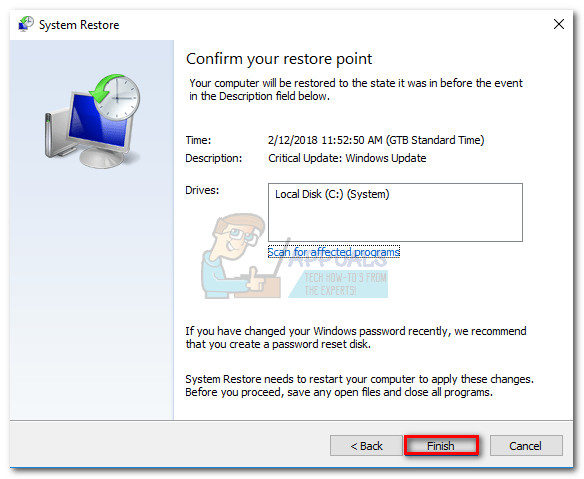
- Hit Next in the first window and then check the box next to Show more restore points. Select a restore point prior to when you first started experiencing the Audio Enhancements Problem prompts. Then, click the Next button to advance.

- Hit Finish and then click Yes at the next prompt to start the restore process. When the restore is complete, your PC will automatically restart. Once your OS is restored to a previous version, see whether the issue has been resolved.
If restoring to a previous System Restore point didn’t resolve your issue (or you didn’t have any restore points to choose from), the only other potential fix at this point is to perform a clean Windows installation.