Fix: ASUS Camera is Upside Down in Windows
When the ASUS camera shows an upside-down image in Windows, it usually happens right after upgrading the operating system, especially from Windows 7 or 8 to Windows 10. This issue arises because ASUS sometimes installs cameras upside-down in some models, and the driver is meant to correct the orientation. However, when Windows installs a generic driver during the OS upgrade, it might not fix this, causing the image to stay flipped.

The main cause is often an incompatible or outdated camera driver. In many cases, reinstalling the original driver from the ASUS support site can fix the issue. Other possible causes include conflicts with antivirus software or incorrect privacy settings, such as another app using the camera in a way that changes the orientation.
Now that you know the causes, let’s move on to the solutions.
1. Install the Creator’s Update
Installing the Windows 10 Creator’s Update fixes compatibility problems with different hardware, including ASUS webcams, by offering better driver support and bug fixes. This update often includes drivers that can handle unique setups, like inverted cameras in some ASUS models. By upgrading, users make sure their system has the latest updates, which can automatically fix the upside-down camera issue without needing to adjust drivers manually.
- Press Windows key + R, type “ms-settings:windowsupdate“, and press Enter to open the Windows Update tab.

- Click on Check for updates and follow the prompts to install any pending updates.
- Install all non-optional drivers and reboot when prompted. After each restart, return to the Windows Update screen to check for more updates.
- Once your Windows is updated, open your camera to see if the upside-down issue is fixed.
2. Find the driver that corresponds with the hardware
The problem occurs when Windows installs a generic driver that doesn’t fit your ASUS hardware after an update or new install, causing the camera to show images upside down. Installing the correct driver for your camera ensures the system understands its orientation, fixing the issue. This step is essential for compatibility when standard drivers don’t work.
- Press Windows key + R, type “devmgmt.msc“, and press Enter to open Device Manager.

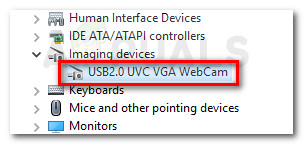
- Expand Imaging devices, and double-click on your built-in camera.

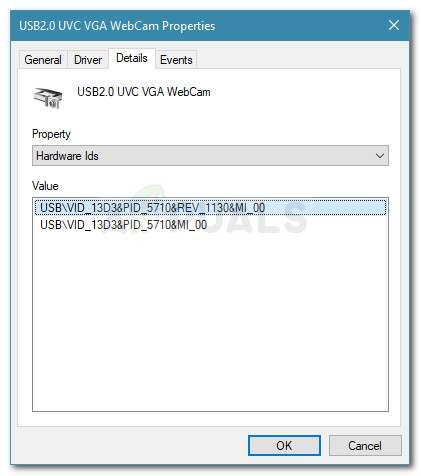
- Go to the Details tab and change Property to Hardware IDs.

- Visit the ASUS support page for your laptop model, find the correct camera driver using the hardware ID, and download it.

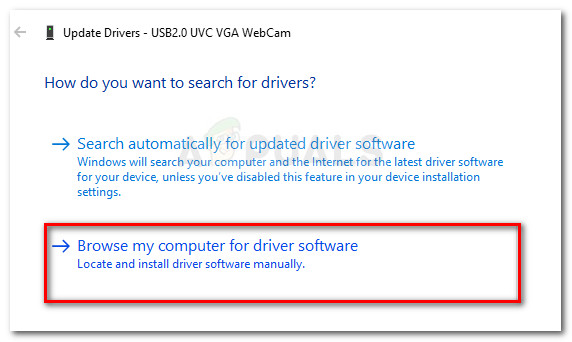
- In Device Manager, right-click your camera, select Update driver, and choose Browse my computer for driver software.

- Select the downloaded driver and follow the prompts to install it.
- Restart your computer and check if your camera works correctly.
Note: You may need to try different drivers to fix the upside-down issue.
3. Use a Third-Party Solution
If built-in options don’t work, third-party software can fix the camera’s orientation by letting you rotate or flip the image. These tools work around limited drivers or system settings, providing a quick fix without complex changes. Make sure to use software from a trusted source to stay secure.
- Download ManyCam from this link (here) and install it.

- Open ManyCam and let it initialize.
- Access camera settings using the vertical bar.
- In the Flip & rotate section, adjust the orientation.

- Note: The ManyCam watermark will appear, and the app must remain open to maintain the orientation.


