How to Fix FiveM Randomly Crashing on Windows 10/11
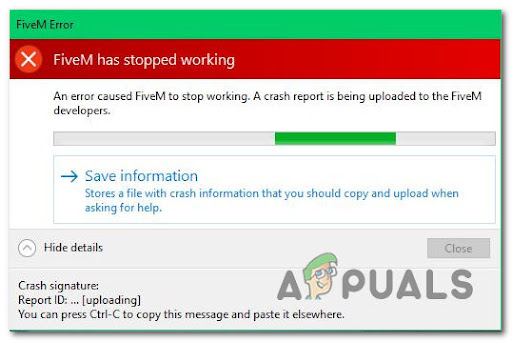
A lot of FiveM players have encountered some crashing errors that are not letting them play the game properly. These crashes are happening randomly while the players are playing. When the crash happens, a message appears on their screen telling them that the app has stopped working. This error is typically encountered on PC on Windows 10 and Windows 11.
After a lot of reports were made by a lot of affected players, we have investigated this issue closely and come up with a shortlist of causes that might trigger this FiveM error:
- Incompatible audio device – This some cases, this FiveM error has occurred because the game was not compatible with some audio devices on your PC. This can be fixed by disabling all the devices that you are not using from the Sound Settings.
- Problems with the GPU drivers – Some players have found out that the trigger for these random crashes was the GPU drivers. They have managed to fix this by uninstalling the GPI drivers that they are currently using, then installing the latest updates available.
- Cache files – Another cause for this error might be the FiveM temporary files that are being stored by your PC. These files could be causing the game to not work properly, making random crashes happen. To fix this, you need to delete all the files inside the cache folder, except the game folder.
- Outdated BIOS – The FiveM random crashes error could be also caused by the BIOS of your motherboard, which is missing some updates that are crucial for the game to work. In order to fix this, you need to download and install the available updates for your specific motherboard.
Now that you are aware of all the possible causes, here is a list of methods that could help you fix this FiveM problem:
1. Disable all unused audio devices
One of the first things that players suggest doing is to disable all the audio devices that you are not using at the moment. You can easily do this from the sound settings of your computer.
There is no official explanation on why this method is effective, but the FiveM community members are speculating that there’s a logical issue with the audio queue management engine that makes the game crash whenever the rendering computer has an unused audio device laying around in idle mode.
Note: This guide is for Windows 11 users, so if your Windows version is older and you need help check online for the exact steps.
In case you don’t know how to do this, here are the steps you need to follow:
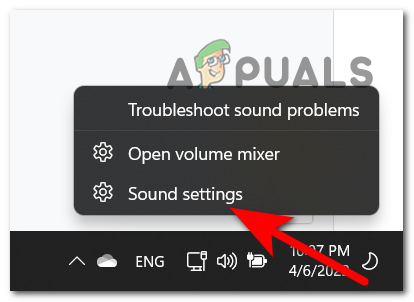
- You need to start by right-clicking on the volume button located on the right side of your taskbar.
- After that, click on Sound settings from the context menu that just appeared.
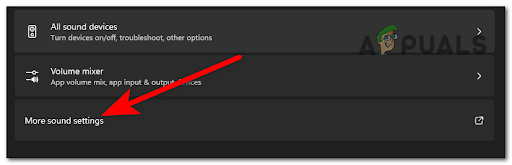
Accessing the Sound Settings menu - Once you are inside the Sound settings, scroll down until you see More sound settings. When you locate it, click it.
Accessing the More Sound menu - After that, you will see a list of your sound devices. Right-click on the one that you want to disable, then click on Disable.

Disable the unused Audio devices - Now you need to close the settings and launch FiveM to see if it still crashes. If the game didn’t crash at startup, repeat the same action that was previously crashing FiveM to make sure that the problem is now resolved.
In case the game still crashes, go check below the next possible method.
2. Reinstall GPU drivers
Another fix that was helpful for other users is to uninstall the GPU drivers installed on your PC, then reinstall them. This will be effective in those scenarios where the problem is occurring consistently (possibly with other games, not just FiveM).
Potential scenarios where you’ll see this problem occurring are an interrupted update, a conflicting driver, or a situation where you consistently denied your PC from updating the GPU drivers.
You can find the latest updates for your GPU on your hardware manufacturer’s official site, but first, you need to clear your current drives and make sure you don’t leave behind any remnant files that might cause the same kind of issue.
Note: In order to do this effectively, you should first enter the Startup Settings menu and ensure that your PC is booting in Safe Mode. This will ensure that the DDU (a tool that we’ll use for uninstalling the current drivers) has the necessary permissions and it’s not interfered with by another 3rd party component.
Here are the steps you need to follow to see how to reinstall your GPU drivers using the Display Driver Uninstaller tool :
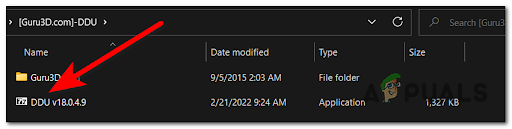
- The first thing you need to do is to download the Display Driver Uninstaller. You can do this from the official site.

Downloading Display Driver uninstaller - Once you’ve done that, extract the files inside a folder and open it. After that, double click on the file inside it and extract the app wherever you want. It will be easy to find if you extract it in this folder.
Opening the DDU executable - After that, you need to make sure that your PC is not connected to the internet.
- Follow the on-screen instructions to complete the uninstallation of your active GPU drivers. Confirm every prompt and provide admin access if you’re asked to do this.
- Once you’ve done that and the GPU drivers are effectively uninstalled, click on the Start button and click on the Power button, then press and hold the Shift button on your keyboard and click on Restart.
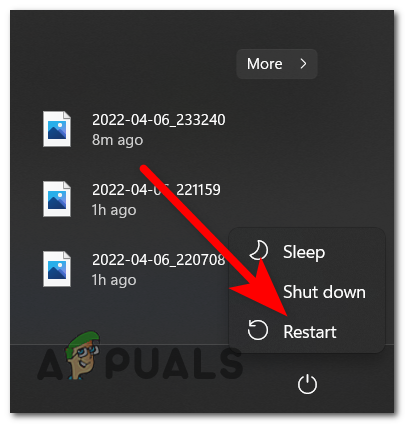
Restarting your PC Note: This operation will allow you to restart directly into the Startup Settings menu so you can boot in Safe Mode.
- After you are taken to the Choose an option screen, select Troubleshoot, then Advanced options. Now click on Startup Settings and confirm the decision.
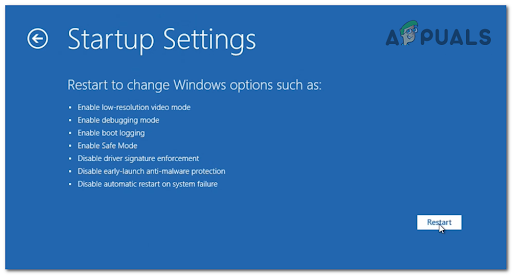
Booting directly into the startup options menu - Now you need to press 4 on your keyboard to boot your PC in safe safe mode.
- After that, go to the folder that you have installed DDU to and launch the app.
- Once the app is on your screen, leave the options as default and select your device type from the right side, then select your device as well. Select GPU and the current device manufacturer you’re using.
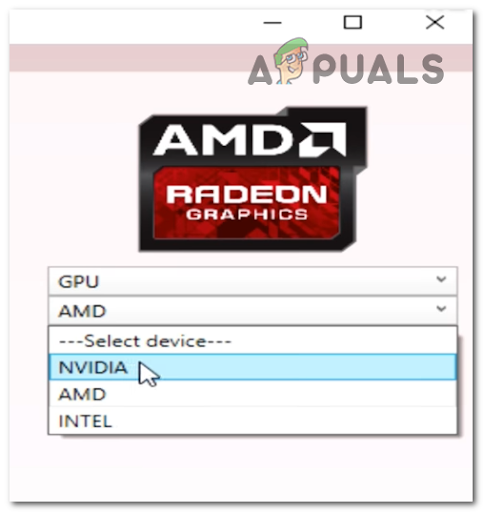
Choose the GPU manufacturer inside the Display Driver Uninstaller screen - After you choose the correct options, click on the Clean and restart button located on the left side.
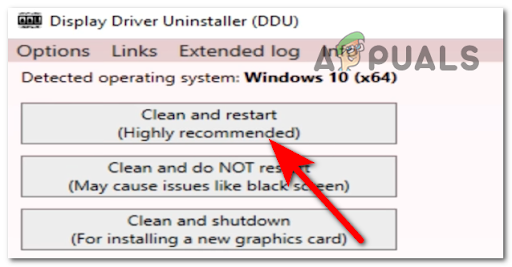
Deploy a Clean and restart procedure via the Display Driver Uninstaller - Now you should wait a few seconds until the drivers are completely uninstalled. After your PC boots back, you need to download the latest updates for your GPU from the following places:
Nvidia drivers
AMD drivers
Intel drivers
- Download the driver version that’s compatible with your GPU model and your OS installation, then follow the on-screen prompt to install the latest iteration of the GPU driver.
- Once the updates are successfully installed, launch FiveM and test it to see if it still randomly crashes.
If you were already using the latest driver versions, move down to the next method below.
3. Clear FiveM cache (except game folder)
This FiveM issue could be also caused by some temporary files that your PC is storing. It was reported that this can be simply fixed by deleting all the files inside the cache folder, except the game folder. Thes files can be located inside the AppData folder.
Note: This method is mostly reported to be effective in situations where you recently installed an official or unofficial patch for your GTA V framework. Try the steps below to clear your FiveM cache and if it doesn’t work, simply reinstall the FiveM installation from scratch to ensure you’re not dealing with some type of corruption.
In case you don’t know how to clear the cache, here’s a guide that will help you do it:
- Open a Run dialog box by pressing the Windows key + R buttons and type inside the search bar ‘appdata’.

Open the AppData folder - Next, press Enter to open the AppData folder.
- Now that you are inside the AppData folder, access the Local folder and search for the FiveM folder, then select it.
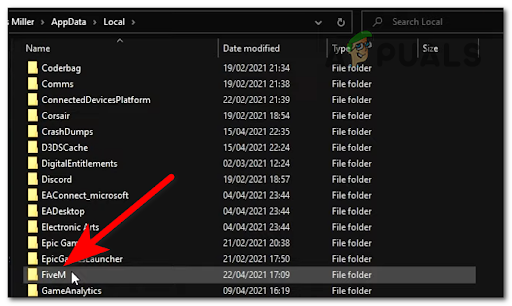
Access the FiveM folder - After that, double click on the FiveM Application Data folder to open it. Inside it, select all the files except the game folder and delete them.

Delete everything except the game folder - In some cases, there could be a caches file inside the FiveM Application Data folder. If you locate it, delete the file as well.
- Now you can close the folder. Launch FiveM and test it to see if the random crashes are still happening.
In case you still encounter the error, check below the last possible method that could help you stop the issue.
4. Update your BIOS if available
The last thing you can try that has fixed the random crashes on FiveM is to try to update the BIOS for your motherboard. This problem might be happening because the BIOS is outdated, causing the game to not work properly.
The developers of this model have confirmed that this newer GTA framework requires a certain BIOS update due to the way the game is rendered on AMD GPUs.
In case you don’t know how to update your BIOS, here are the general instructions you need to follow:
Note: Keep in mind that every manufacturer has a different tool that is used for installing BIOS updates and every scenario is different. The instructions below should only be looked at as general guidelines – makes sure you consult the official documentation from your motherboard manufacturer on how to update your BIOS firmware.
- Visit the official site of your motherboard manufacturer and find the latest updates available for your graphics card. Once you find it, download it locally.

Downloading the BIOS update Note: In some cases, you can find updates that you can install directly from Windows or updates that you need to put on a USB flash drive and install directly from your BIOS. In case the updates are only available to install from a flash drive, search online for the specific instructions for your motherboard manufacturer.
- Now you need to download the file. After is fully downloaded, extract the compressed file into a folder and open the file to begin the installation of the update.
Install the BIOS update - Once the installation has begun, wait until the update is fully installed.
- After that, restart your PC, and when it boots back launch FiveM to see if it still randomly crashes.


