How to Use Find and Replace in Word – Desktop & Mobile
- The Find and Replace tool in Microsoft Word streamlines locating and modifying specific text, phrases, or formatting across documents, enhancing editing efficiency.
- Word supports advanced functionalities like wildcards and regular expressions for complex searches and formatting adjustments, enhancing precision in document editing.
- The mobile versions of Microsoft Word offer basic find features but lack the complete Find and Replace capabilities of the desktop versions, requiring desktop applications for complex editing tasks.
Microsoft Word’s Find and Replace feature is a powerful tool for editing and managing documents efficiently. Here are detailed steps to access and use this feature across different versions of Microsoft Word on Windows, macOS, and mobile apps.
1. On Windows
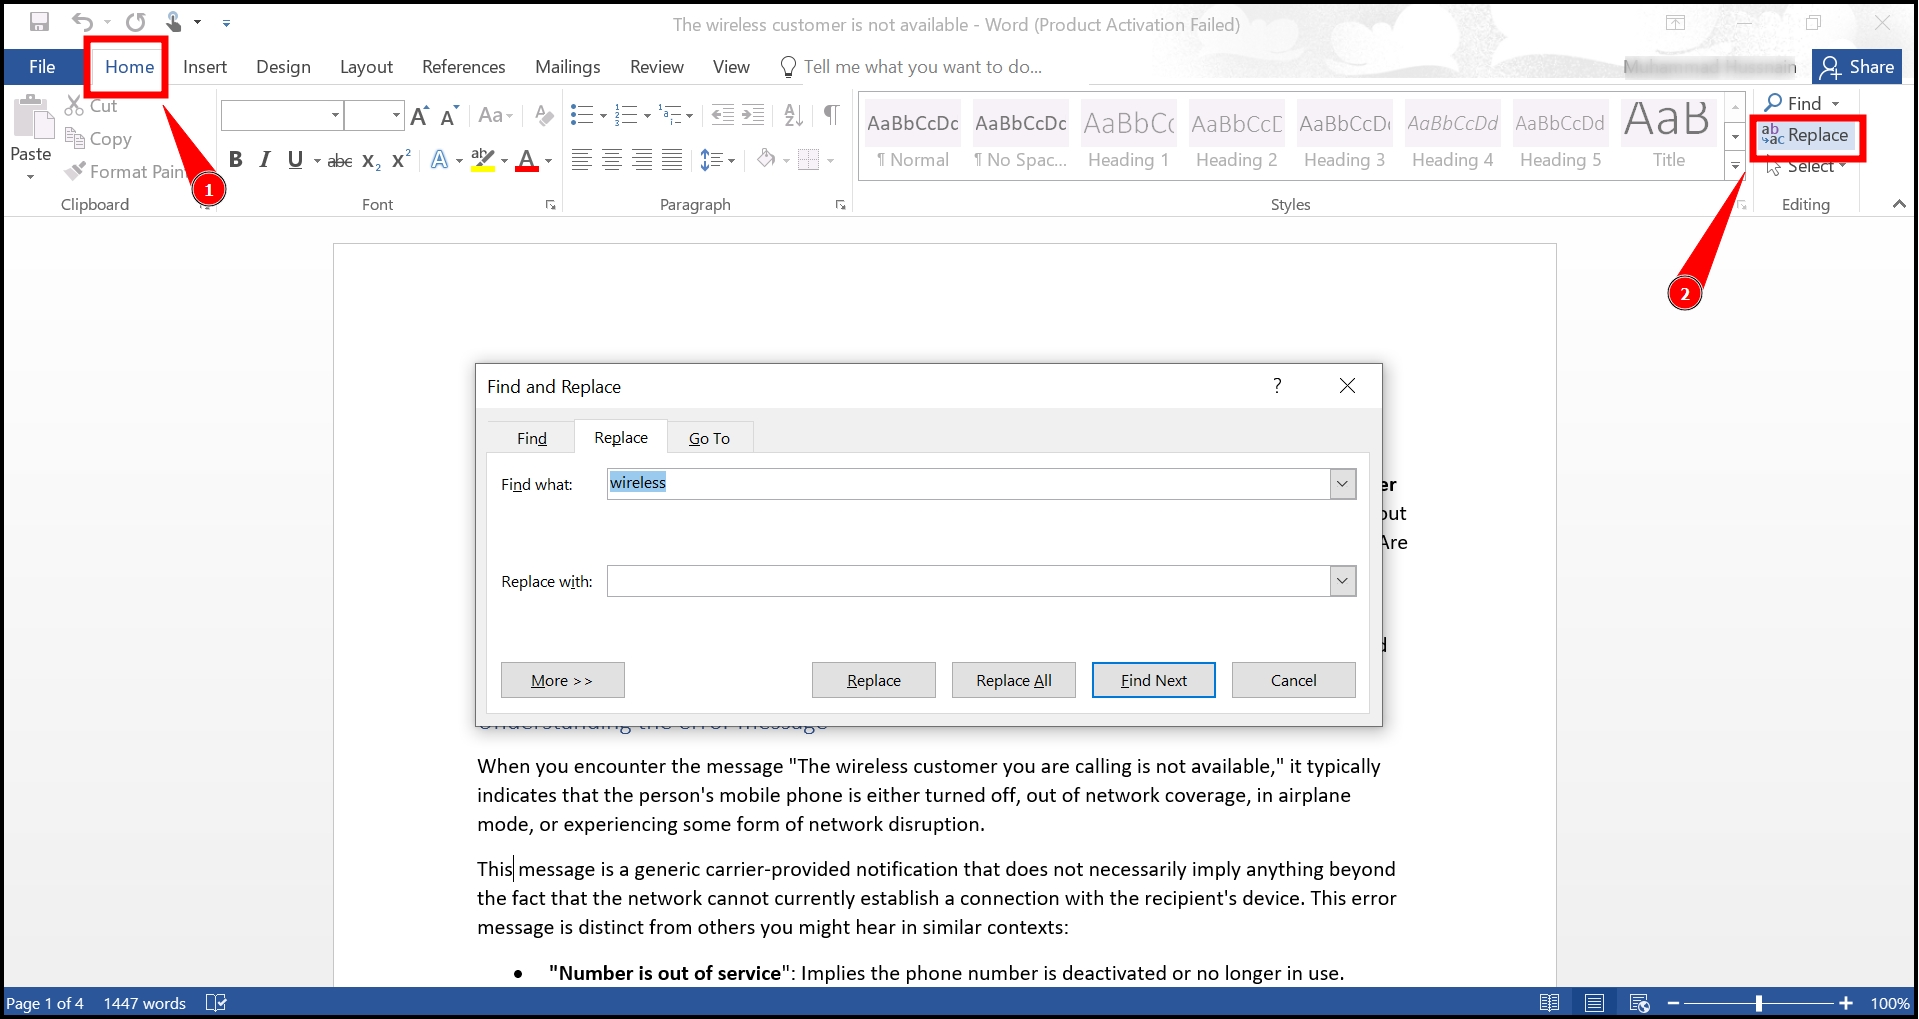
- Press Ctrl + H to open the Find and Replace dialog box directly. Alternatively, you can access it via the Ribbon. Click the “Home” tab, and in the “Editing” group, click on “Replace.”
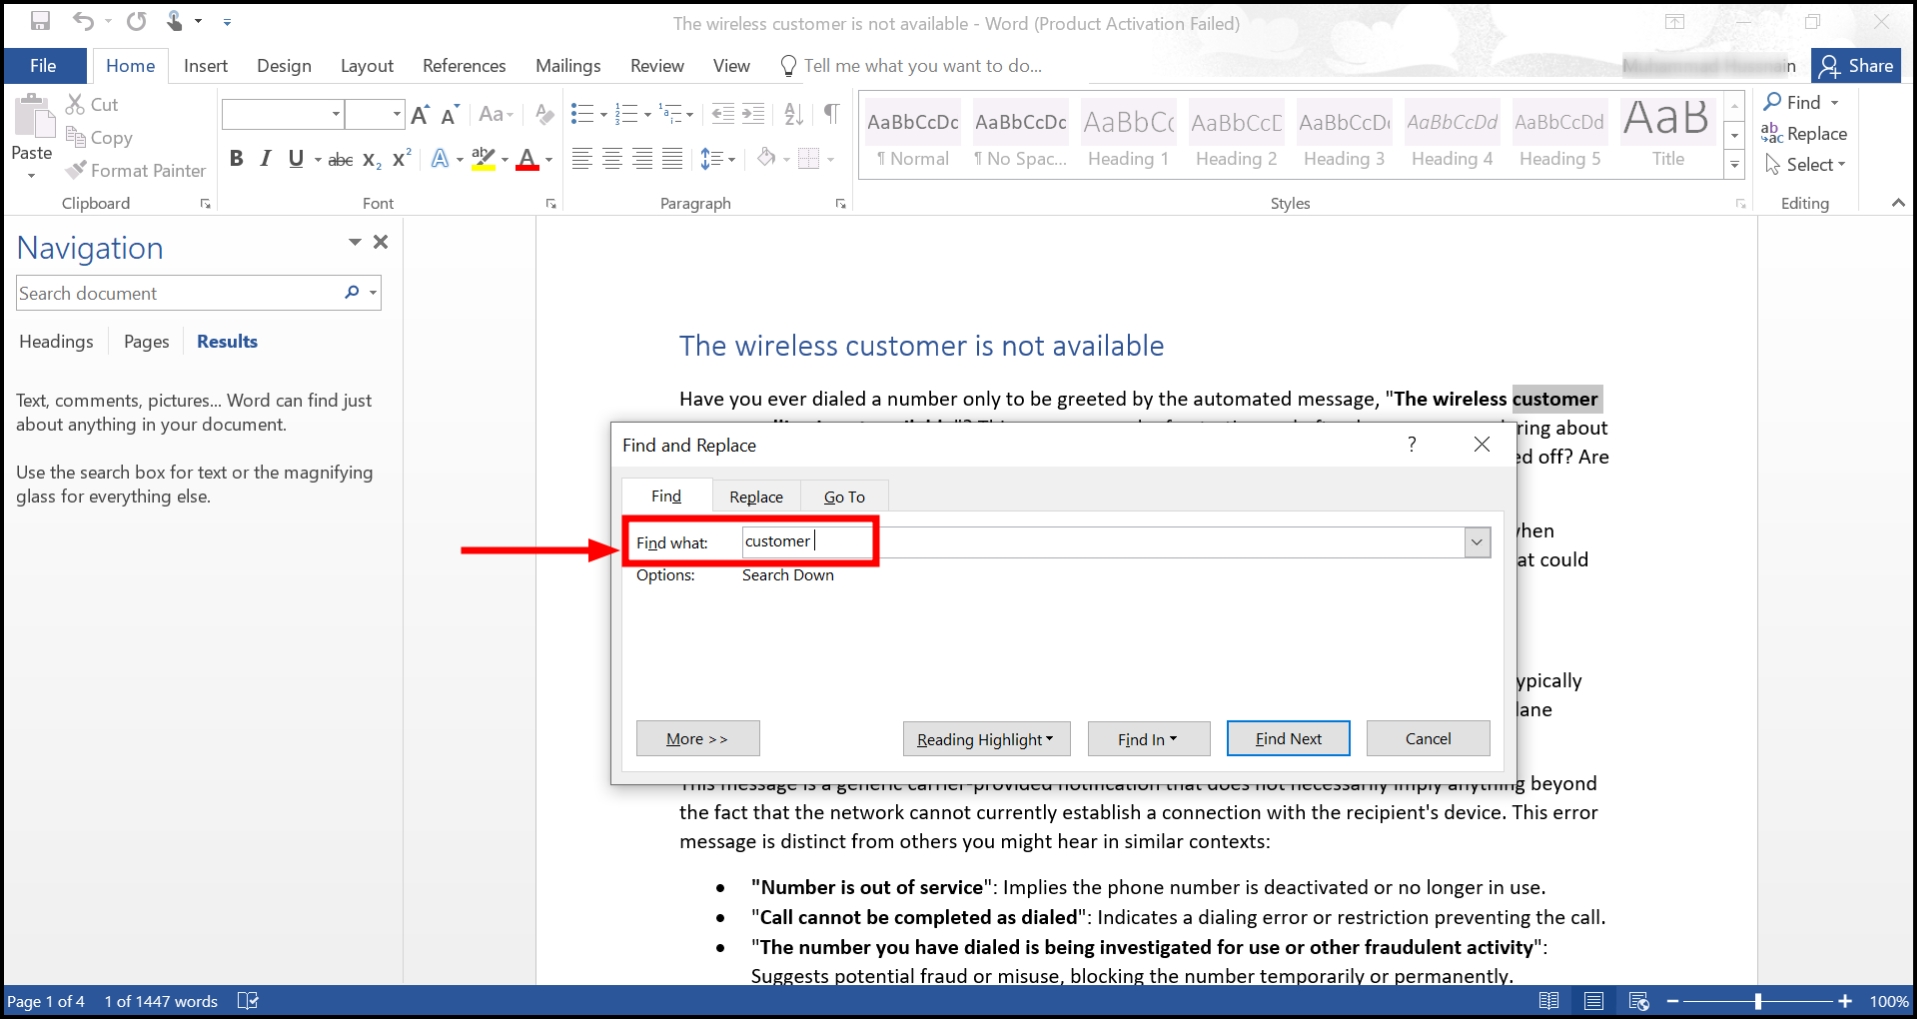
Access the Find and Replace tool - In the “Find what” box, type the text you want to search for.
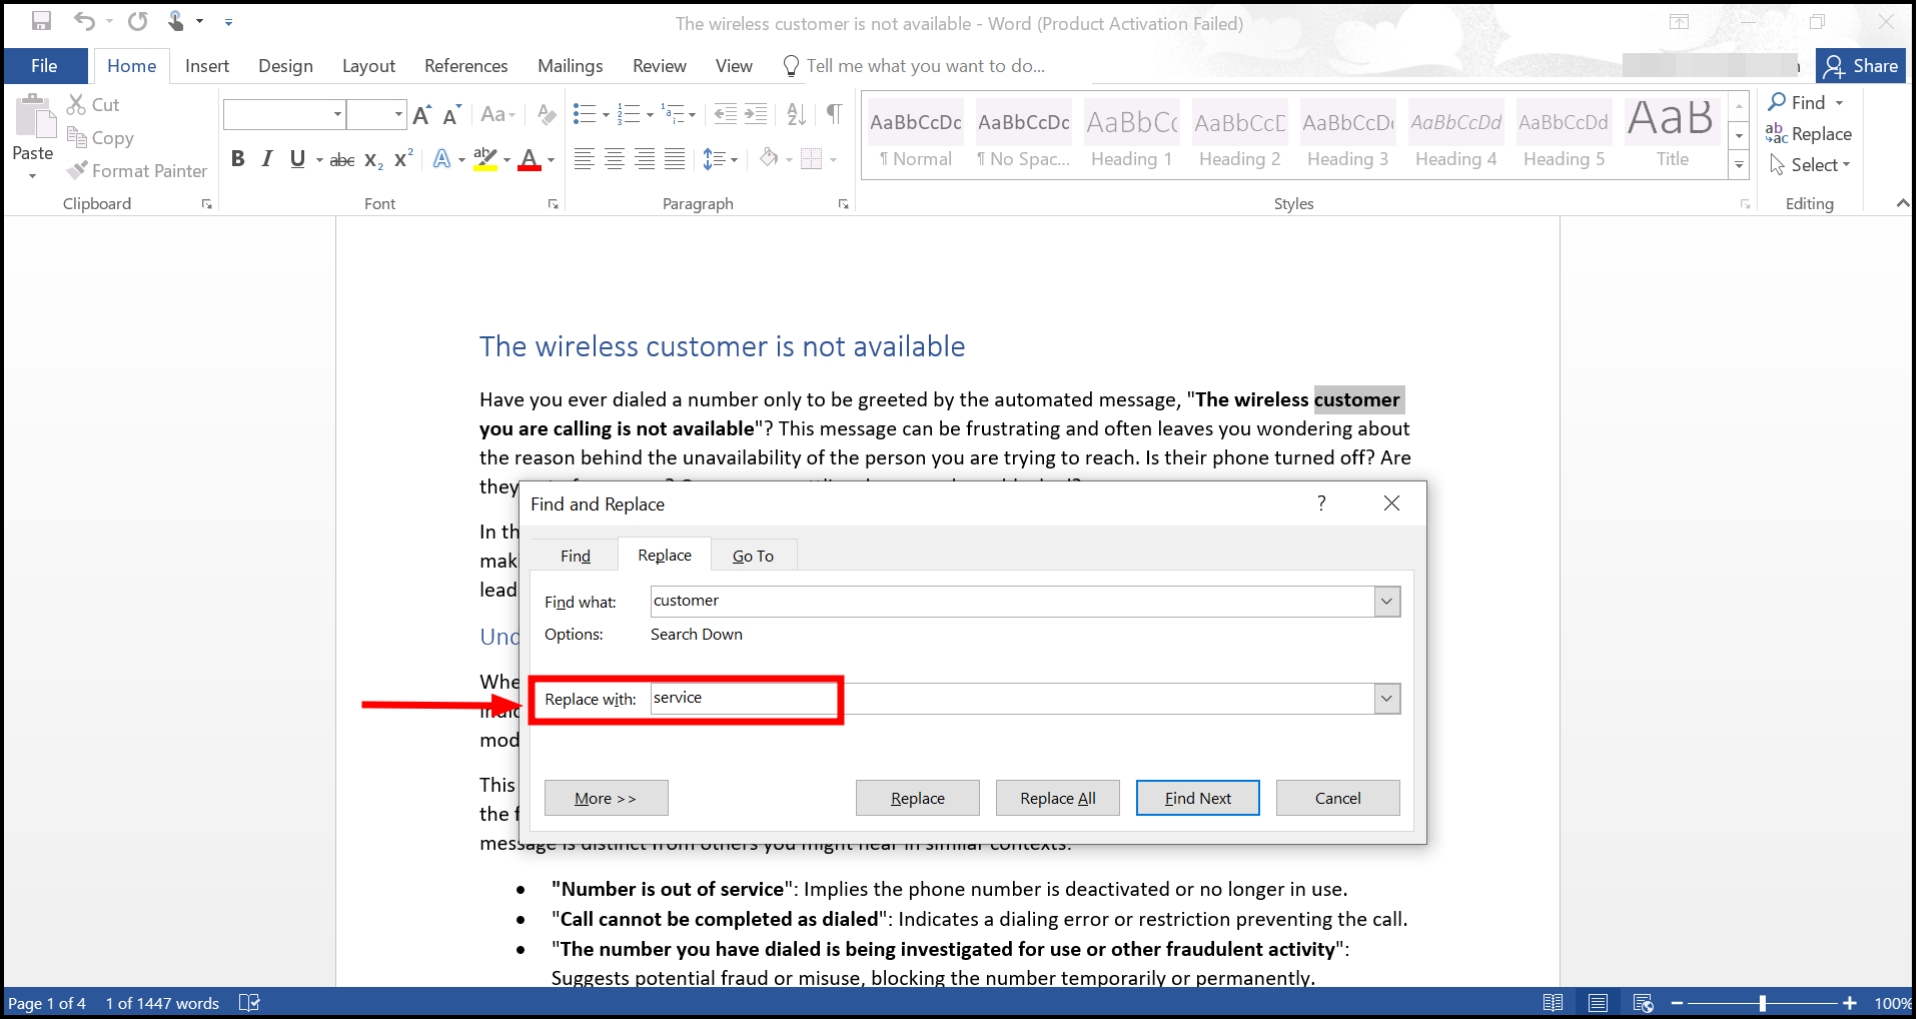
Enter the text in Find what - In the “Replace with” box, enter the replacement text.
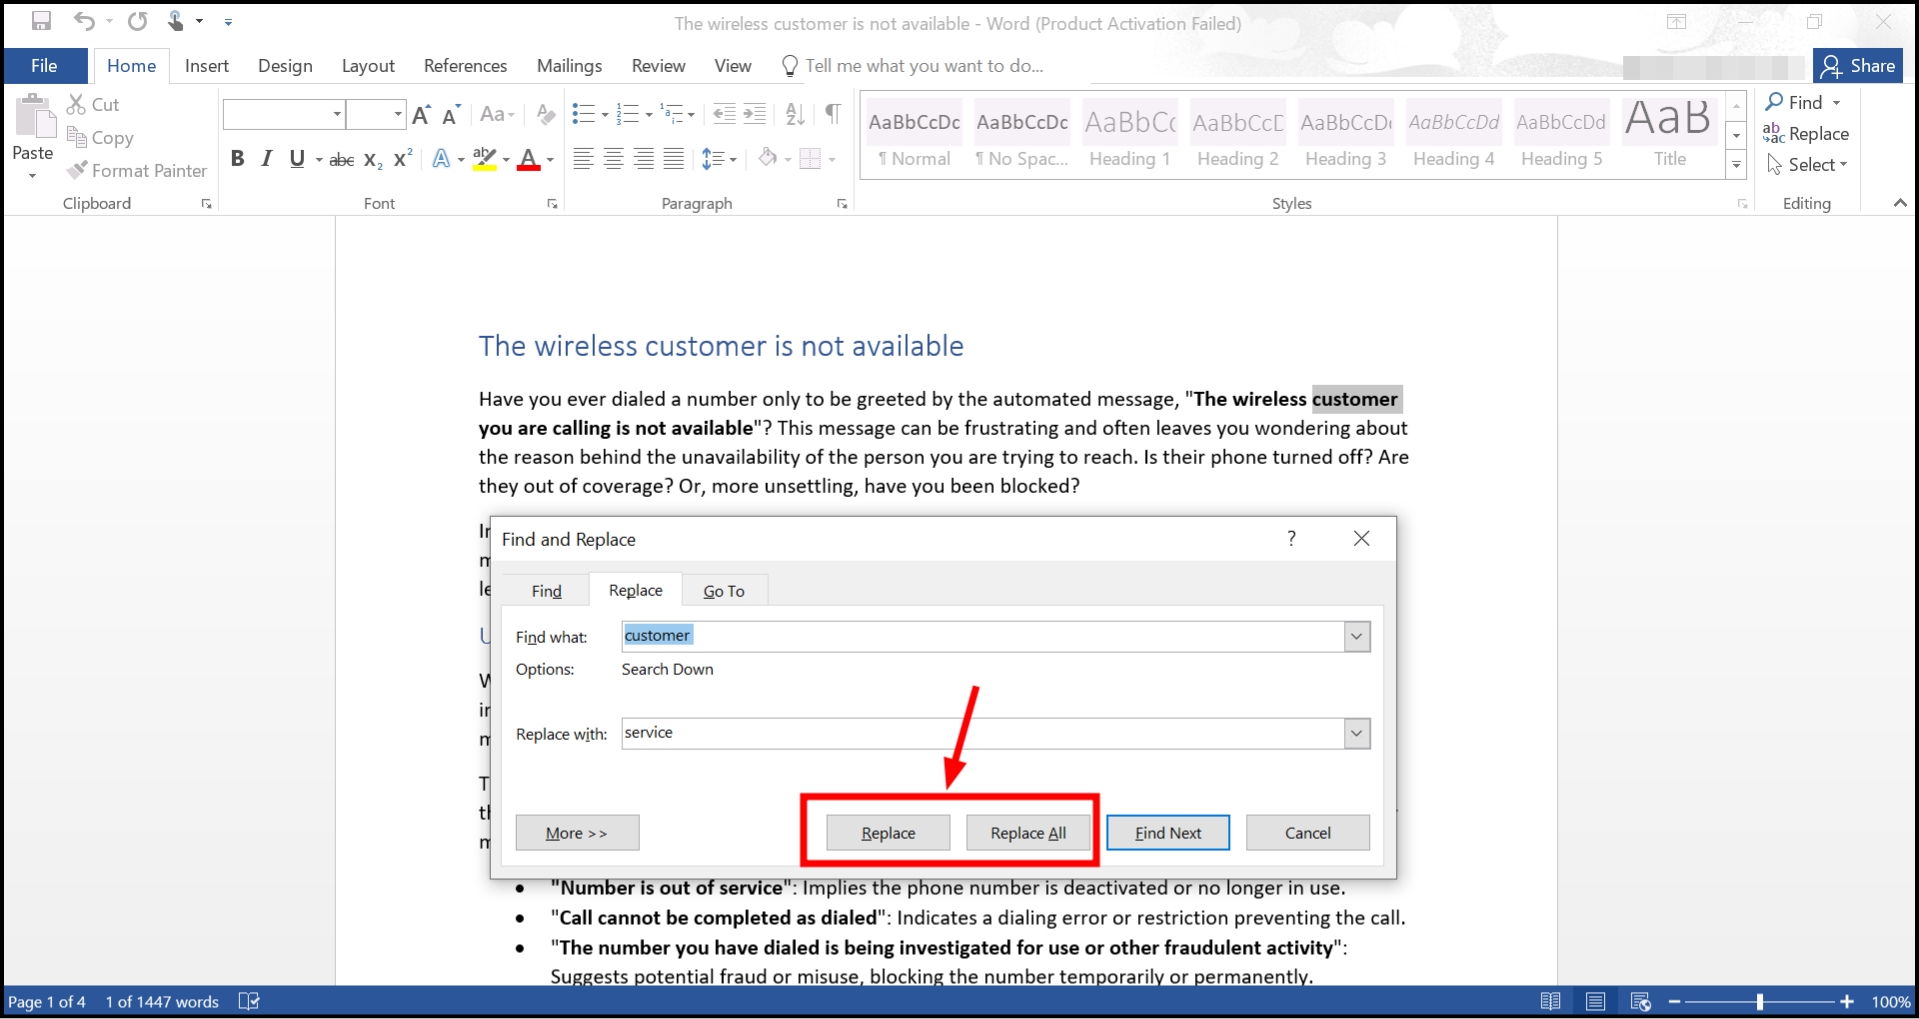
Enter the text in Replace with - Use “Find Next” to locate the first instance, then click “Replace” to update that specific occurrence, or click “Replace All” to update all instances of the text throughout the document.
Click Replace or Replace All
2. On macOS
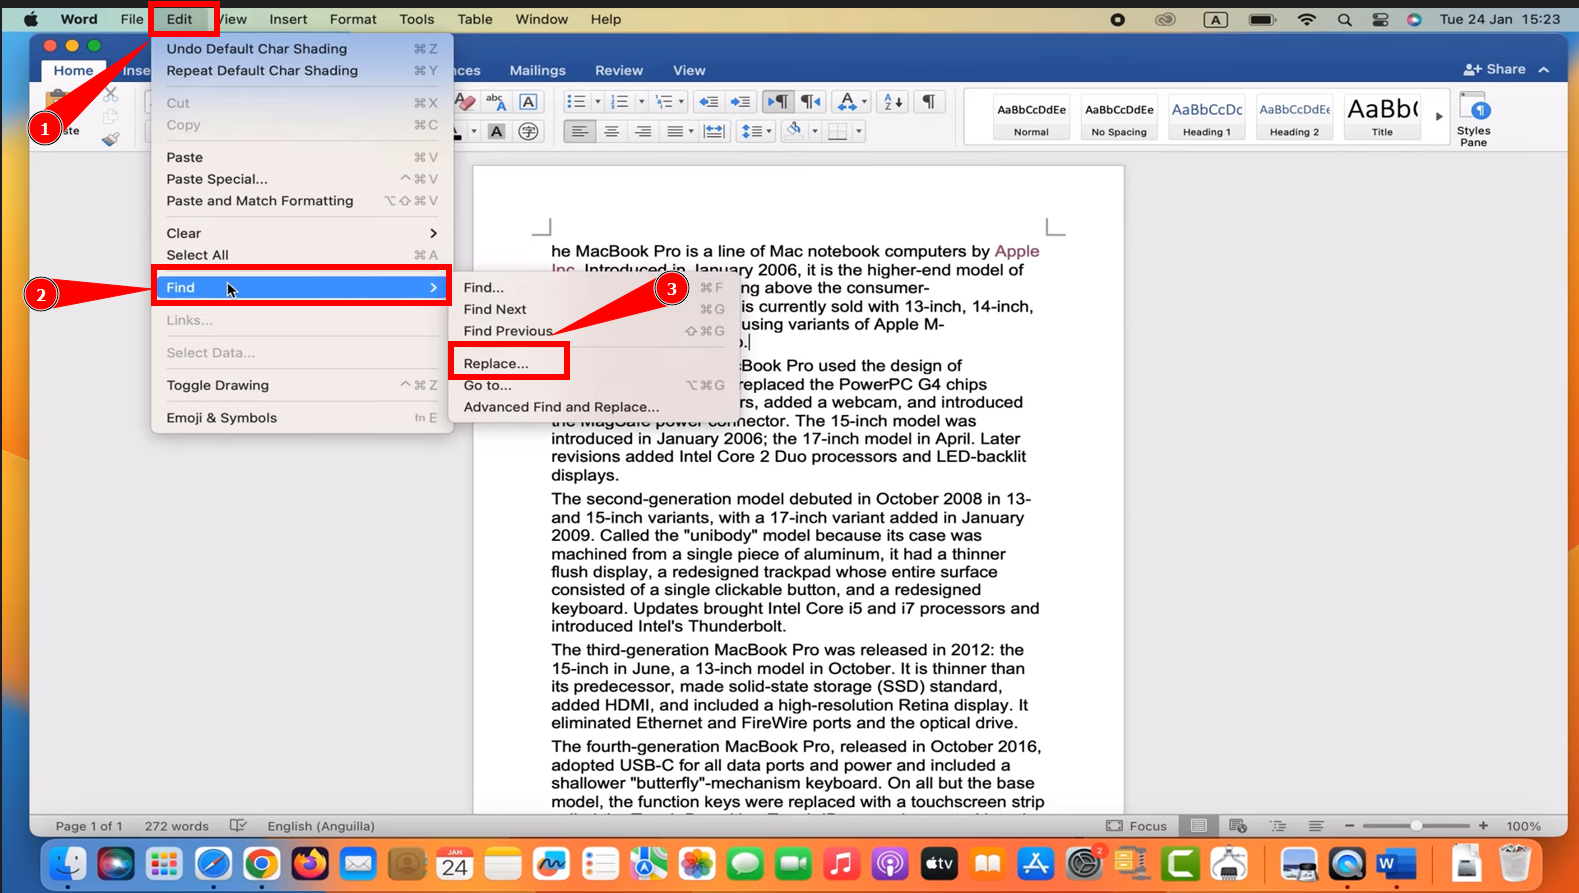
- Press Cmd + H to open the Find and Replace tool. Alternatively, go to the “Edit” menu, choose “Find,” and then select “Replace” to open the dialog box.
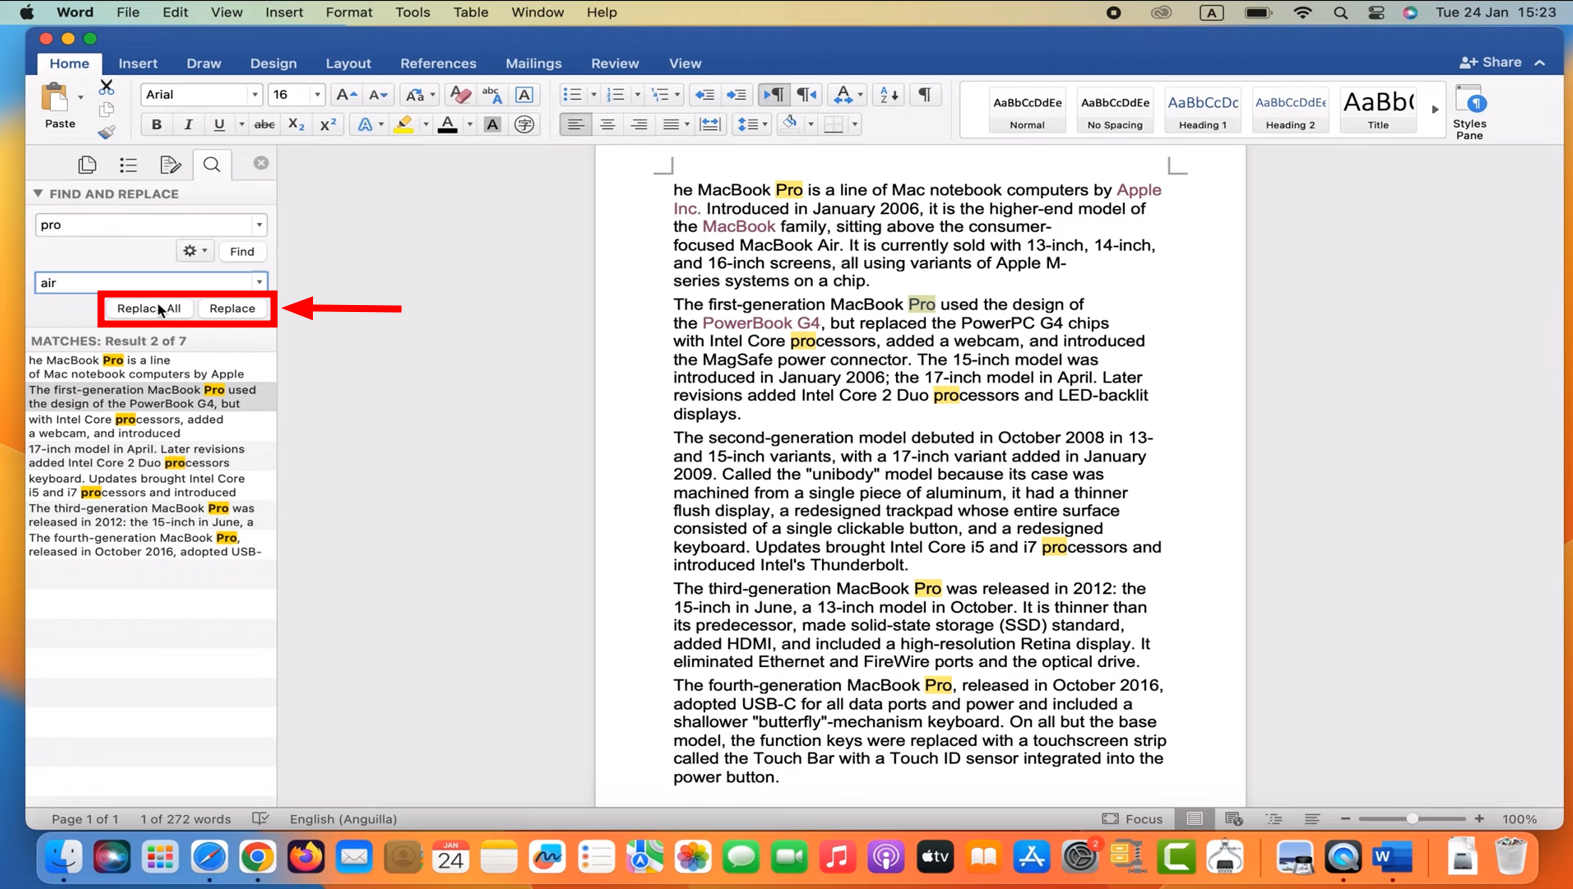
Access the Find and Replace tool - Enter the search term in the “Find what” box and the new text in the “Replace with” box.

Enter the text in both boxes - Then click “Replace” to modify each or “Replace All” to replace all occurrences.
Click Replace or Replace All
Find and Replace tool on the Word mobile app
Using the Find and Replace tool in the Microsoft Word mobile app is more limited than the desktop versions, but you can still perform basic Find and Replace functions.
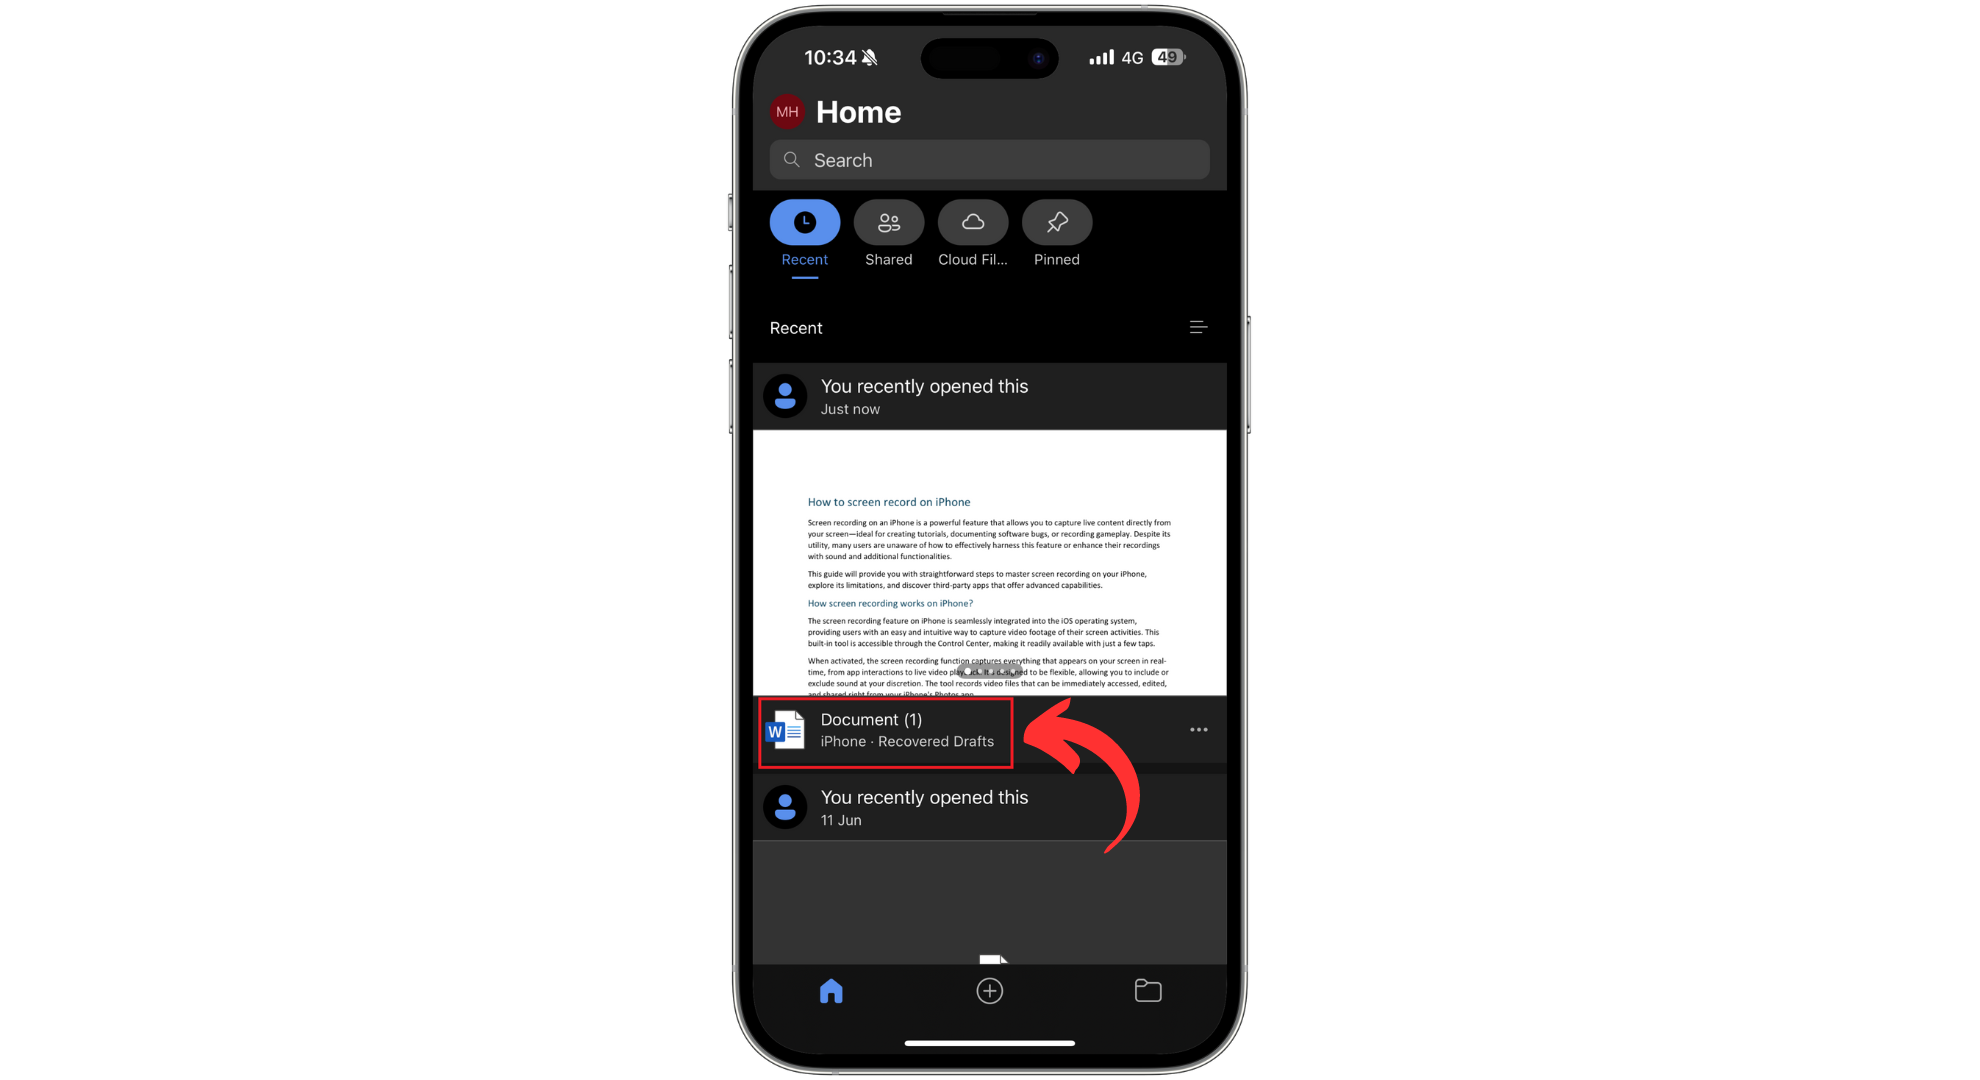
- Launch the Microsoft Word app on your mobile device and open the document you want to edit.
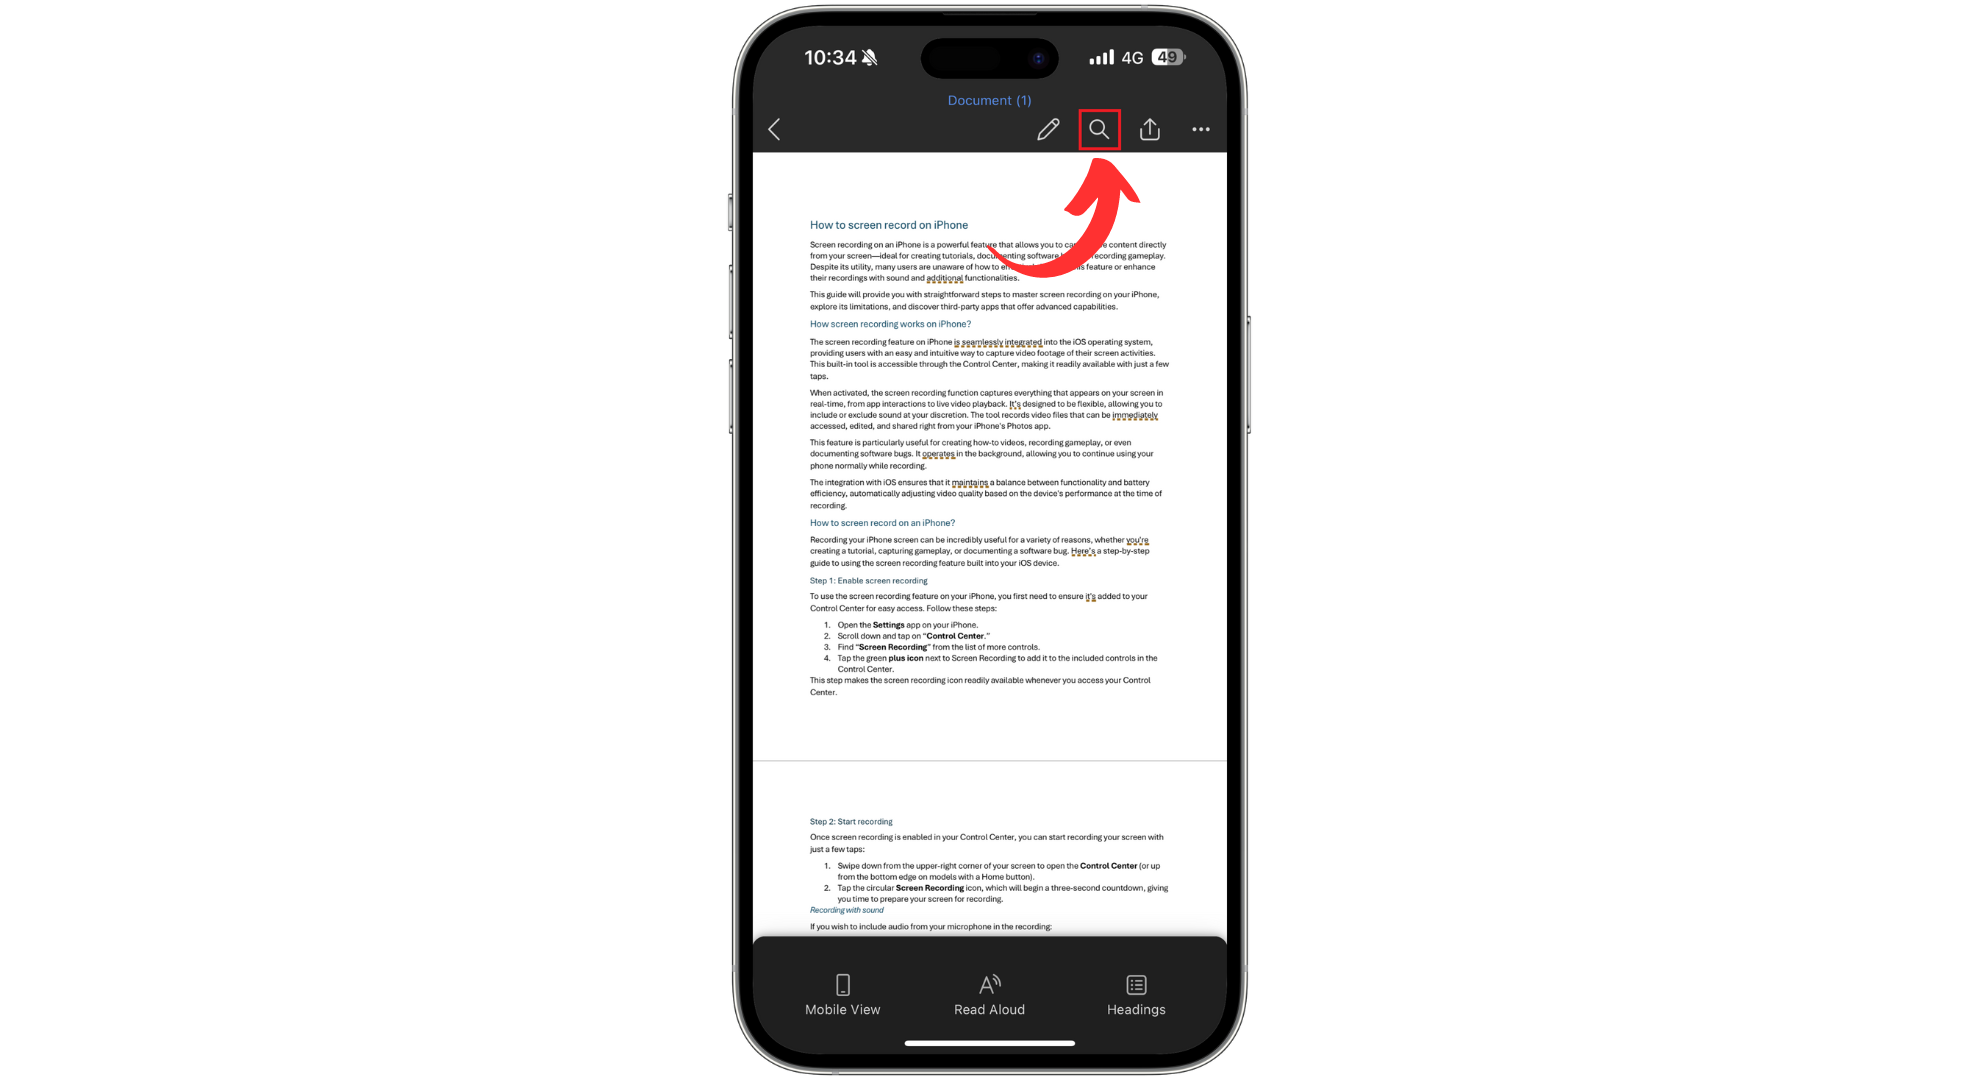
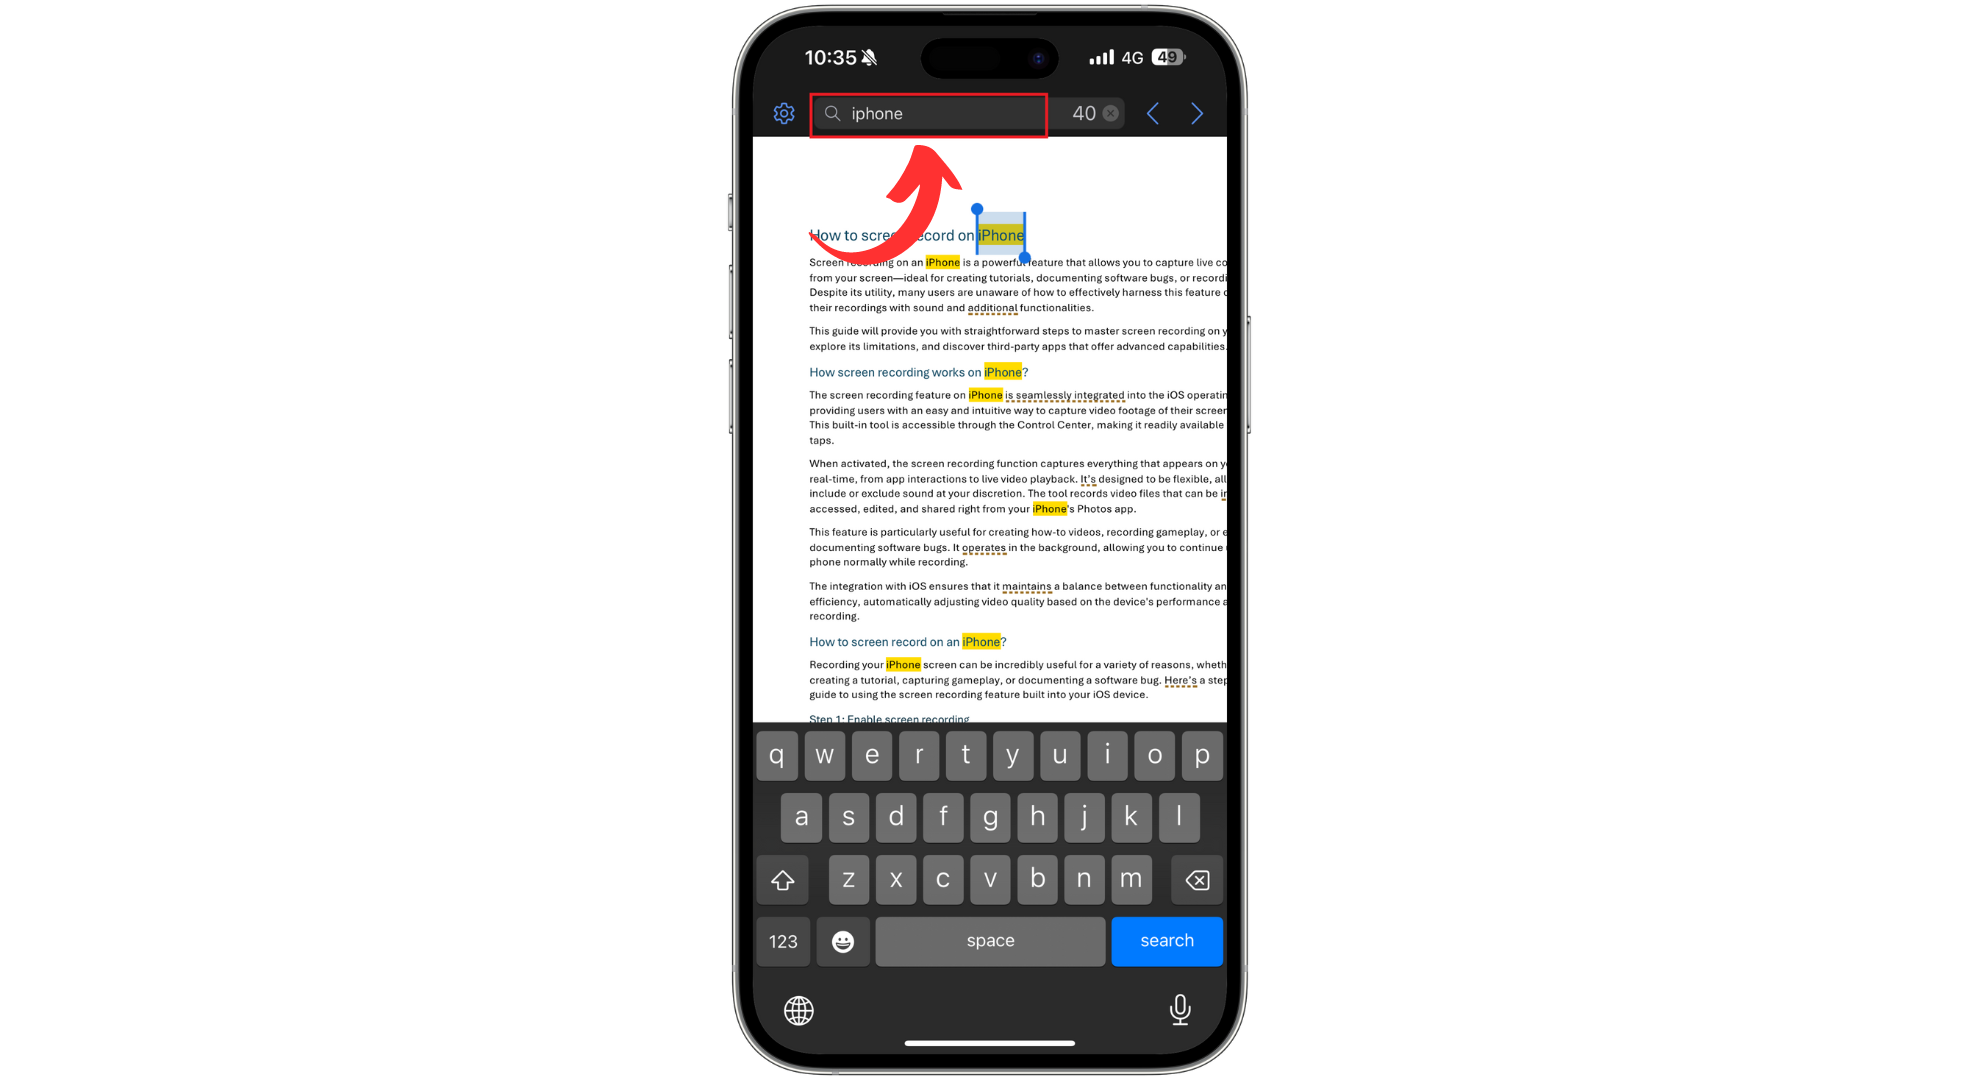
Open the document - Tap on the magnifying glass icon, usually at the top of the screen, to access the Find function.
Tap on Find option - Enter the word or phrase you want to find.
Enter the text - Tap on the “Settings gear” icon on the upper left corner of the display.
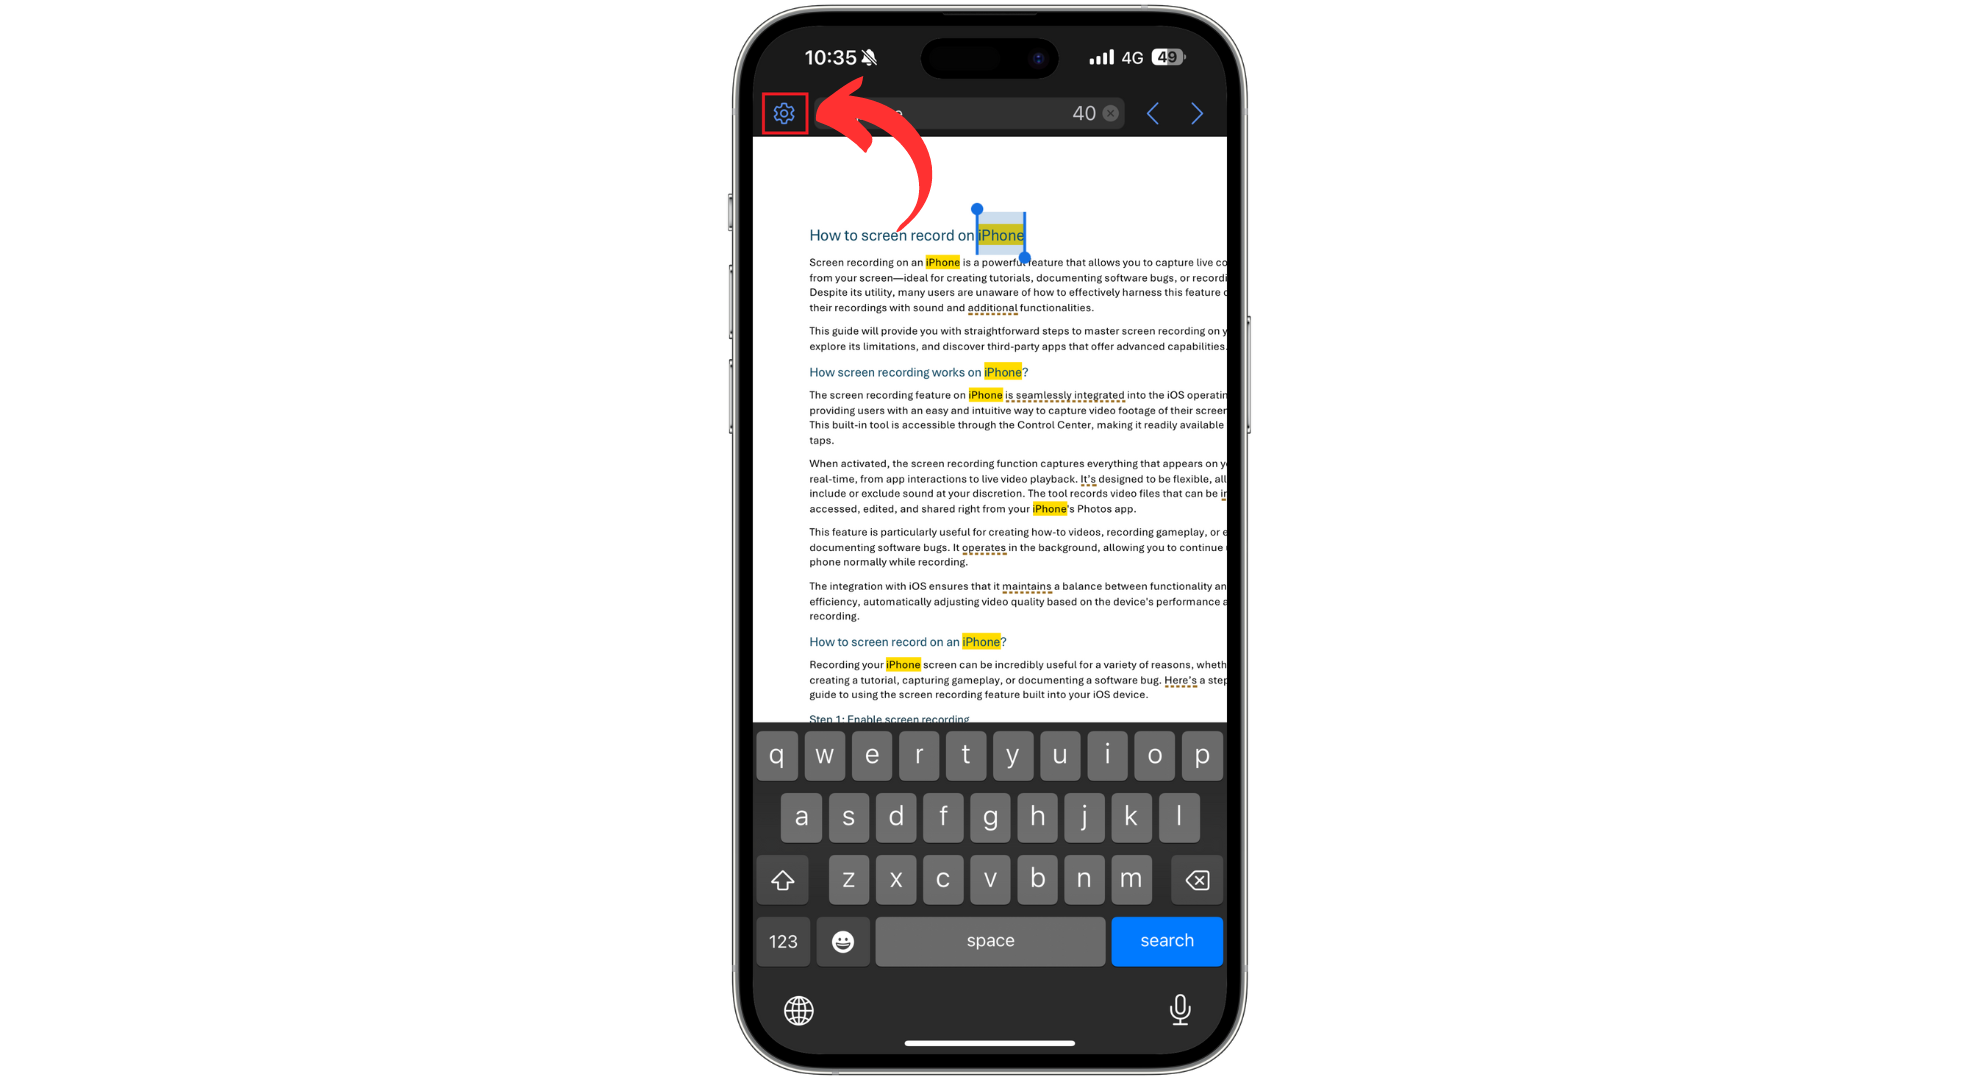
Tap on the Settings icon - Select the options you want to use, Find and Replace or Find and Replace All, and tap “Done.“
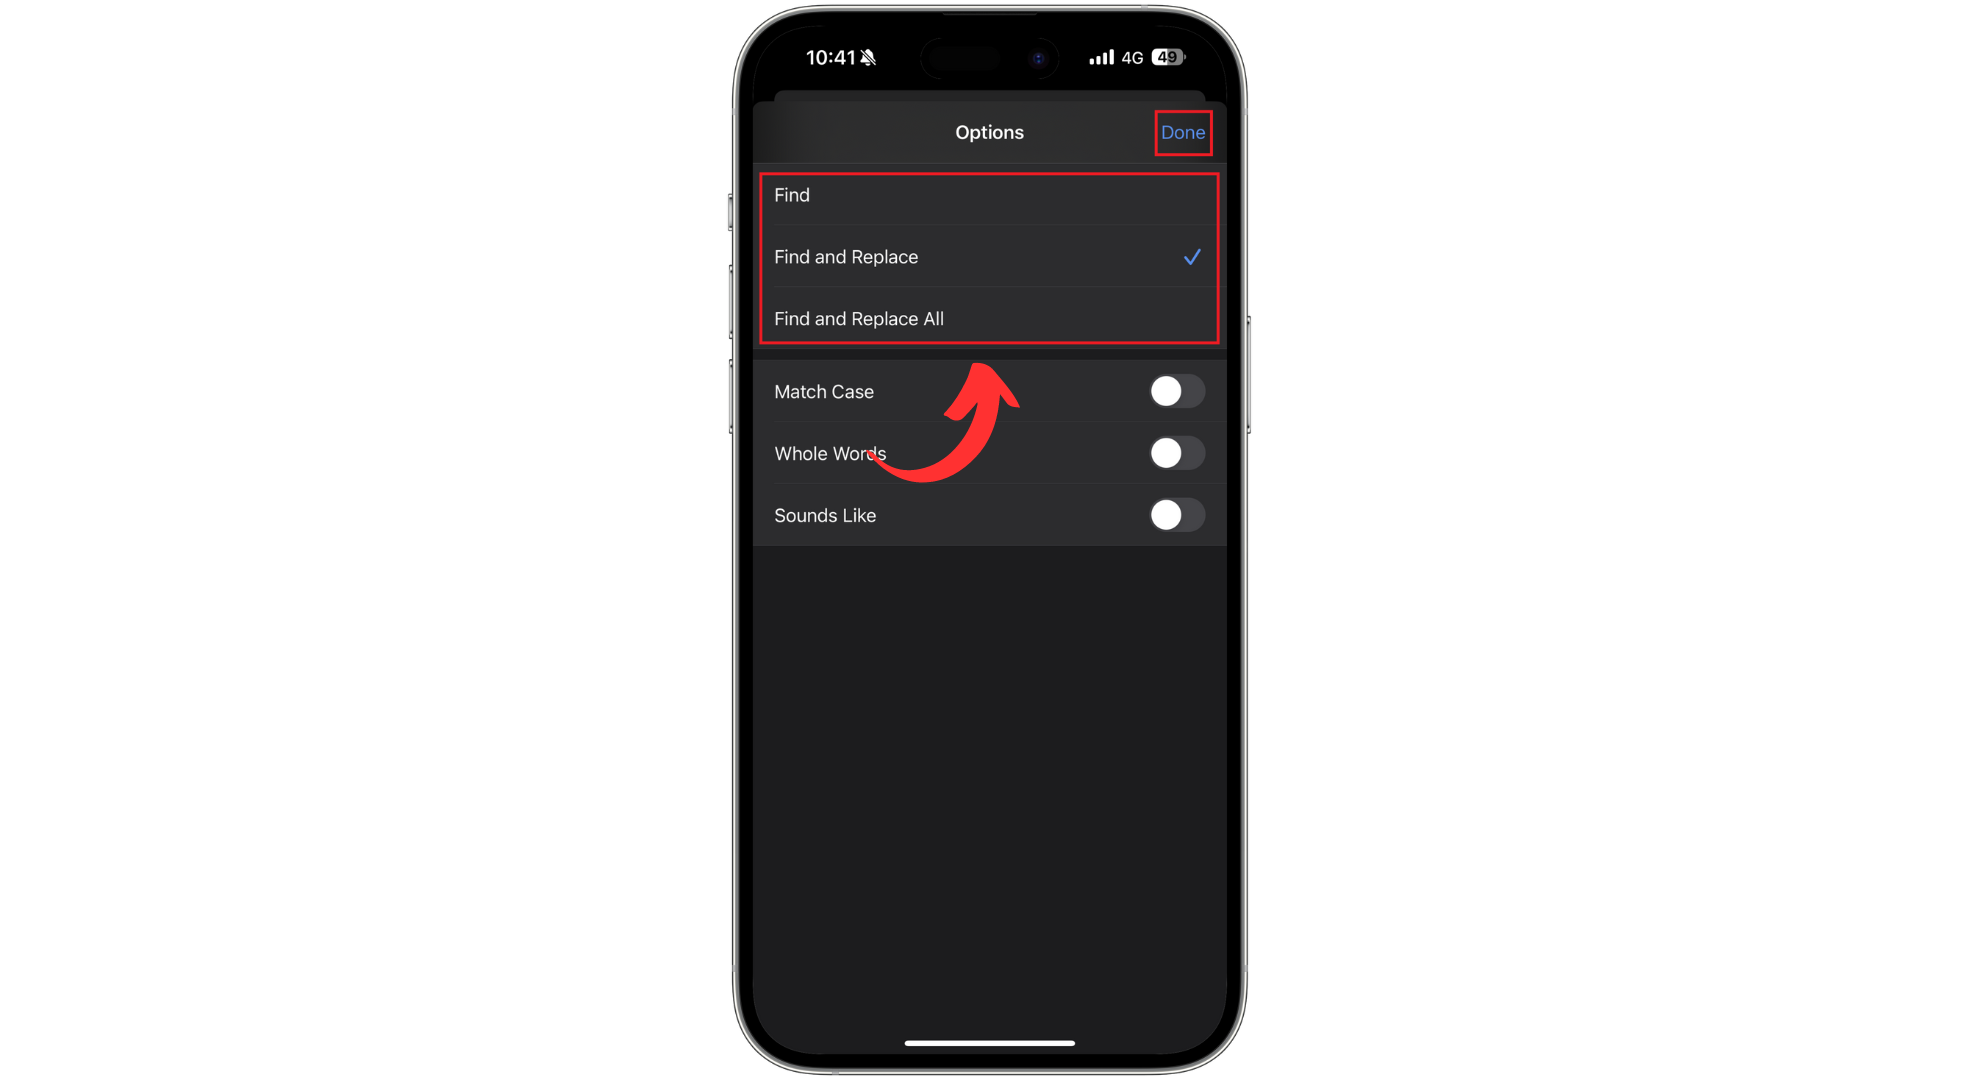
Tap Done - Enter the replacement text in the “Replace” box and tap “Replace.“
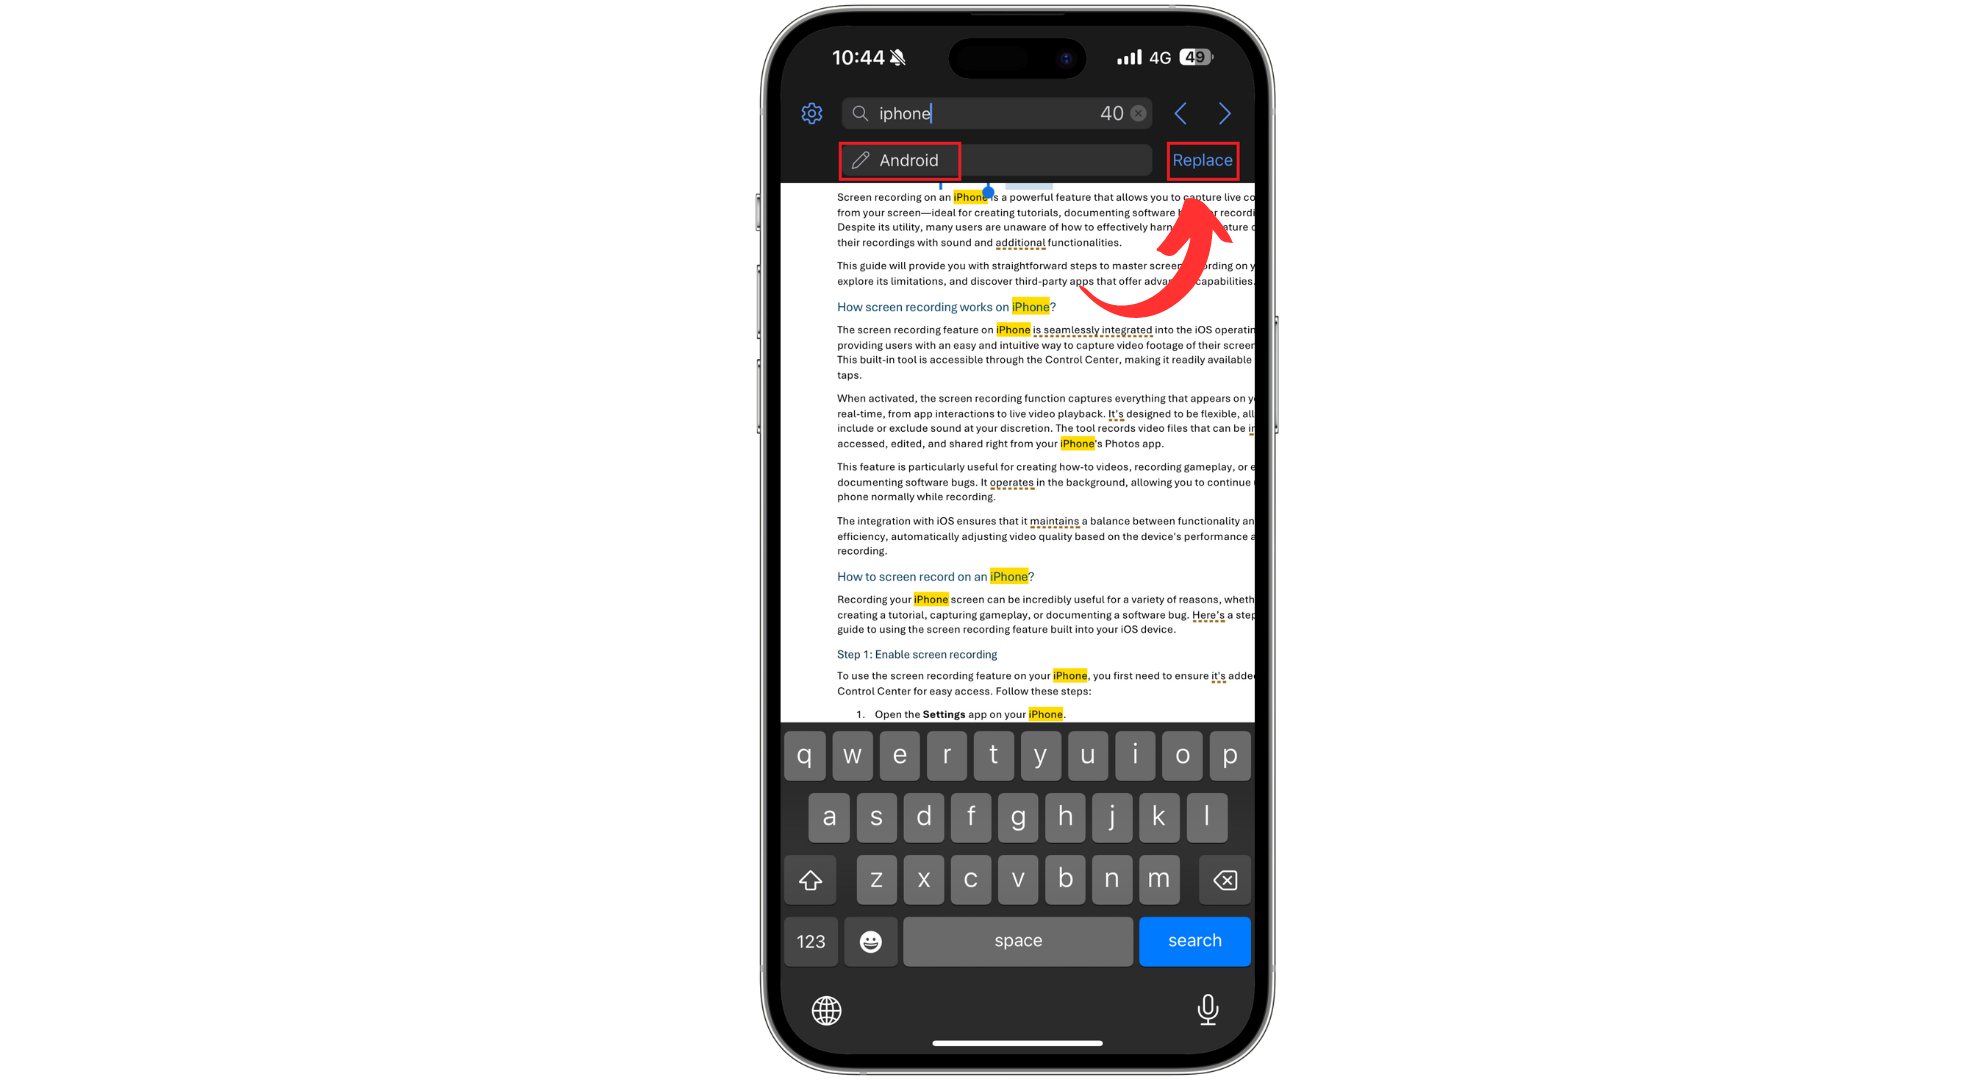
Tap Replace
Advanced Find and Replace features in Microsoft Word
Microsoft Word’s advanced Find and Replace features offer enhanced search capabilities that are particularly useful for editing detailed and complex documents. These tools allow users to refine their searches and replacements, meeting specific needs accurately.
They allow functions like case sensitivity, word-only searches, and pattern-based searches using wildcards and regular expressions. Here’s how you can use them:
↪ Advanced Find options
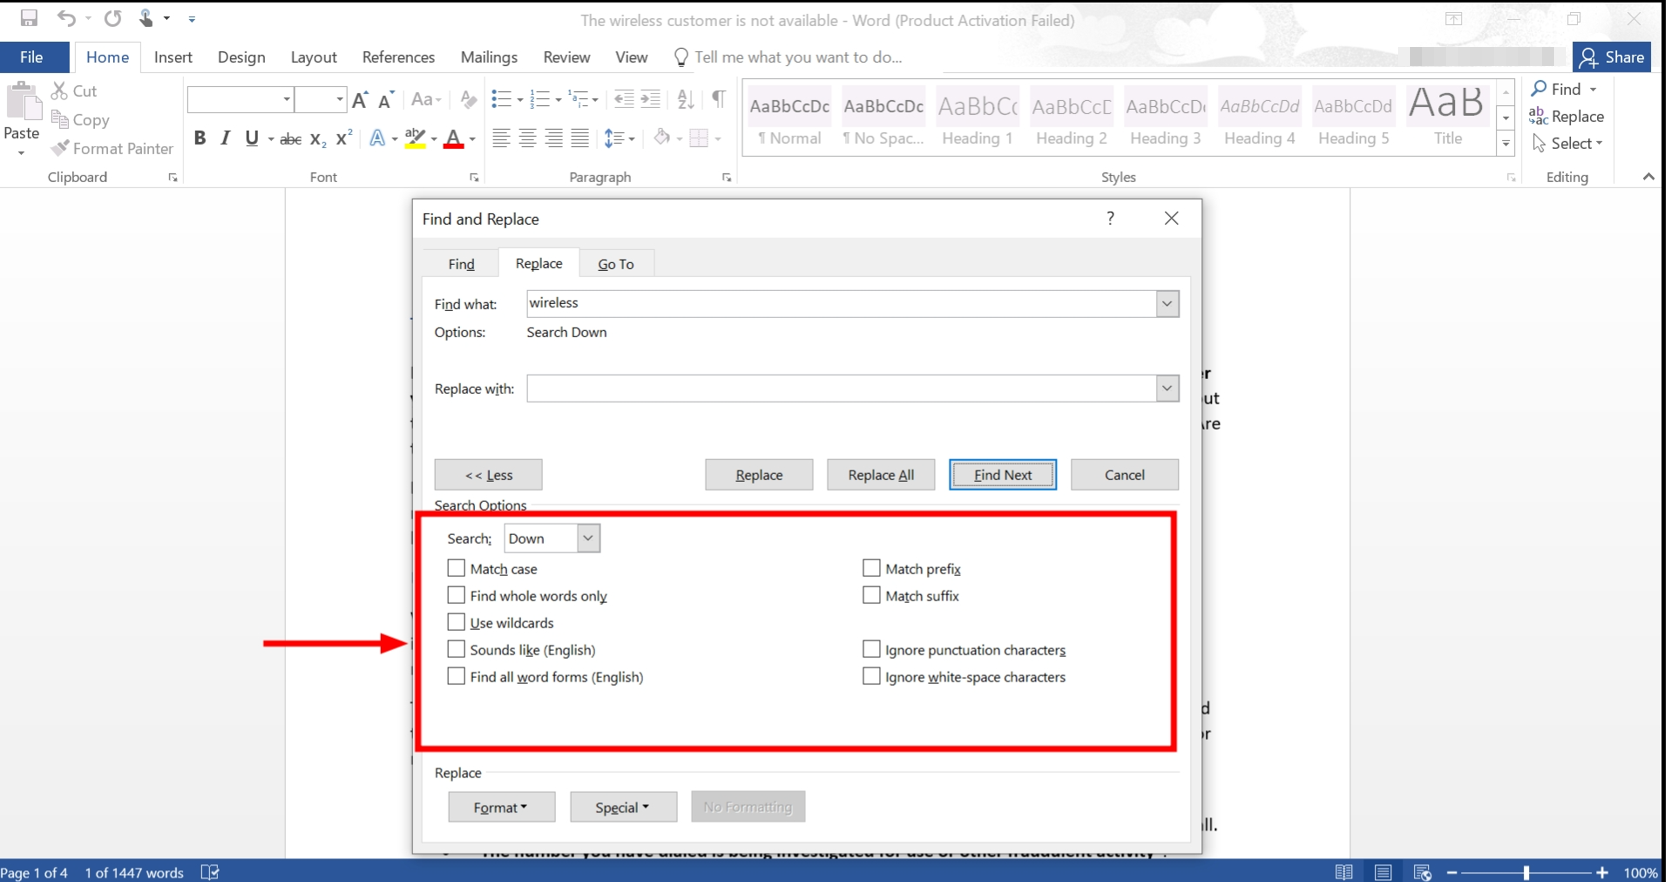
You can access more detailed search options to refine your results. Press Ctrl + H on Windows or Cmd + b on macOS to open the Find and Replace dialog box. Click the “More >>” button to expand the dialog box and reveal advanced search options.
↪ Case sensitivity and whole words only options
- To make your search case-sensitive, check the “Match case” option. This will differentiate between uppercase and lowercase letters, making your search specific to the casing of the terms entered.
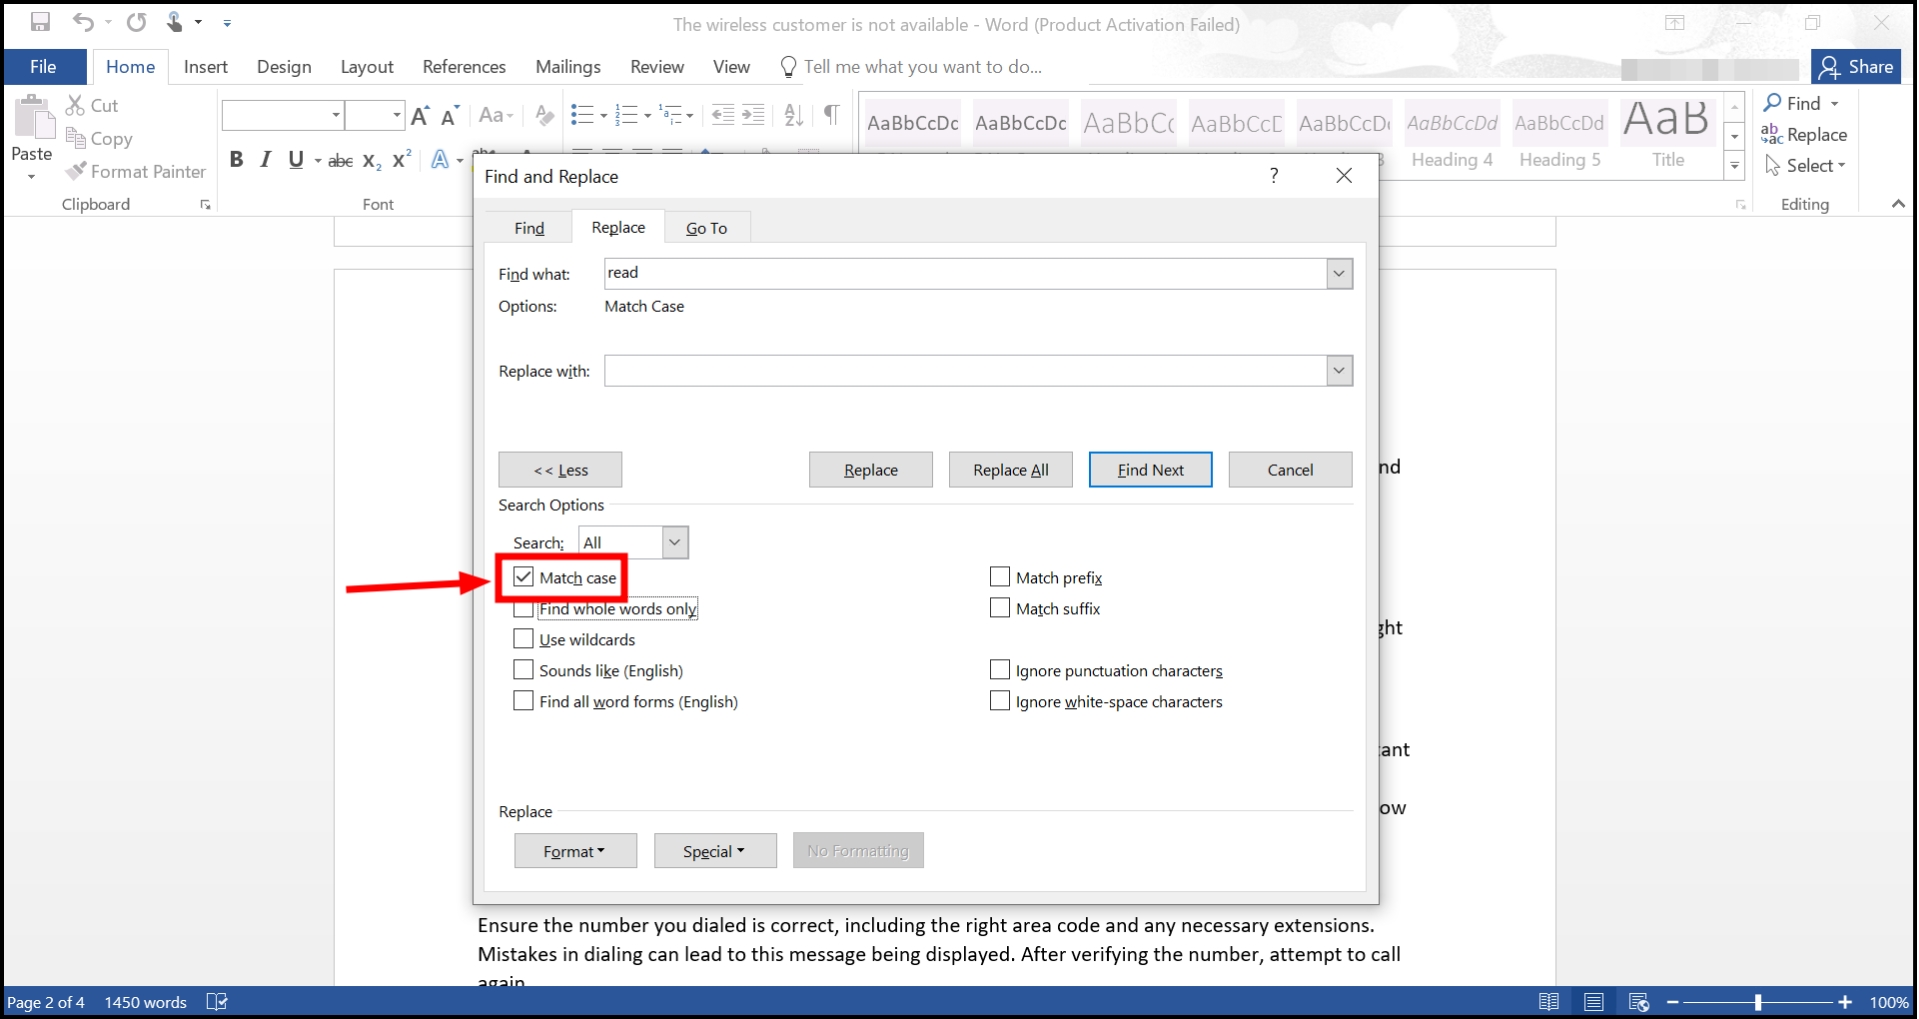
Click Match Case - Select “Find whole words only” to ensure the search term is matched only as a whole word, not as part of a larger word. For example, searching for “read” will not return “ready” or “bread.”

Tap on Find whole words only
↪ Wildcards and Regular Expressions
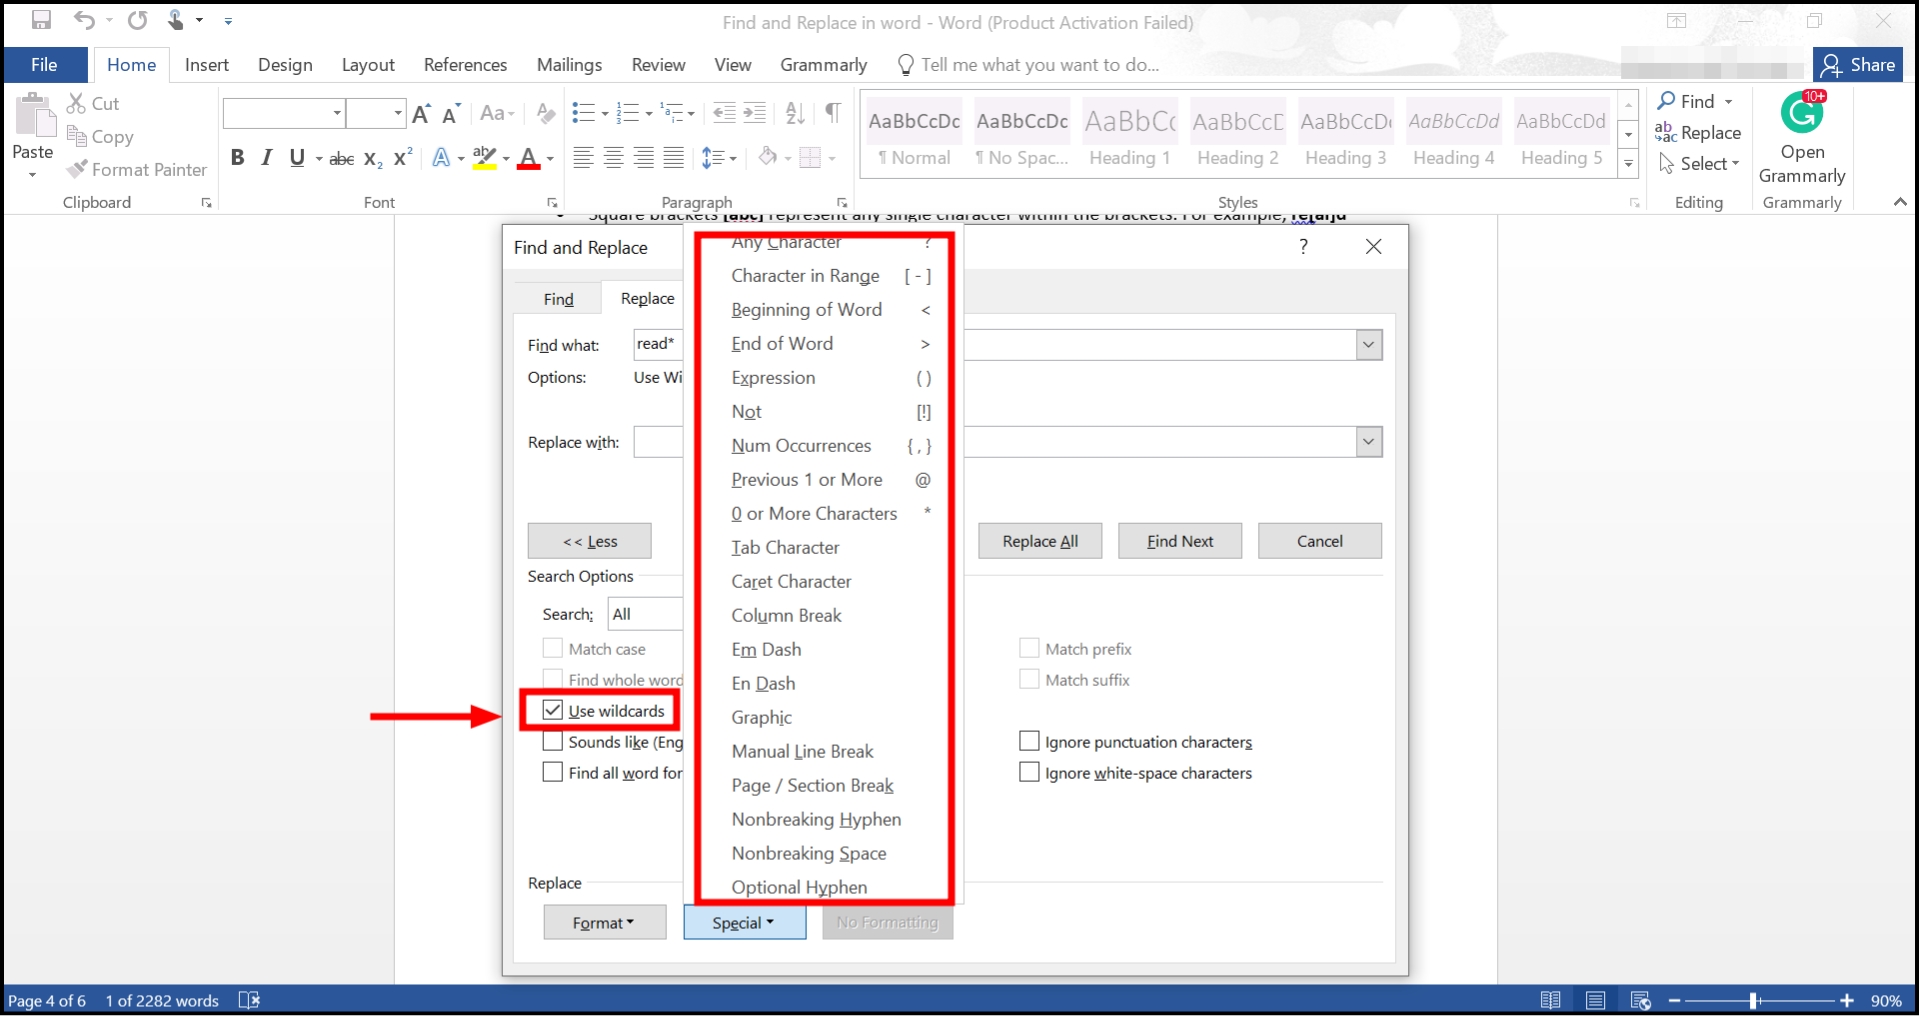
Wildcards are special characters that represent one or more characters in a search term, allowing for flexible search patterns:
- The asterisk represents any series of characters. For example, read would find “reader,” “reading,” “readiness,” etc.
- The question mark ? represents any single character. For example, re?d would find “read” and “reed.”
- Square brackets [abc] represent any single character within the brackets. For example, re[ai]d would find “read” and “reid.”
↪ The Find and Replace formatting (bold, italics, etc.) option
This method allows you to search for all instances of text in a specific format and replace them with or without altering the formatting.
- To find and replace specific formatting, open the Find and Replace dialog box (Ctrl + H for Windows, Cmd + H for macOS) and click on “More >>“.
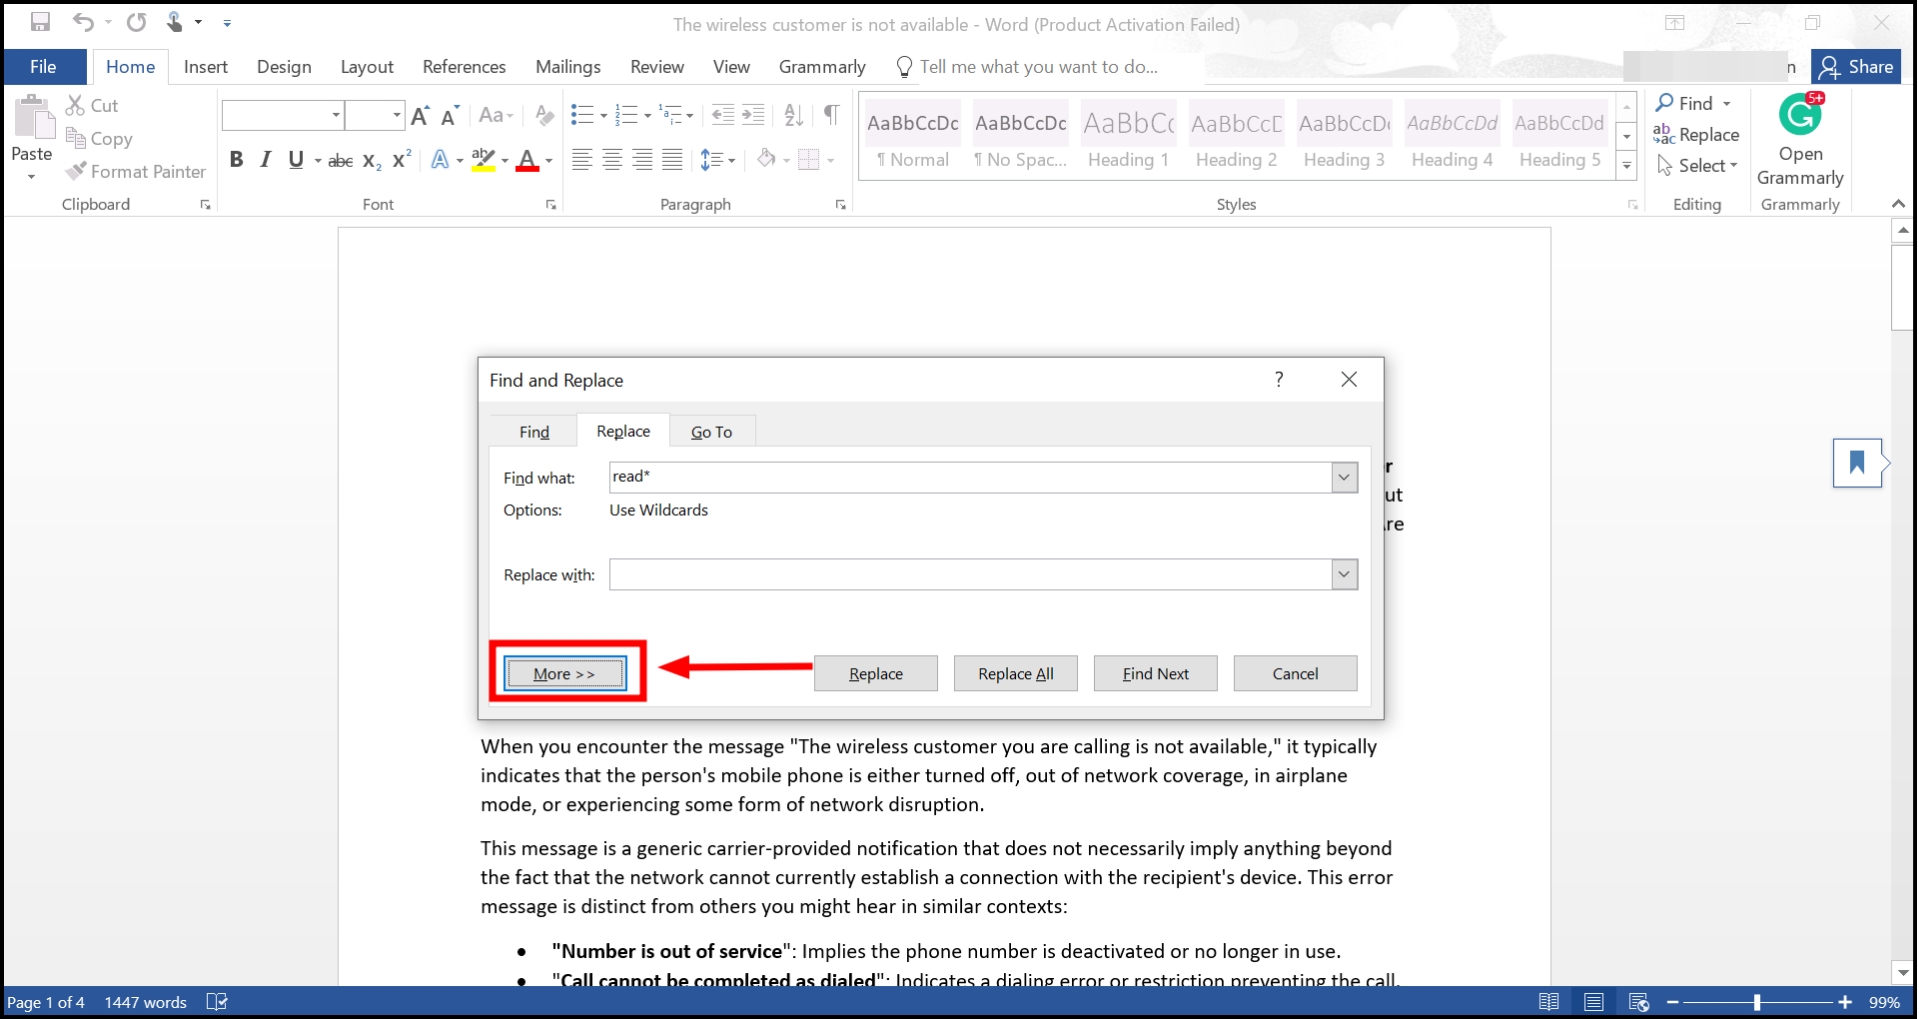
>” width=”1919″ height=”1019″> Click on More>> - Then, select the “Format” button at the bottom of the dialog box.
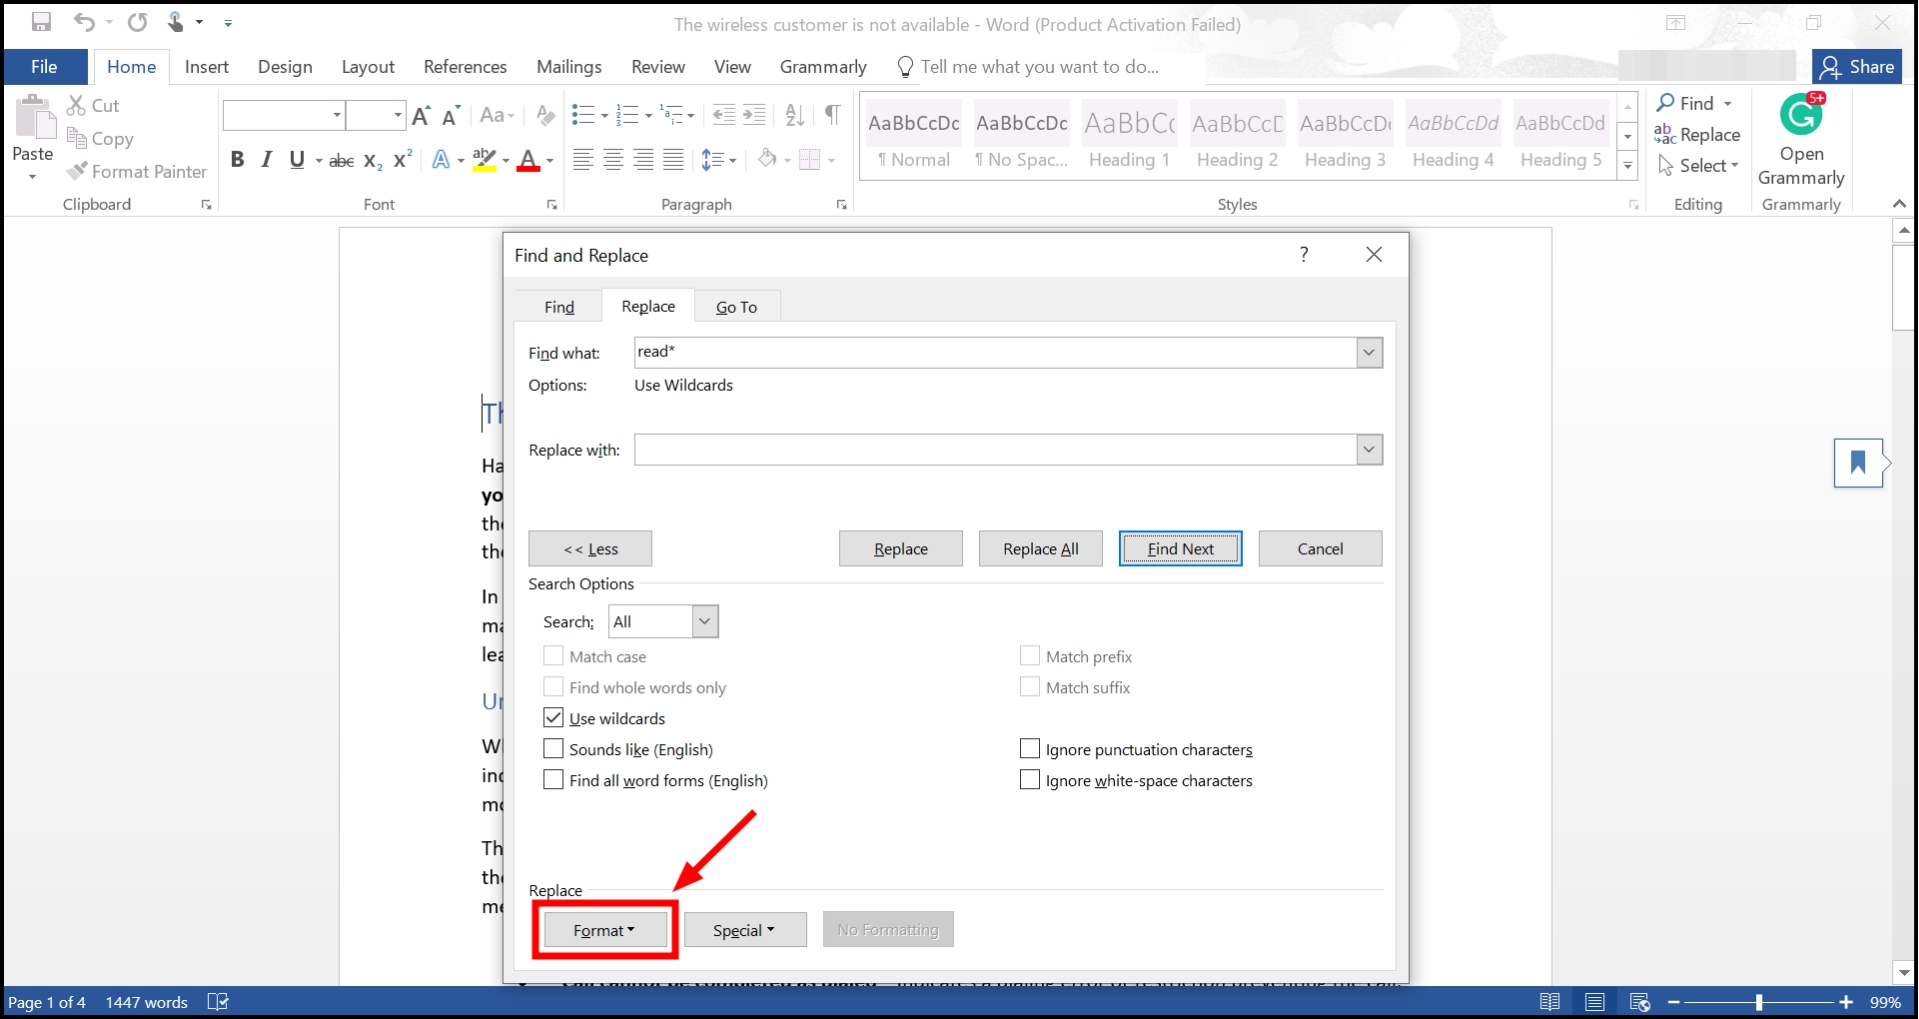
Select Format - Choose the formatting you want to find (e.g., bold, italics). To replace the found text with different formatting, input the replacement text in the “Replace with” box and then click the “Format” button to set the new formatting.
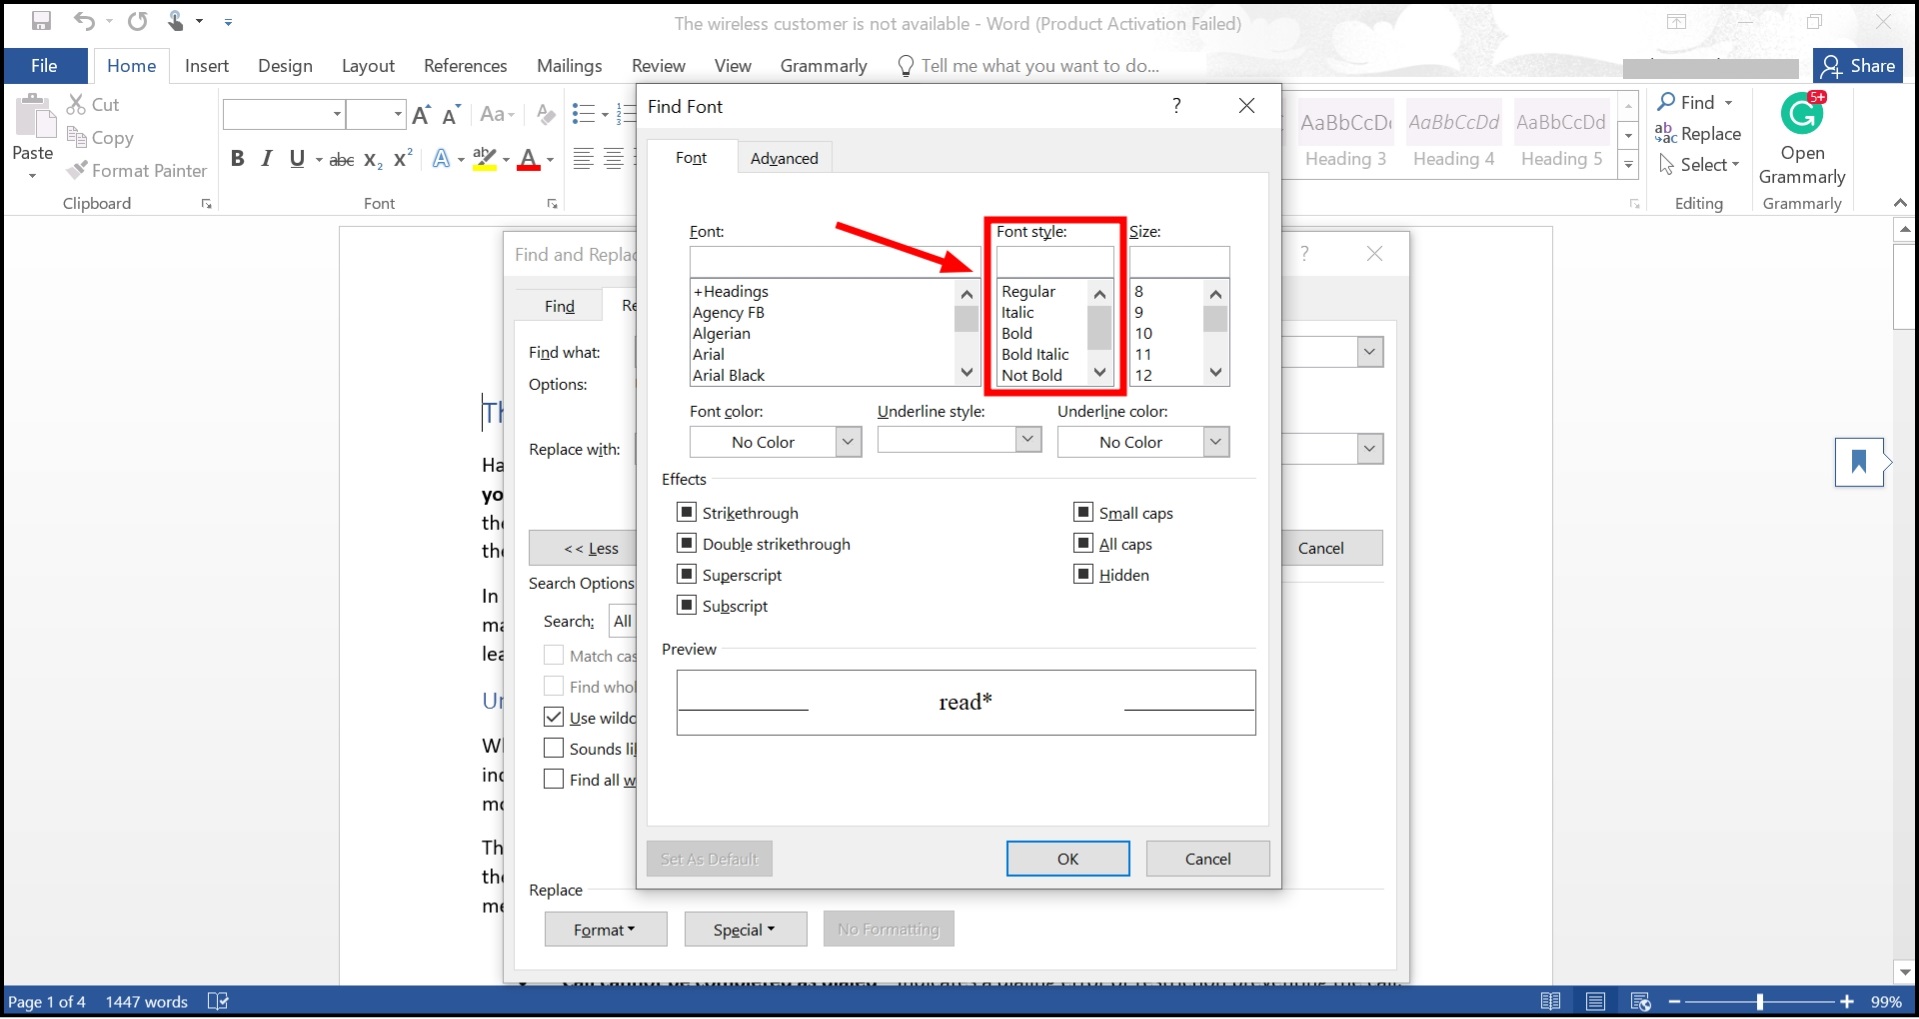
Select the options
↪ The Find and Replace special characters (paragraph marks and tabs) option
These options are helpful for cleaning up documents, such as replacing double paragraph marks with a single one or converting tabs into spaces for better text alignment.
In the “Find what” or “Replace with” fields, click on the “Special” button to insert special characters such as paragraph marks (^p), tabs (^t), or other non-printable symbols.

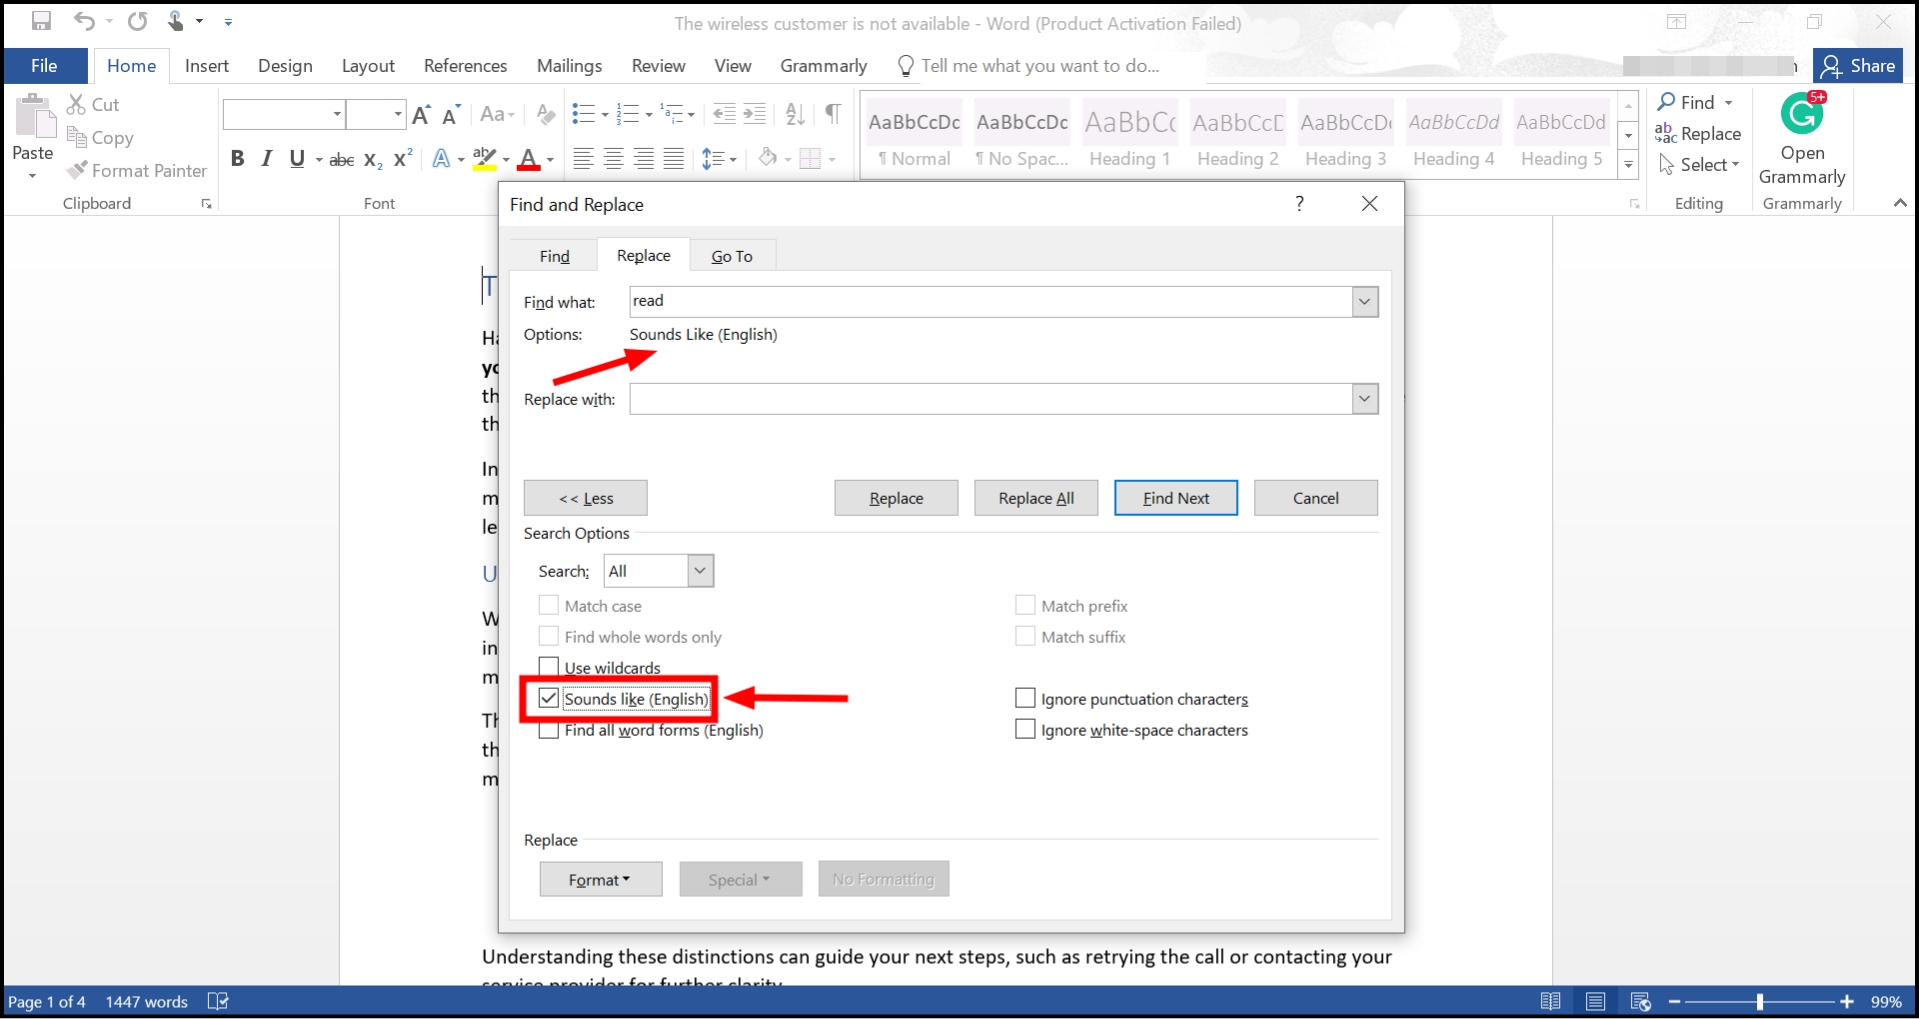
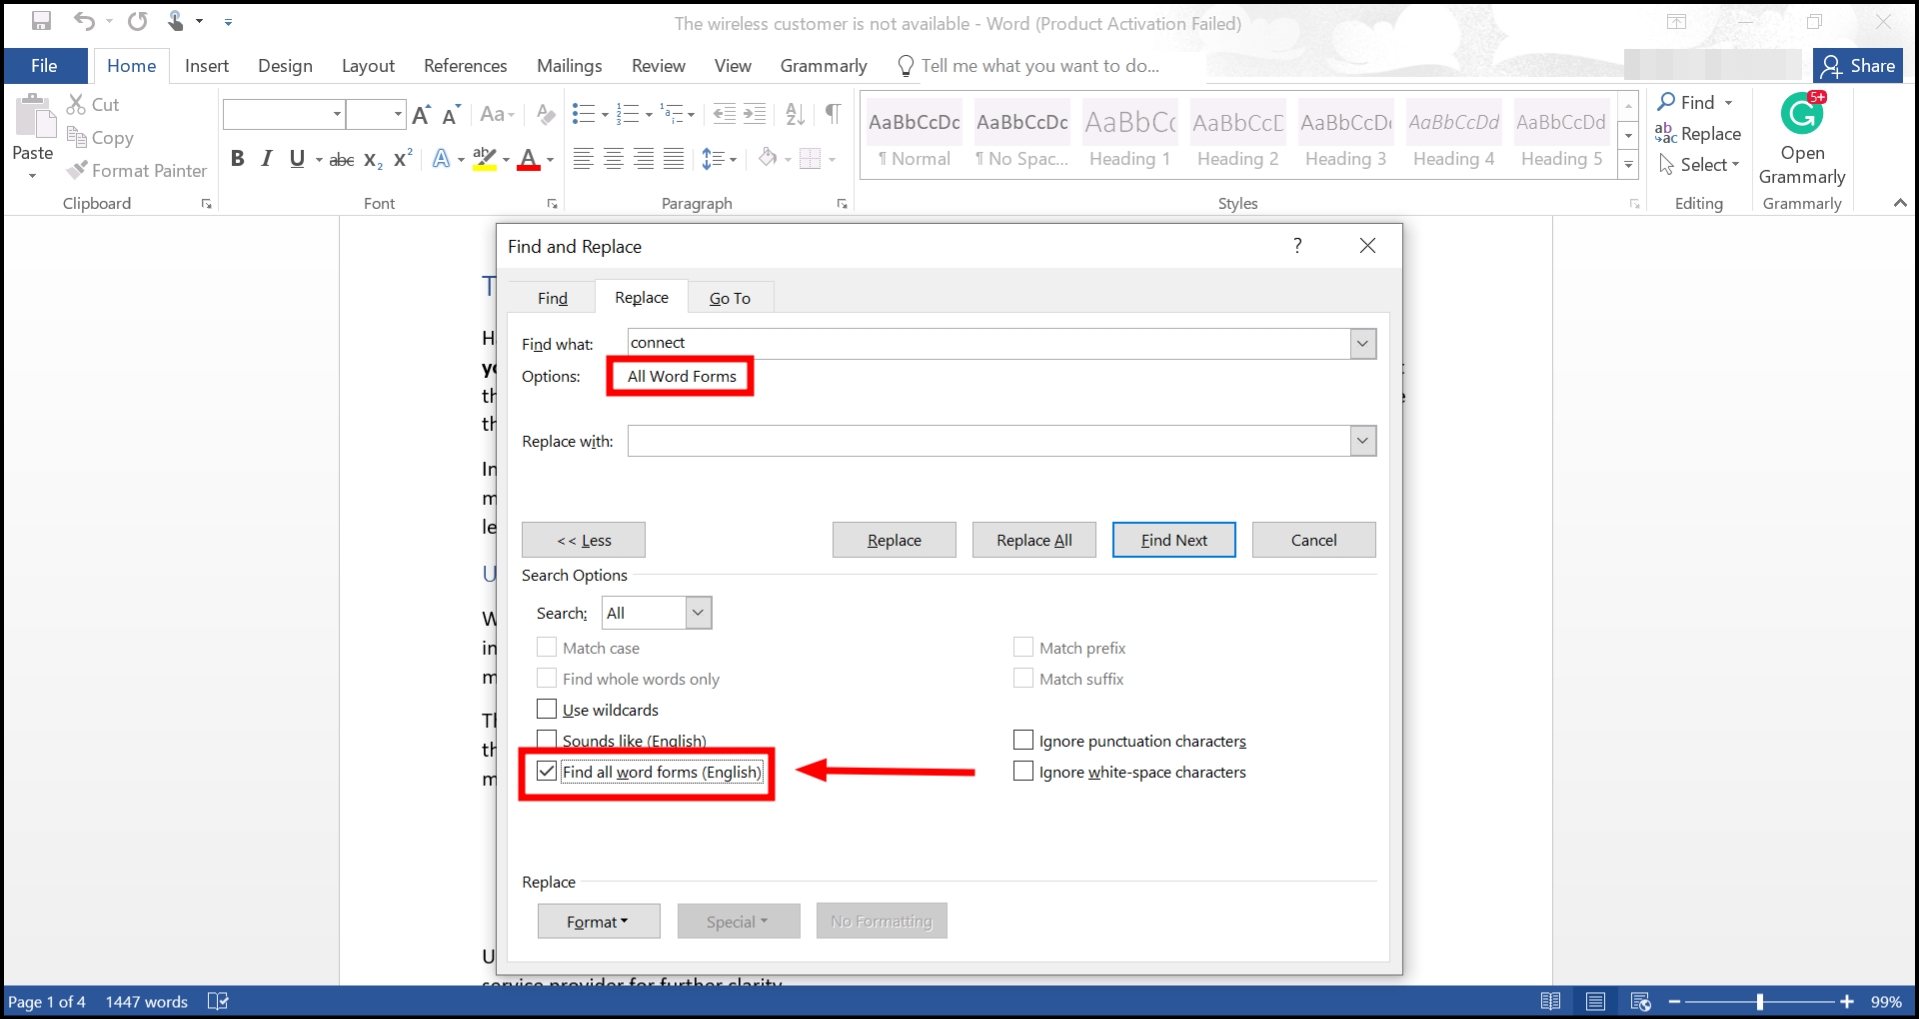
↪ The “Sounds Like” and “Find All Word Forms” options
Both options are accessed through the “More >>” settings in the Find and Replace dialog box under “Search Options.”
- The “Sounds Like” (phonetic search) option can be used to find words that sound similar to the search term, which helps catch common phonetic misspellings.
- “Find All Word Forms” is useful for linguistic editing, allowing you to find various morphological forms of a word. For example, searching for “connect” will also find “connected,” “connecting,” etc.
Troubleshooting Common Issues
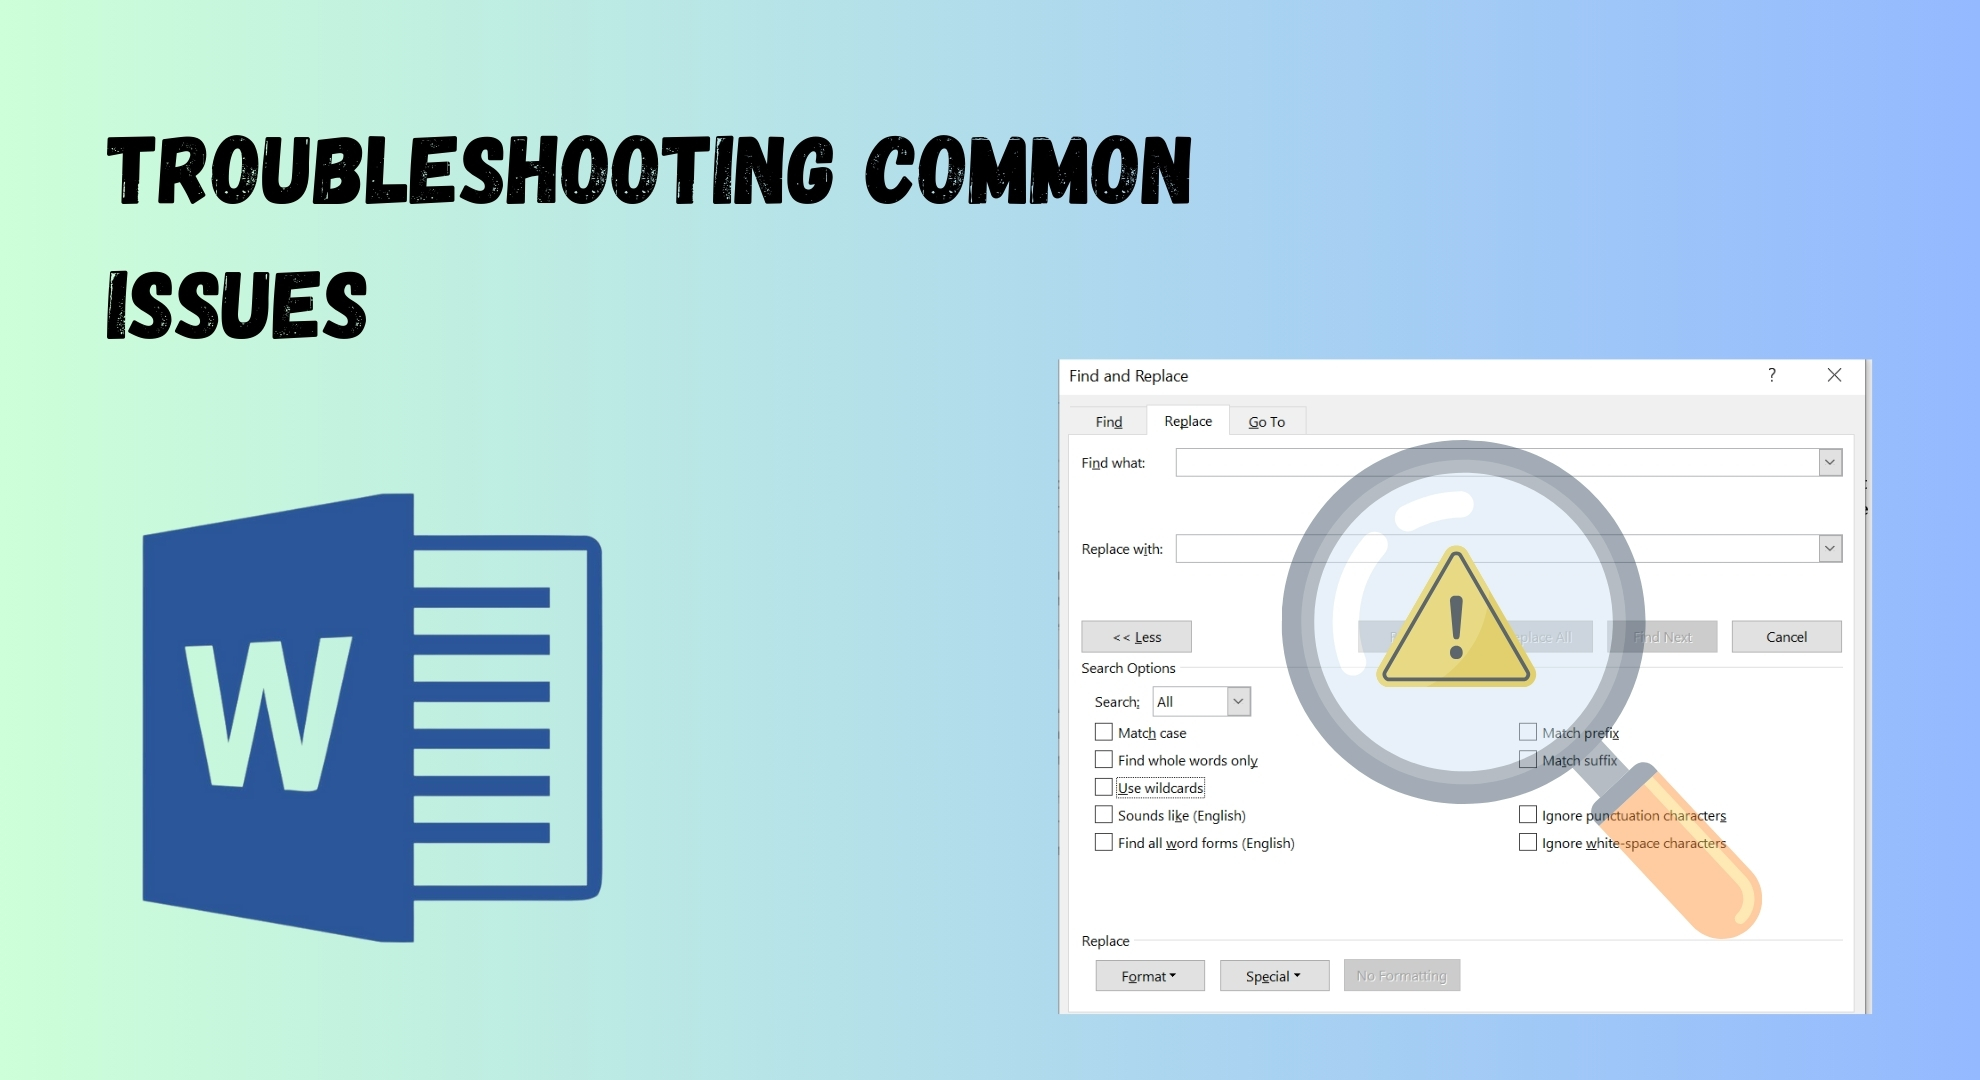
Troubleshooting common issues with Microsoft Word’s Find and Replace can smooth out the editing process. Here are some streamlined tips to handle typical problems:
- Find and Replace not working: Ensure that “Match case” and “Whole words only” are appropriately set and double-check for hidden formatting or extra spaces in your search terms.
- Incorrect replacements: Use the “Replace” option to approve each change individually, preventing text meaning or accuracy errors.
- Formatting issues: When searching for specific formatting, use the “Format” button to define what you’re looking for or changing precisely.
- Special characters not recognized: Use the “Special” button to insert correct codes for characters like paragraph marks (^p) or tabs (^t).
- Features unavailable: Some features may not be available in restricted modes like “Read Mode” or “Web Layout.” Switch to “Print Layout” to access all functionalities.
Microsoft Word’s Find and Replace tool is an essential feature for anyone looking to streamline their document editing process. Whether you’re working with simple text replacements or need to conduct complex searches using advanced features like wildcards and formatting options, this tool can significantly enhance your productivity.


