Fix: File Explorer Search Box Not Returning Any Results
A lot of affected users have reported many problems with the Windows over time, and one of the most common ones is the File Explorer search box not returning any results. This error appears when people are trying to use the search box option, not giving any results or not working properly. This error is only encountered on Windows 10 and Windows 11.
After a big number of people have reported this issue, we have decided to take a deeper look into it to see what could be the causes. Here are all the possible triggers:
- Corrupted system files – This is one of the most common reasons that was causing this problem to people. This could be happening due to minor problems that are going on with your computer. Fortunately for you, there is a scan that can be used with the help of the Command Prompt to search for corrupted files. If there are files that are being found, they will be repaired or restored.
- Random bugs – Another cause that might trigger this issue could be some random bugs that are happening to your File Explorer. This issue is occurring on both Windows 10 and Windows 11. This won’t let the search bar work properly, but luckily for you, Windows has an option called Search and Indexing Troubleshooter. This troubleshooter will determine exactly what is causing your issue, recommending instantly a solution that you can try.
- Cortana bug – As players report, this issue might be also caused by an inconvenience between Cortana and the Windows. Because the Cortana virtual assistant is open when you try to use the File Explorer search bar, this might actually cause the search bar to not return any results. To fix this, you can try to close the Cortana virtual assistant from the Task Manager.
- Outdated Windows – Your Windows may be out of date, which is the root of this problem. This could occur if you neglected to install the update after missing it. Your system may experience a variety of issues as a result, including the one with the File Explorer search bar. All you need to do to remedy this is visit Windows Update in Windows Settings, download the updates there, and install them.
- Problems with Indexing services – Another cause that you should consider is the Indexing services going through problems. These problems consist of the Indexing services having some corrupted files that are messing with the services, not letting them work as they should. The problem could also happen because the services are not enabled, meaning that they won’t work until turned on. All you have to do is to make sure that the Indexing services are enabled and also to a rebuild to make sure that is working properly.
Now that you know all the possible causes, here is a list of all the methods that people have used in order to fix this File Explorer issue:
1. Restart the File Explorer
The first thing that users recommend you to do is to restart the File Explorer. This error could be a simple big that is happening to the File Explorer, so it is worth trying to fix it by completely closing it.
All you have to do is to open the Task Manager and find the File Explorer task, then restart it. After that, your File Explorer search box should work properly.
In case you don’t know how to do this, here are the steps you need to follow:
- You need to start by opening the Task Manager. You can do this in many ways, but one of the easiest ones is to press the CTRL + Shift + ESC keys. The Task Manager will appear on your screen.
- Once you are inside the Task Manager, you should be able to see the Windows Explorer process right inside the Apps section.
- Click on it, then click on the Restart button on the bottom right side.
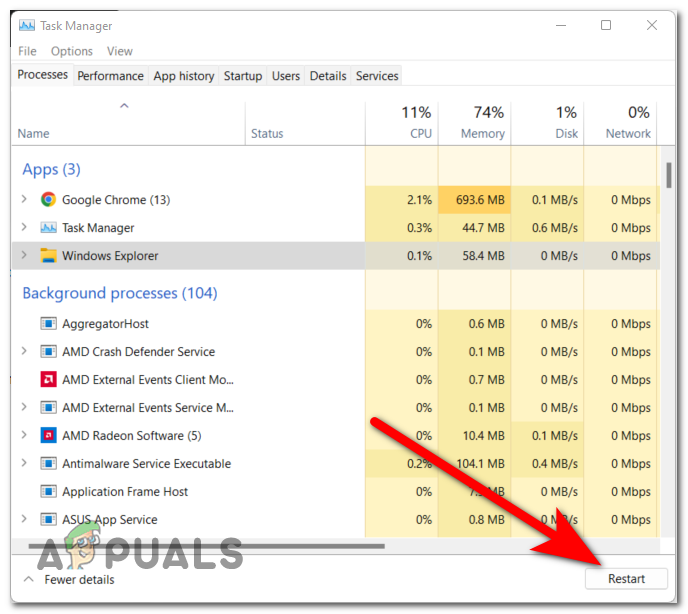
Restarting the File Explorer from the Task Manager - After a few seconds, the process should be complete.
- Now you need to open the File Explorer and test to see if the search box will now work.
In case you still encounter the File Explorer search box not returning any results issue, check the next method below.
2. Reboot your computer
The second thing that users suggest you try is to restart your PC. This is another easy thing to do that has helped many people make their File Explorer search option work.
This issue could be caused by the computer’s components which are not loaded properly, which is making your Windows act this way. So it is worth rebooting your computer to see if a fresh start will fix the problem.
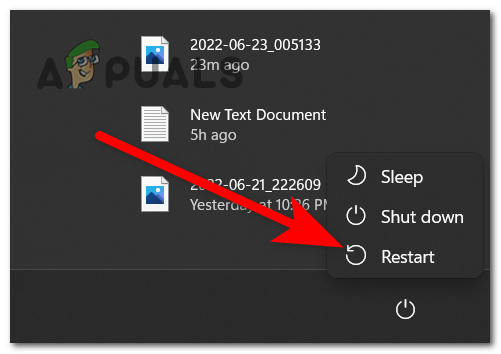
All you have to do is to reboot your personal computer. There are a few ways that you can do this, but the easiest one is to do it from the taskbar. Open the Start menu by clicking on the icon or pressing the Windows key, then click on the Power button and click on Restart. This will start the rebooting process.
After the computer boots back and you get to the desktop, open the File Explorer and test the search box to see if the method had any results.
If the File Explorer is still not working, go to the next method below.
3. Check your system for corrupted files
People also recommend you to check the corrupt system files to see if there are harmful files. Some files can become corrupted, leading to Windows problems like this one. This can happen anytime due to unknown reasons, but they are minor reasons that can be fixed very easily.
You can fix this using the Command Prompt with administrator privileges to scan your PC for corrupted files. This can be simply done by pasting some commands that will do the job. This will be achieved by running SFC (System File Checker & DISM (Deployment Image Servicing and Management) scans in quick succession. When the process has finished, you should restart your computer to complete this method.
Note: Before going straight to the steps of this method, you should make sure that you are connected to a stable internet connection.
In case you don’t know how to check your system for corrupted files, here are the steps that you need to follow:
- You need to start by opening the Command Prompt with administrator privileges. To do this, you have to open a Run dialog box and type ‘cmd‘ inside the search box, then press CTRL + Shift + Enter.
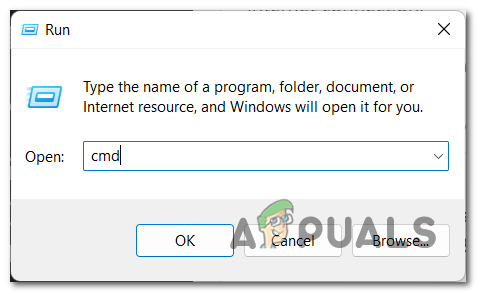
Opening the Command Prompt using a Run dialog box - After that, you will be prompted by the User Account Control (UAC) to confirm that you want to give the administrator privileges. To continue, you have to click on Yes.
- Now that the Command Prompt is on your screen, you have to copy and paste the following command, then press Enter to insert the command:
sfc /scannow

Starting the verify for corrupted files on your computer - This will start the scan. It will take some time depending on your computer components, and could take a few minutes in some cases. Wait until the scan is over.
- Once the SFC scan is complete, you have to insert the following command to complete the process:
DISM /Online /Cleanup-Image /RestoreHealth
- After you are done with that as well, type exit to close the Command Prompt or close it directly.
- Now you need to reboot your computer to make sure that if changes were made, they will be applied.
- Once the computer has restarted, test to see if the File Explorer search box is still not returning any results.
If this method didn’t fix your issue as well, go to the next possible fix below.
4. Use the Search and Indexing Troubleshooter
Another method that you should try is to use the Search and Indexing Troubleshooter to see if there are any problems that can be fixed. In case the troubleshoot fixes some problems indeed, this might actually make your File Explorer search box work properly again.
This troubleshooter includes a series of automated repair strategies aimed at resolving various scenarios that will corrupt & break the indexing & search functionality on Windows. This repair tool is present on both Windows 10 and Windows 11.
Note: The Search and Indexing Troubleshooter can be found inside the Control Panel. There you need to follow the instructions that appear on your screen.
Here are the steps you need to follow in order to use the Search and Indexing Troubleshooter:
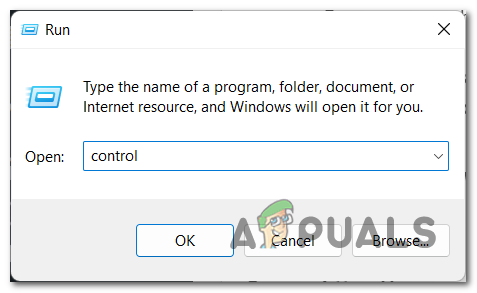
- Open a Run dialog box by pressing the Windows key + R and type inside the search box ‘control‘, then press Enter to open the Control Panel.
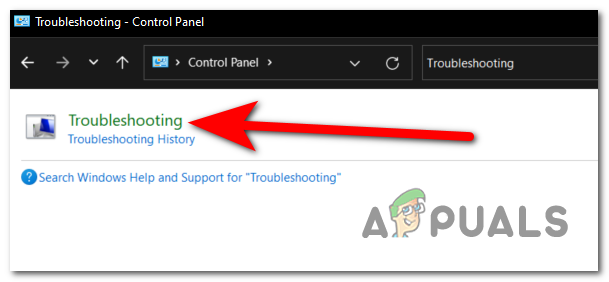
Using a Run dialog box to open the Control Panel - After the Control Panel appears on your screen, use the search bar and search for Troubleshooting. When you find it, click on the result.
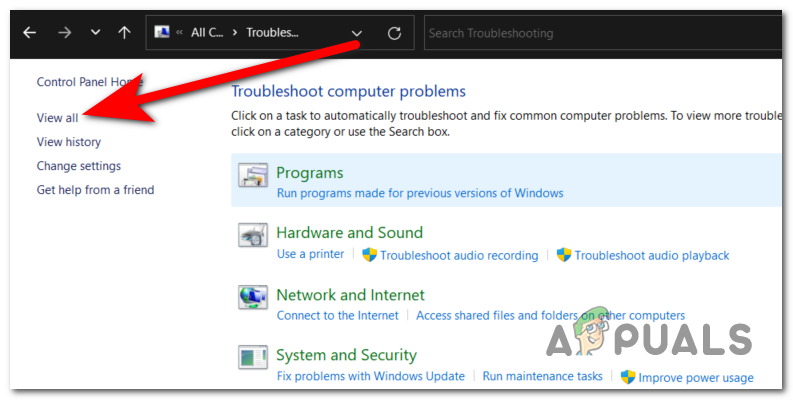
Clicking on the Troubleshooting section inside the Control Panel - Now that you are inside the Troubleshooting section, look for the View all button on the left side of the screen and click on it. This will take you to a list with all the troubleshooters that you could use to save your computer problems.
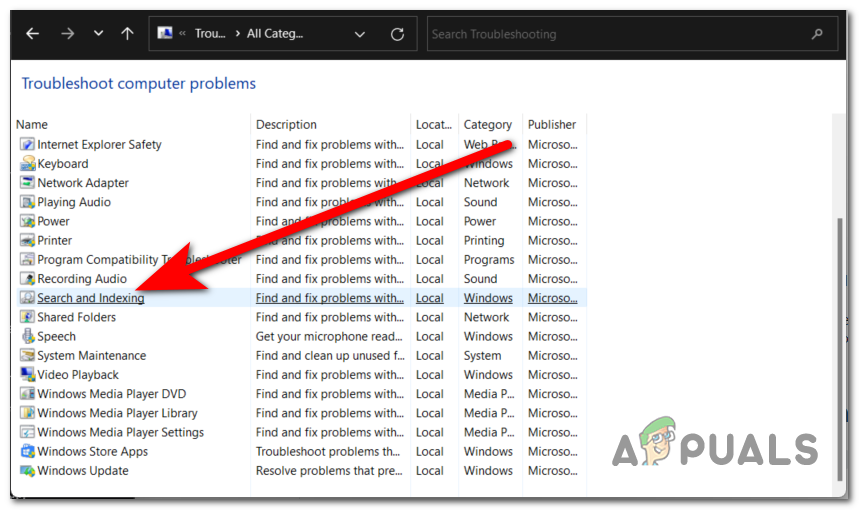
Going to the list of all the troubleshooters available on your PC - Once you’ve done that, you have to go through the list of troubleshooters until you find Search and Indexing. When you see the section, click on it.
Accessing the Search and Indexing section - After that, you need to click on Next and then choose from the next option which is the one that you are encountering. When you are done with that, click on Next again.
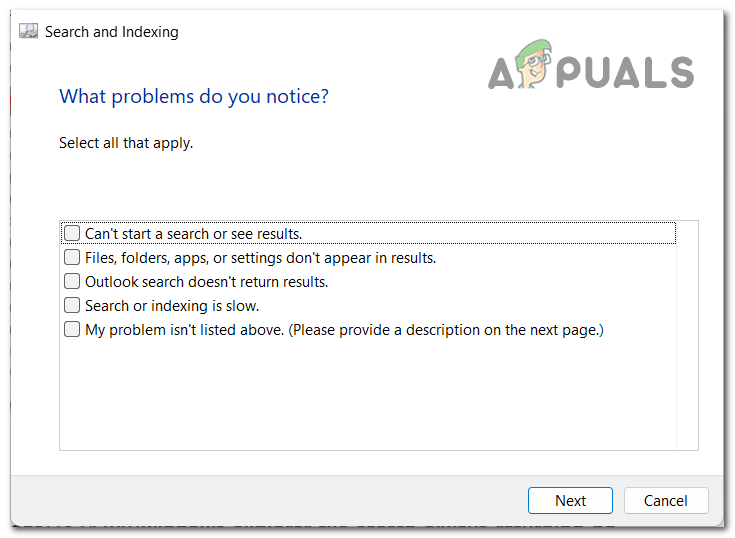
Choosing the problems that you are encountering to continue with the Troubleshoot - Now a suggestion will appear on your screen depending on what causes your File Explorer search box issue. Follow the instructions and let the troubleshoot fix the problem.
- Once you are done with that, you can close the Control Panel and test the File Explorer to see if the problem is fixed.
If the problem is still occurring in your File Explorer, go to the next method.
5. Reboot your Windows virtual assistant Cortana
Some of the users that have gone through the File Explorer search box not returning any results issue have managed to fix this issue by rebooting the virtual assistant of Windows named Cortana.
All you have to do is to restart the Windows virtual assistant named Cortana. You can do this from the Task Manager, so close the process of it and see if this had any effect on your issue.
In case you don’t know how to use this, here are the steps you need to follow:
- You need to start by opening the Task Manager. There are more ways that you can do to open it, but one of the easiest ways out of them is to press the CTRL + Shift + ESC keys.
- Once you are inside the Task Manager, look through the list of apps until you find Cortana.
- When you find it, right-click on Cortana and click on End task. This way you will close the app.
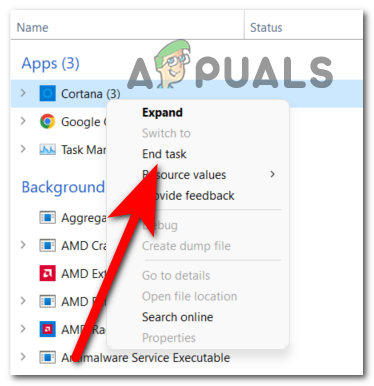
Closing the Cortana virtual assistant from the Task Manager - When you are done with that, close the Task Manager and test the File Explorer to see if the search box now works.
- If the problem has been fixed and you can use the search box properly, you can try to launch Cortana again to see if it will cause the error again.
In case this method didn’t fix this issue as well, go to the next one below.
6. Rebuild the Indexing services
The affected users also suggest that you should try to rebuild the Indexing services in order to fix the File Explorer search box not returning any results issue. This method will rebuild the Indexing service, meaning that the problems that are happening to it will be repaired if this scenario is applicable.
To do this, all you have to do is to go to the Control Panel and find the Indexing Options. From there, you will be able to rebuild and repair the Indexing services.
Here is a guide that will show you exactly what you have to do:
- You need to start by opening the Control Panel. To do this, you need to open a Run dialog box by pressing the Windows key + R and type inside the search bar ‘control‘, then press Enter. You can also use other ways to open the Control Panel, so do it how you want.

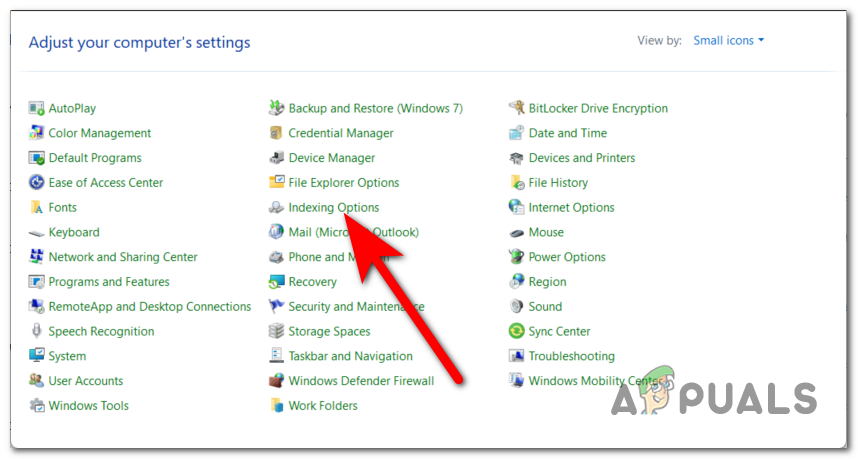
Opening the Control Panel using a Run dialog box - After you are inside the Control Panel, you need to click on the Category button located in the top right corner of your screen. You will extend the drop-down menu, then select Small icons to be able to see all the settings available to access.

Selecting the Small icons view type inside the Control Panel - Now that you are seeing every setting, you need to look for the Indexing Options one. When you find it, click on the option.
Accessing the Indexing Options - Once the Indexing Options have appeared on your screen, click on the Advanced button and then click on Rebuild.
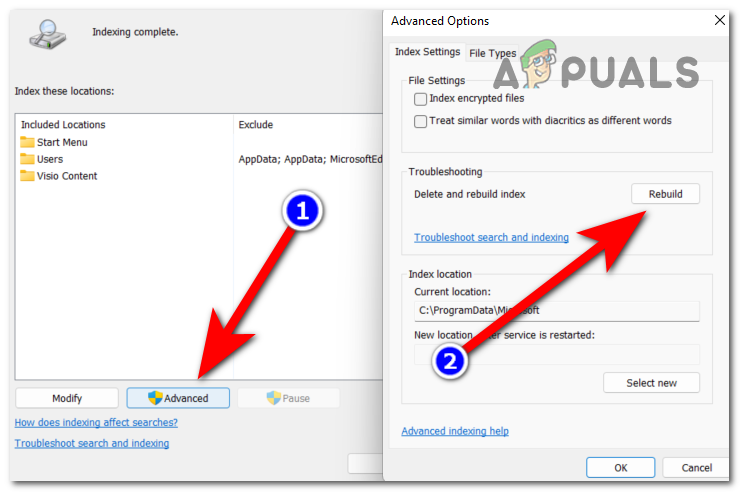
Starting the rebuilding process of the Indexing services - You will have to confirm that you want to rebuild the Indexing services. Click on OK to continue. This process might take a while depending on your computer.
- Wait for the process until it is complete.
- Once the rebuild is done, go and test the File Explorer to see if the search bar is still not returning any results.
In case the same issue still appears on your screen, go to the next method below.
7. Restart the Windows Search Service
According to the people who went through this problem, another thing that is worth doing is to check if the Windows Search Service is enabled and running correctly. And if it is, you should restart it so make sure that is working as best as it can.
Note: The Windows Search Service enables users to quickly search for files and items by file name, properties, and full-text contents, so it is very important to make sure that it is running properly.
You can restart this service by going into the Services menu. There you will need to check if the Windows Search Service is running as it should. After that, you need to restart it to ensure if this is the cause or not.
In case you don’t know how to do this, here are the steps you need to follow:
- You should start by opening the Services menu. To do this, press the Windows key + R to open a Run dialog box and type ‘services.msc‘ inside the search bar, then press Enter to open the Services.

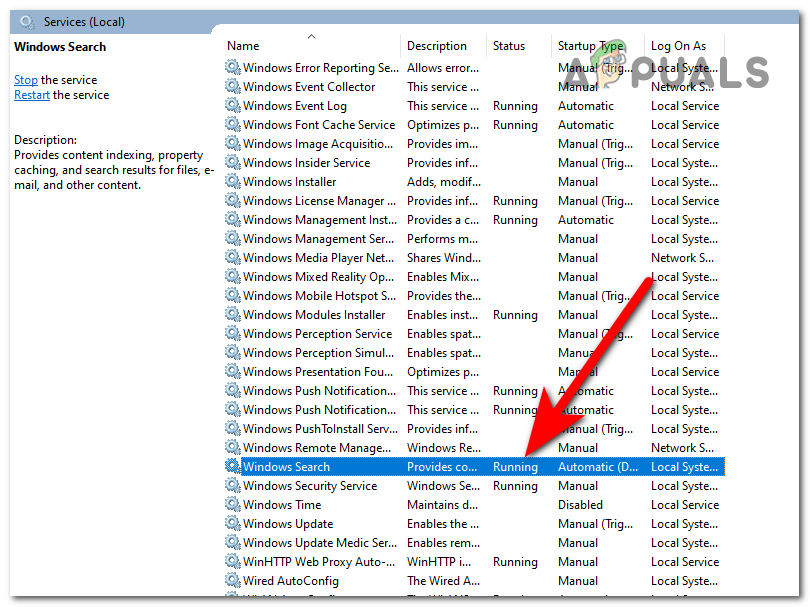
Using a Run dialog box to open the Services - You must navigate through the Services list after they display on your screen. Look until you see Windows Search Service. Make sure the status reads “Running” right after the name of the service.
Checking if the Windows Search service is running properly - In case the Windows Search Service indicated that is disabled, double-click on it and set the Startup type to Automatic. After that, click on Start to turn on the service, then click OK.
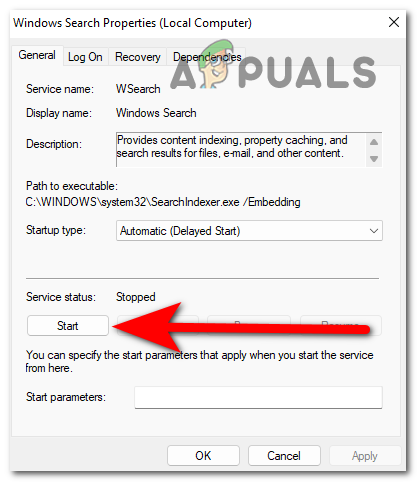
Turning on the Windows Search service - After making sure the Windows Search service is up and running correctly, you must restart it to ensure appropriate operation. To do this, you need to right-click on the service and click on Restart.

Restarting the Windows Search service to ensure that is working good - Once the service has been restarted, you need to test the File Explorer to determine if you can now utilize the search box.
If the File Explorer search box is still not returning any results, go check the next possible method.
8. Enable the Always search file names and contents option
You should also try to enable the Always search file names and contents option. Installing this option will guarantee that while looking for non-indexed items, the File Explorer search function will look for the correct files and give the best results.
All you have to do is to open the File Explorer and go to the Options of it. There you will be able to activate this option by checking the box next to it.
Here is a step-by-step guide that will show you how to enable this option:
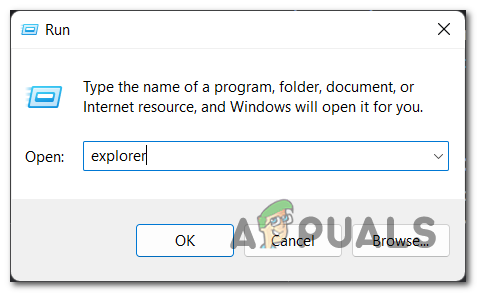
- The first thing you need to do is to open the File Explorer. There are many ways to do it, but one that works for both Windows 10 and Windows 11 is to open a Run dialog box by pressing the Windows key + R. Then, you need to type ‘explorer‘ inside the search box and press Enter.
Using a Run dialog box to open the File Explorer - Once you are inside the File Explorer, you have to click on the Options button located on the upper side of the windows.

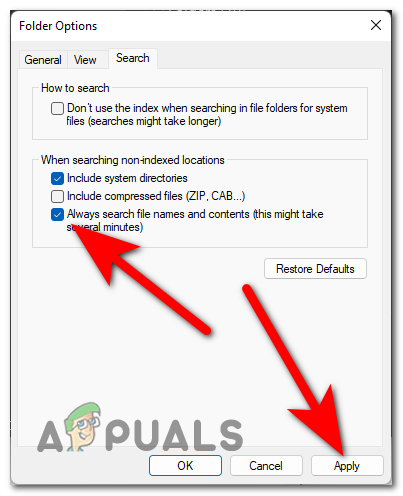
Accessing the Options of the File Explorer - After you’ve done that, you have to select the Search section. After that, right after where it says Always search file names and contents option is a box that you have to click on to enable the option. When the box is checked, click on Apply to save the changes.
Enabling the Always search file names and contents option - After that, you should test the search box of the File Explorer to see if there were any differences.
In case neither of the methods before has fixed your File Explorer search box not returning any results problem, check below the last method available.
9. Install the latest Windows updates
The last thing you need to do is to make sure that your Windows is having the latest updates installed. The File Explorer search box not working issue is only one of many issues that can be brought on by Windows being out of date.
All you need to do is access Windows Update, check to see if any updates are available, then install them if they are. The Windows Update is located in your computer’s settings.
In case you don’t know how to check if the latest Windows updates are installed, here are the steps:
- Firstly you have to open the Windows Settings. One of the fastest ways that you could do this is to open a Run dialog box by pressing the Windows key + R and typing ‘ms-settings:’, then pressing Enter.
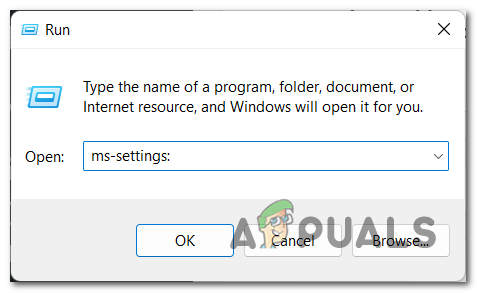
Using a Run dialog box to open the Windows Settings - When you are in the Windows Settings, use the menu on the left to scroll down until you see Windows Update. Click on it when you locate it.

Accessing the Windows Update section - Once you are inside the Windows Update, you should be able to see the Check for updates. Wait a few moments until the scan is ready. If there are updates founds that are waiting on you to install, click on Install to start the process.

Checking for available updates for your Windows - When the updates are installed, restart your computer to make sure that the updates apply properly.
- Once your PC is back on, test to see if your File Explorer search box is still not returning any results even after doing this.


