SOLVED: File Explorer Not Loading or Loading Slowly After Windows 10 Upgrade
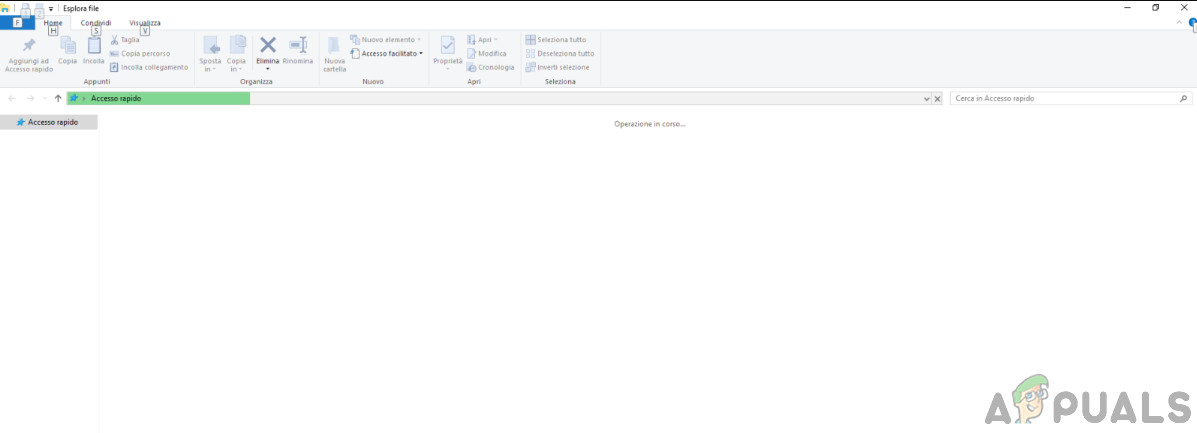
When File Explorer fails to load or loads slowly after a Windows 10 upgrade, it usually displays a green loading bar at the top, leaving users waiting and unable to access their files. This problem often indicates that the system is struggling to load important files or folders. The main reasons are usually corrupted system files or conflicts from older Windows installations.
Outdated drivers or incompatible apps can also contribute.
In this article, we will discuss several ways to solve this issue.
1. Run SFC/DISM Scans
Running SFC and DISM scans helps fix problems in Windows that might slow down File Explorer. The SFC (System File Checker) checks and replaces missing or damaged Windows files, while DISM (Deployment Imaging Service and Management) fixes deeper issues that SFC might not catch. Using both scans can help make File Explorer work better by fixing any outdated or broken files.
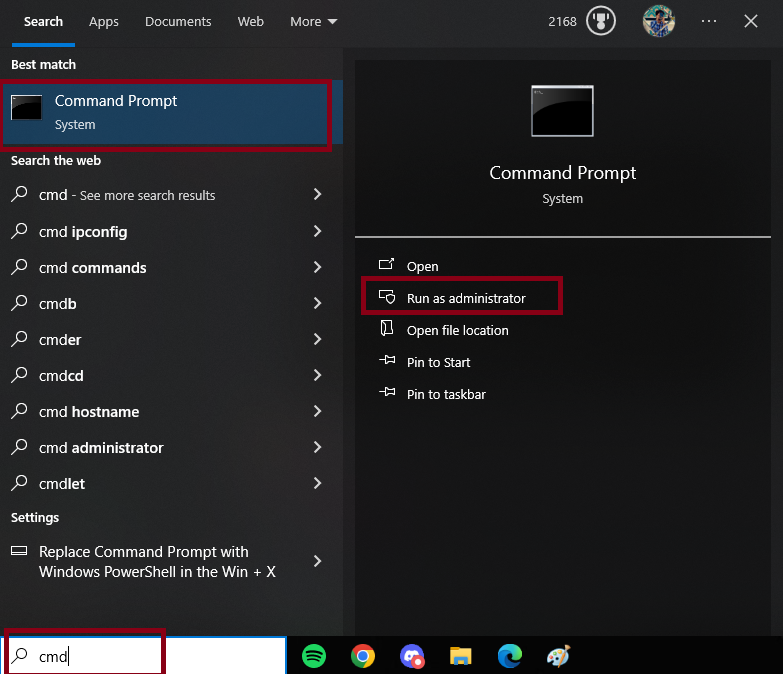
- Open the Search menu, type Command Prompt, right-click it, and select Run as Administrator.
- In the Command Prompt, enter the command:
sfc /scannow
Dism /Online /Cleanup-Image /RestoreHealth
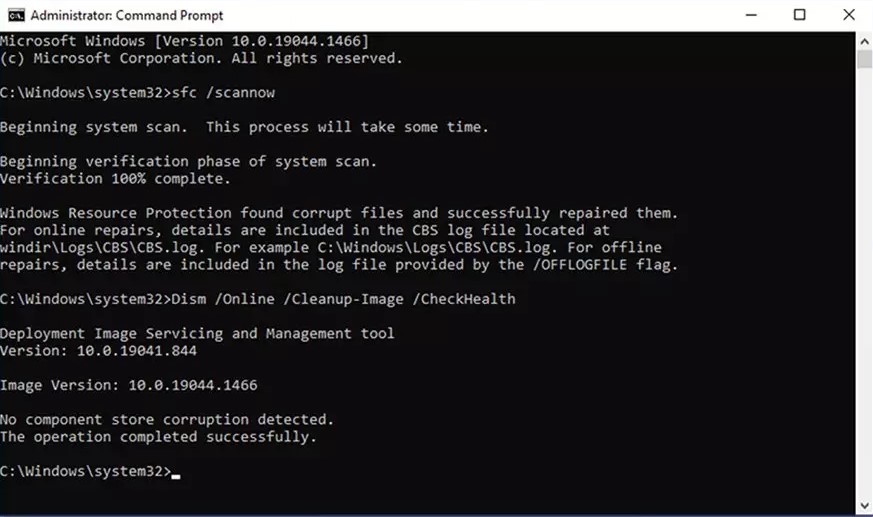
- Restart your PC after the scan is complete.
2. Disable Windows Search
Turning off Windows Search can improve File Explorer’s performance by stopping the indexing service, which can consume system resources and slow down File Explorer, especially on older computers. Disabling it can help determine if search issues are causing the slowdown.
- Press Windows Logo key + R to open the Run dialog box.
- Type msconfig and press Enter.
- Go to the Services tab in the System Configuration window.
- Scroll down and locate the Windows Search service.
- Uncheck the checkbox next to Windows Search to disable it.
- Click Apply and then OK.
- Close the System Configuration window.
- When prompted, choose Restart to apply the changes immediately.
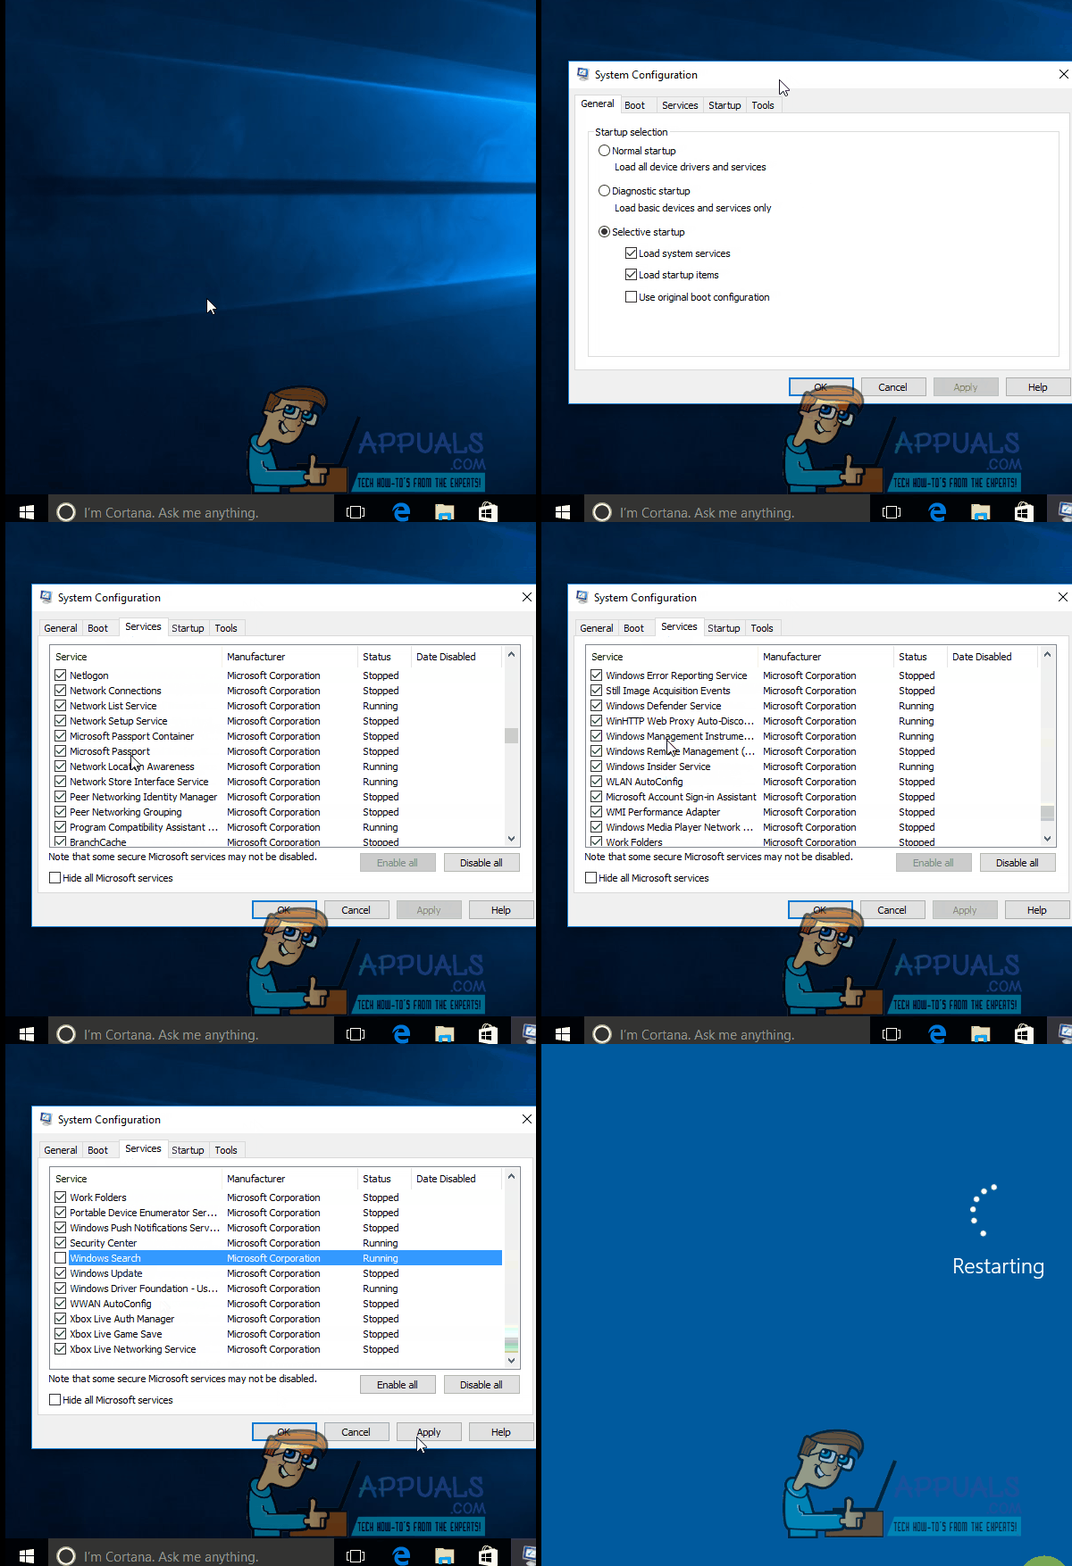
- After restarting, the Windows Search service will be disabled, and File Explorer should perform better.
3. Disable OneDrive
File Explorer can slow down due to OneDrive’s background syncing, especially with many files. Turning off OneDrive can remove these delays, helping File Explorer run faster without the extra load from syncing files.

Here, you can Disable OneDrive and then try loading the File Explorer after power cycling your computer.
Note: You will be required to enter your credentials again after you log back in, so make sure you have them at hand.
4. Change Optimization
Adjusting folder settings can make File Explorer faster by optimizing it for specific file types, reducing unnecessary processing and fixing delays.
- Press Windows + E to open File Explorer. If it’s slow, let it load fully.
- Find and open the problematic folder.
- Right-click on empty space and select Customize this folder.
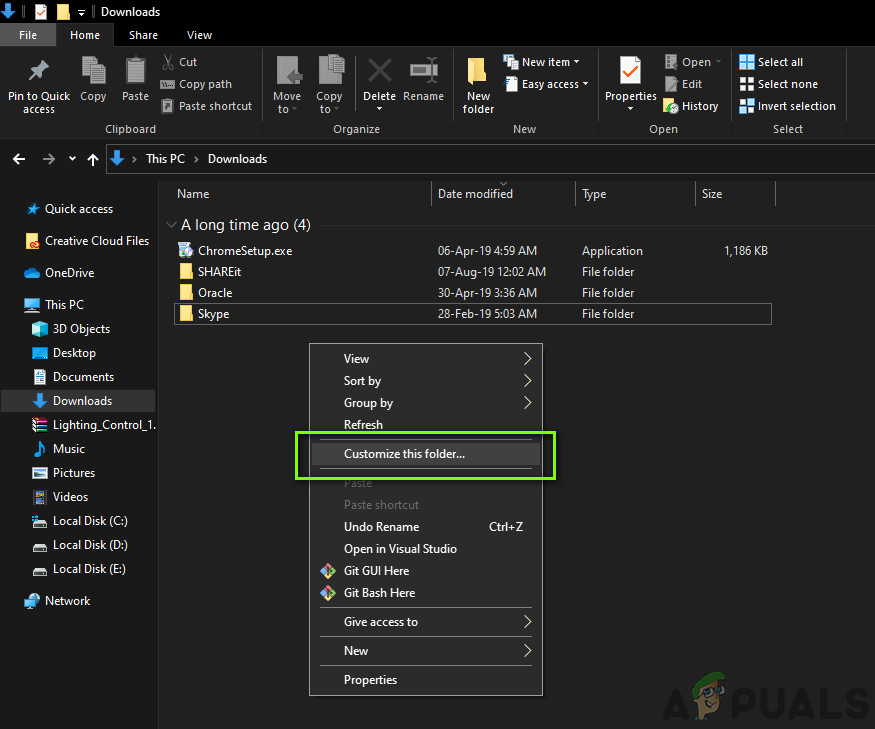
Customize this folder – Folder options - Under Optimize this folder, select General. Optionally, apply changes to all subfolders.
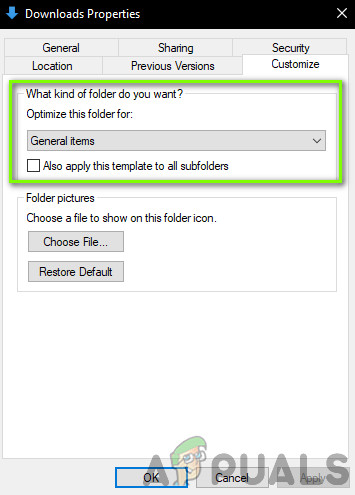
Changing Optimize settings - Save changes and exit. Restart your computer to see if the problem is resolved.
5. Replace Date Created Column
Improving File Explorer’s speed can often be done by changing the “Date Created” column. This column makes Windows find and show the exact creation date for each file, which can slow things down in folders with lots of items. Removing or replacing it can reduce the processing load, resulting in faster and smoother navigation.
- Press Windows + E to open File Explorer.
- Right-click a column heading and choose More.
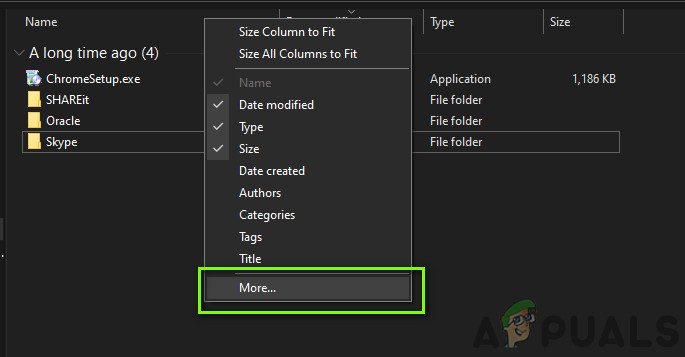
Additional options – File Explorer - Uncheck Date and check Date Modified. Save changes and exit.
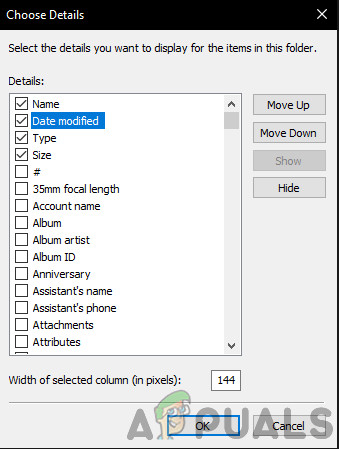
Disabling Date Column – File Explorer - Restart your computer to see if the issue is fixed.
6. Run Search and Index Troubleshooter
If File Explorer is slow, running the Search and Index Troubleshooter can help find and fix problems with the Windows search service. This service is often linked to slow loading times. The troubleshooter checks for errors or interruptions that might be causing the delay and helps restore normal performance.
- Right-click the Start button and select Settings.
- Go to Update & Security, then click on Troubleshoot.
- Scroll down and select Search and Indexing, then run the troubleshooter.
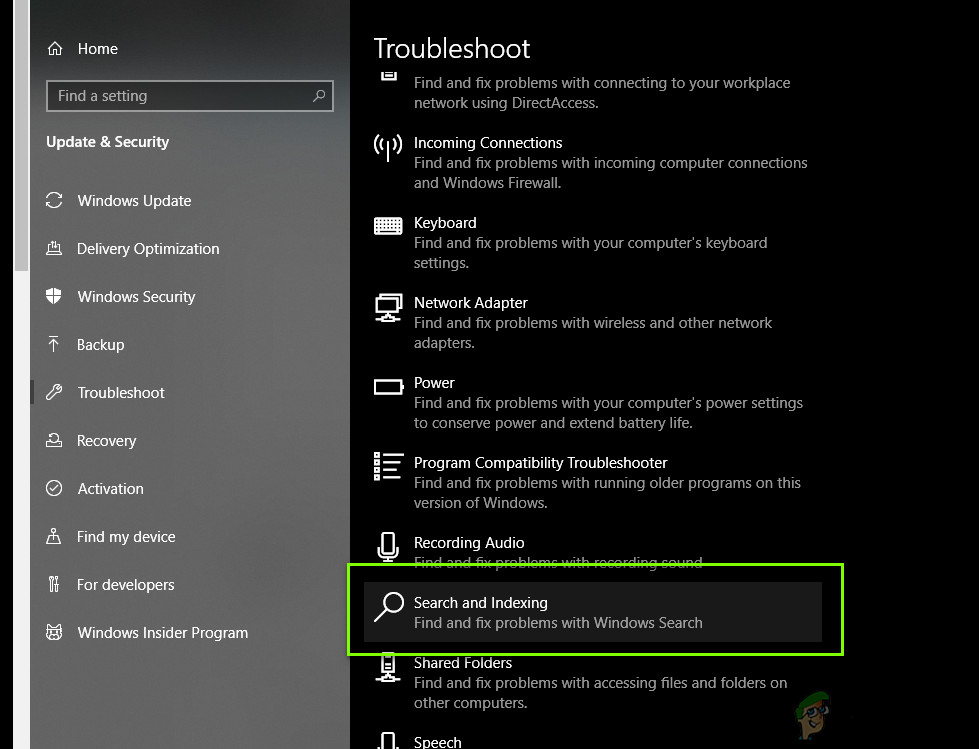
Search and Indexing Troubleshooter - Follow the on-screen instructions to complete the process.