Fix: “Failed to Update the System Registry” Error in Windows 10/11
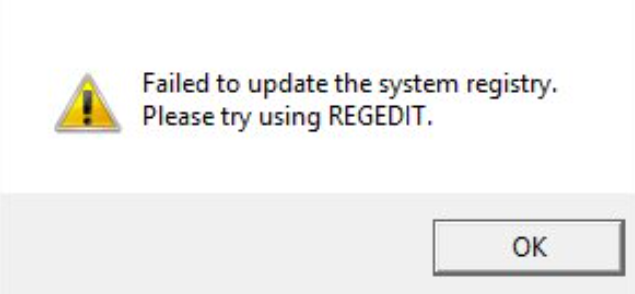
Error “Failed to update the system registry. Please try using REGEDIT” indicates that the program you are trying to run has attempted to modify the Windows Registry but does not have sufficient permissions to do so. The Windows Registry is a critical database that stores system settings, configurations, and application information. Many programs need to write to the registry to store their settings or configuration data.
This error often appears when running older programs that were originally designed for previous versions of Windows, such as Windows XP, Vista, or 7. These programs may not be fully compatible with modern operating systems like Windows 10 or Windows 11, leading to errors like this.
The most common causes behind this error usually include:
- Lack of administrative permissions
- Incompatibility with current Windows versions
- Program blocked by antivirus software (which may prevent it from making necessary registry changes)
Now that you understand the causes, let’s move on to the solutions for resolving this registry update error on Windows 10 and 11.
1. Run the Program as Administrator
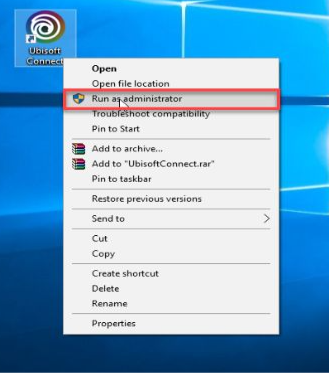
Running the program with administrator permissions ensures it has the necessary rights to make changes to the Windows Registry. This step often resolves the error by allowing the program to perform its intended actions. It also helps bypass User Account Control (UAC) restrictions that may otherwise block the process.
Right-click the program that is causing the error and select “Run as administrator“.
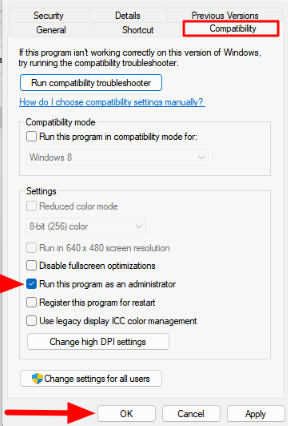
To make this setting permanent:
Right-click the program, select Properties, go to the Compatibility tab, and enable “Run this program as an administrator“.
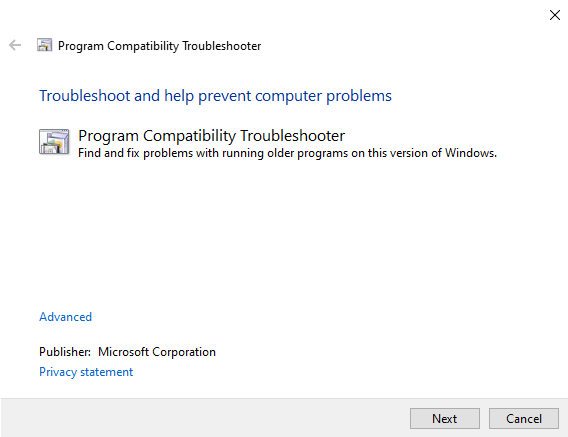
2. Use the Program Compatibility Troubleshooter
The Program Compatibility Troubleshooter is a built-in Windows tool designed to help older programs run properly on newer operating systems. It works by enabling compatibility mode, adjusting display/file settings, and redirecting registry calls for legacy software.
On Windows 10:
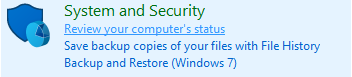
- Open the Control Panel (type “Control Panel” in the search bar and press Enter) and click Review your computer’s status under System and Security.
- Click on Windows Program Compatibility Troubleshooter at the bottom left.
On Windows 11:
- Go to Settings > System > Troubleshoot > Other troubleshooters.
- Find Program Compatibility Troubleshooter and click Run.
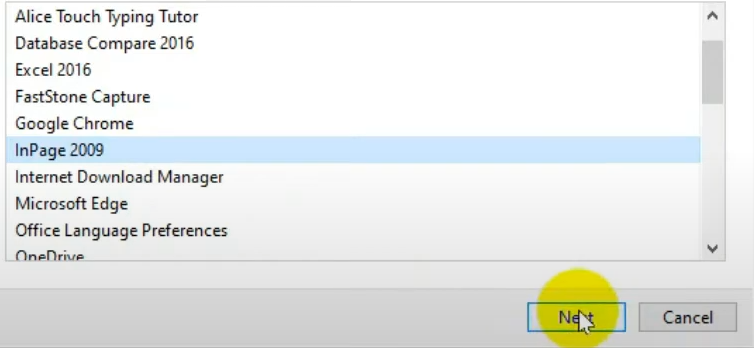
Next:
- Click Next to begin scanning for programs that require troubleshooting.
- Select the program that is causing the error and click Next.
- Choose “Try recommended settings“.

- Click “Test the program…” to launch it with the new settings.
- Close the program and click Next.
- Click “Yes, save these settings for this program” to apply the changes.

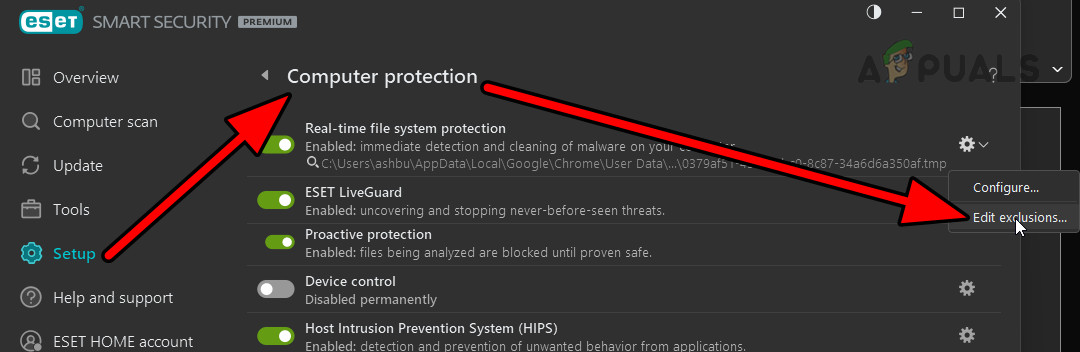
3. Whitelist the Program in Antivirus
If your antivirus software is blocking the program, it may prevent it from modifying the registry. Adding the program to the antivirus exclusion or whitelist list can help.
- Open your antivirus settings, navigate to the Exclusions or Allowed Apps section, and add the affected program.
- Restart your computer and try running the application again.
4. Reinstall the Program with Administrator Rights
If the issue persists, reinstalling the program may help. Right-click the installer and select Run as administrator to ensure it has the required permissions during installation.


