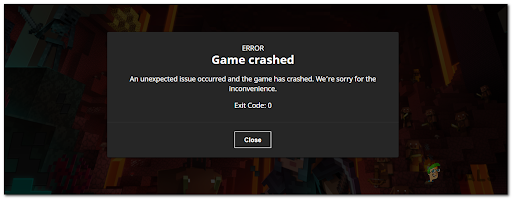
Fix: ‘Exit Code 0’ Minecraft Game Crashed Error on Windows?
Some Minecraft players are encountering a weird ‘Exit Code 0’ error whenever they attempt to launch the game This error is typically encountered on the PC version of the game. This is confirmed to occur with both modded and unmodded versions of Minecraft.
After doing an in-depth investigation of this problem, it looks like there are a lot of different scenarios that might be ultimately responsible for your PC’s inability to launch Minecraft and get past the Exit Code: 0 error.
Here’s a list of occurrences that might be ultimately responsible for this error screen:
- Conflicting programs – There might be programs that are conflicting with Minecraft, causing this error as your PC struggles to access every dependency of this game. To solve this, you need to find out if you have installed any software that doesn’t work alongside Minecraft and uninstall it if necessary. The best course of action to do this is to perform a clean boot.
- Conflicting mods – This error was caused for some people because of some incompatible mods that they had installed. If you are currently using any mods that do not play well with one another, the only solution is to delete the conflict modes and only keep those that you are most fond of.
- Outdated GPU drivers – Outdated drivers are another common culprit that causes this error to occur, especially if you’re using a dedicated GPU. You can fix that by updating your GPU from Device Manager or you can update the drivers by using the proprietary software (GeForce Experience or Adrenalin)
- Corrupted asset files – In some people’s cases, this error was caused by some corrupted or damaged files of the game. This might be produced by manual user intervention or appear after an antivirus scan that ended up quarantining some files. To fix that, you need to uninstall the game completely along with any modes, then clean install it.
- Corrupted FML file – On the most recent Minecraft versions, there is one file that’s very prone to becoming corrupted. It’s called FML and it’s very prone to break, especially if you install mods and you meddle around with config files. Fortunately, if it becomes corrupted, you can simply delete it without breaking the game – the launcher will generate a fresh FML file the next time you launch Minecraft.
- Other Conflicting config files – Another possibility that might cause this issue to occur is a collection of config files that aren’t matching your current Minecraft installation. You might expect to see this occurring when you’re installing a mod that was taken directly from another player’s game installation. In this case, you can fix the issue by accessing the configs folder and deleting it altogether in order to allow the game to generate new equivalents.
- Mod is incompatible with your OS – Another reason why you can expect to get this error while launching the game is a mod incompatibility. If you are attempting to run a modified executable that was initially created before the launch of Windows 11, the only way to get around this issue is to run the executable in compatibility mode with an older OS version.
- Conflict with Nvidia Experience or Adrenaline – The FPS counting gameplay overlay features on both Nvidia Experience and Adrenaline is known to conflict with certain Minecraft mods. To make sure they don’t disrupt the game and cause this error, the best course of action would be to close your GPU app before launching the game.
- Missing Java JRE environment – Most people believe that Minecraft requires the Java JDK environment install in order to run. While this is true, certain mods will also require you to install the latest JRE environment version. If you’re attempting to launch a modified Minecraft version, this could be the reason why you’re seeing the error code.
Now that you are familiar with every potential cause of this issue, let’s go over some of the most common culprits that might be responsible for the ‘Exit Code 0’ error on Minecraft.
Close any conflicting programs
We already know with certainty that this Exit Code 0 error could be triggered by some conflicting programs that don’t work alongside Minecraft – this list is quite big and growing as new mods make their way to Minecraft.
So before jumping straight to the next methods, consider closing any conflicting program by checking your currently installed programs against a curated list of software that is known to conflict with Minecraft.
Don’t worry, you aren’t expected to know which are the conflicting programs. Luckily for you, the Minecraft community has come up with a list of all the programs that are incompatible with Minecraft.
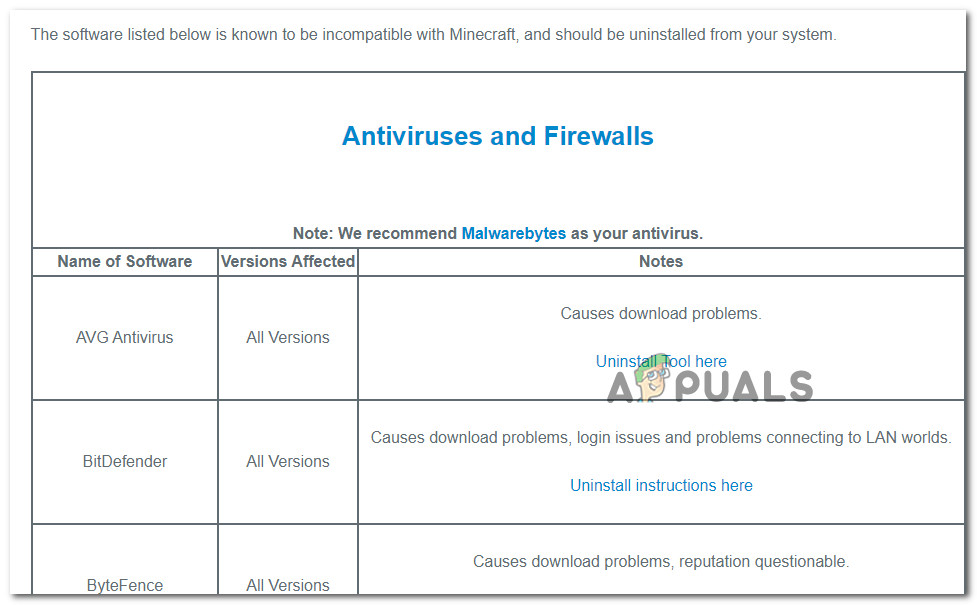
Search through the list for common software and if you find any incompatibilities, consider deleting them or at least disabling them (before launching Minecraft) to make the game work.
If you don’t have any conflicting programs installed and the Exit Code 0 error still appears, check below the following method.
Remove conflicting Minecraft Mods
Once you ruled out a 3rd party incompatibility as a possible reason for seeing the Exit Code 0 error when launching Minecraft, the next thing you should focus on is checking if any of the mods you’re currently using for Minecraft are actually incompatible with your game version.
Actually, incompatible mods are the most common cause for this error code. If this scenario is applicable to you, the Exit Code 0 error could be prevented by deleting the incompatible mods.
Fortunately, you don’t need to guess which of the mods are actually responsible for the Exit Code 0 – you can check the Minecraft logs to figure out which mod is tied to the error you’re getting so you know exactly which model you need to uninstall.
Follow the instructions below to figure out which mod is causing the Exit Code 0 and remove it from your Minecraft installation:
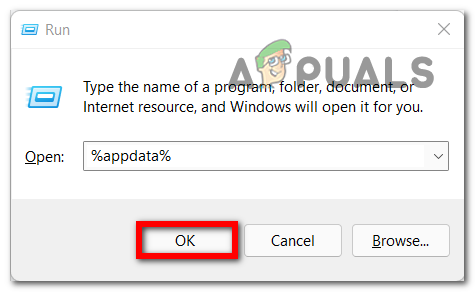
- Open a Run dialog box by pressing Windows key + R. Next, write ‘%appdata%’ inside the text box and press Enter to open up the folder.
Opening up the AppData folder Note: Keep in mind that the APPDATA folder is hidden by default, so you won’t be able to access it by manually browsing to its location.
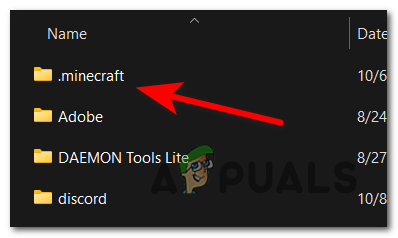
- Once you’re inside the AppData, access the .minecraft folder.
Accessing the Minecraft folder - Once you’re inside the Minecraft folder, double-click on the logs folder.
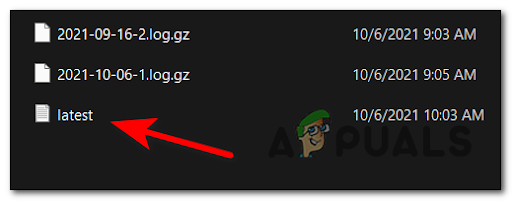
Accessing the logs folder of Minecraft - Inside the logs folder, scroll down until you see a notepad called ‘latest’, then access it by double-clicking.
Accessing the latest text log on Minecraft Note: To make matters easier, you should open this file with Notepad++, since it will make it easier to find your culprit.
- Once you’ve opened the latest file with Notepad++, press Ctrl + F to open up the finding function, then type ‘exit code 0′ and hit the Find Next button.
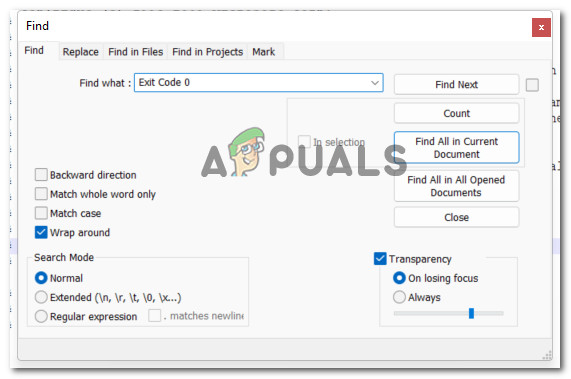
Finding out which mode is causing the error - Next, once the results come in, investigate which mod is tied to this crash, the go-ahead, and uninstall the conflicting mode using your launcher or directly from your mod folder.
- Reboot your PC and see if you are not able to launch Minecraft normally.
In case the same kind of issue is still occurring, move down to the next potential fix below.
Update GPU drivers
On certain PC configurations, particularly with low-tier GPUs, the problem that ended up causing the exit code 0 error on Minecraft was actually a series of outdated graphics and physics drivers.
In this case, the issue should be fixed by updating your GPU to the latest version. You can do this from Device Manager or you can use the proprietary updating applications supplied by Nvidia or AMD.
Here’s a guide on how to update all GPU drivers:
- Open up a Run dialog box by pressing Windows key + R, then inside the dialog box type ’devmgmt.msc’ and press Enter.

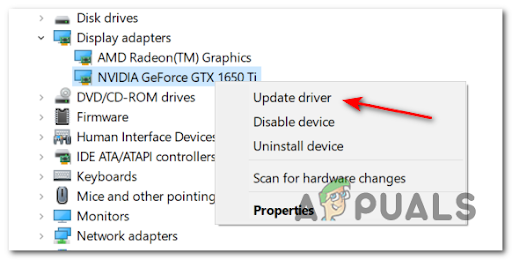
Opening up Device Manager - Inside the Device Manager, scroll down through the list of installed devices until you find Display Adapters, then expand the drop-down menu associated with it.
- Next, right-click on the dedicated GPU that you’re using, and from the context menu that has appeared click on Update driver.
Updating the driver - After that, click on Search Automatically for updated driver software. Wait until the initial scan is complete, then install the latest available software by following the given instructions.

Search automatically for updated GPU drivers - After the latest driver is installed, reboot your computer and launch Minecraft again to see if the Exit Code 0 error still occurs.
If the error still appears or Device Manager wasn’t able to find a newer driver version, you can make sure that you’re using the latest version available for your graphics card model by using the proprietary software according to your GPU manufacturer.
Use the applicable manufacturer in your case:
- GeForce Experience – Nvidia
- Adrenalin – AMD
If the 3rd party utility discovers a new version, install it then restart your computer again to see if the issue is fixed or not.
In case the issue is still not fixed, move down to the next potential fix below.
Delete all files present in the configs folder
The configs file is probably the most vulnerable folder component of the Minecraft installation. Here is where you’ll find temporary files belonging to both the main game and all your installed mods.
More often than not, file corruption will make its way inside the configs folder, so you’ll need to make a habit out of clearing the contents of this folder regularly if you’re into installing mods.
A lot of people that have managed to get rid of the Exit Code 0 error have fixed the problem by deleting the configs folder located inside Minecraft’s AppData folder.
Follow the next instructions if you don’t know how to delete the configs folder:
- Press Windows key + R to open a Run dialog box and type ‘%appdata%’, then press Enter.
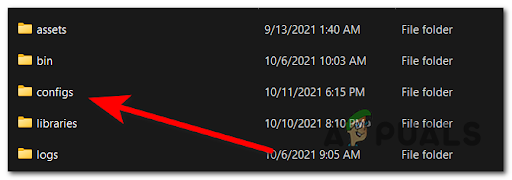
Opening up the AppData folder - Inside the AppData folder, double click on the .minecraft folder to access it.
Accessing the Minecraft folder - Next, right-click on the configs folder and click on Delete from the context menu to get rid of it.
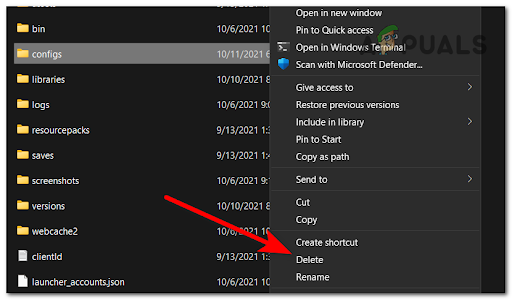
Deleting the configs folder Note: Additionally, you can access the contents of the configs folder and press Ctrl + A to select everything inside, then right-click on a selected item and choose Delete.
- Once the configs folder has been cleared or deleted, launch Minecraft once again and see if you are still experiencing the exit code 0 error.
In case the issue is still persisting, move down to the next potential fix below.
Delete the main Forge Mod Loader file
The FML file is the main component behind the Forge Mod Loader software program that allows you to install custom Modes for Minecraft. Unfortunately, it’s a file that will often get flagged by AV software (particularly 3rd party options) and it’s also very susceptible to becoming corrupted if you’re using an older Minecraft version.
If you’re using the Forge Mod Loader utility to install modes and you’re currently experiencing the ‘exit code 0’ error, follow the instructions below to delete the main FML file and see if this finally allows you to launch the game without seeing the same error.
Follow the instructions below for the complete instructions on how to do this:
- Open a Run dialog box by pressing Windows key + R. Type ‘%appdata%’ and press Enter.

Accessing the appdata folder - Once you’re inside the Appdata folder, access the .minecraft folder.
Accessing the Minecraft folder - Inside the .minecraft folder, access the configs folder and locate the FML file.
Accessing the Configs folder - When you see it, right-click on it and choose Delete from the context menu to get rid of it.
Reinstall Minecraft
File corruption inside your Minecraft installation can also be responsible for this error, particularly if were previously able to launch the game normally and this error only started to appear after you installed a Mod launcher.
Since it can be tricky to identify the culprit (if the first method in this article didn’t help), the best thing you can do at this point is to ensure that you back up your saves before reinstalling Minecraft.
For step by step instructions on how to do this, follow the guide below:
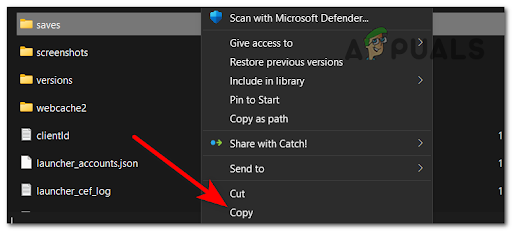
- First of all, before uninstalling the game you need to create a copy of the game’s saves that you can copy back after you reinstall Minecraft. Press Windows key + R to open up a dialog box and type ‘%appdata%’, then press Enter.
Accessing the appdata folder - Inside the AppData menu, access the .minecraft folder and copy the saves folder, then paste it somewhere safe.
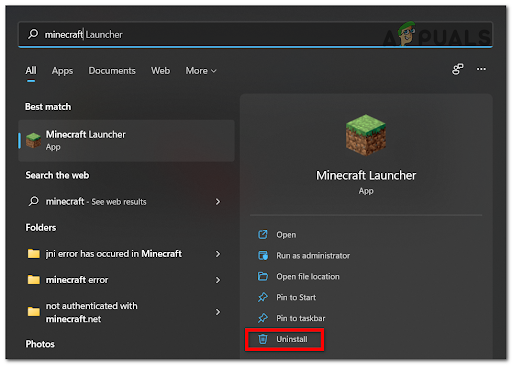
Copying the Minecraft saves - After you are sure that the saves are safe, click on the Search option in your taskbar and search for Minecraft, then click on Uninstall and follow the given instructions (if any).
Uninstalling Minecraft - A folder will still be found in the AppData, so access again the APPDATA folder with a Run dialog box (step 1) and delete the .minecraft folder once again.
Deleting the Minecraft folder - Now download the Minecraft installation from their official site and reinstall the game.
- After the installation is complete, test the game to see if the error persists. If this is the case, check below the next method.
Run incompatibility with an older Windows version
If you’re experiencing this issue while attempting to run an older Minecraft version in order to accommodate mods that will no longer work with the latest versions, chances are you’re seeing the exit code 0 error due to a program incompatibility.
Most likely, the Minecraft version that you are attempting to run is not compatible with Windows 10 or Windows 11.
Fortunately, you can bypass the error in this case by forcing the main launcher of Minecraft to run in compatibility mode with an older Windows version.
Follow the guide below for step-by-step instructions on forcing the game to run in compatibility mode:
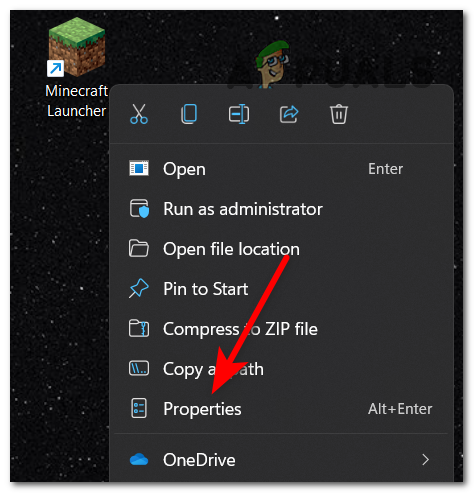
- Right-click on the Minecraft icon and click on Properties.
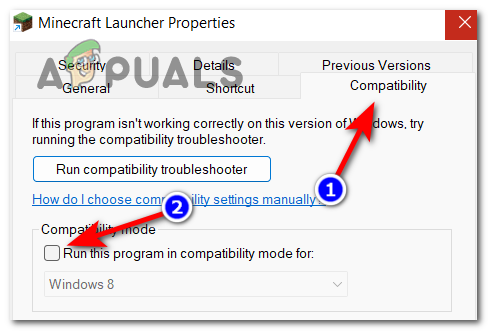
Accessing the Properties screen of Minecraft - Inside the Properties menu, click on Compatibility, then check the box under where it says Compatibility mode.
Run compatibility mode - After that, extend the drop-down menu, and from the list of Windows versions select Windows Vista – if available. If not, select a Windows 8.
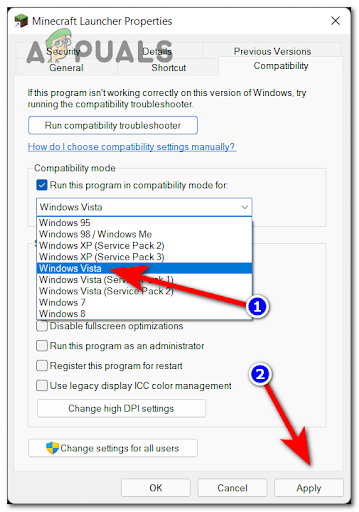
Running Minecraft in Compatibility mode - Once you’ve made this modification, launch the game to see if the problem is fixed.
If the same Exit Code 0 error is still occurring at the very start, move down to the next potential fix below.
Close Nvidia Experience or Adrenaline (if applicable)
If you’re using a dedicated Nvidia or AMD GPU, the proprietary FPS counting software that overlays over whichever game you’re playing might conflict with Minecraft – this is reported with a wide array of GPU models from both AMD and Nvidia.
Some Minecraft players that have encountered the Exit Code 0 error have managed to fix the issue by closing the proprietary software according to your GPU manufacturer. You can close them from the hidden icons from your taskbar.
If you don’t know how to close your specific software according to your GPU manufacturer, check below the steps:
- Click on the up arrow to extend the menu that shows the hidden icons.
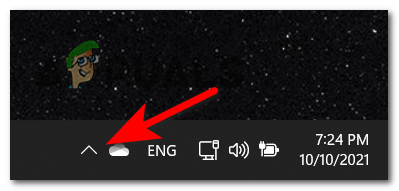
Expanding the taskbar menu - Now look for your specific software according to your GPU manufacturer, then right-click on it and close it.
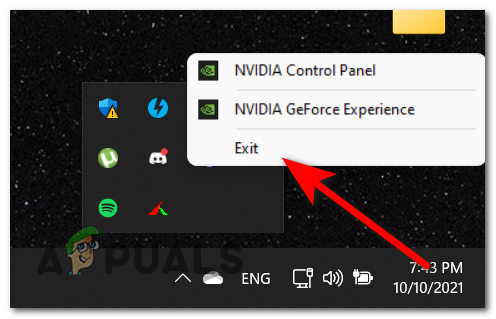
Closing Nvidia Experience
Download and configure Java JRE (if applicable)
If you’re running Minecraft Vanilla, then installing the latest JDK version of Java will be enough to run the game with no issues.
But if you’re using certain modified builds of Minecraft, you might be required to install the Java JRE environment too – failing to do so might trigger the exit code 0 during startup.
If the Java JRE environment is not yet installed on your PC (or you’re not sure that it is), follow the instructions below to download, install and configure it so that Minecraft can make use of its dependencies:
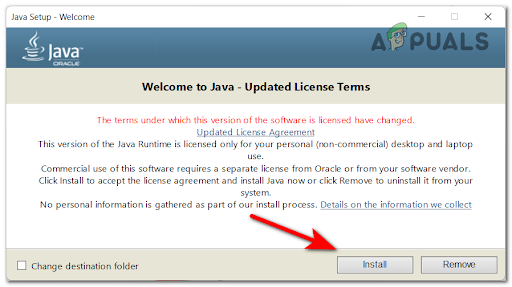
- Firstly, you need to access the Oracle official website and download the Java JRE 8 specific for your Windows version.
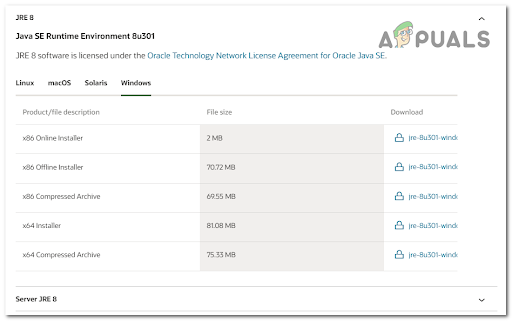
Accessing the download page of Java JRE - If you don’t have an account, you need to create one in order to download the Java JRE 8. Click on the downloaded file and allow the User Account Control to open the file.
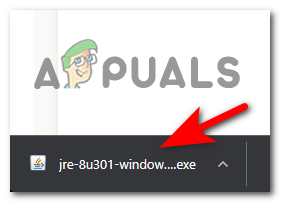
Downloading the latest version of the JRE dependency - Click on Install and wait until the installation is complete.
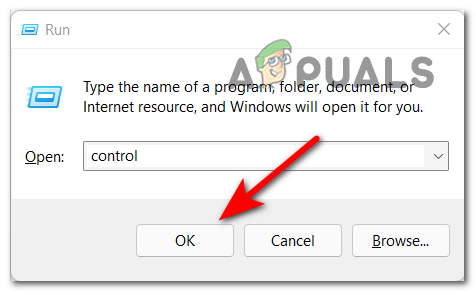
Install the latest version of the JRE pack - After the installation is complete, press Windows key + R to open a Run dialog box and type ‘control’.
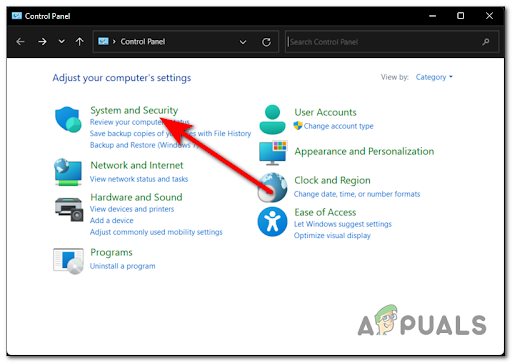
Accessing the Classic Control Pane interface - Inside the Control Panel, click on System and Security.
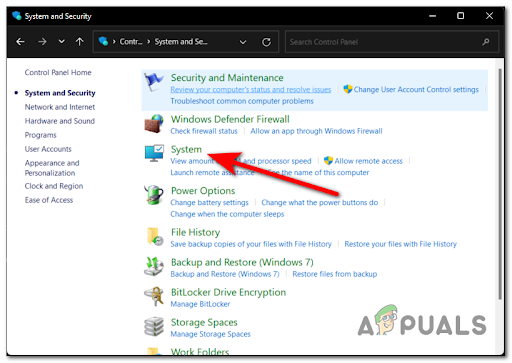
Accessing the System and Security tab - Inside the System and Security tab, click on System.
Accessing the System tab - Inside the System menu, click on Advanced system settings that will open the System Properties.
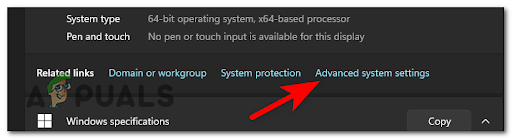
Accessing the Advanced Settings menu - Afterward, click on Environment Variables, then click on Path and press on Edit.

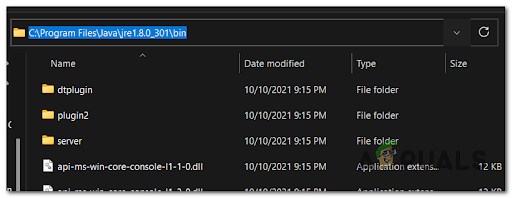
Editing the Environment Variables - Now you need to find the location of Java JRE 8. To do this, go to your PC’s folder, access the disk that you have it installed on, then go to Programs Files and access the Java folder. Inside it, enter the Java JRE 8 folder and click on Bin, then copy the location of the folder.
Setting up the JRE environment - Go back to Edit Variable Properties, click on New and paste the folder’s location, then press Ok.
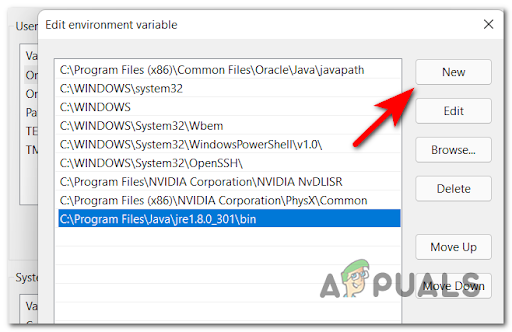
Create a new environment variable
Once the JRE installation has been correctly configured, reboot your PC and see if Minecraft launches without issues after the next startup is complete.
Perform a clean boot
If none of the methods so far have proven to be effective in your case, there’s a big chance you’re dealing with some kind of software conflict that we’ve not been able to identify so far.
If you’re facing this issue, the best way to go around identifying the conflicting culprit is to perform a clean boot.
This process starts Windows with a minimal set of drivers and startup programs so that you can determine if any background program is interfering with Minecraft, causing the error to occur.
Check below for the exact instructions if you don’t know how to do a clean boot:
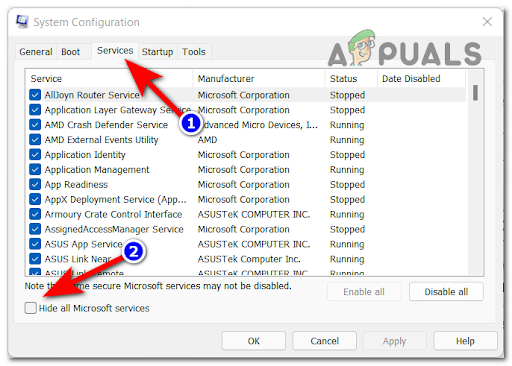
- Open a Run dialog box by pressing Windows key + R and type ‘msconfig’ to open up the System Configuration.

Open up the System Configuration menu - Inside the System Configuration menu, click on Services from the bar at the top. You need to check the box where it says Hide all Microsoft services to avoid ending any Microsoft service essential for your OS.
Opening up the Services menu - After you do that, click on Disable all. This will make sure that your next system startup will be completed without any 3rd party services.
- Now access the Startup tab and click on Open Task Manager.
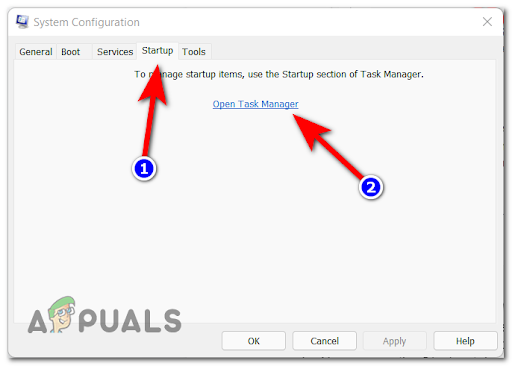
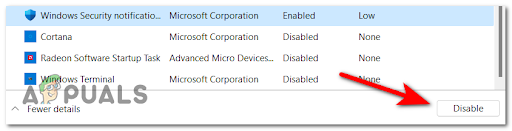
Opening the Startup screen - The Startup tab of Task Manager will appear on your screen. Manually select every 3rd party startup service and click on Disable to exclude them from being started at the next startup. Continue on doing this until there is no startup service left that is allowed to run at the next startup.
Disabling unnecessary services - Now what’s all left to do is to perform a clean boot. You will need to reboot your PC in order to take advantage of this state.
- When your computer boots back, launch Minecraft and test again to see if you still encounter the Exit Code 0 error.
- Regardless of the outcome, reverse engineer the instructions above to make sure that your next computer startup is normal and 3rd party services are permitted to run.


