Fix: Excel AutoSave Not Working or Greyed Out
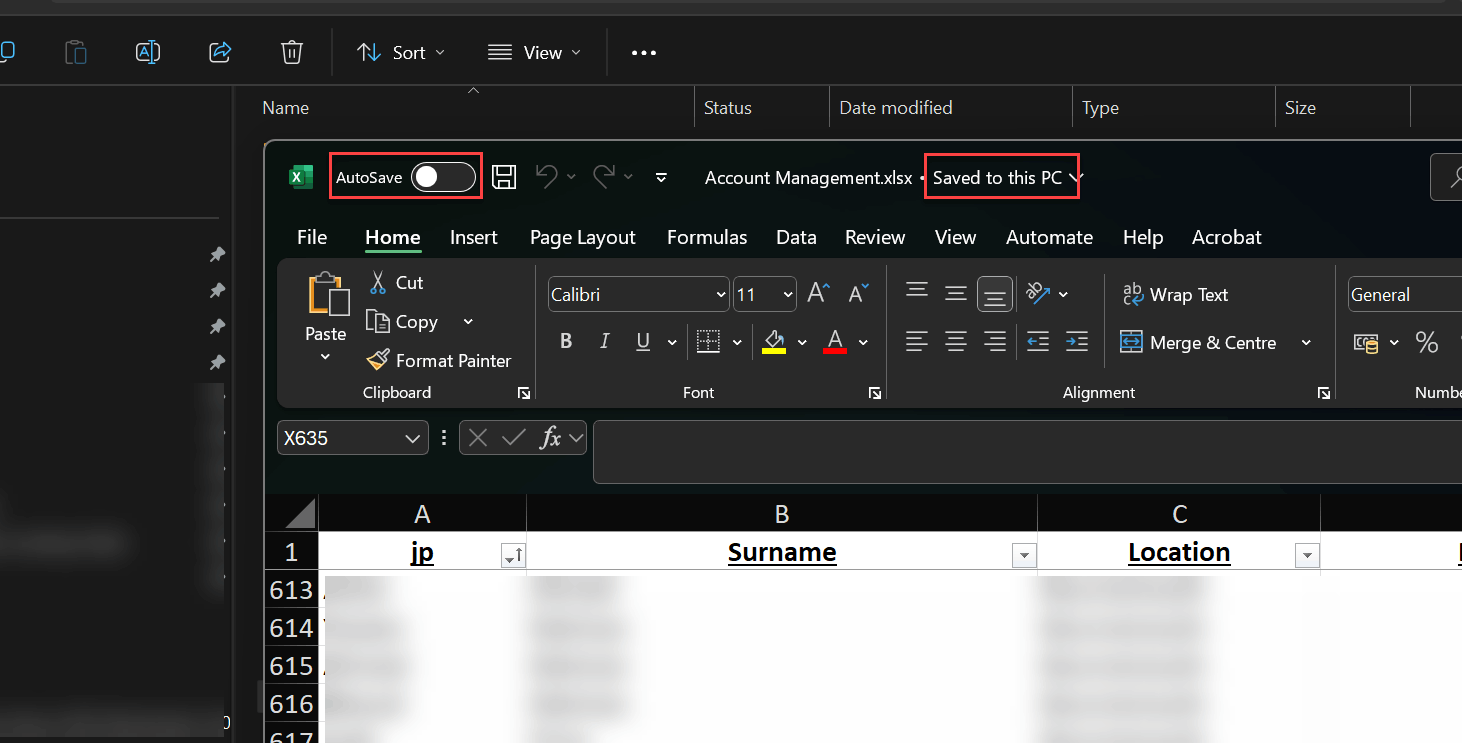
If Excel AutoSave suddenly stopped working for workbooks stored in OneDrive or SharePoint after an Office/OneDrive update, the most common reason is that Excel is no longer treating the workbook as a cloud file. When that happens, the AutoSave toggle can be grayed out, or the title bar may show Saved to this PC even though you expect the file to be in OneDrive/SharePoint.
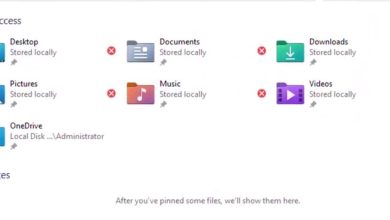
This usually happens when Excel opens a local/cached copy (for example, a Recent entry pointing to a cache, OneDrive sync paused/stuck, account mismatch, or a permissions/lock conflict).
AutoSave can also be disabled by unsupported file types, Protected View / Read-only mode, encryption/sensitivity labels, legacy sharing features, or Office–OneDrive integration being turned off by settings or policy.
1. Open the Workbook from Inside Excel
If you normally open the file by double-clicking it in File Explorer, switch to opening it from within Excel to ensure it’s treated as a cloud workbook.
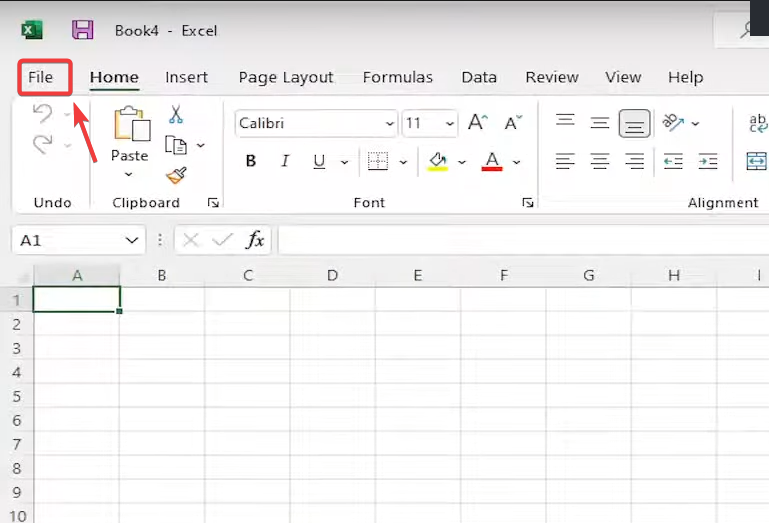
- Open the Excel application on your computer.
- Click on the File tab in the top-left corner.
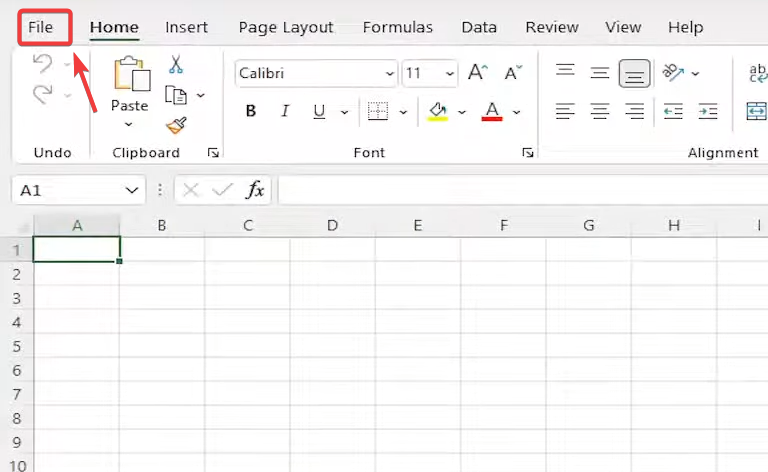
- Select Open.
- Choose OneDrive – Personal (or your organization’s OneDrive/SharePoint) and navigate to the folder where your workbook is saved.

- Select the workbook and click Open.
Tip: If you’re using SharePoint/Teams, opening the file in the browser and choosing Open in Desktop App can also help Excel attach correctly to the cloud location.
2. Update Microsoft Office (Excel) and Also Update OneDrive
AutoSave problems often appear when Office and OneDrive are out of sync (one updated, the other didn’t). Update Office first, then ensure OneDrive is updated too.
Update Office (Excel):
- Launch Excel (or any Office app).
- Go to File > Account.
- Under Product Information, find Update Options.
- Select Update Now.
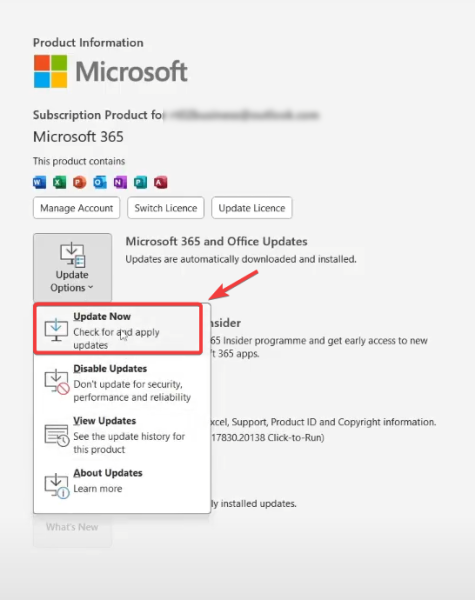
- After it finishes, close all Office apps and reopen Excel.
Update OneDrive (important):
- Click the OneDrive icon > Settings > About to see version details.
- If you installed OneDrive from the Microsoft Store, open the Store and install updates from Library.
- After updating, restart OneDrive (Quit OneDrive, then open it again).
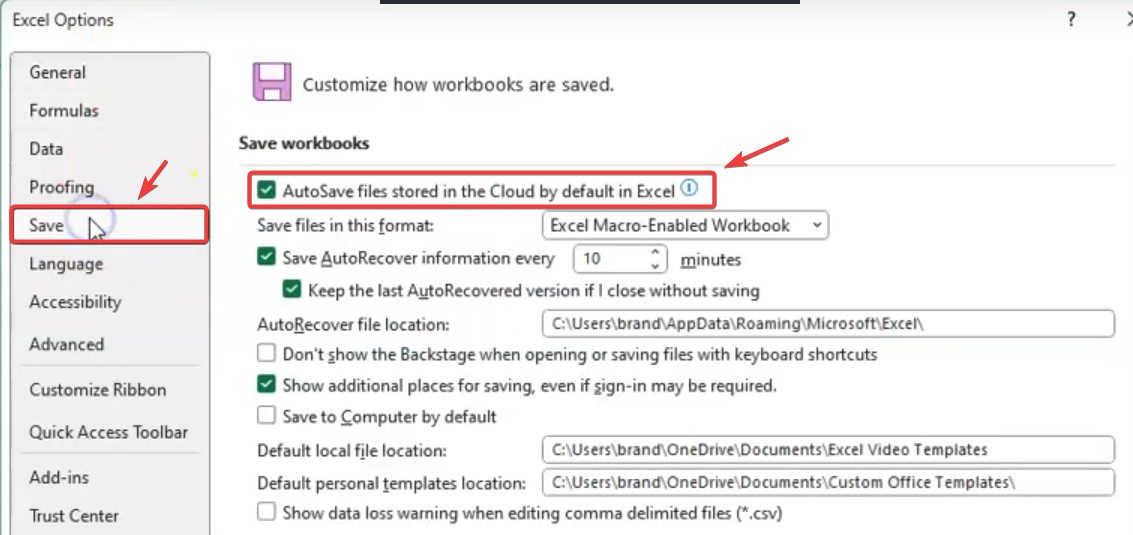
3. Enable “AutoSave Files Stored in the Cloud by Default” in Excel Settings
If this option is disabled, cloud files can open with AutoSave off. Turning it on makes AutoSave turn on automatically for compatible OneDrive/SharePoint files.
- Launch Excel.
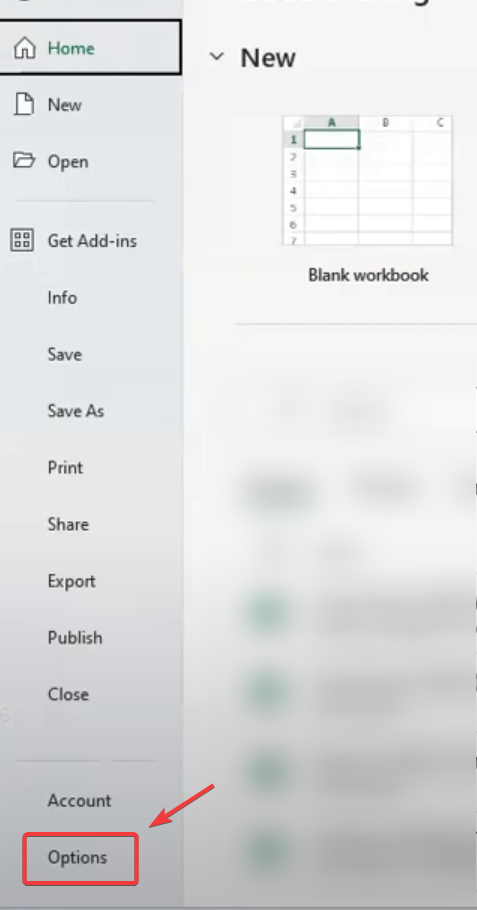
- Click File.
- Select Options.
- Go to Save.
- Check AutoSave files stored in the Cloud by default in Excel.
- Click OK, close Excel, reopen the workbook from OneDrive, and test AutoSave.
4. Check Add-ins or Third-Party Interference
Some add-ins and third-party tools (especially ones that inject into Office, handle macros, or manage data connections) can interfere with syncing and disable AutoSave. Testing Excel without add-ins helps confirm whether something is blocking cloud behavior.
- Launch Excel.
- Click File.
- Select Options.
- Go to Add-ins.
- At the bottom, use the Manage dropdown.

- Select COM Add-ins and click Go.
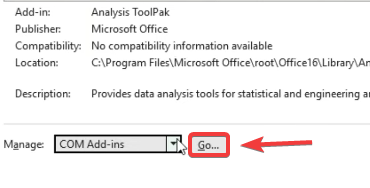
- Uncheck non-Microsoft or unnecessary add-ins.
- Click OK, close Excel, reopen it, then test AutoSave.
If none of the methods above work, reinstall both Excel (Office) and OneDrive to repair deeper issues with sign-in components, sync integration, or application files.
- Uninstall Microsoft Office (or Microsoft 365) from Apps & features.
- Uninstall OneDrive.
- Restart your PC.
- Install OneDrive again, sign in, and let it finish syncing.
- Install Office again, sign in, then open the workbook from File > Open > OneDrive.