11 Easy Ways to Fix Ethernet Not Working But Wi-Fi Is
 Reviewed by Huzaifa Haroon
While Wi-Fi is ubiquitous, using an Ethernet cable offers advantages in certain scenarios. It is especially beneficial when you need a stable and fast internet connection for tasks such as downloading large files, streaming videos, or online gaming.
Ethernet cables offer uninterrupted internet signals, unlike Wi-Fi, which can be disrupted by interference from walls or other obstacles. However, a common issue is Ethernet not working while Wi-Fi works fine.
If you’re facing this challenge, don’t worry. This guide will outline possible causes and provide effective solutions.
What’s occurring is your wireless connections are functioning normally, but your wired (Ethernet) connection is not. Various factors can disrupt Ethernet functionality, including software or hardware issues. Even minor physical damage can affect Ethernet due to its wired nature. Here are some common causes of Ethernet malfunctions.
- Cable Damage: Physical damage to the Ethernet cable can stop data flow, causing issues. Wi-Fi remains unaffected.
- Hardware Issues: Faulty Ethernet ports or network cards can disrupt Ethernet connectivity, though router malfunctions may affect both Ethernet and Wi-Fi.
- Virus/Malware: Infections can alter network settings, block internet traffic, and damage network components, disrupting Ethernet connectivity.
- MAC Address Issues: Incompatible MAC addresses can cause connectivity problems in Ethernet or Wi-Fi connections.
- Incorrect Network Configuration: IP address, subnet mask, or gateway settings might be incorrectly configured.
- Network Adapter Problems: The network adapter might not be enabled, or drivers could be outdated.
- Network Congestion: Too many devices connected to the network can cause congestion and disrupt connectivity.
Here are the detailed steps to help resolve your Ethernet connection problems when Wi-Fi is operational:
1. Check the Ethernet Cable and Port
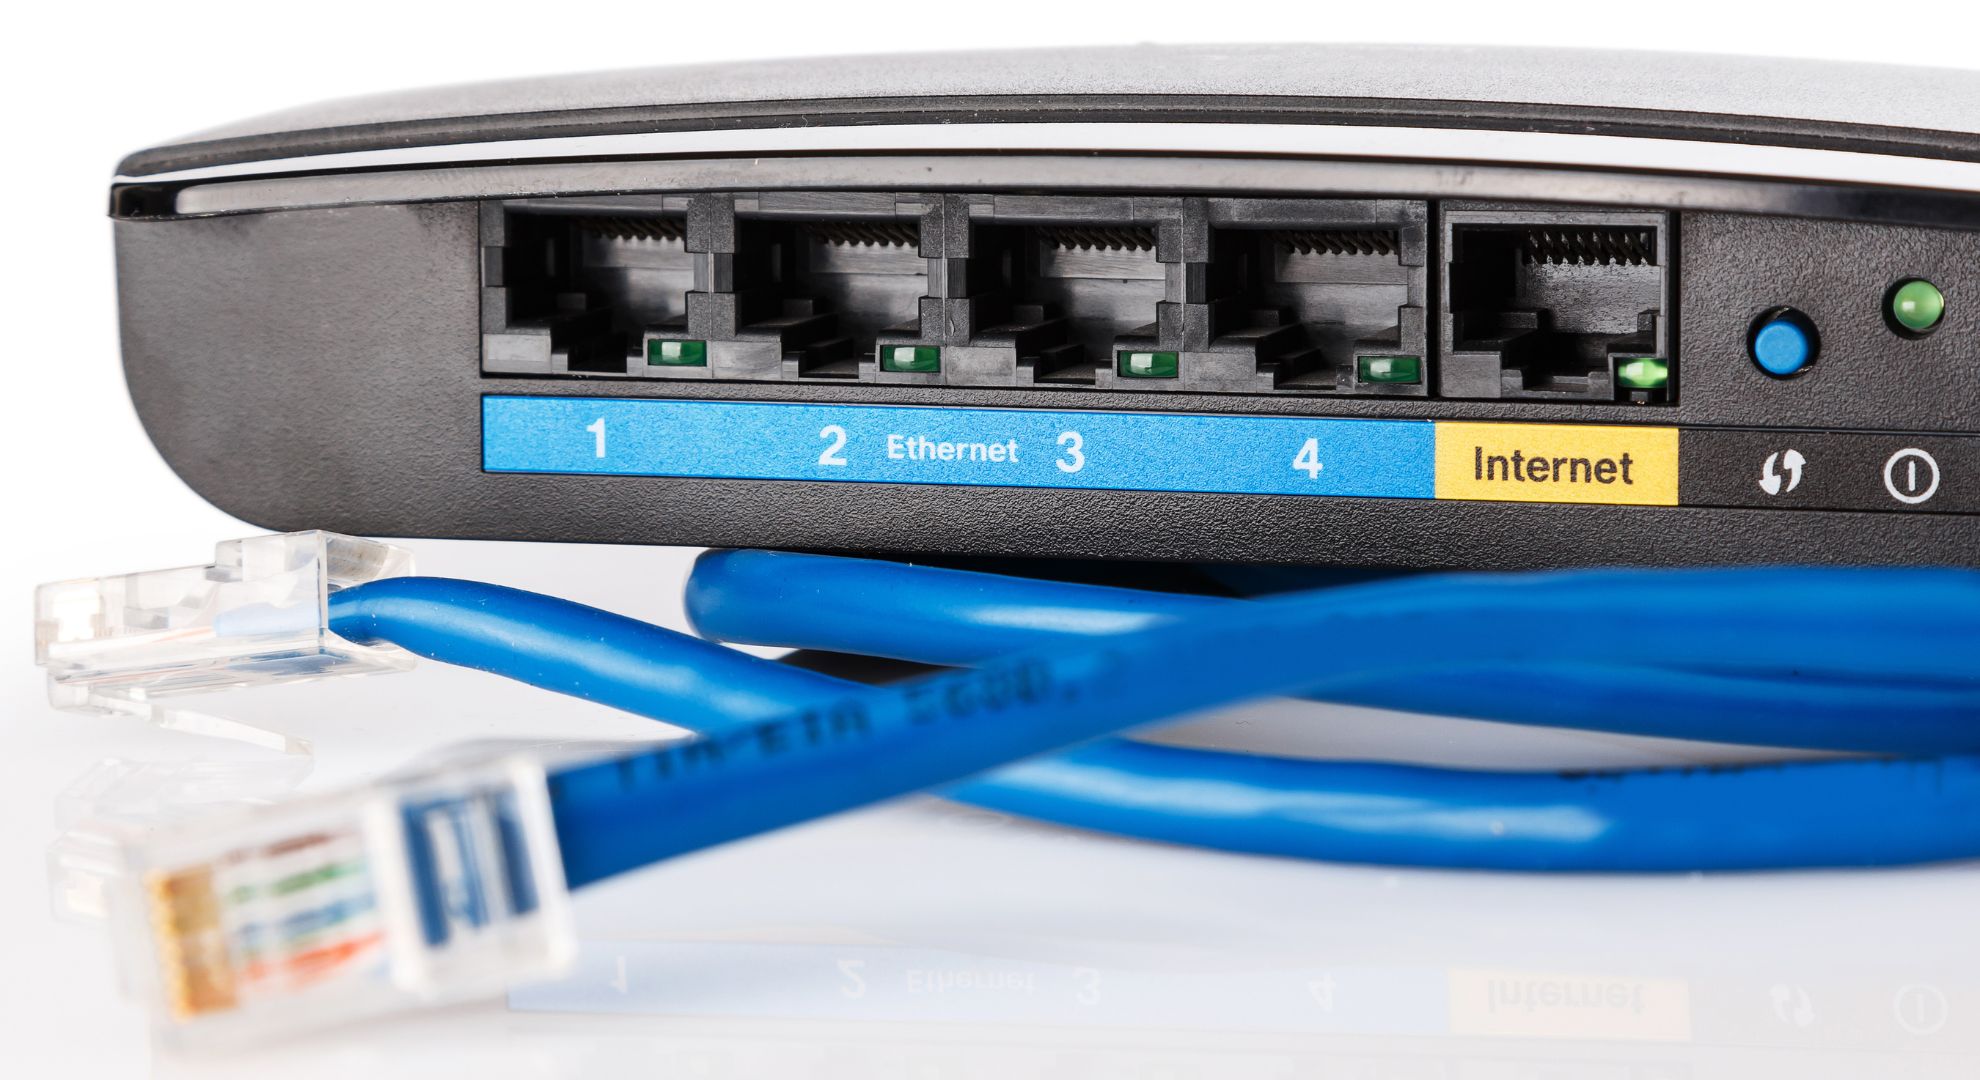
If you suspect your Ethernet cable is faulty, replace it with another to confirm. If the new cable works, the original is likely defective. If you don’t have a spare cable, test the suspect cable on a different computer.
The Ethernet port on your router might also be malfunctioning. Routers usually have multiple ports, so try another port to see if the issue resolves.
2. Ensure Your Ethernet Adapter Is Enabled
- Press Win+R to open the Run window.
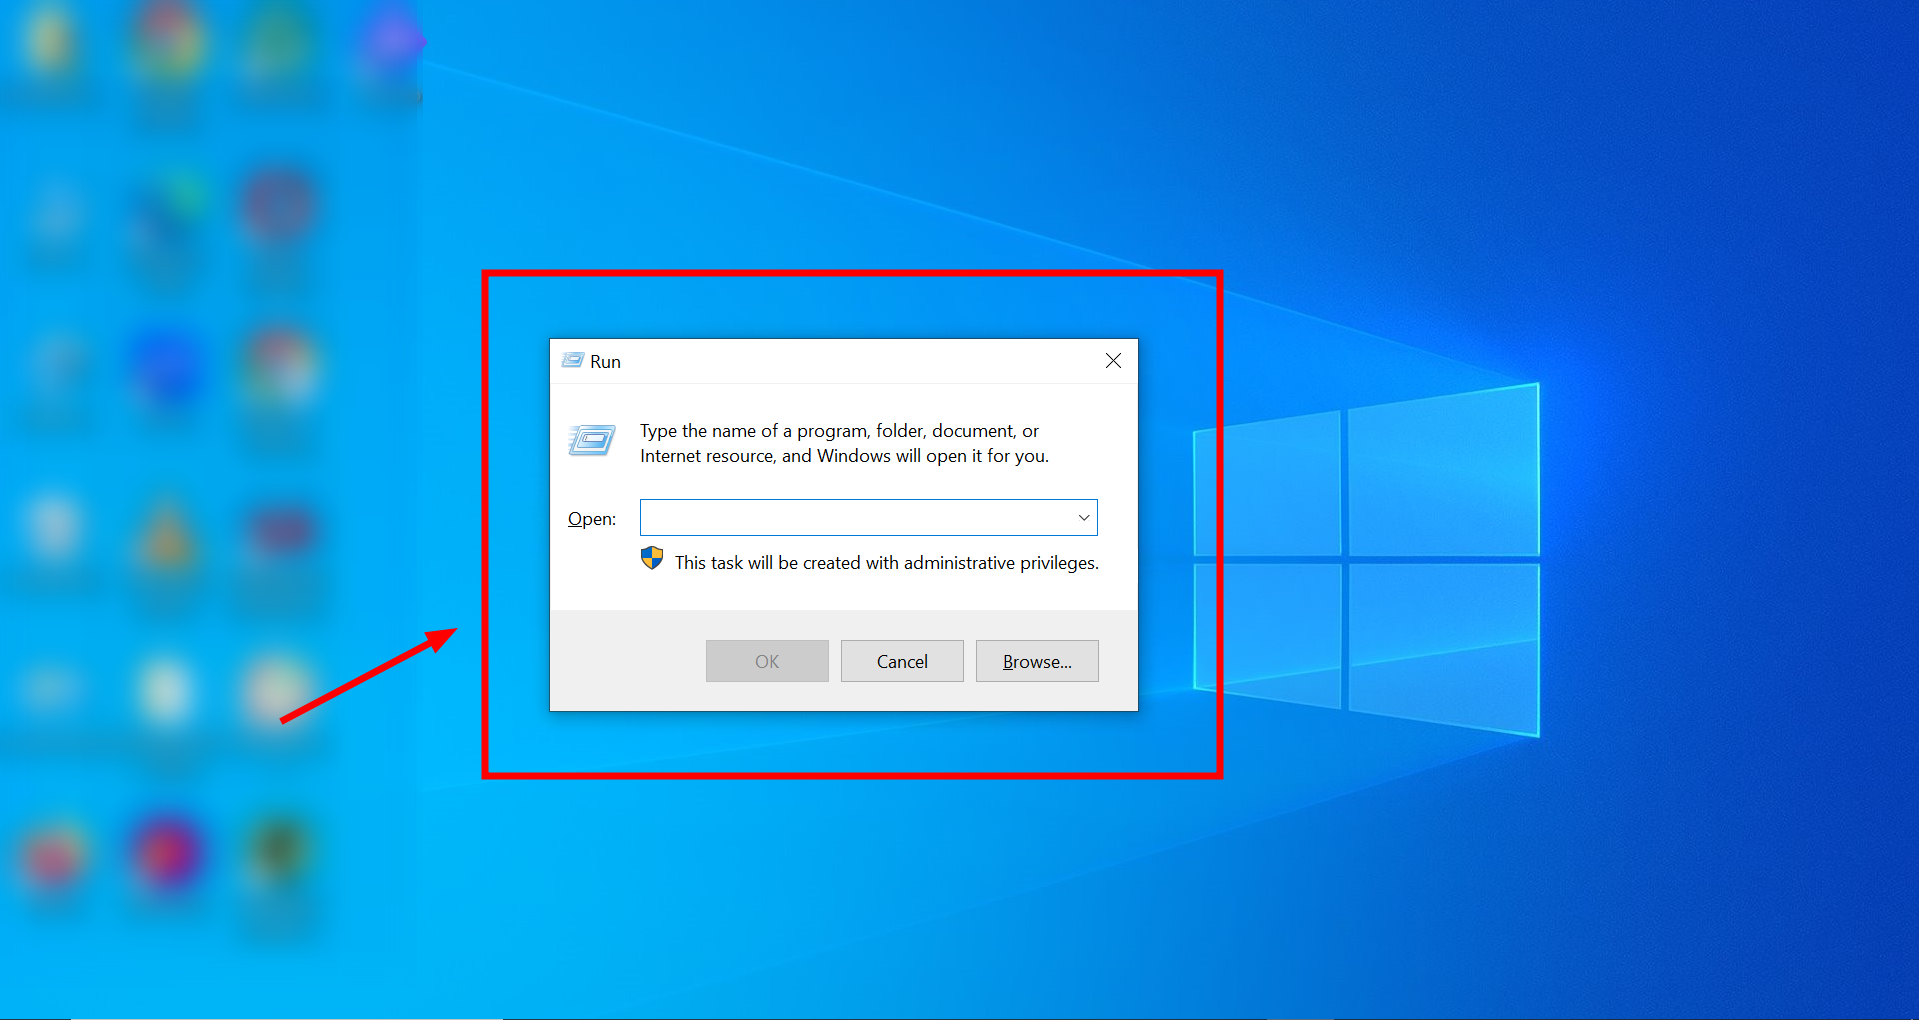
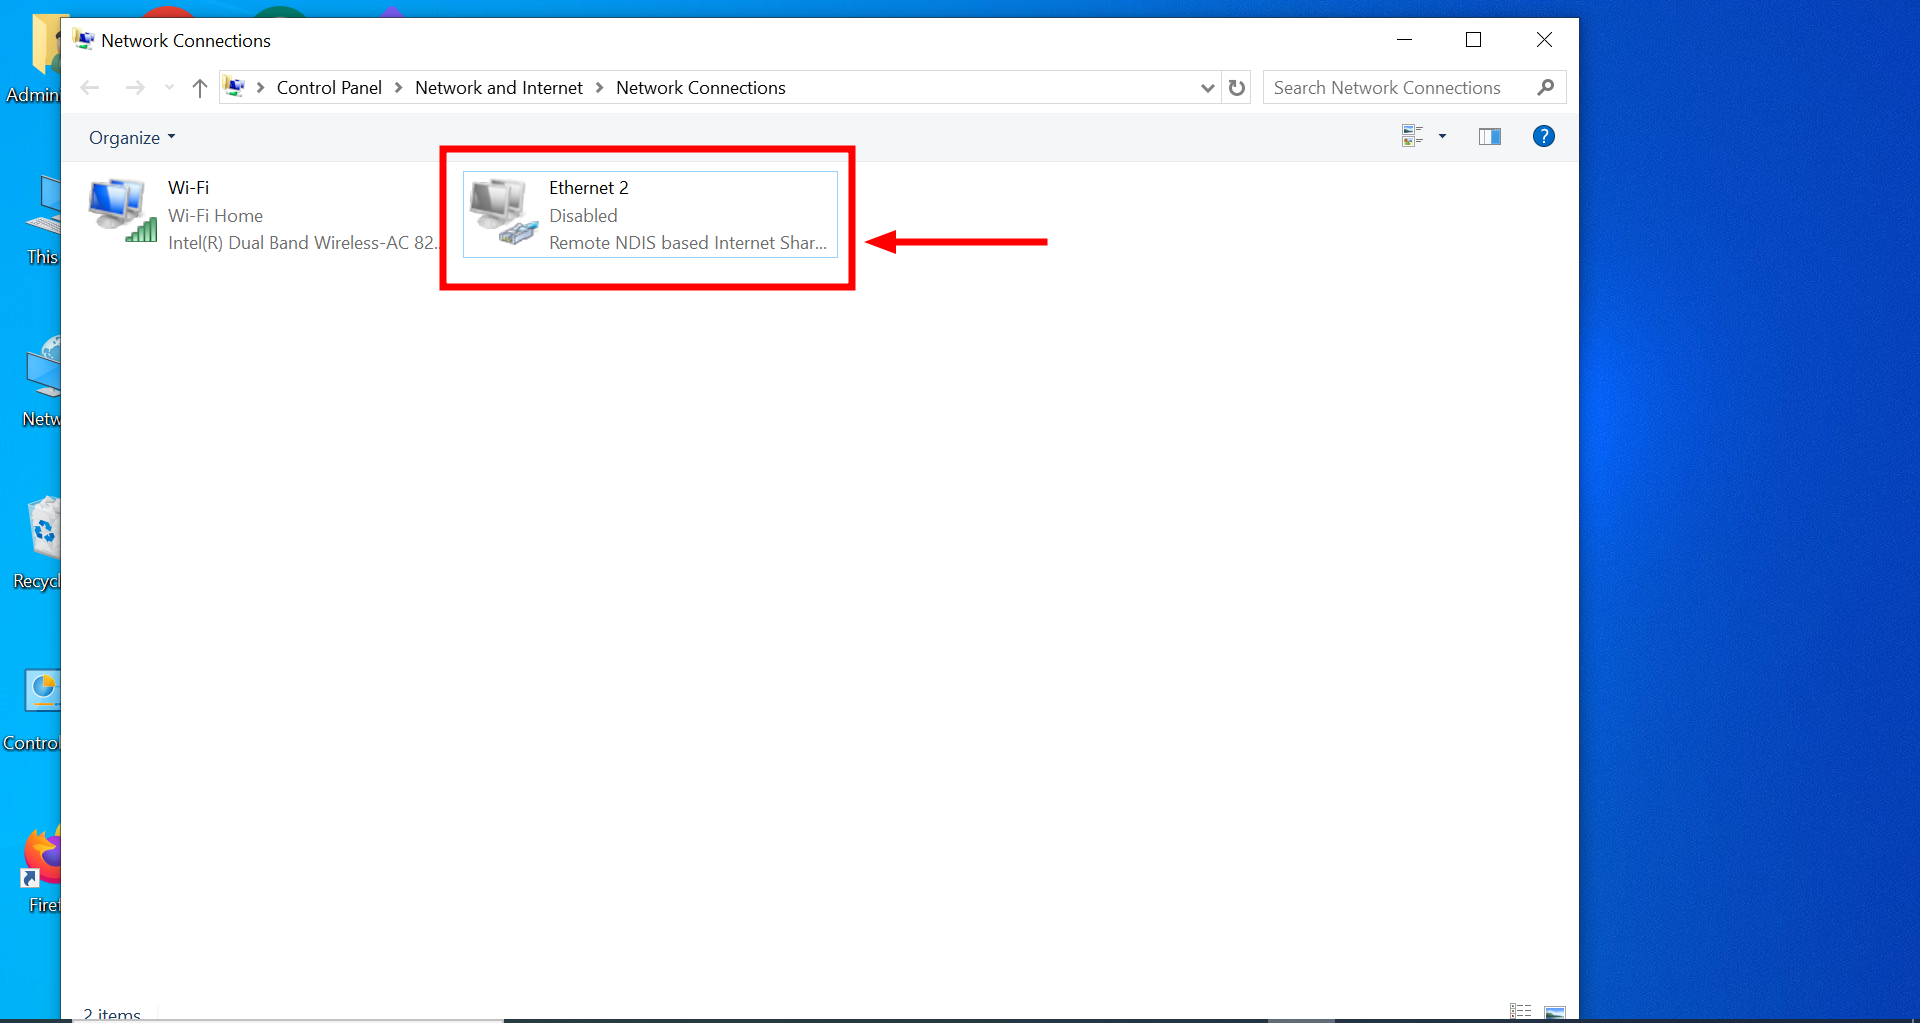
Open Run tool - Type NCPA.CPL in the Run window and press Enter. This command opens the Network Connections window.
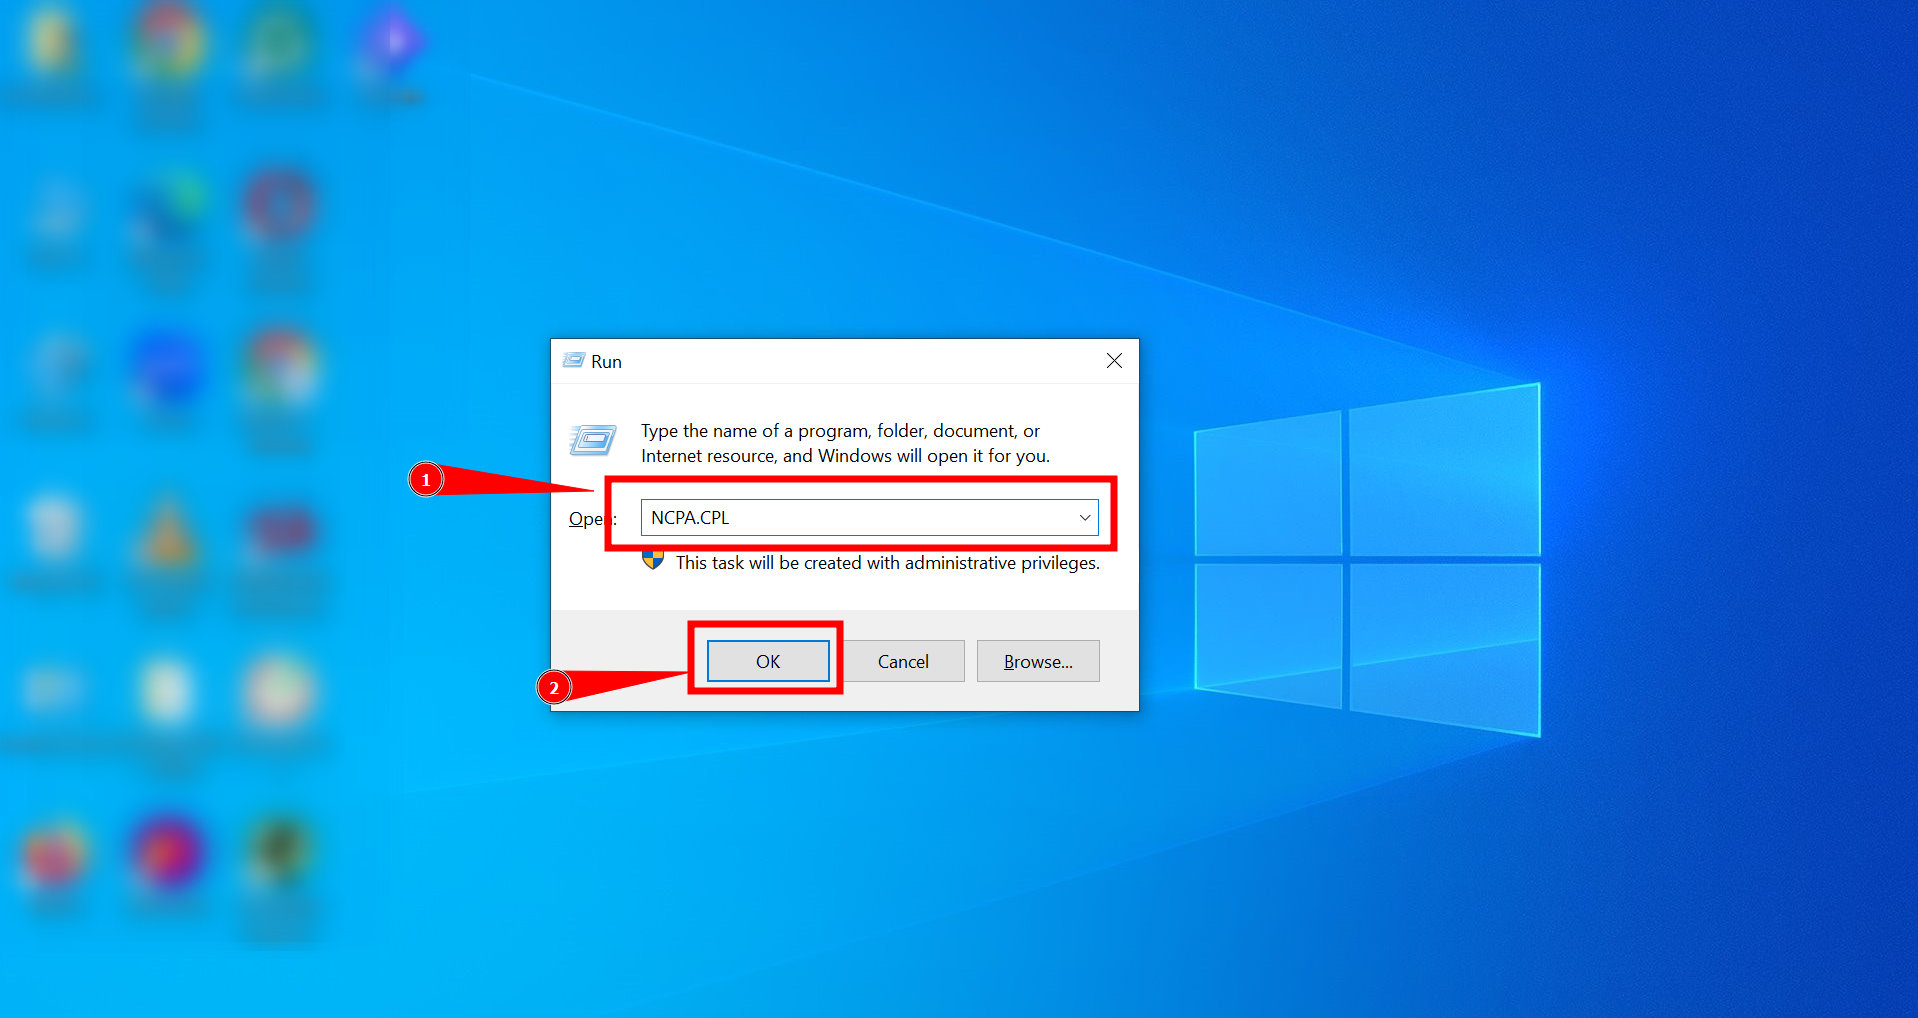
Click OK or press Enter - Find your Ethernet adapter in the list. If it shows as “Disabled,” it needs to be enabled.
Check if it shows disabled - Right-click on the Ethernet adapter and select “Enable” from the context menu. The system will begin enabling the Ethernet.
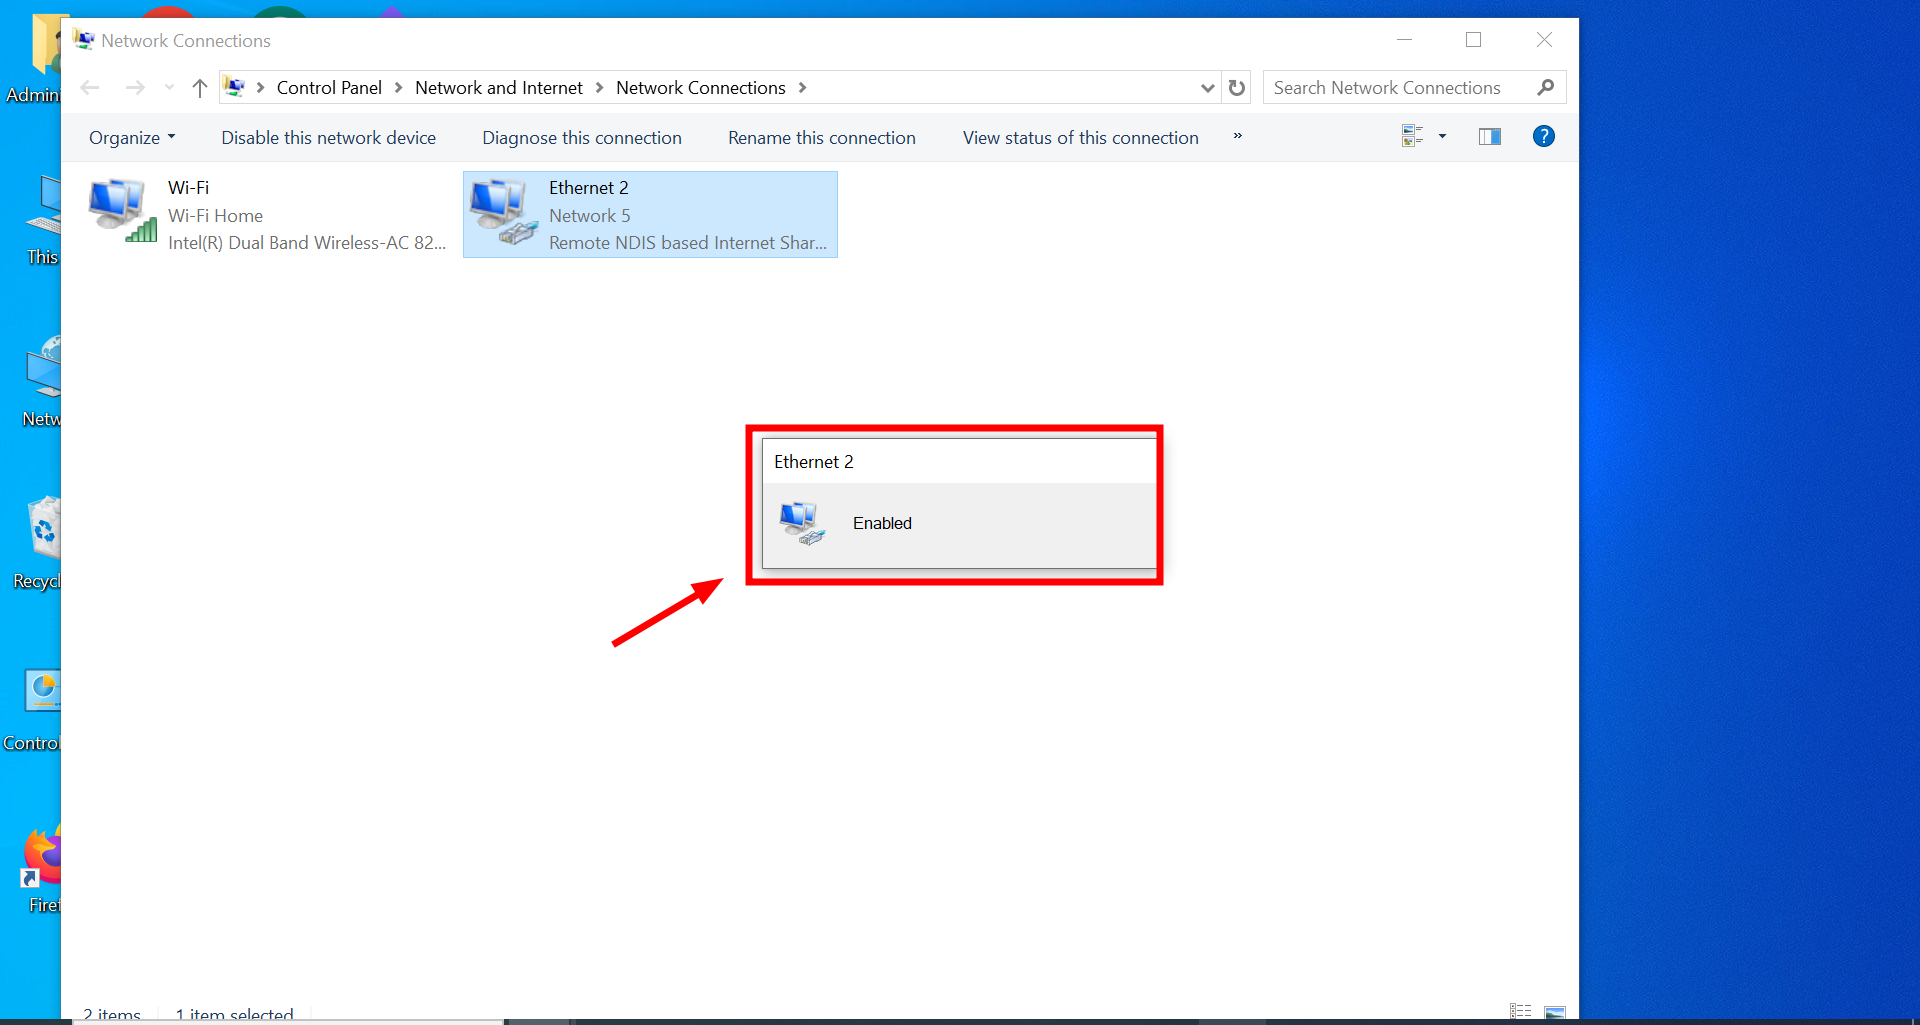
It will start enabling
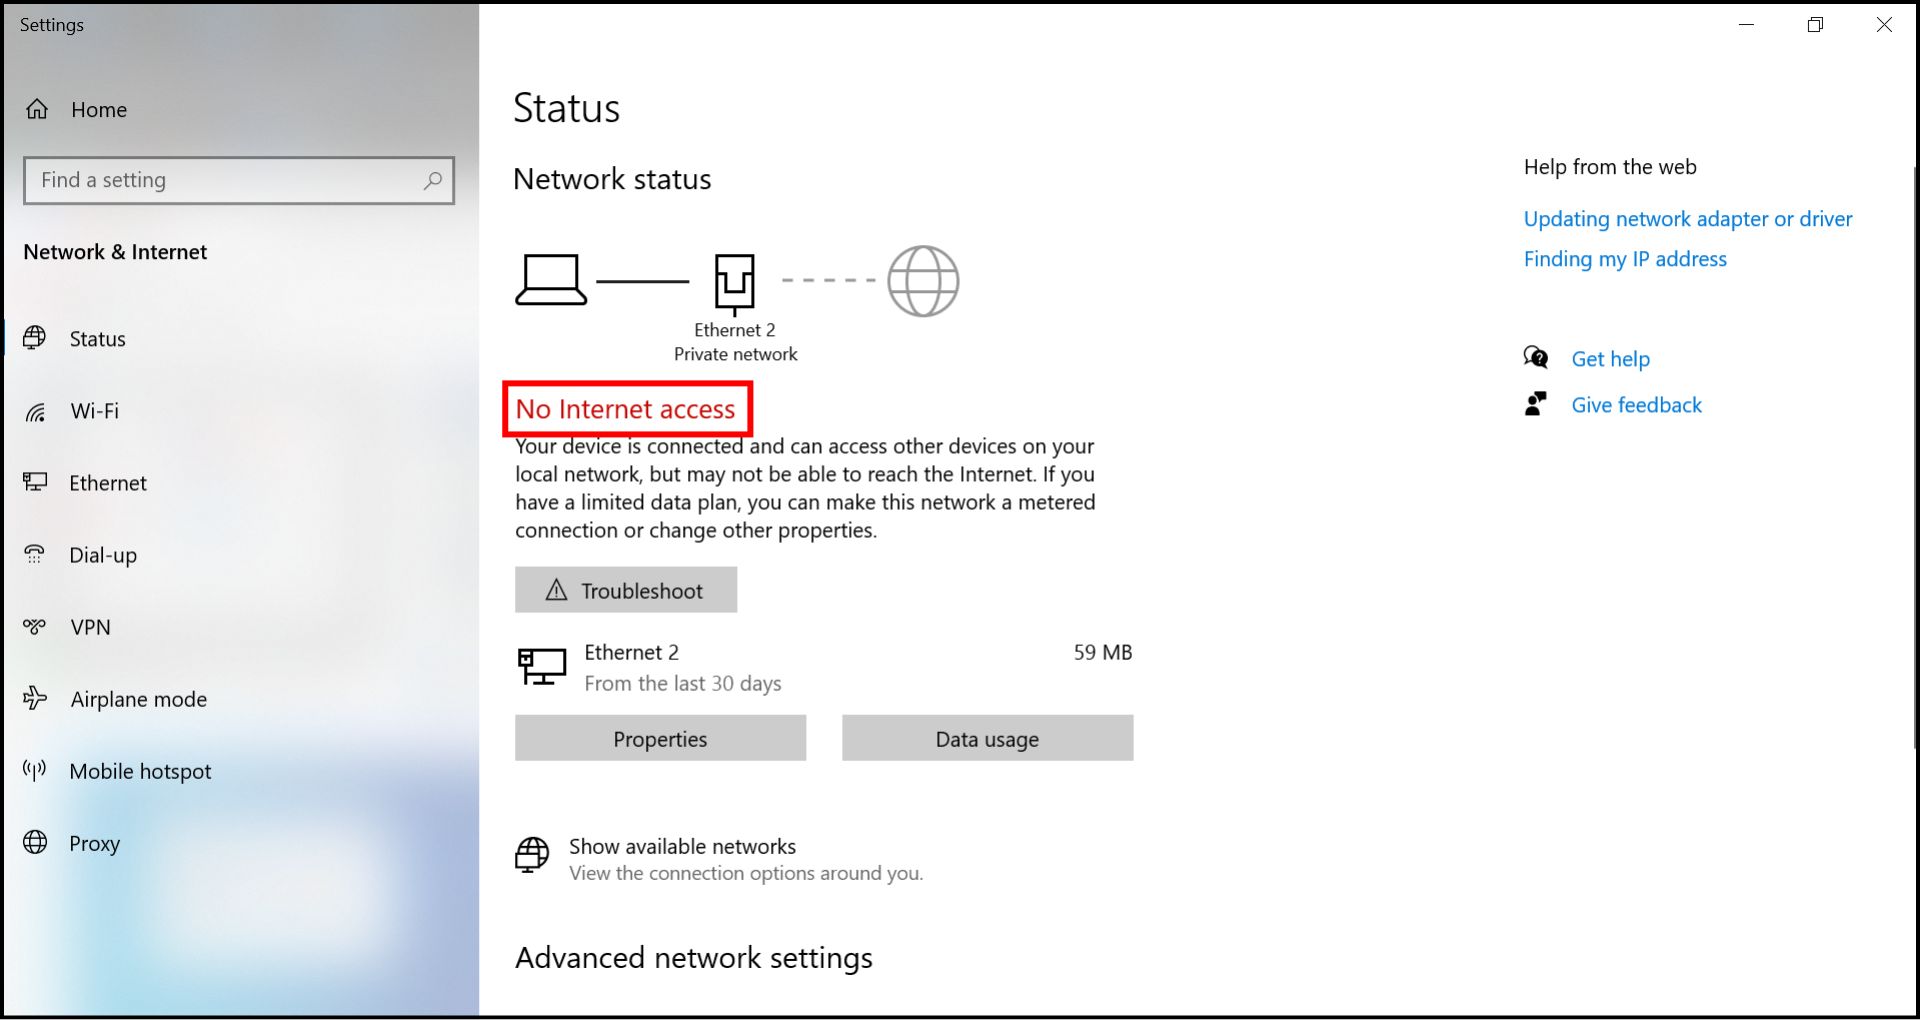
3. Check the Ethernet Connection Status
If your Ethernet connection is problematic while Wi-Fi is operational, checking your network status in your computer settings can help diagnose issues.
- Open “Settings” on your computer.
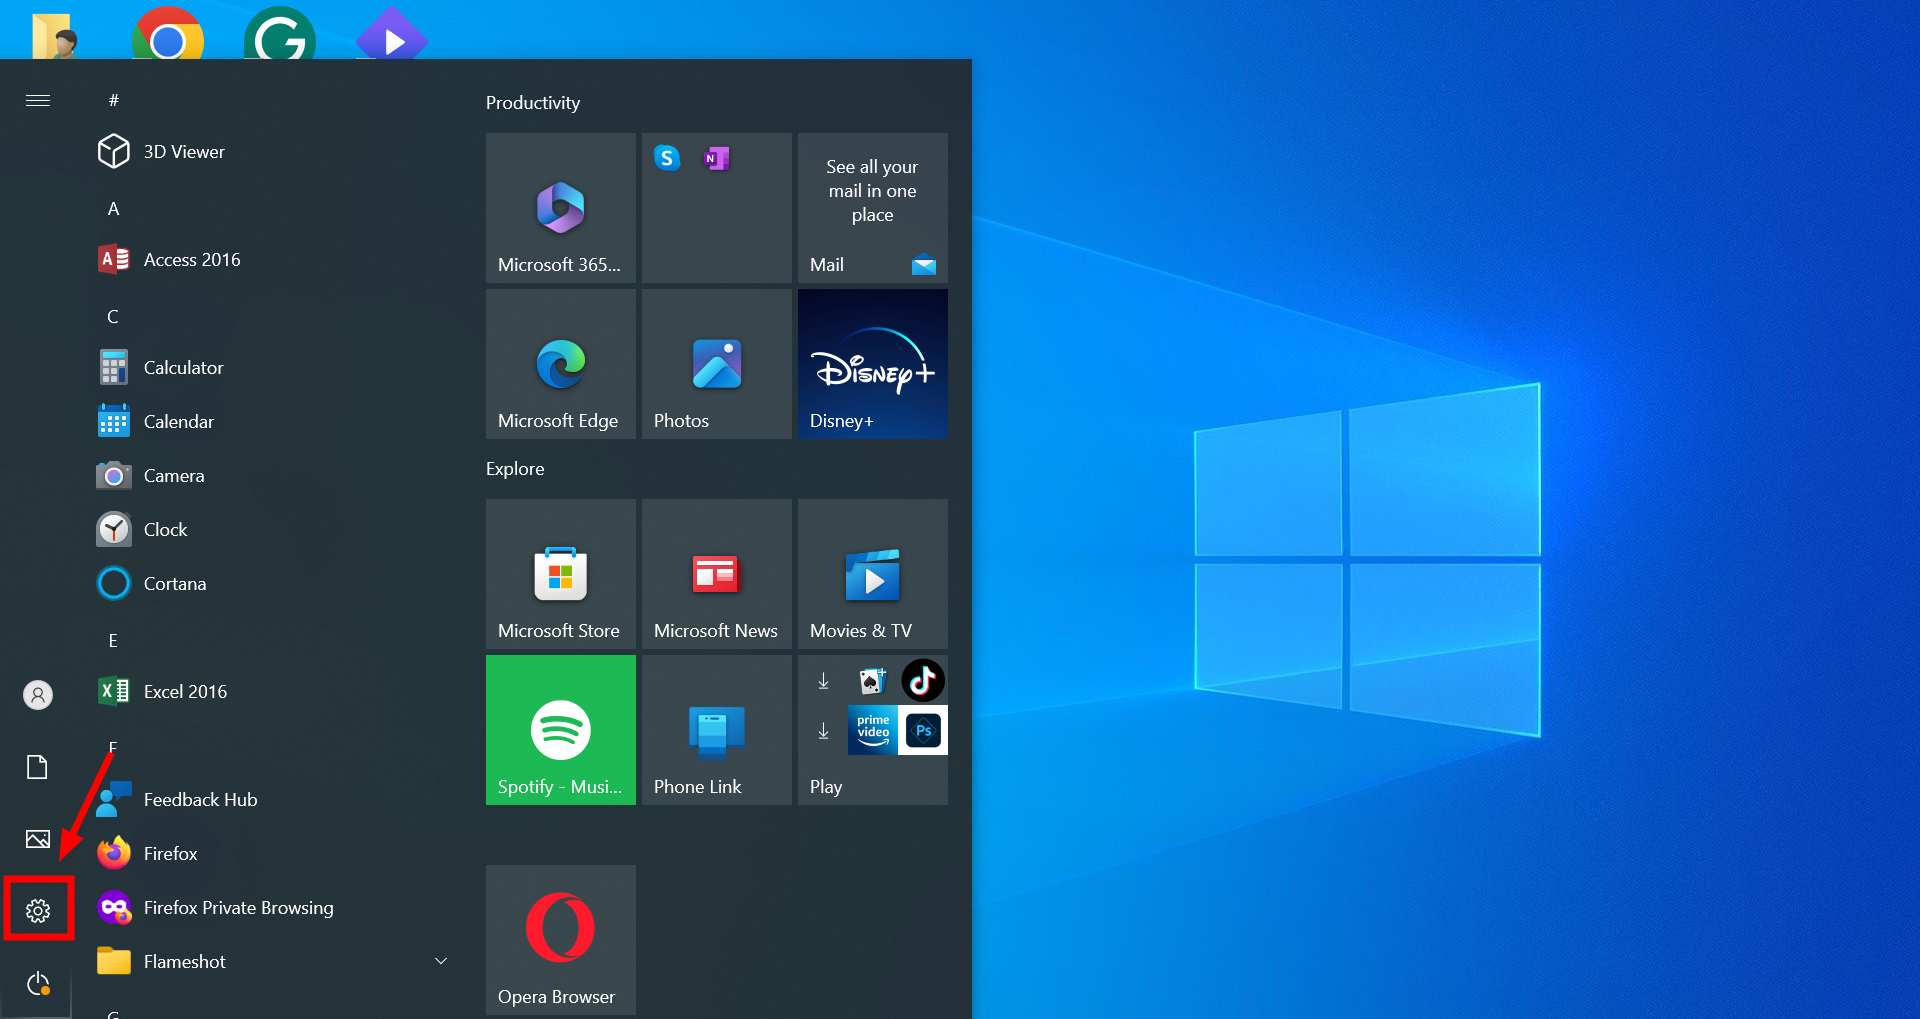
Open Settings - Click “Network & Internet.”
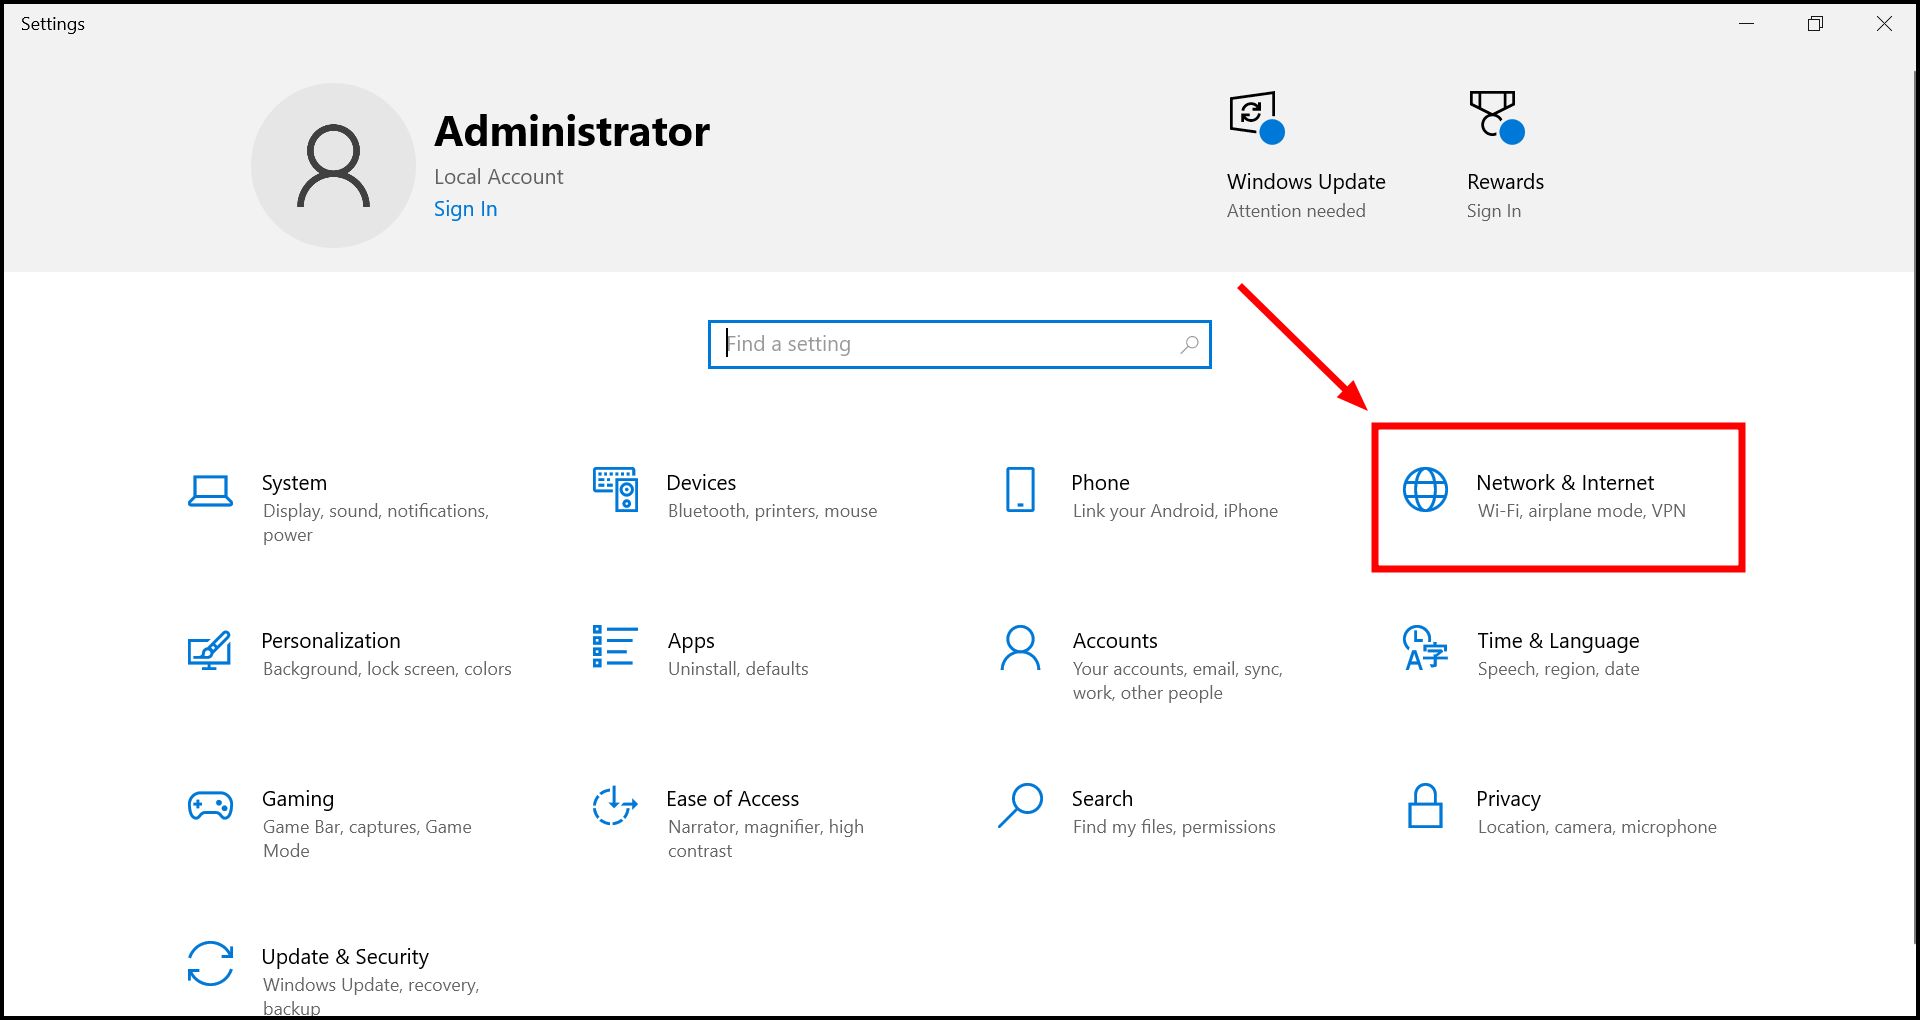
Click Network & Internet - At the top of the page, check the status of your Ethernet connection. It should indicate “Connected” under the network name if everything is functioning correctly. For error messages like “Action needed” or other warnings, explore the Ethernet settings for details by clicking on “Ethernet” in the settings.
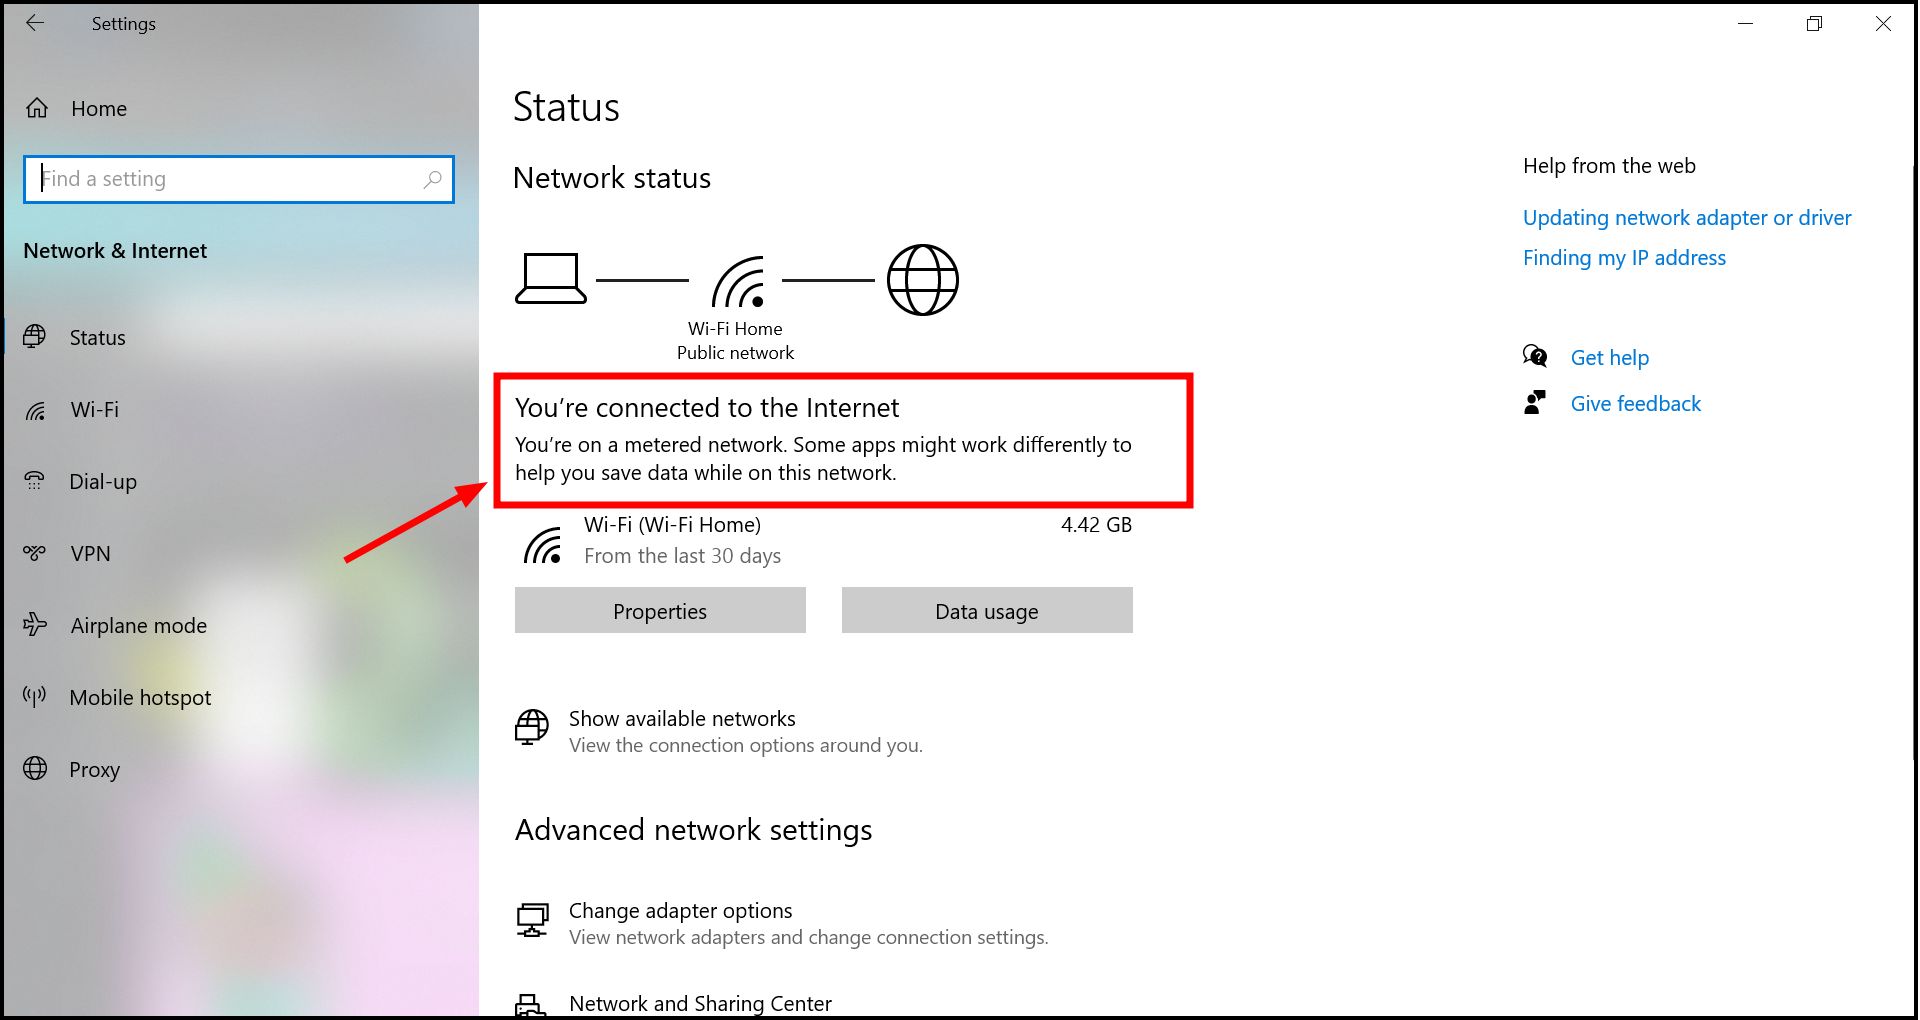
See if it says Connected
You will be directed to a page with detailed information about your Ethernet connection, including your connection status and IP address. Look for error messages or warnings that could suggest the issue. Common problems might involve IP conflicts, network adapter issues, or connectivity errors. If prompted, follow any suggested actions like “Repair” or “Reset Network.”
4. Run the Network Adapter Troubleshooter
The Network Adapter Troubleshooter is a Windows feature that scans for network adapter issues and attempts to resolve them automatically.
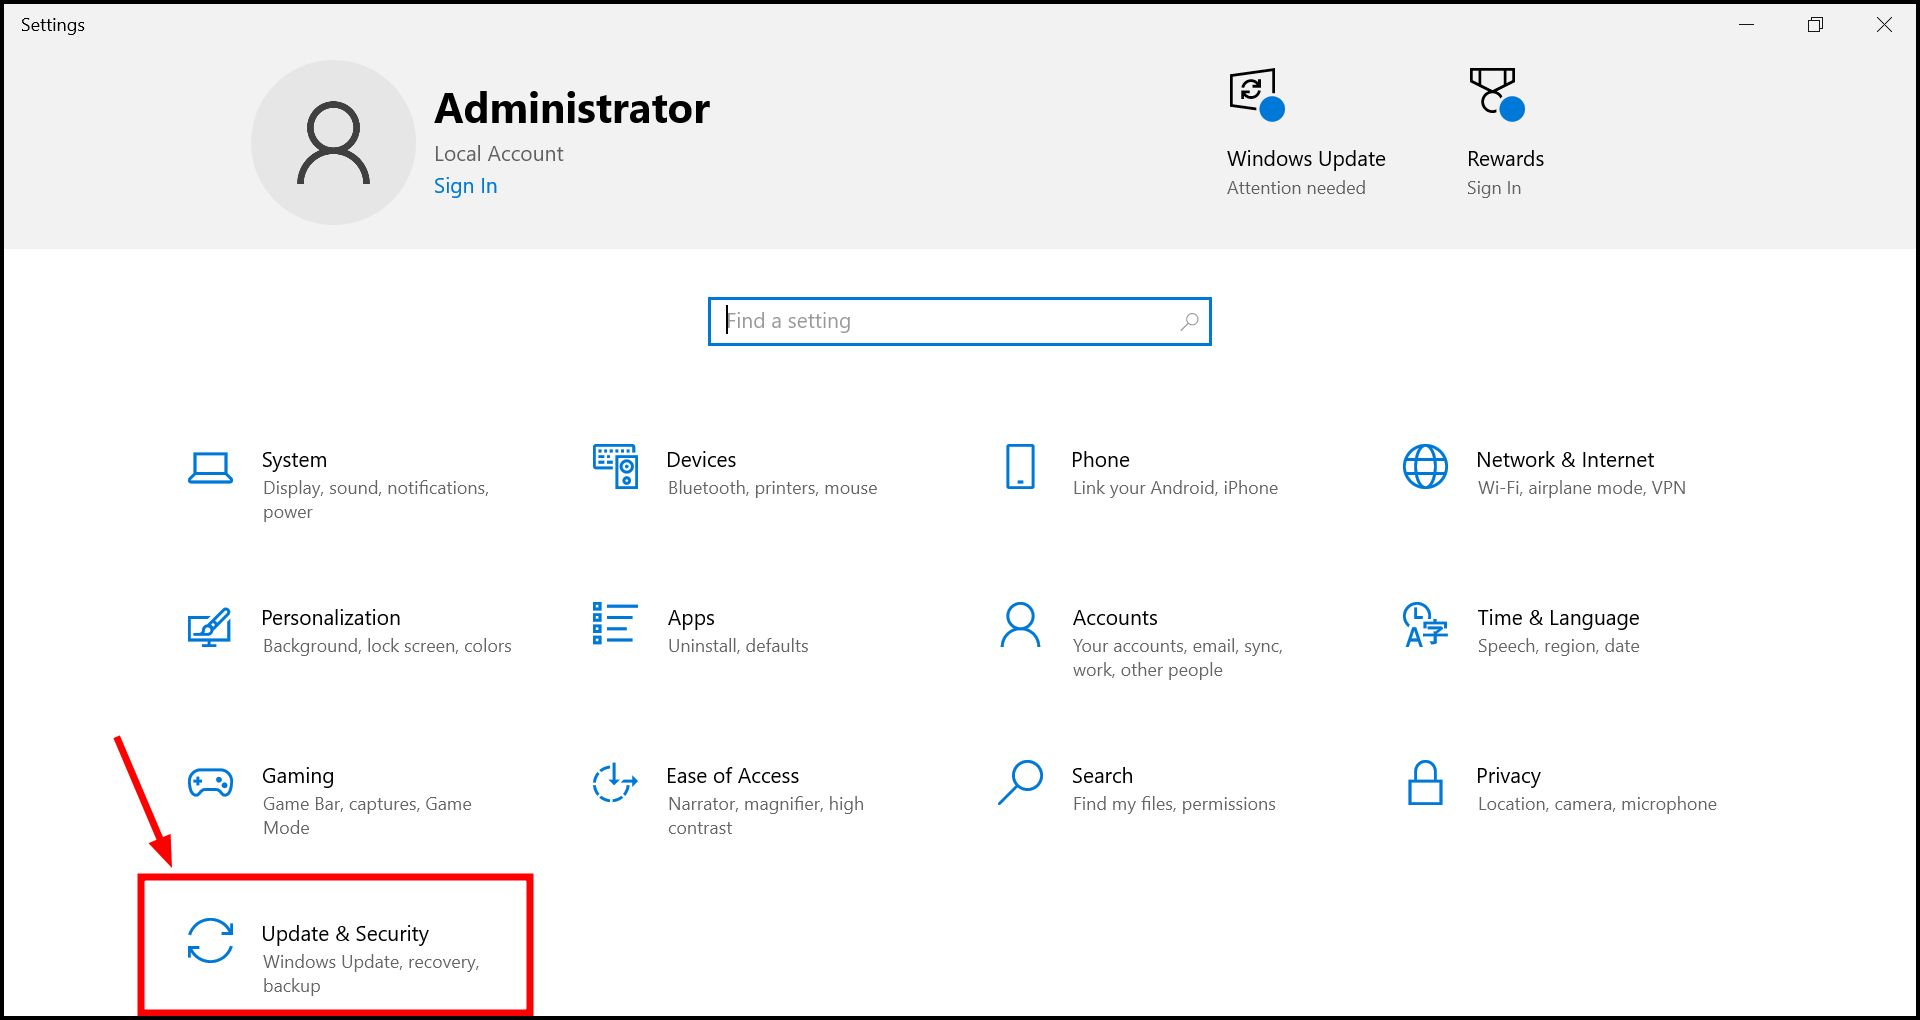
- Right-click the Start button and select “Settings.”

Open Settings - Choose “Update and Security.”
Go to Update and Security - Click on the “Troubleshoot” option from the menu.

Click on Troubleshoot - Select the “Additional troubleshooters” option, indicated in blue.
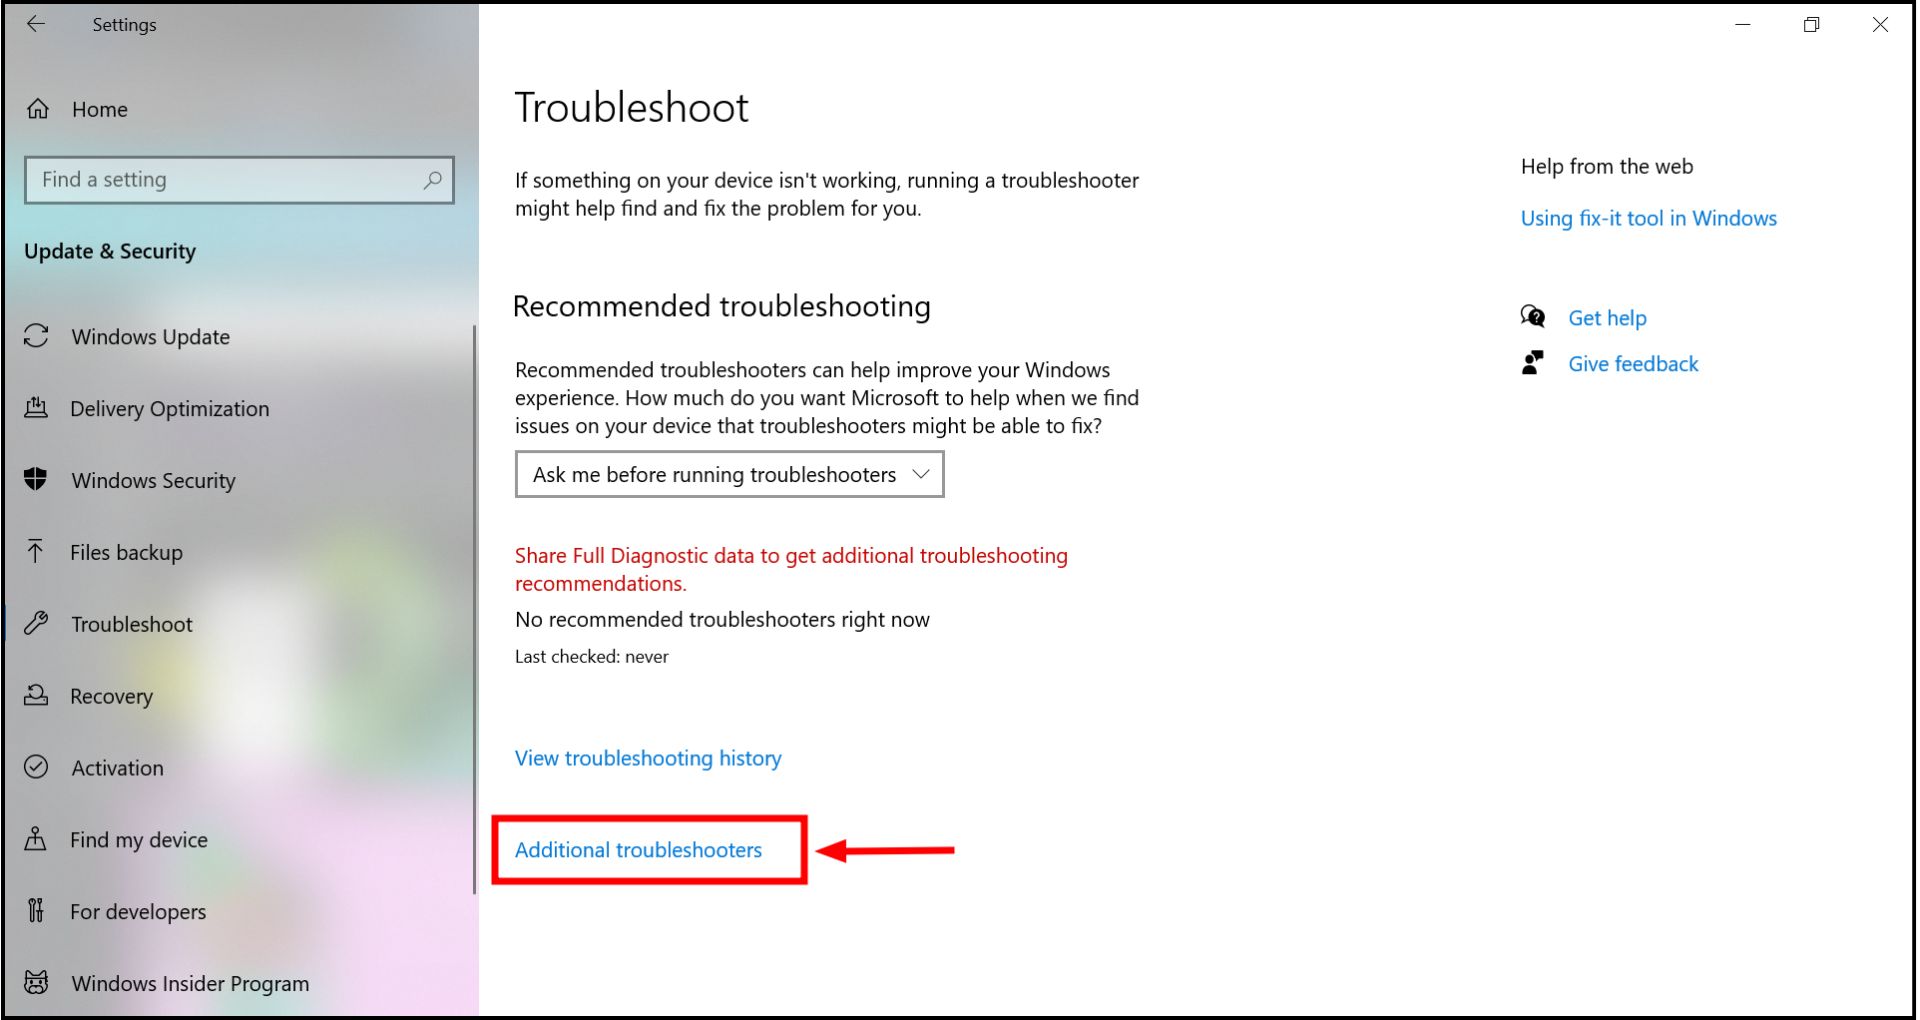
Click on Additional troubleshooters - Scroll down to find the “Network Adapter,” and click on it.
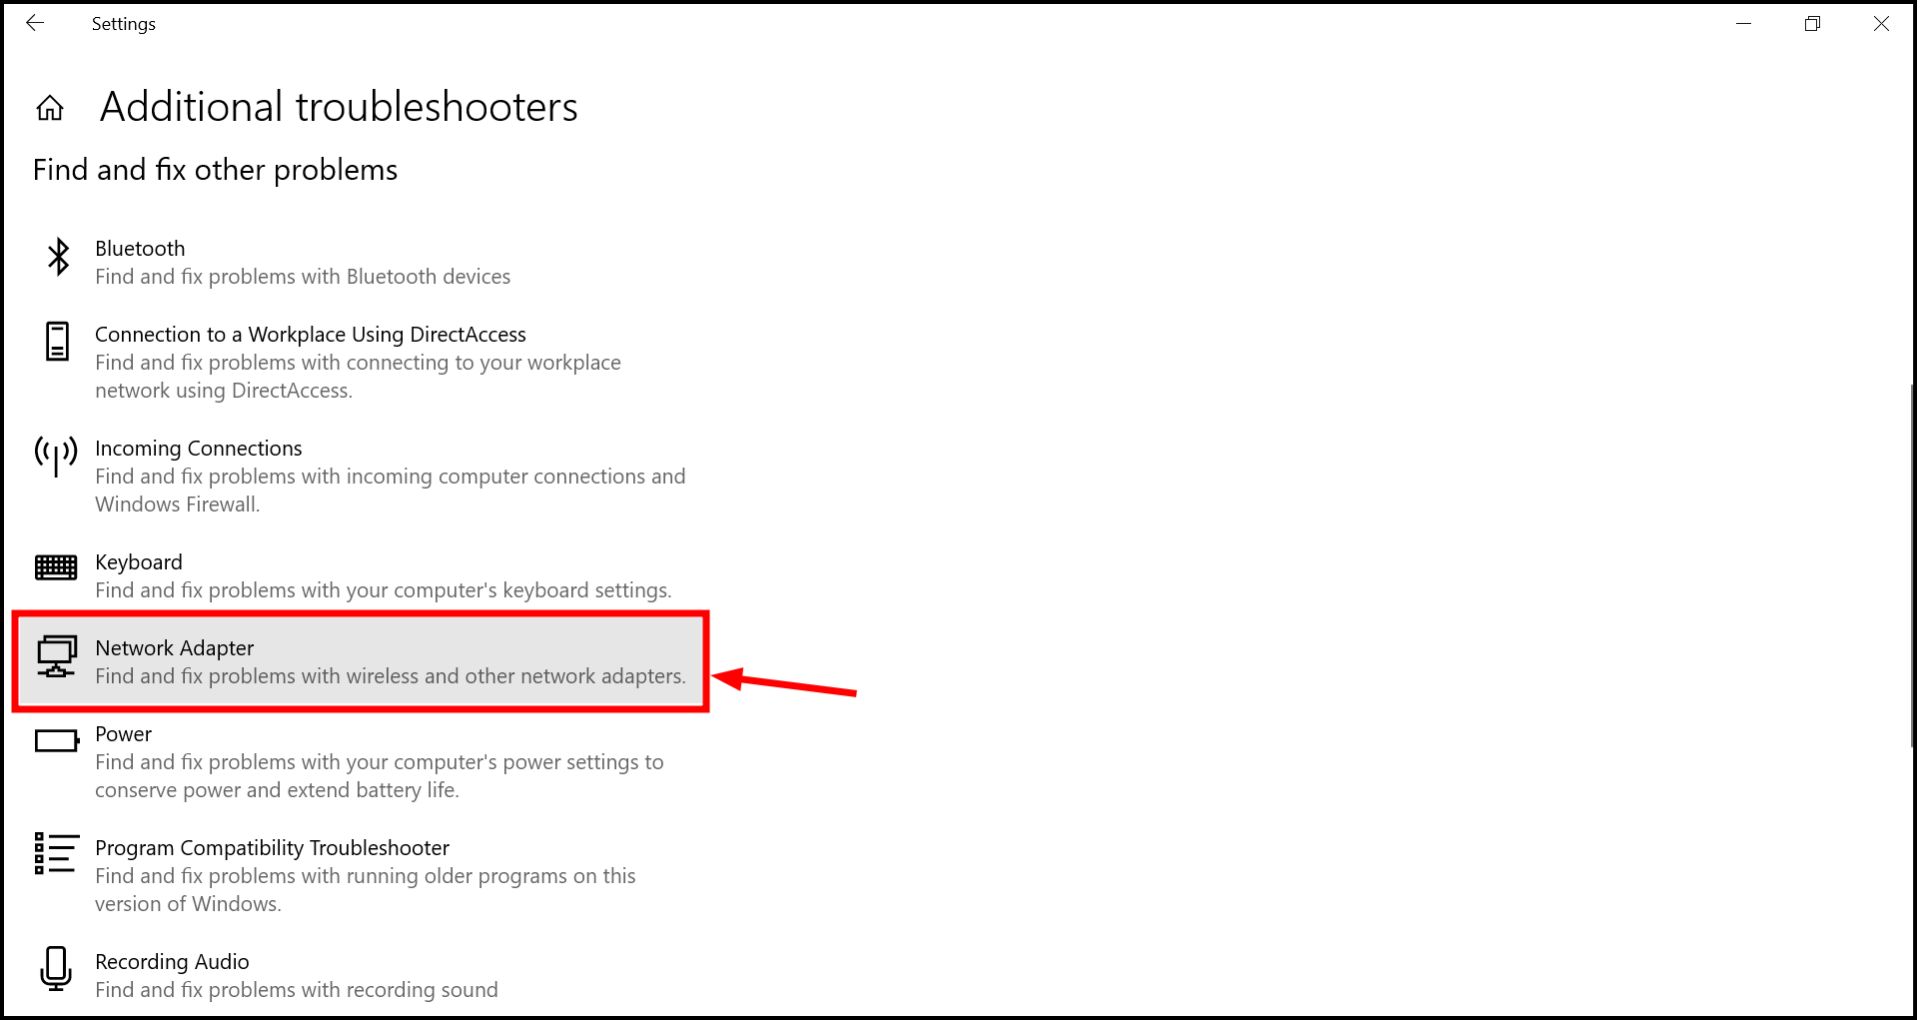
Click Network Adapter - Click “Run the Troubleshooter” and follow the on-screen instructions to complete the process.
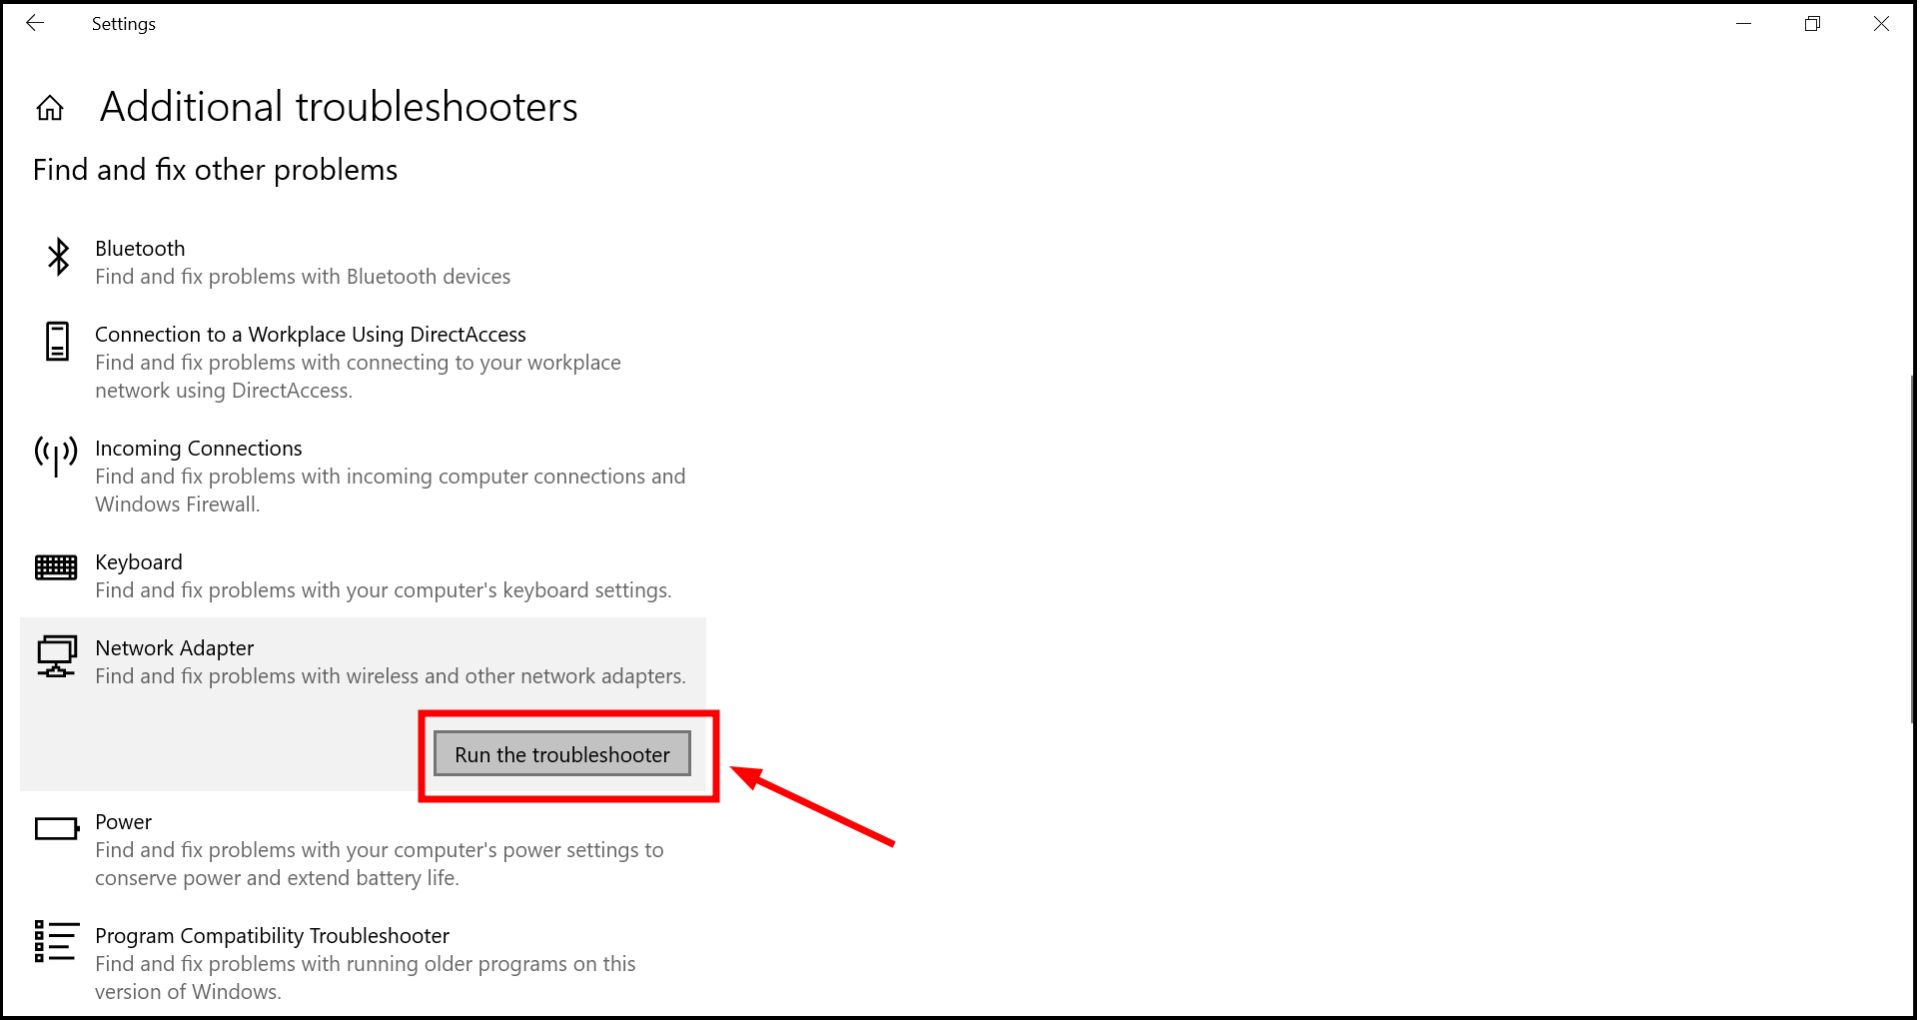
Click Run the Troubleshooter
Once the troubleshooter finishes, verify whether your Ethernet starts working.
5. Temporarily Turn off Antivirus and Firewall
Antivirus software and firewalls on your PC might interfere with your Ethernet connection. You can confirm this by disabling them temporarily and reconnecting the Ethernet.
↪ Turn off Windows Defender Antivirus
- Type “Windows Security” in the Start menu search bar and open the application.
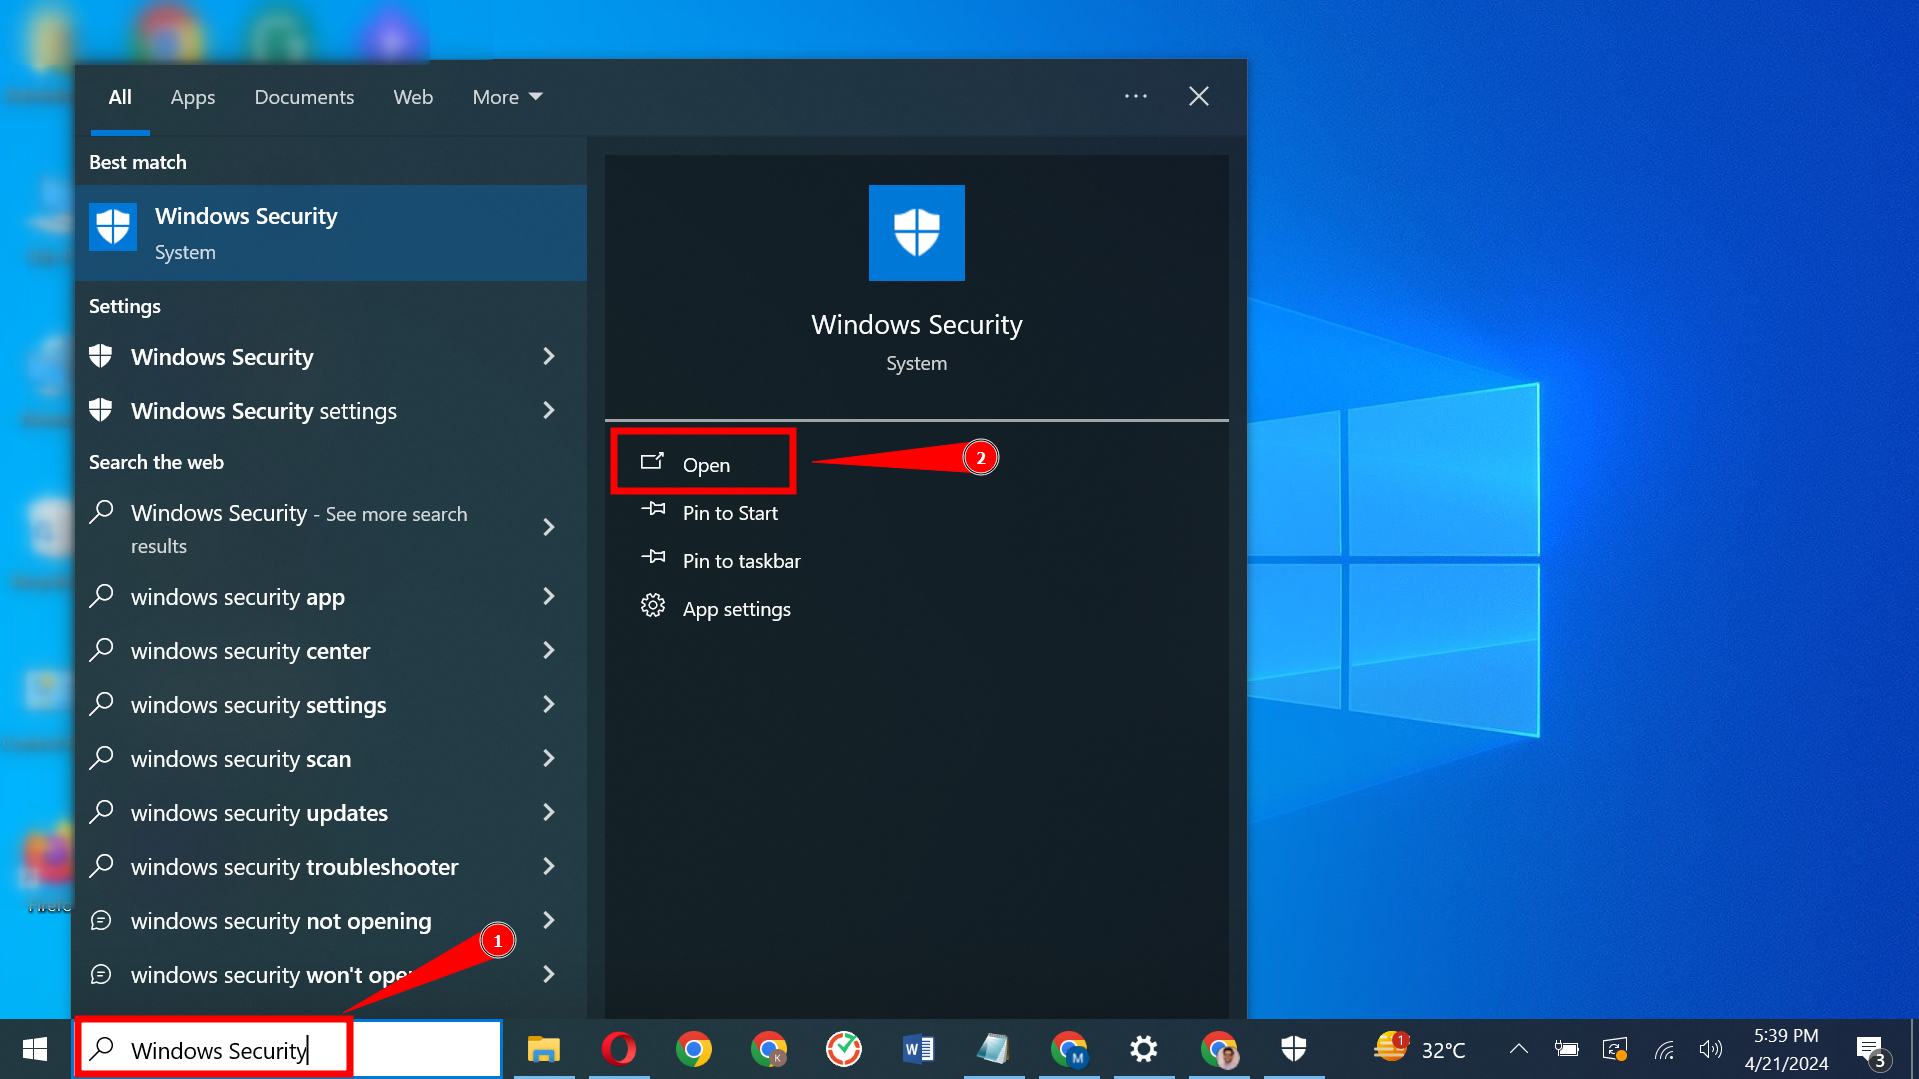
Open Windows Security - Click “Virus & threat protection” from the options on the left.
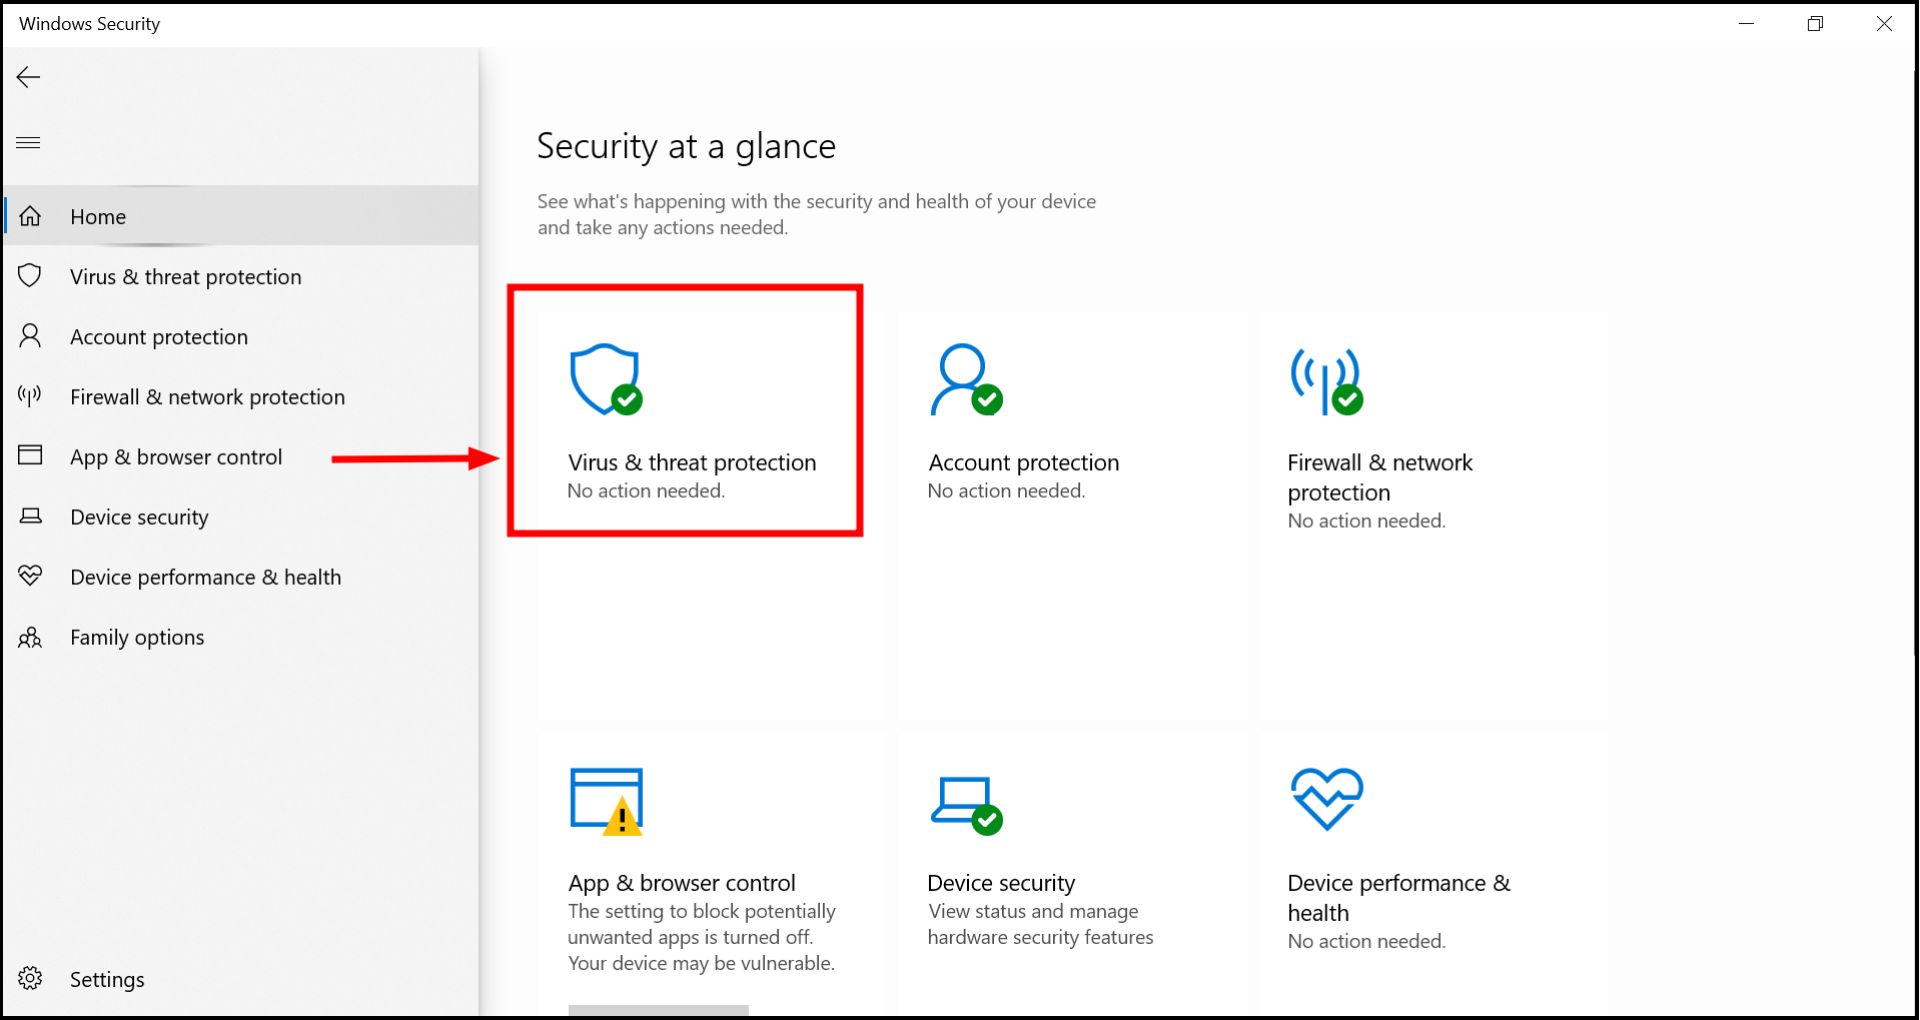
Open Virus & threat protection - Under the “Virus & threat protection settings” section, click “Manage settings.”
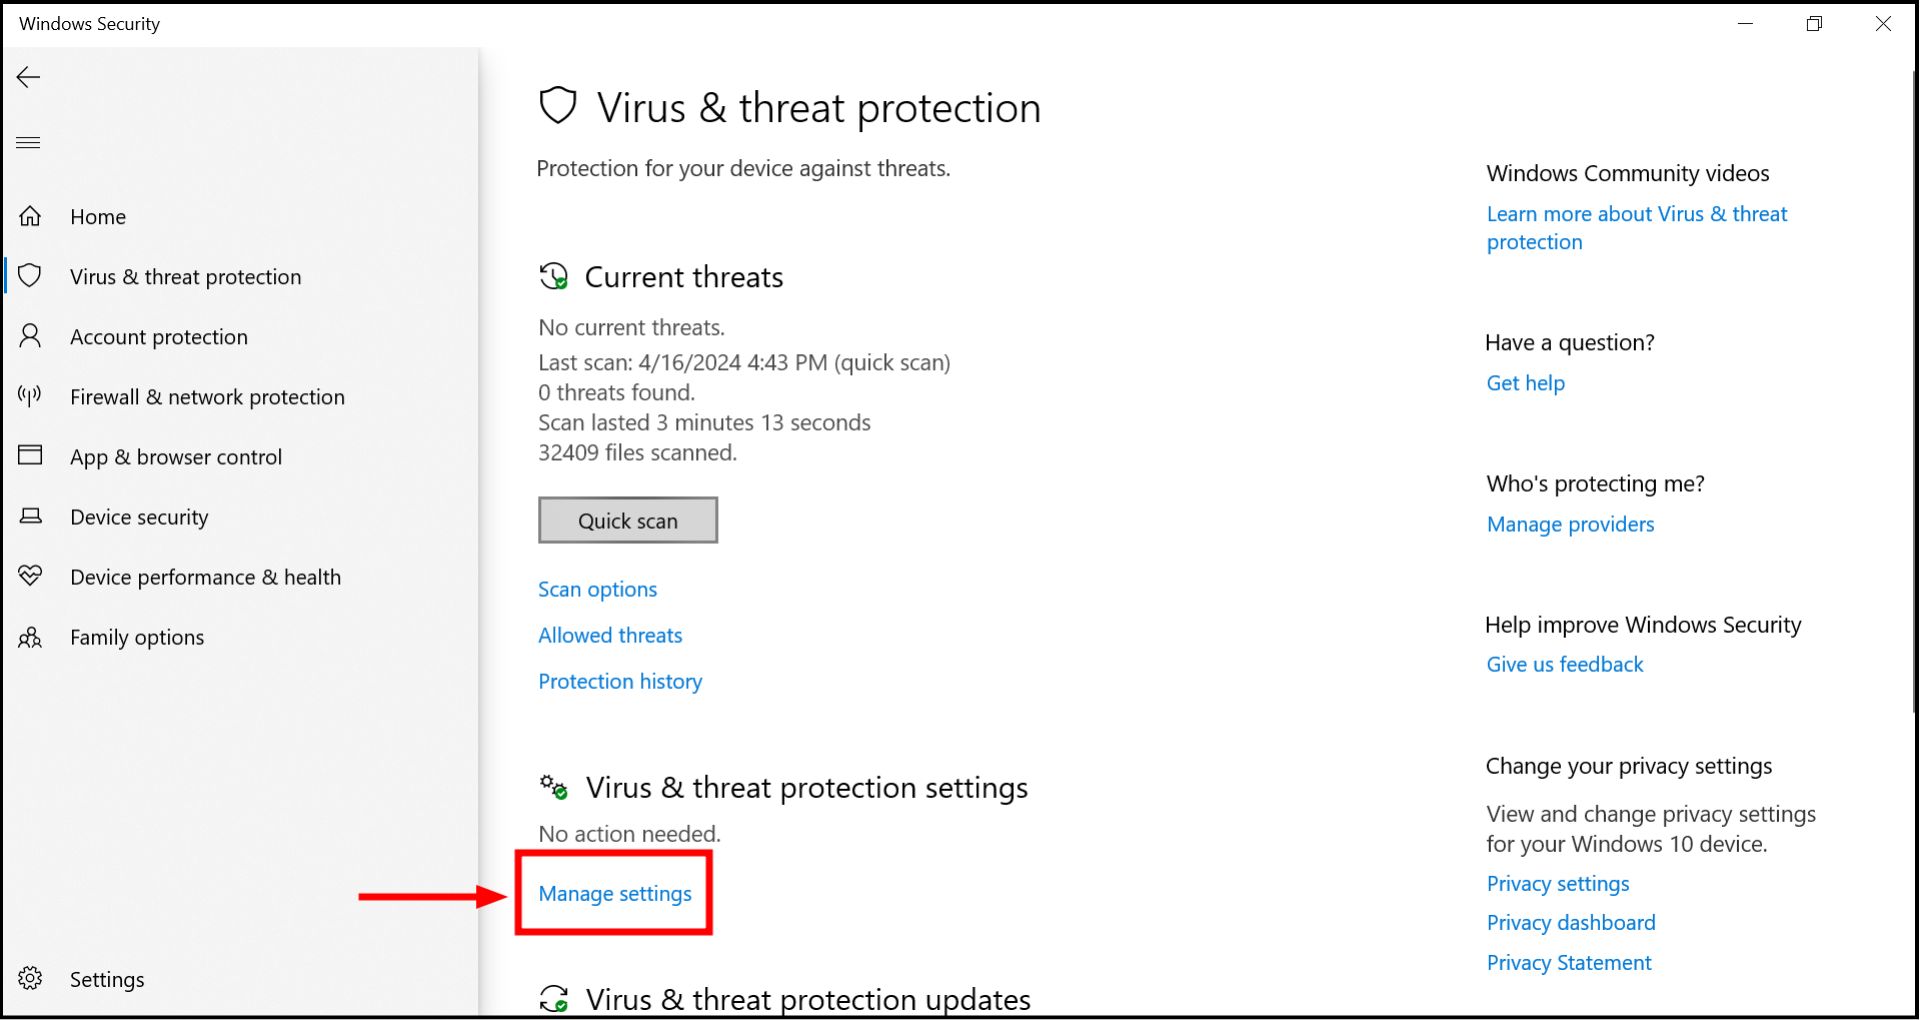
Click on Virus & threat protection settings - Toggle off “Real-time protection.” This will temporarily disable the antivirus.
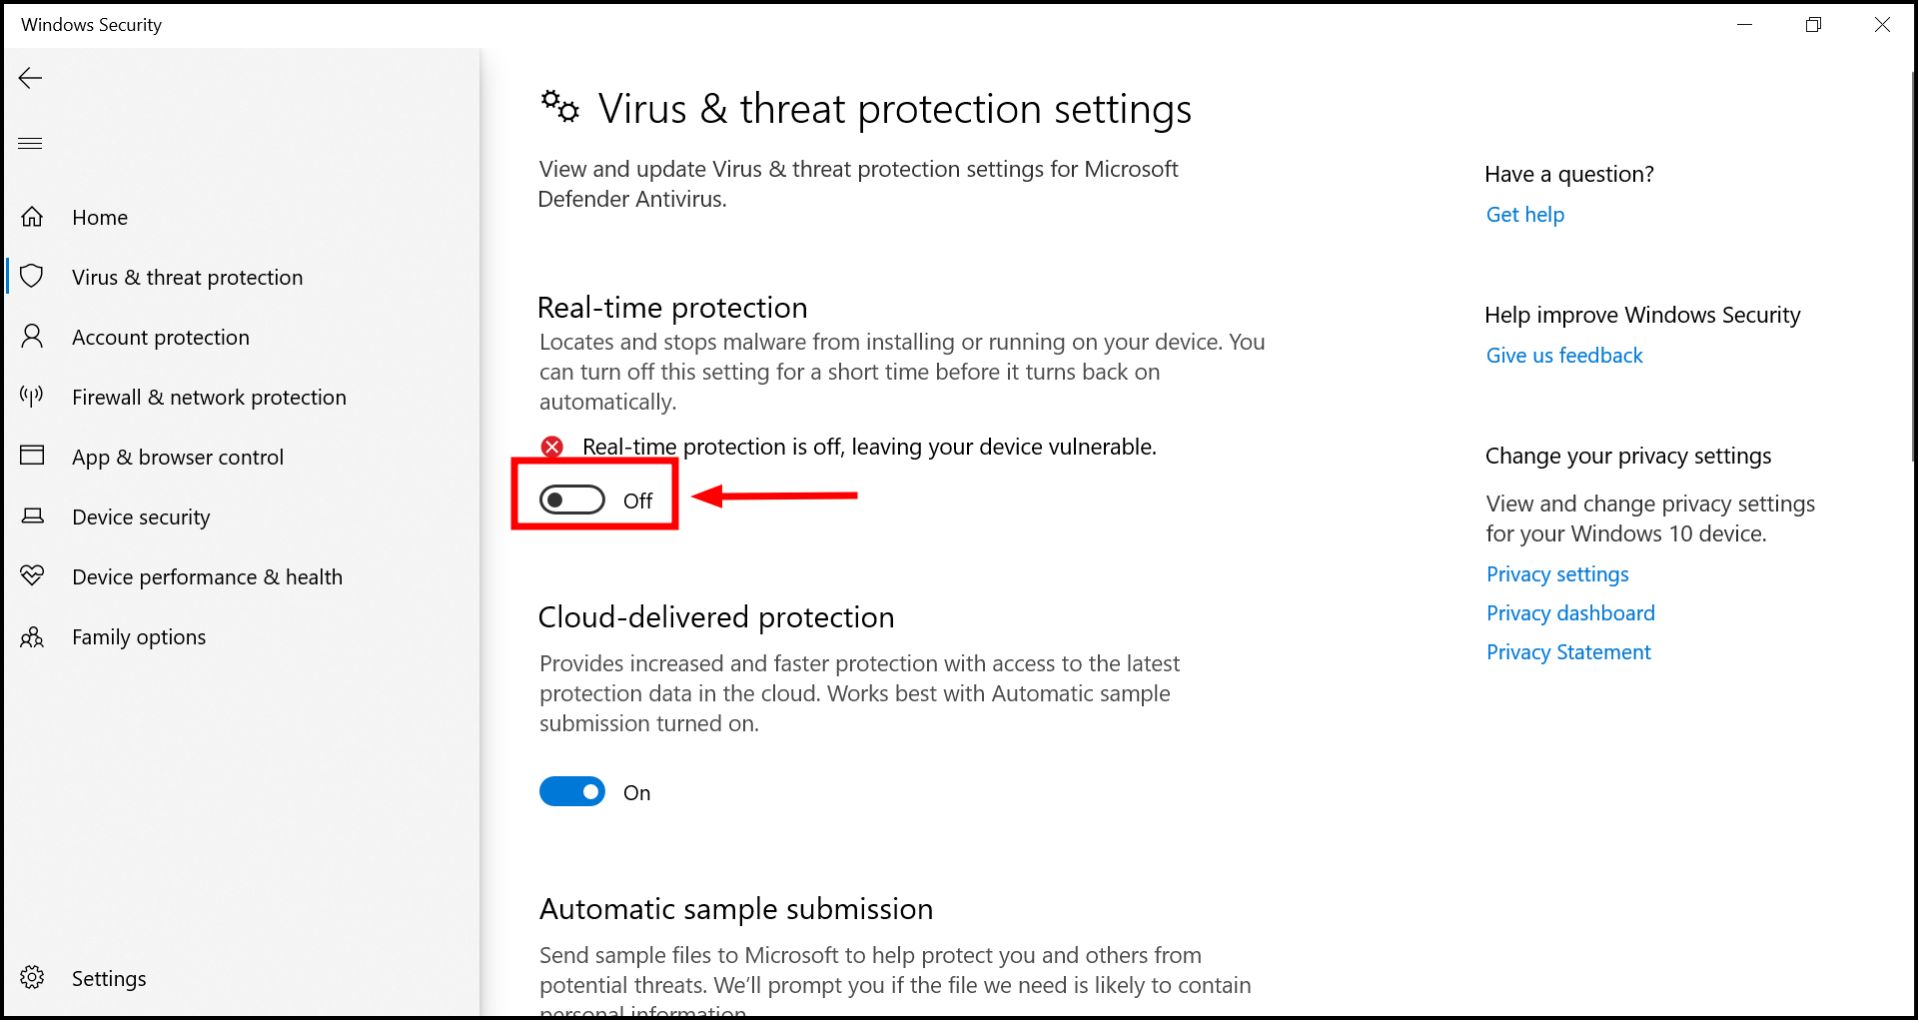
Turn off the antivirus
With the antivirus temporarily disabled, try connecting to the internet again. After testing, ensure you re-enable Real-time protection to maintain your computer’s security.
↪ Turn off the Windows Defender Firewall
- Open Windows Security using the search bar.
Open Windows Security settings - Select “Firewall & network protection” on the left sidebar and choose your active network (usually marked as “Active“).
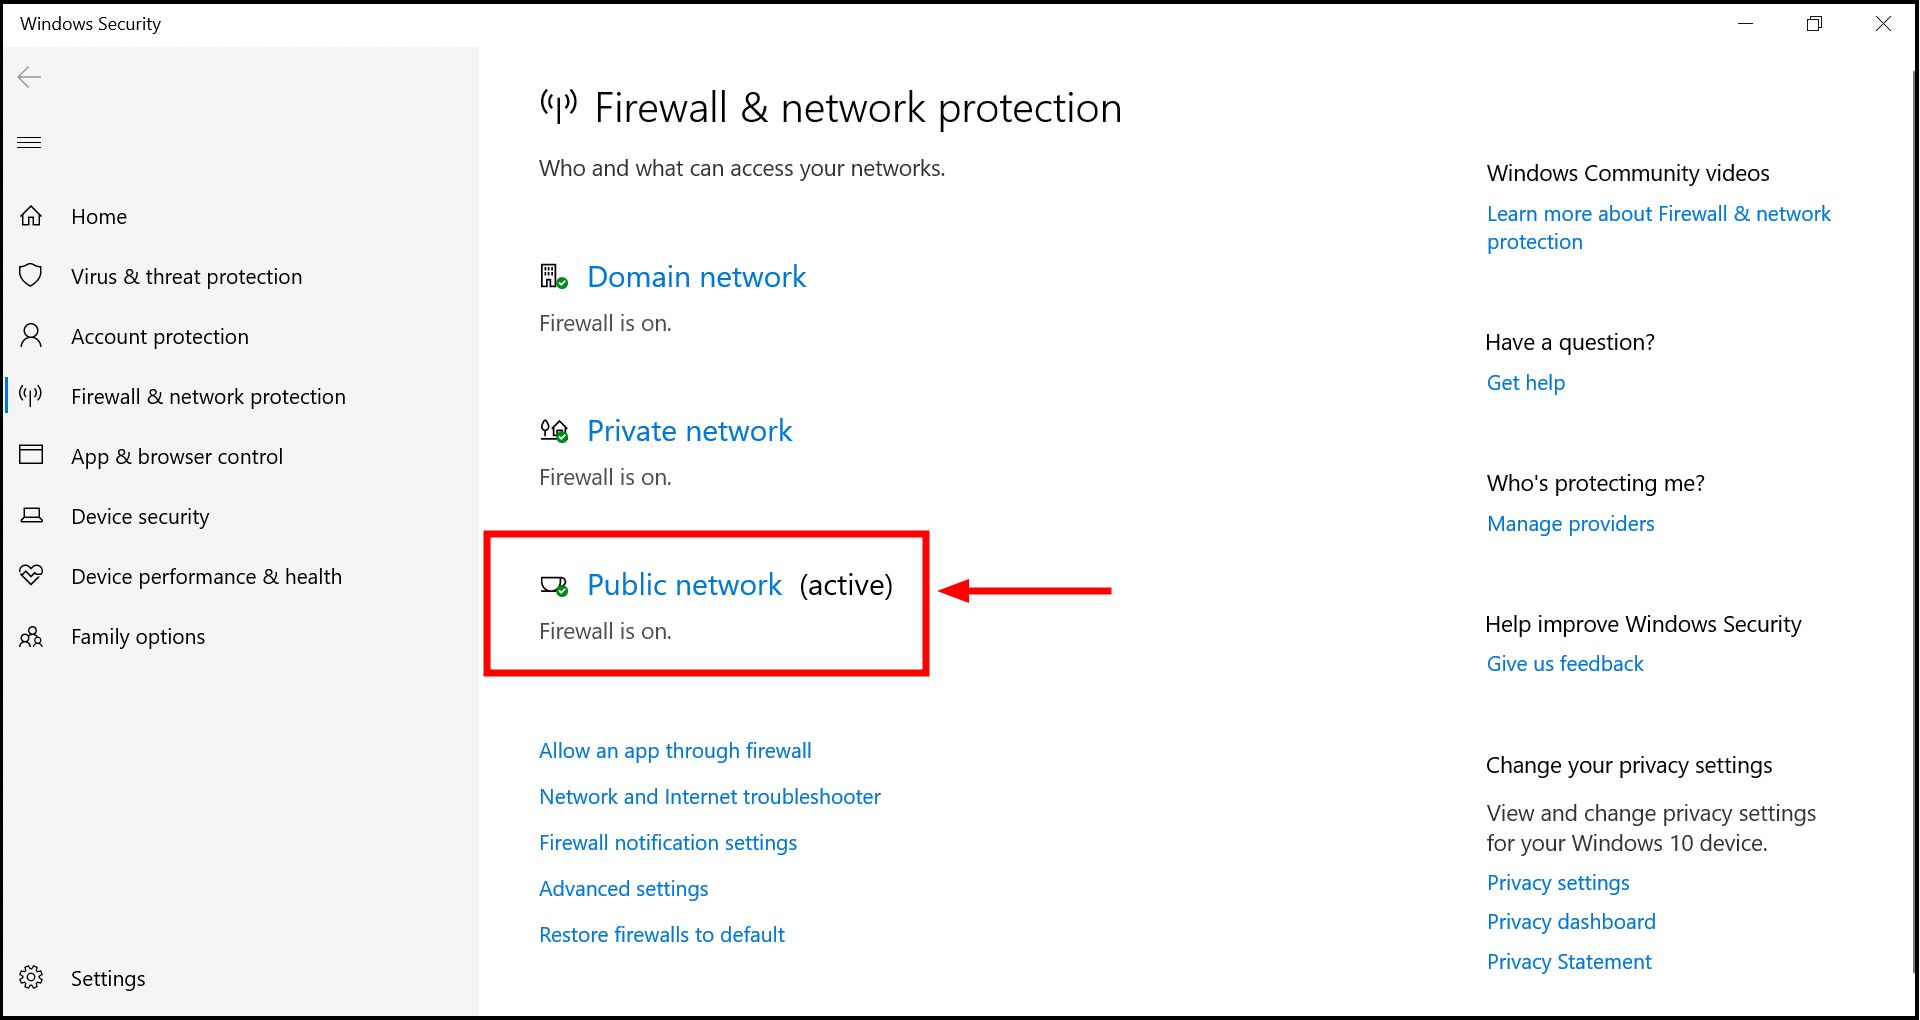
Click on Firewall & network protection - Toggle the Windows Defender Firewall to OFF.
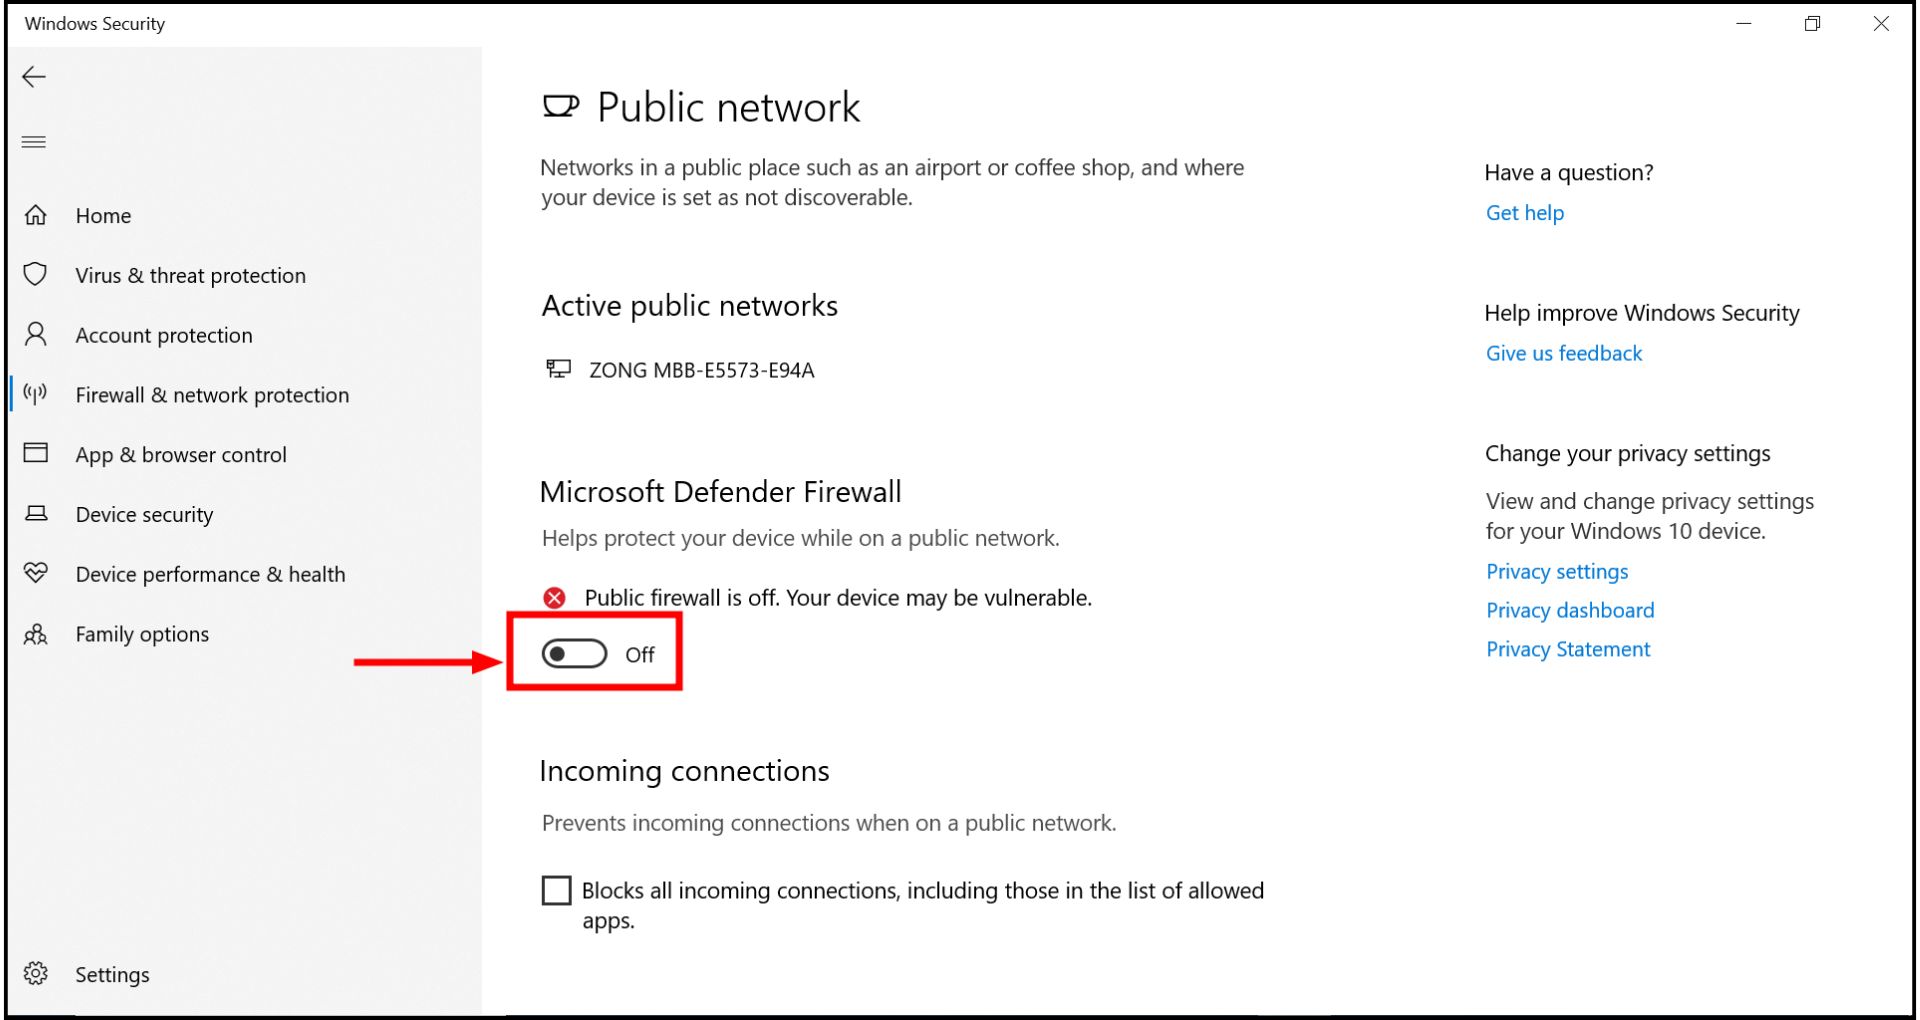
Turn it off
Test your internet connection after disabling the firewall. Remember to re-enable the firewall to secure your PC against network threats.
6. Set Ethernet as the Preferred Network Connection
If both Ethernet and Wi-Fi are available, you might want to prioritize Ethernet for its speed and stability. To set Ethernet as your preferred connection in Windows, follow these steps:
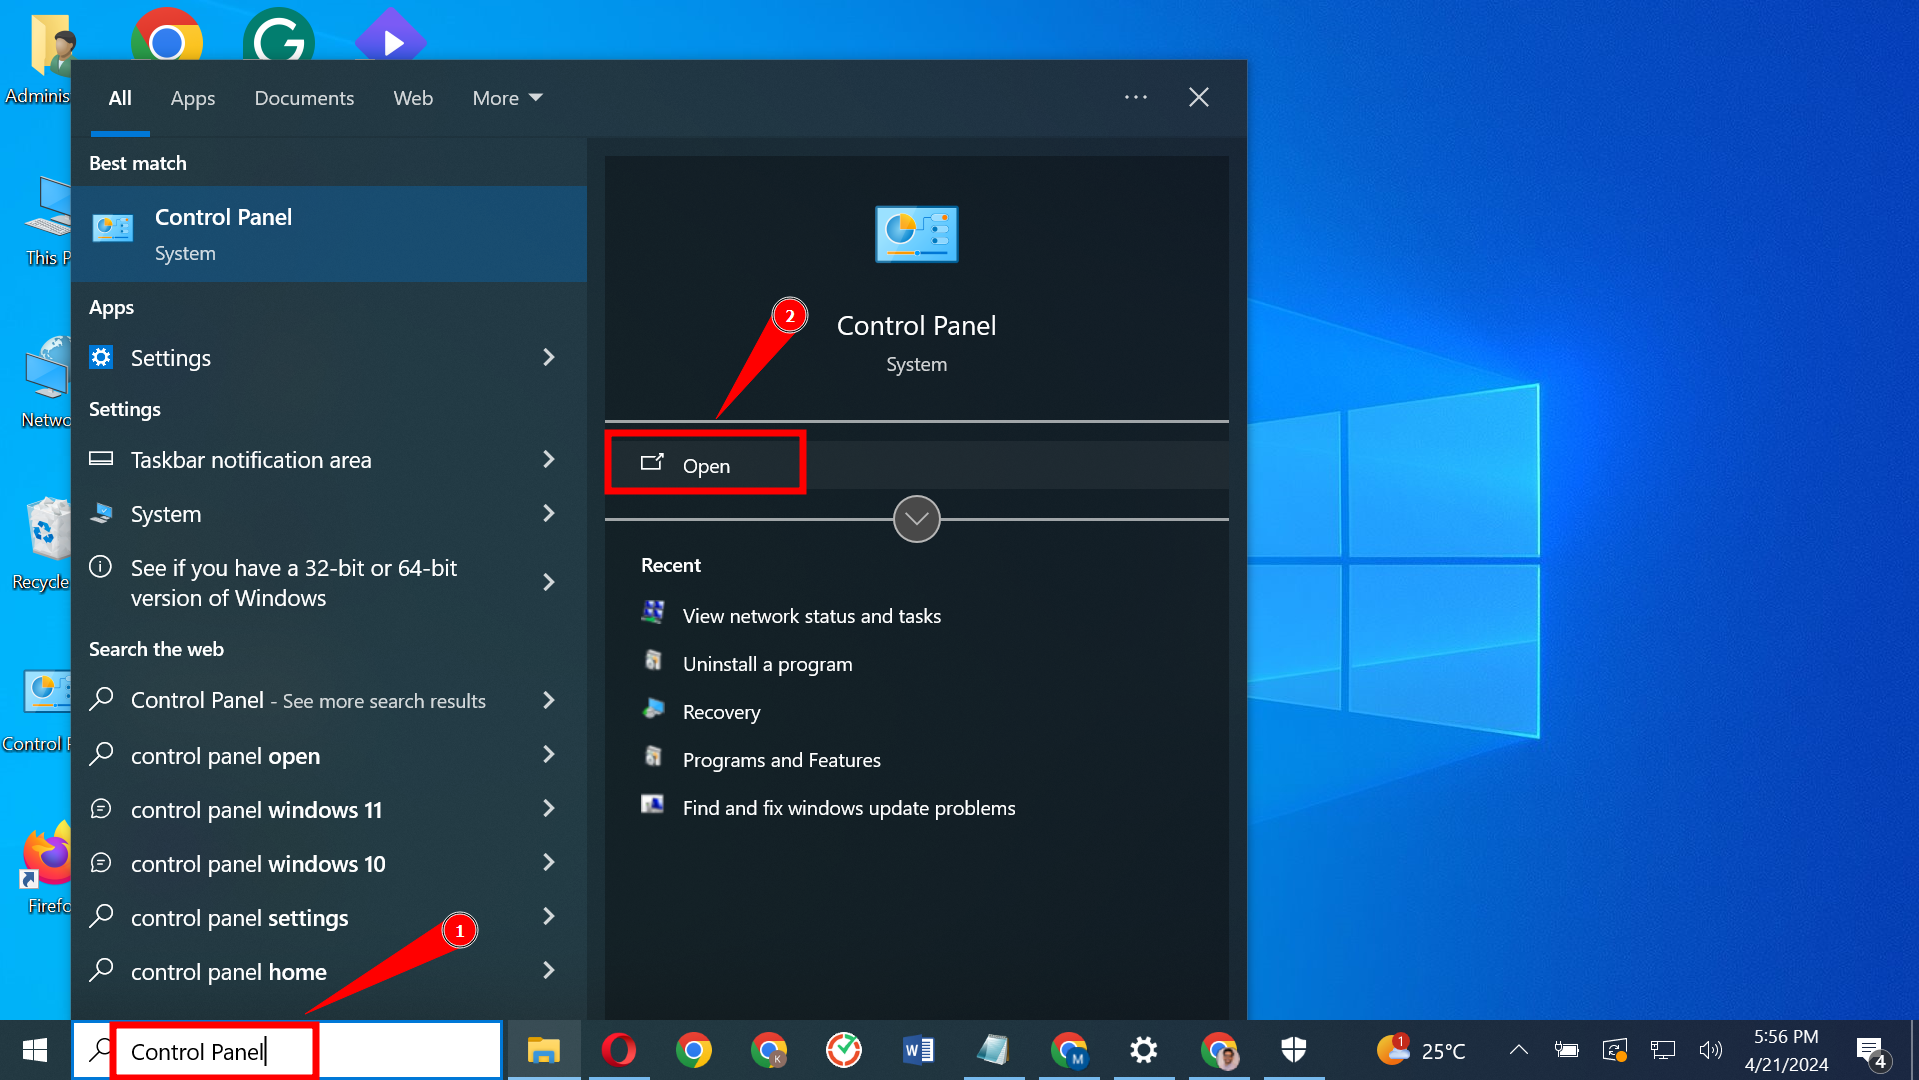
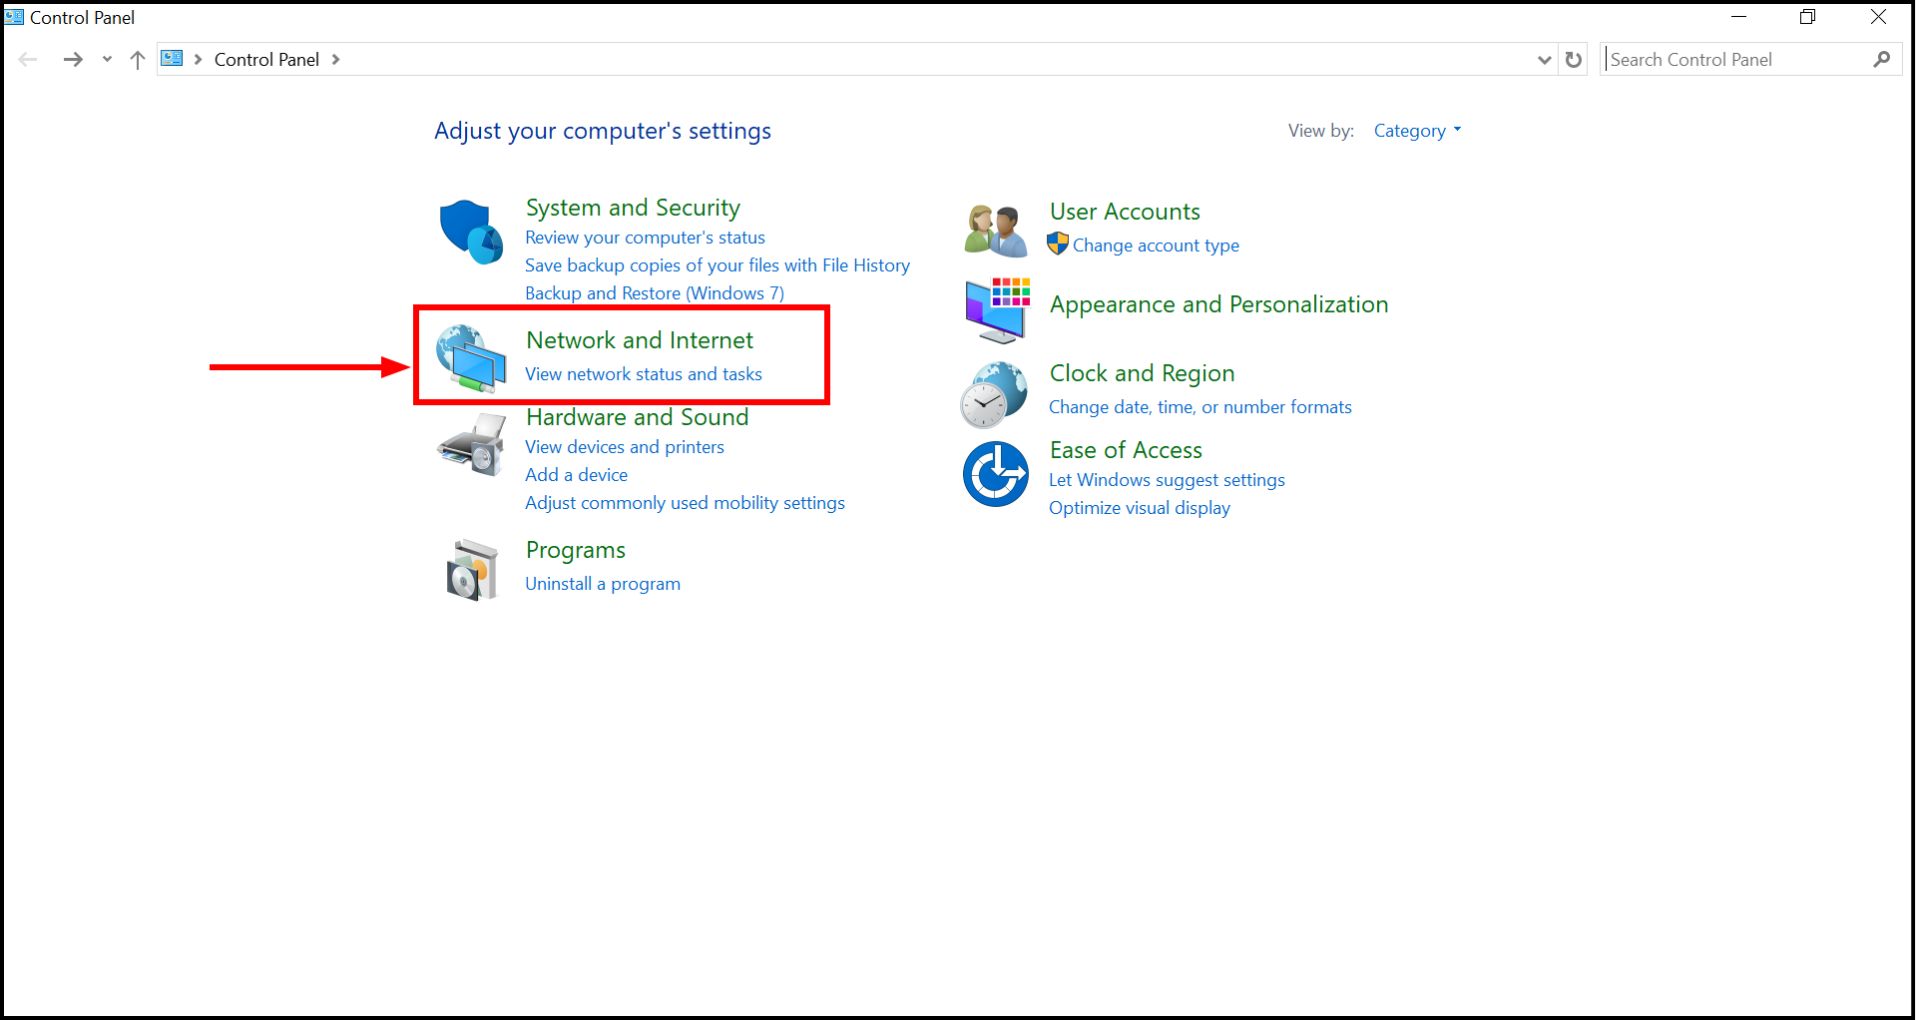
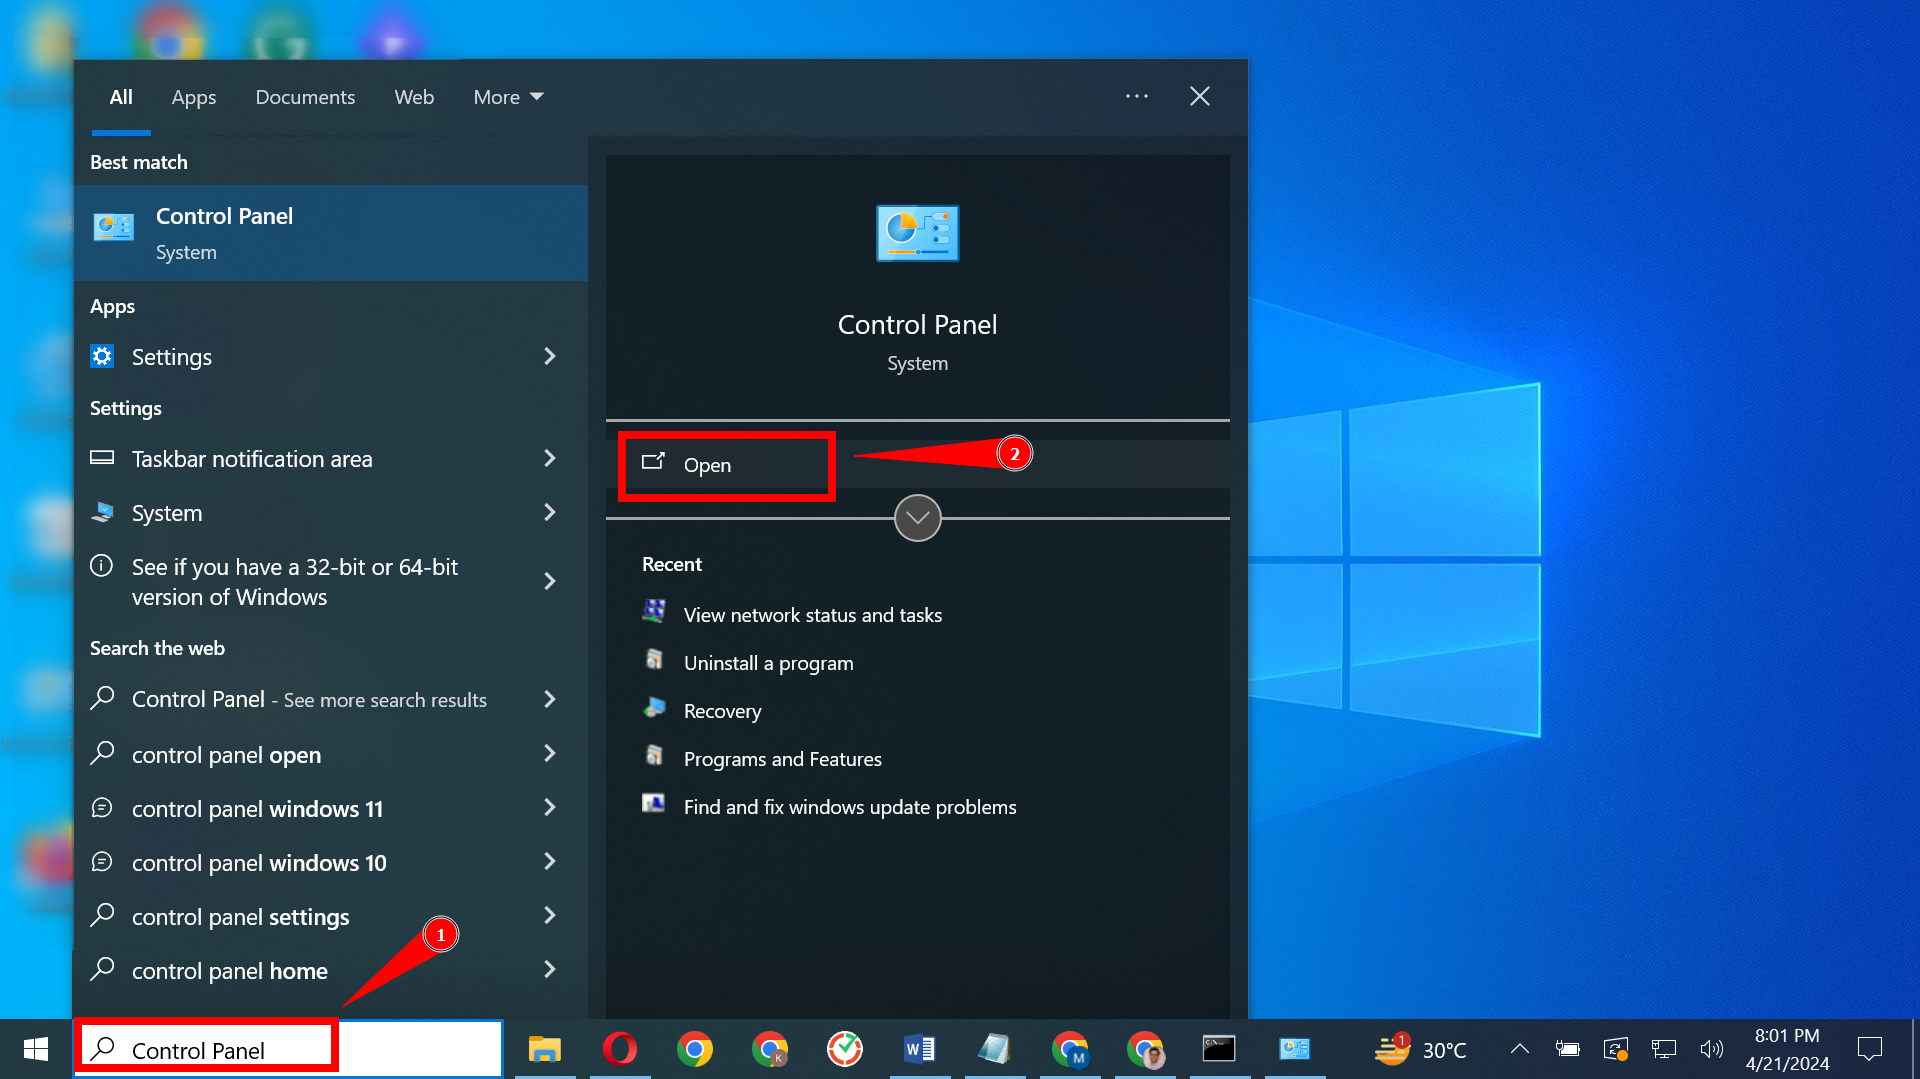
- Press the Windows key, type “Control Panel,” and click Open.
Open Control panel - Select “View network status and tasks” under “Network & Internet.”
Open Network & Internet settings - From the left menu, select “Change adapter settings.”
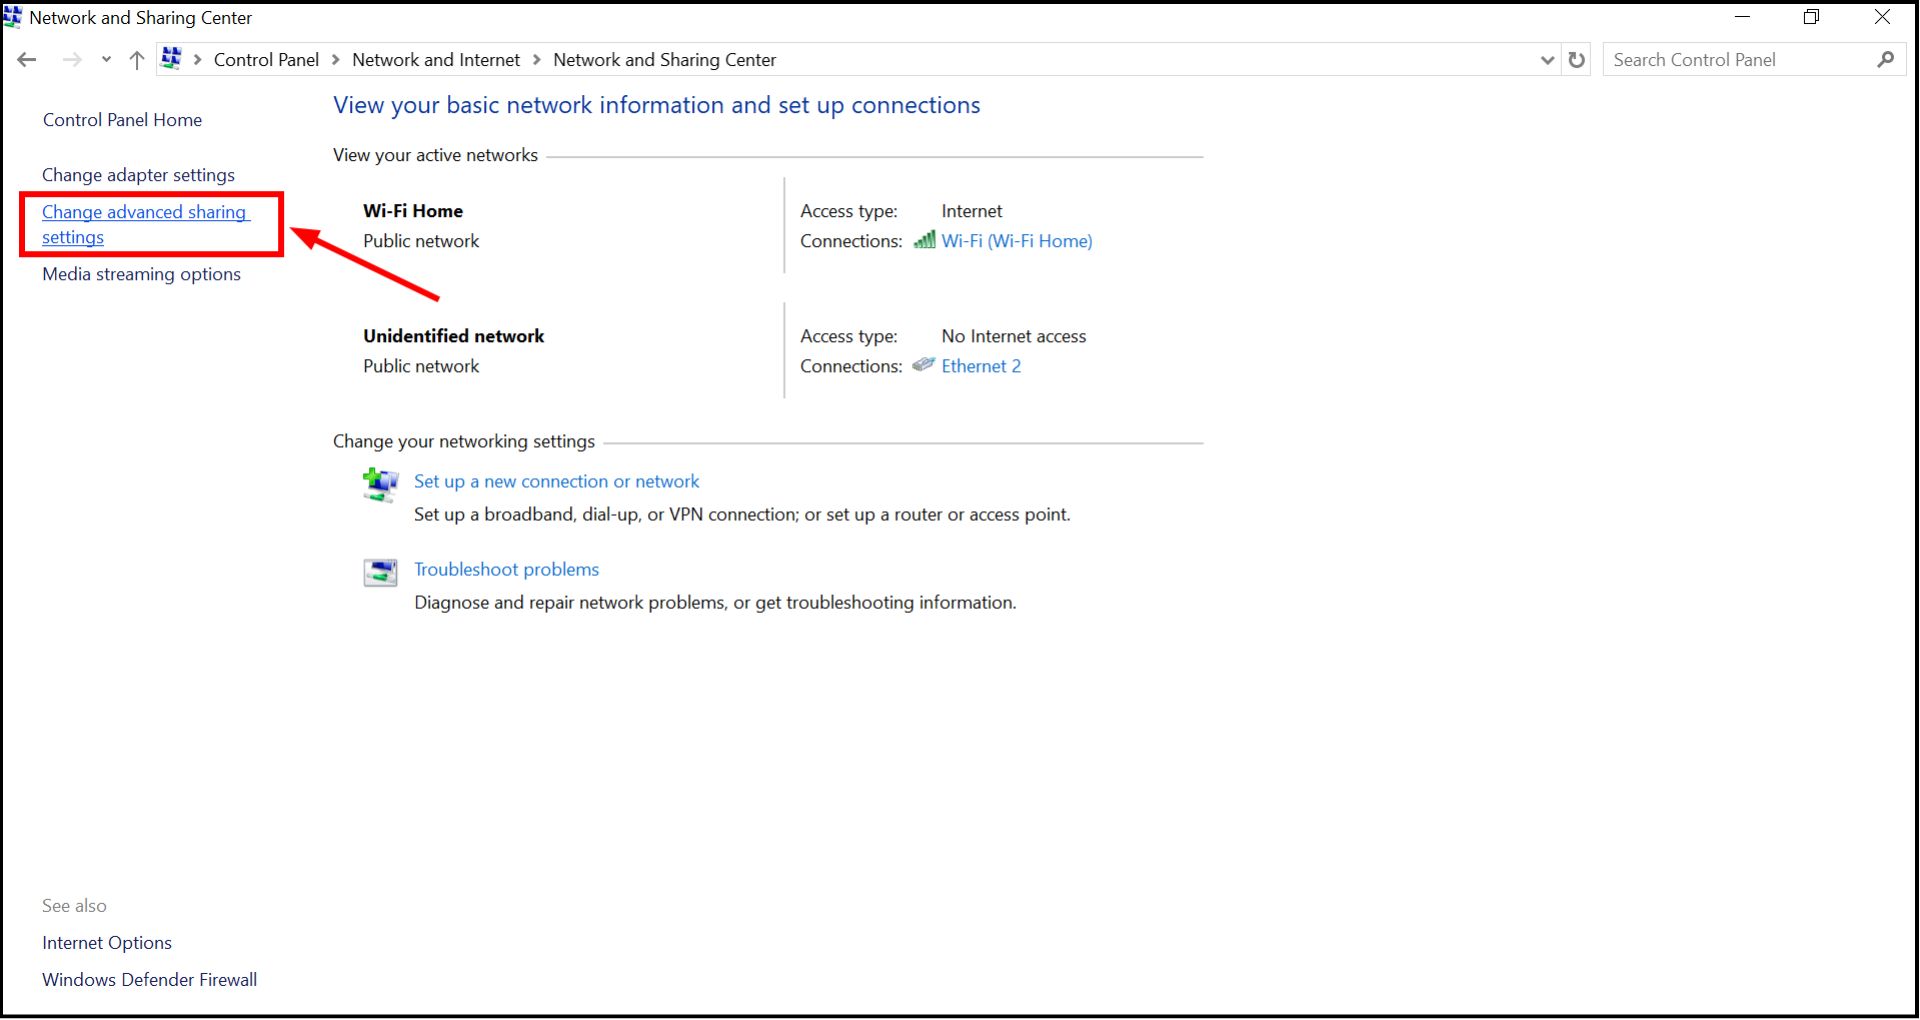
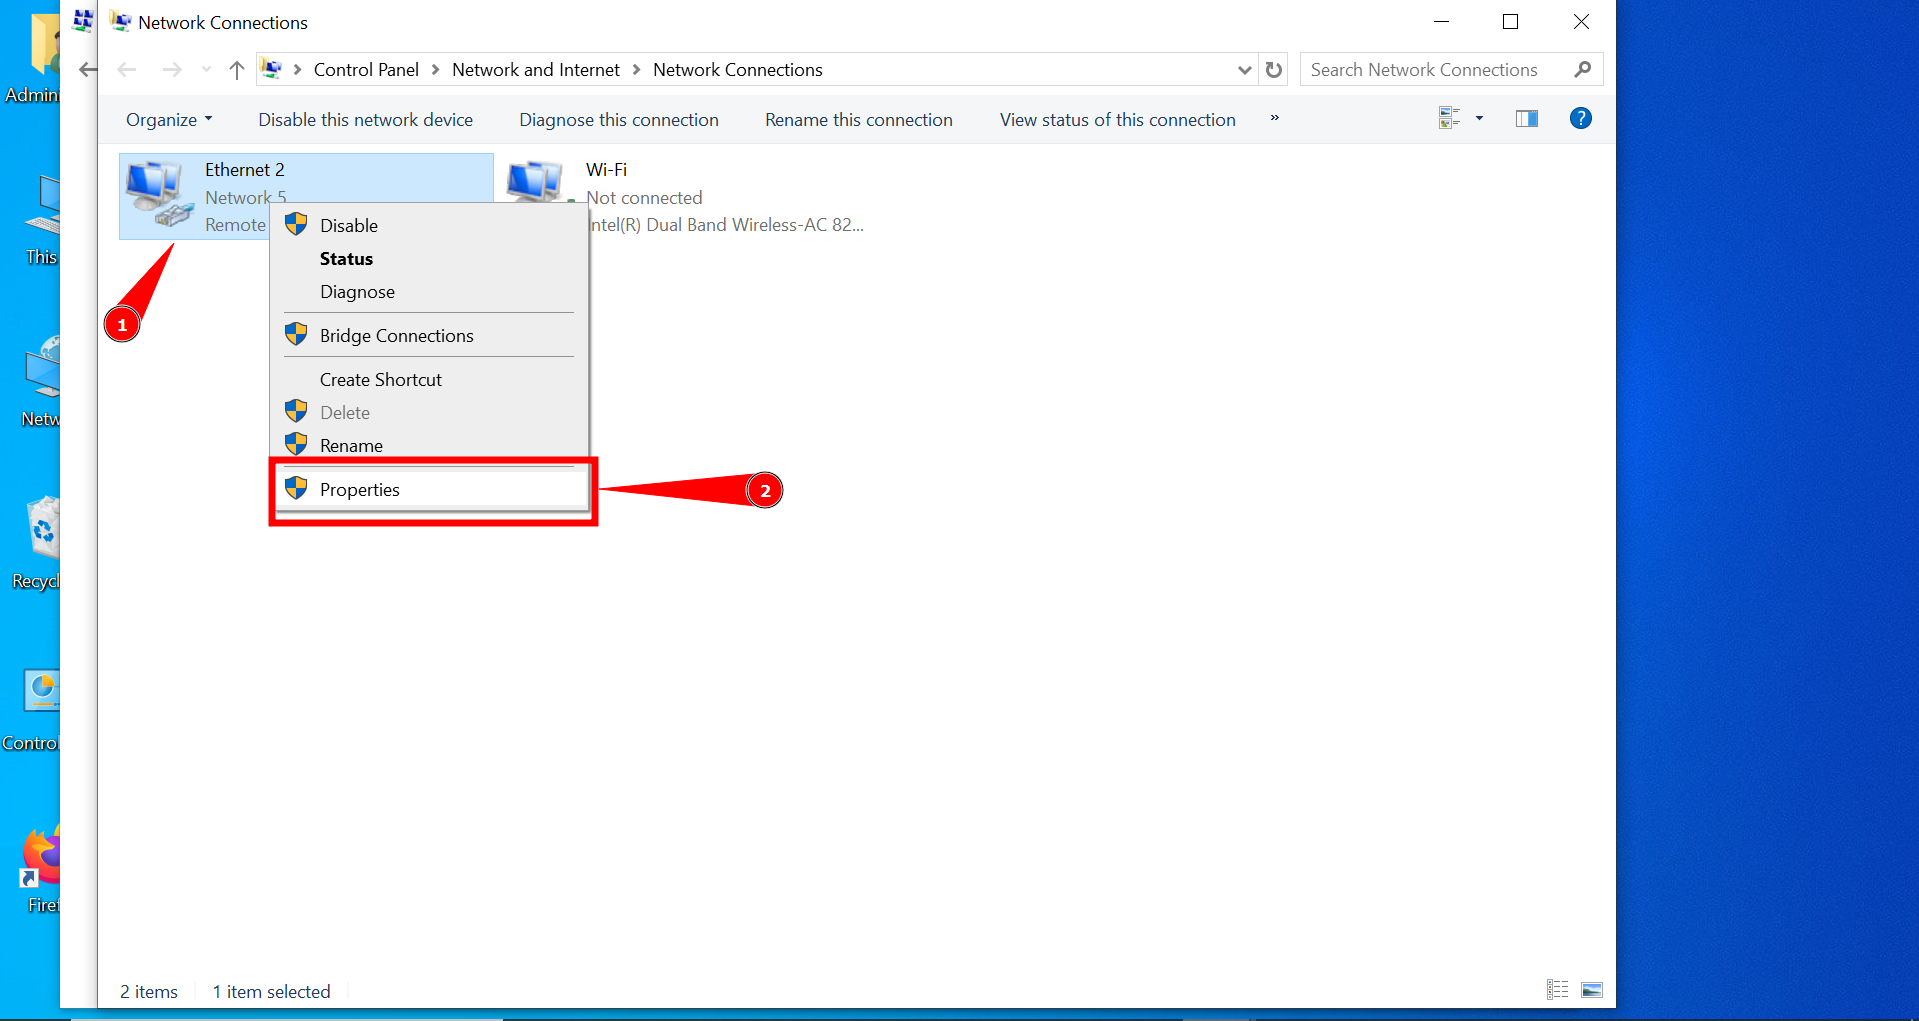
Click on Change Adapter settings - Right-click “Ethernet” and choose “Properties.”
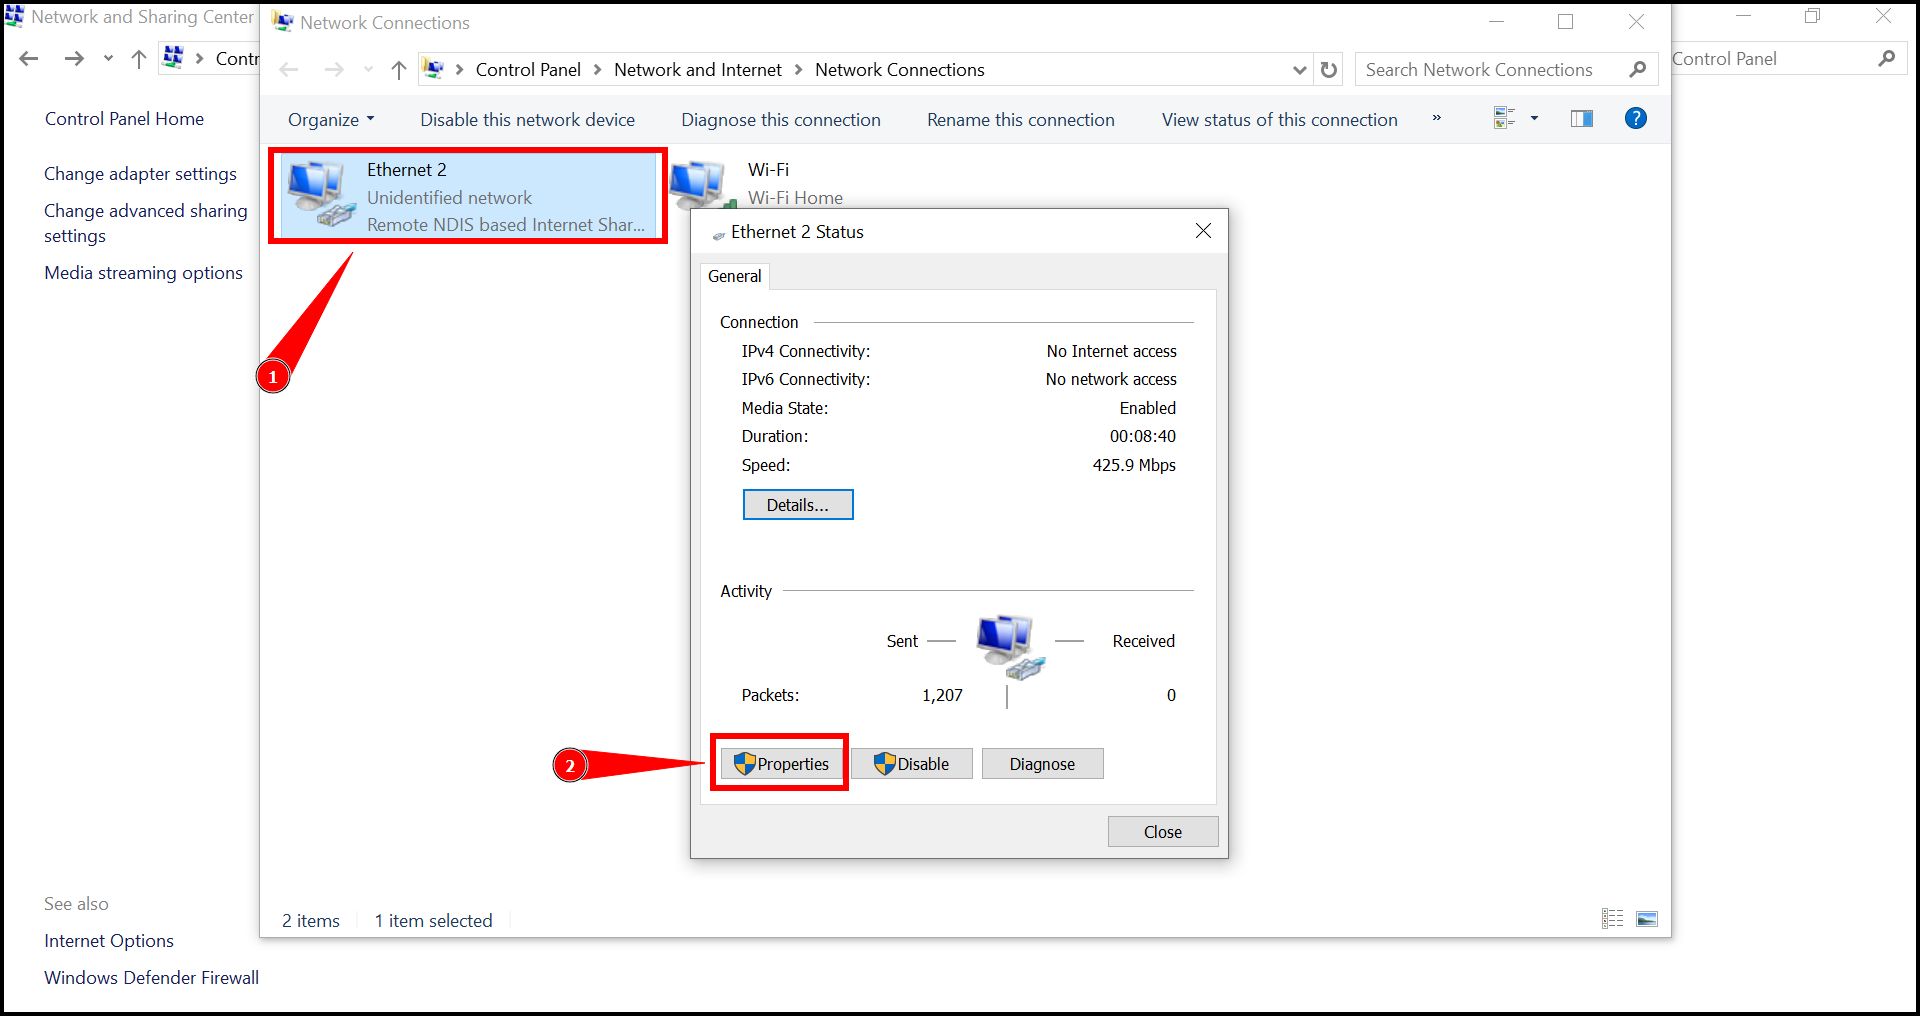
Go to Properties - Double-click “Internet Protocol Version 4 (TCP/IP)” to access its properties.
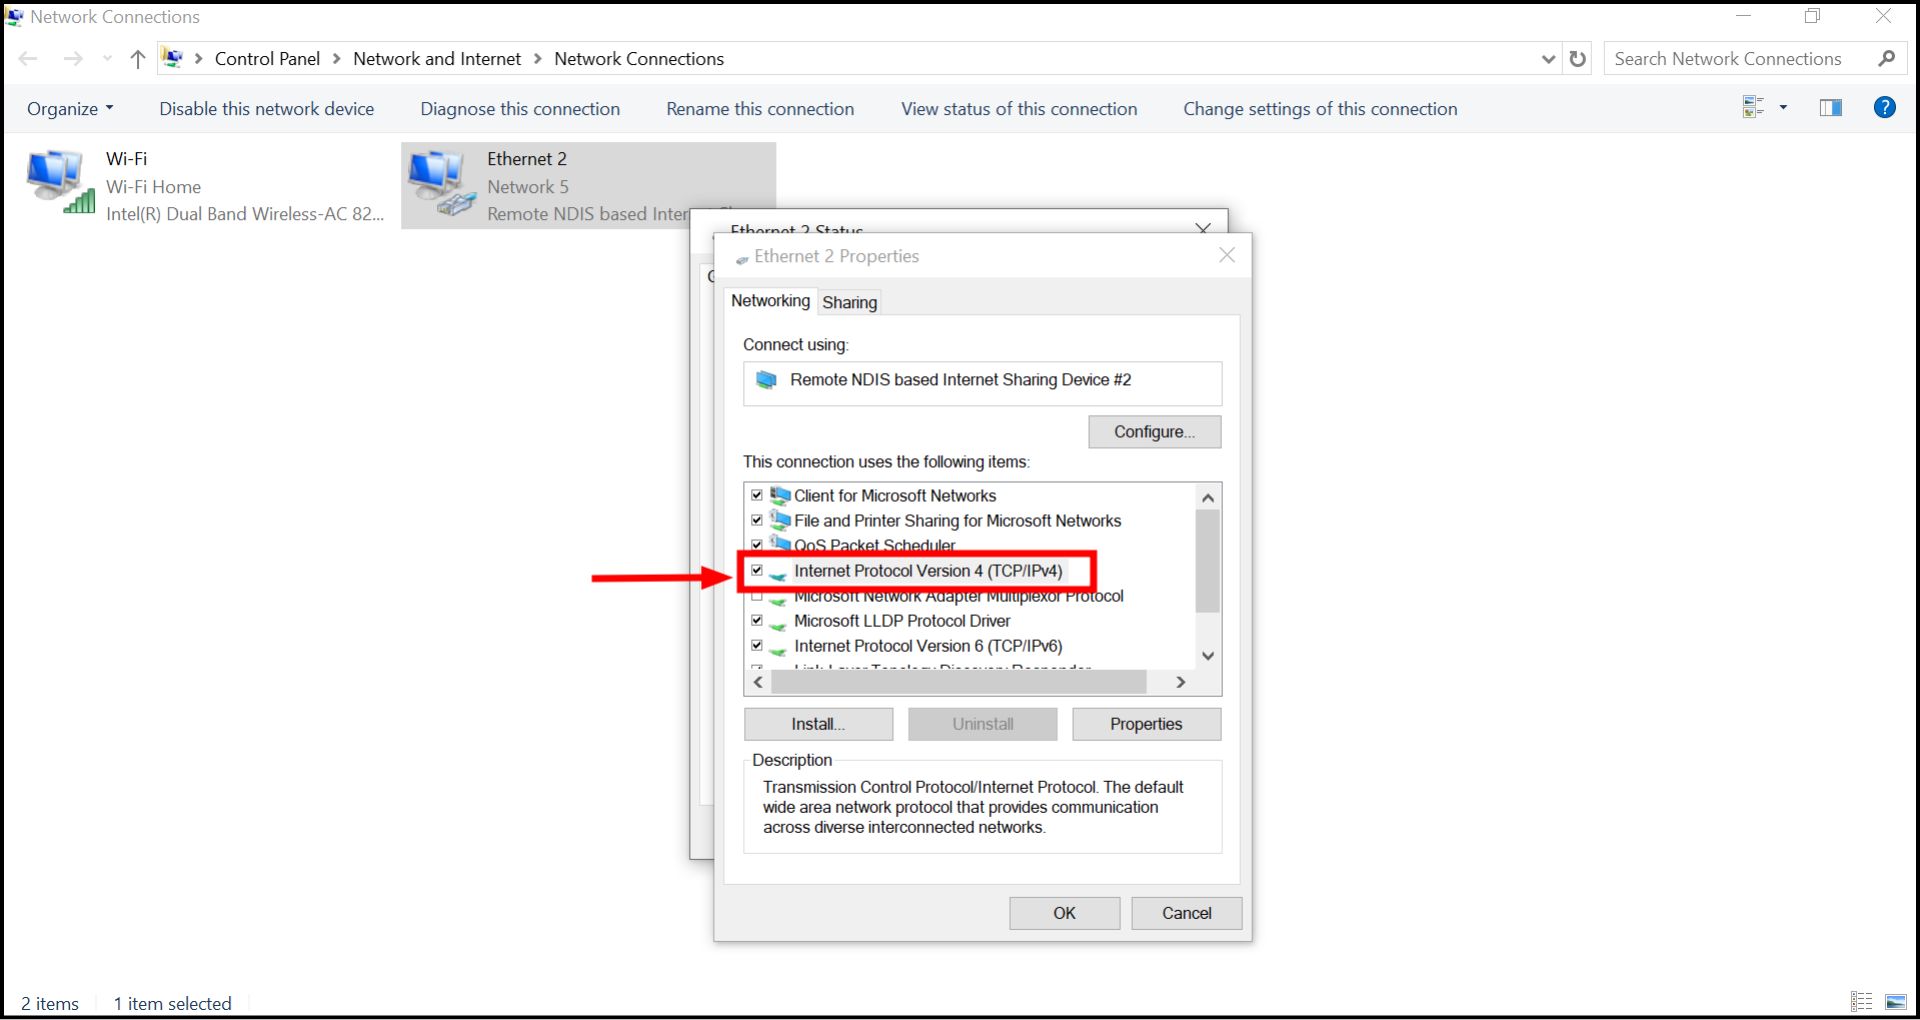
Double click on Internet Protocol Version 4 - In the IPv4 properties window, go to the “General” tab and click “Advanced.
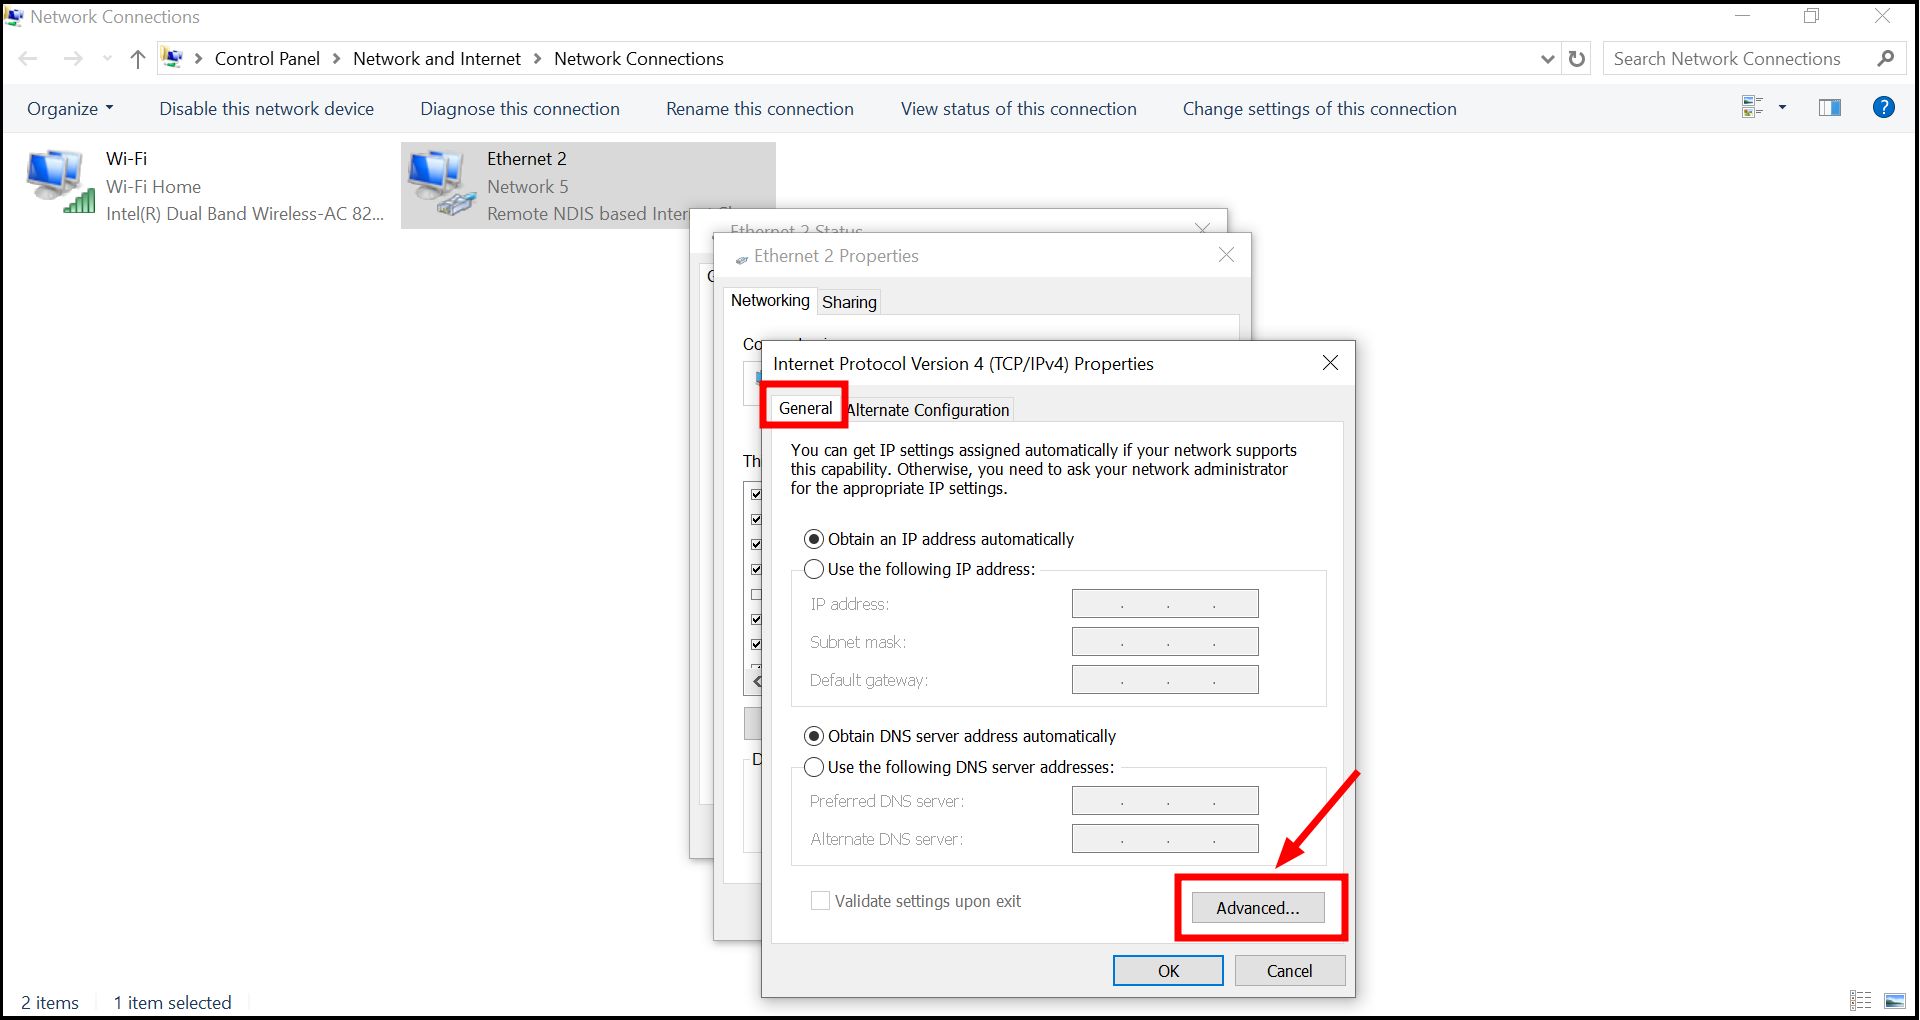
Click Advanced - Uncheck “Automatic metric” and enter “1” in the “Interface metric” box to prioritize Ethernet. Click “OK” on all open windows to apply the changes.
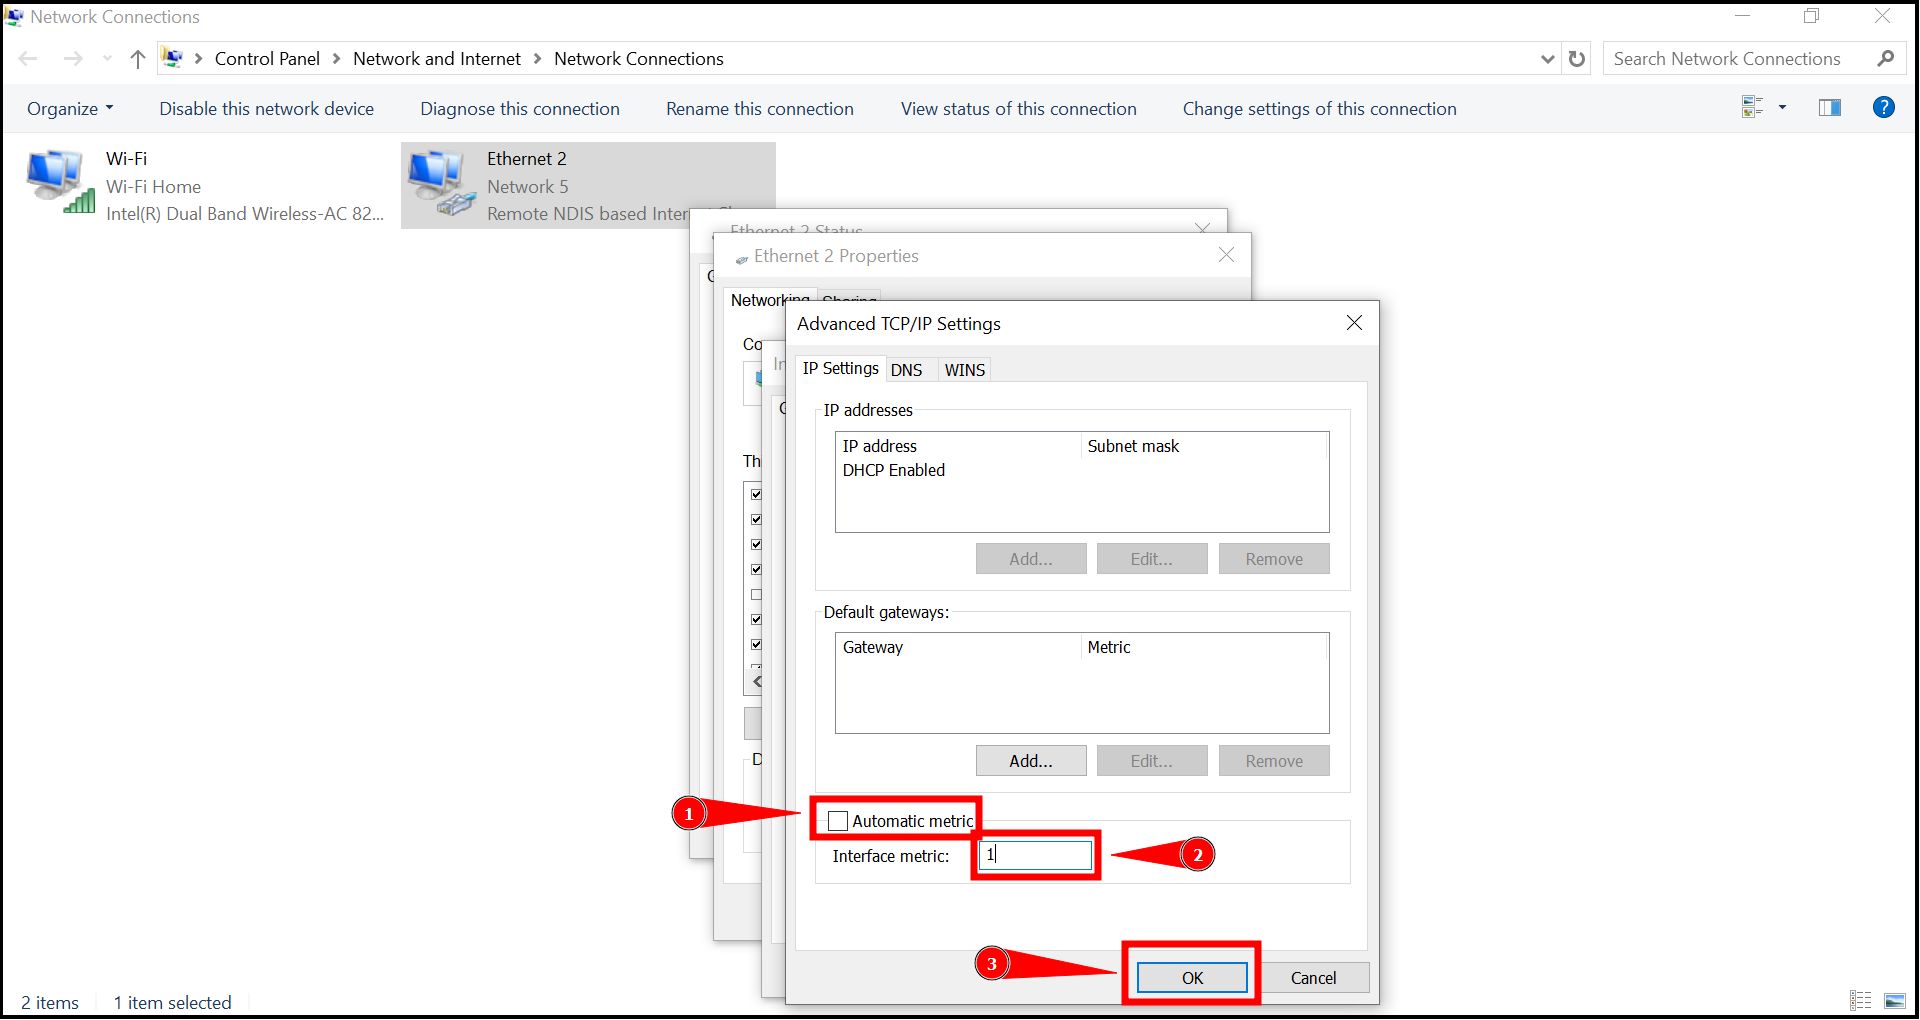
Change the value and click OK
Setting the interface metric to 1 ensures that Ethernet is used preferentially whenever it’s connected, making it the primary path for internet and network traffic.
7. Reset Your Network Adapter
If Ethernet issues persist while Wi-Fi remains functional, resetting your network adapter may help.
- Open Windows Settings and click “Network & Internet.”
Open Network & Internet settings - Scroll down to “Network Reset.” This option is typically found at the bottom of the list.
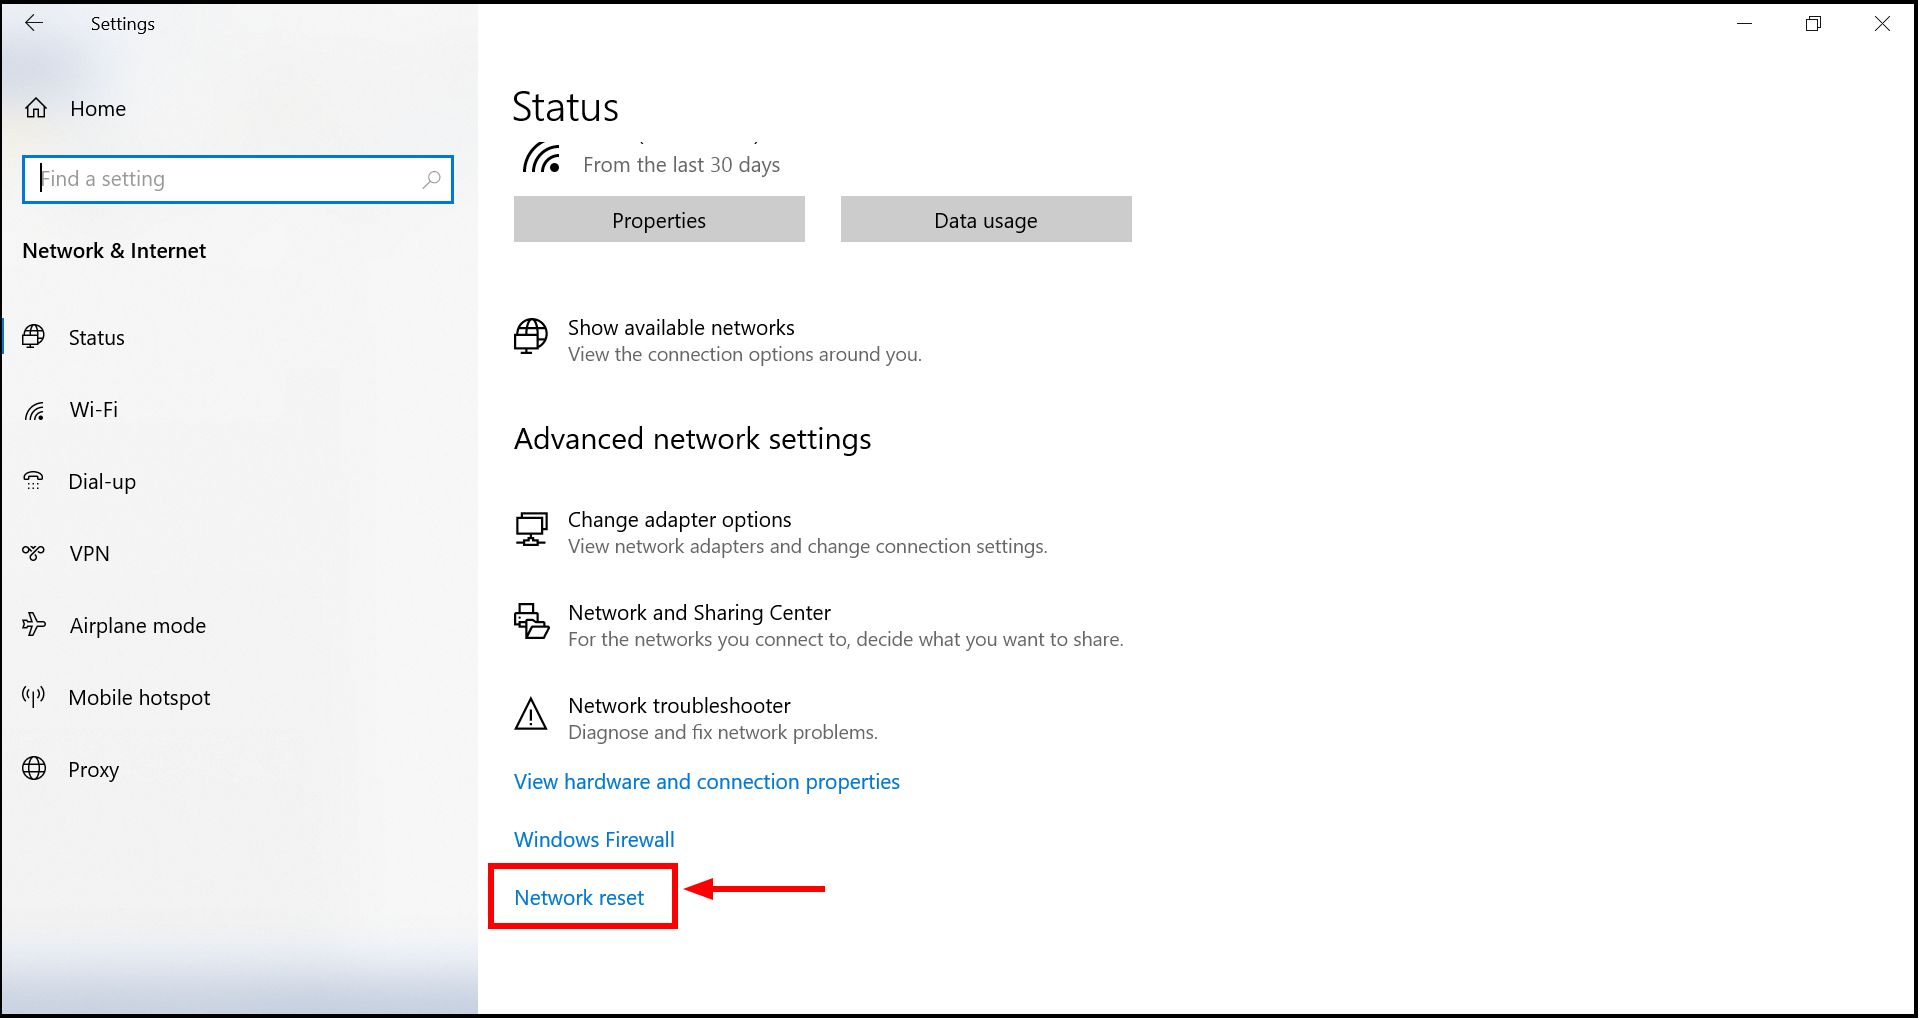
Click Network reset - On the Network Reset page, click the “Reset now” button.
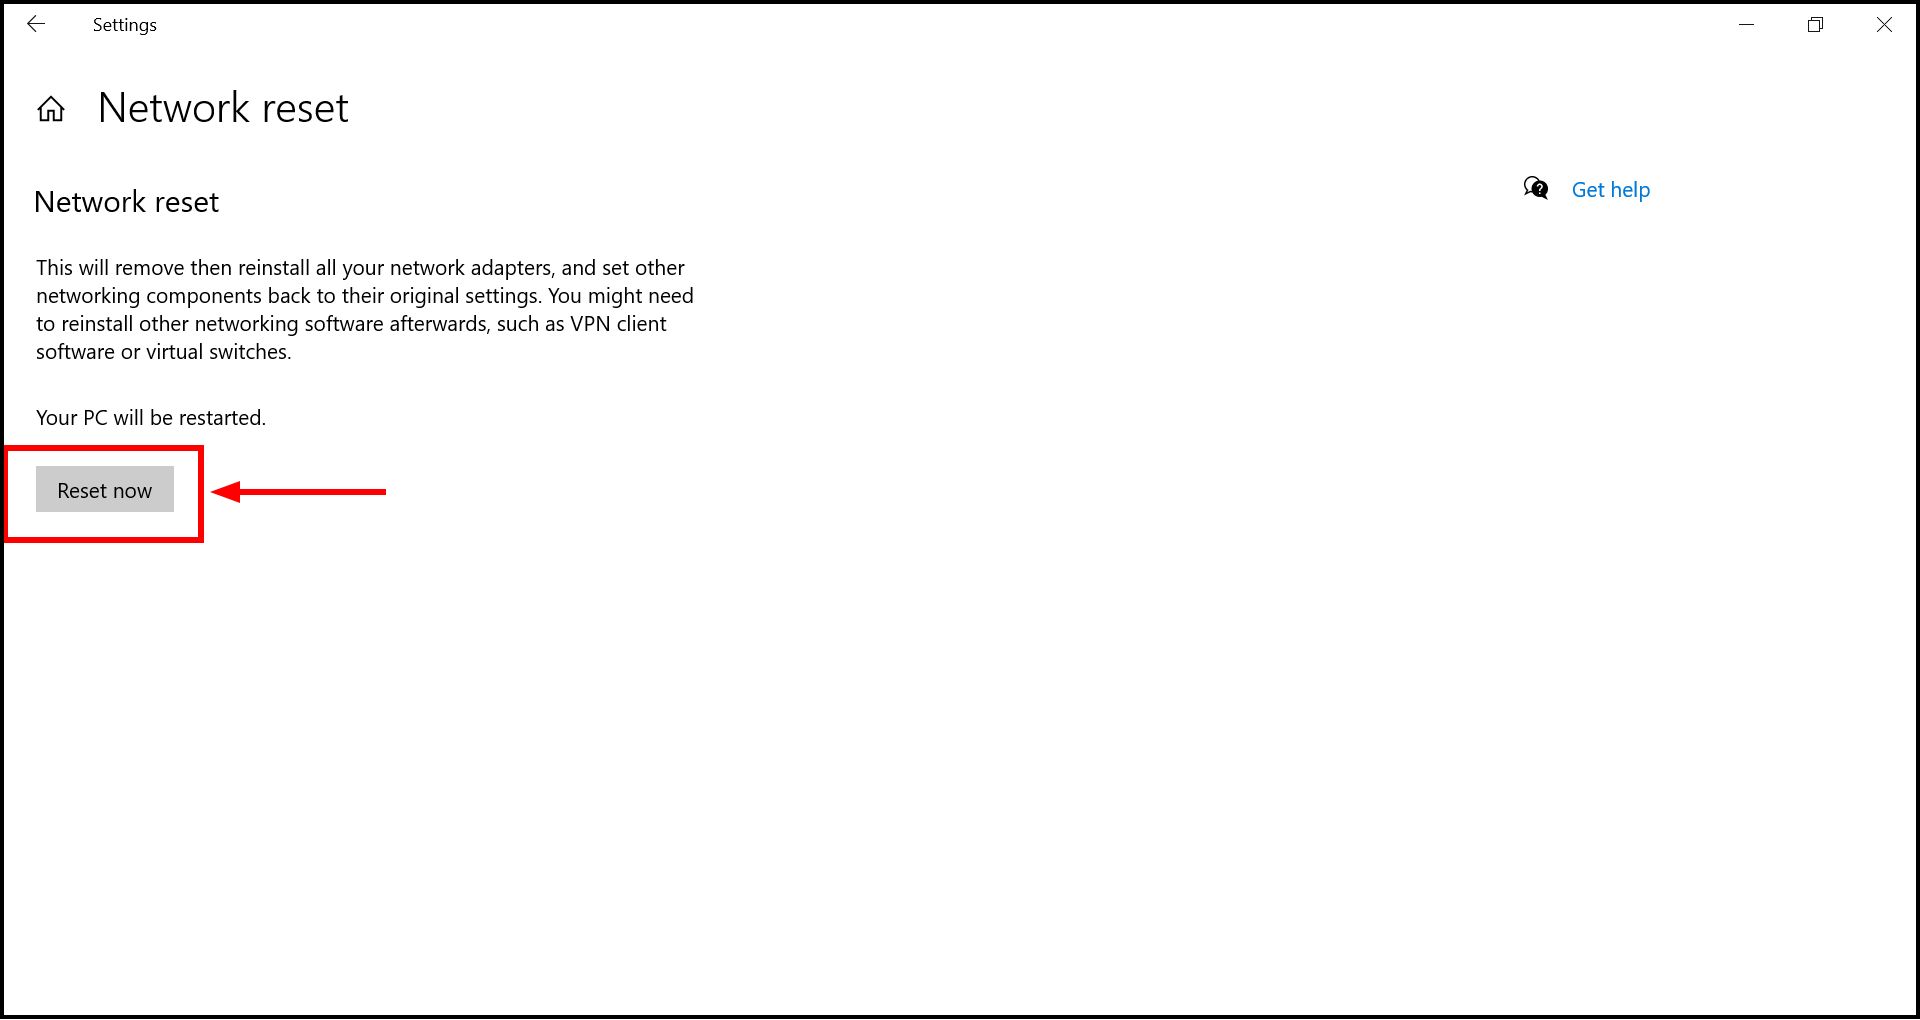
Select Reset now
This reset will restore your network adapter’s default settings, resolving most Ethernet-related issues.
8. Change Your Ethernet Adapter’s MAC Address
Updating the MAC address of your Ethernet adapter may resolve connectivity issues, particularly if network restrictions or MAC address conflicts are involved. Here’s how to adjust it on a Windows PC:
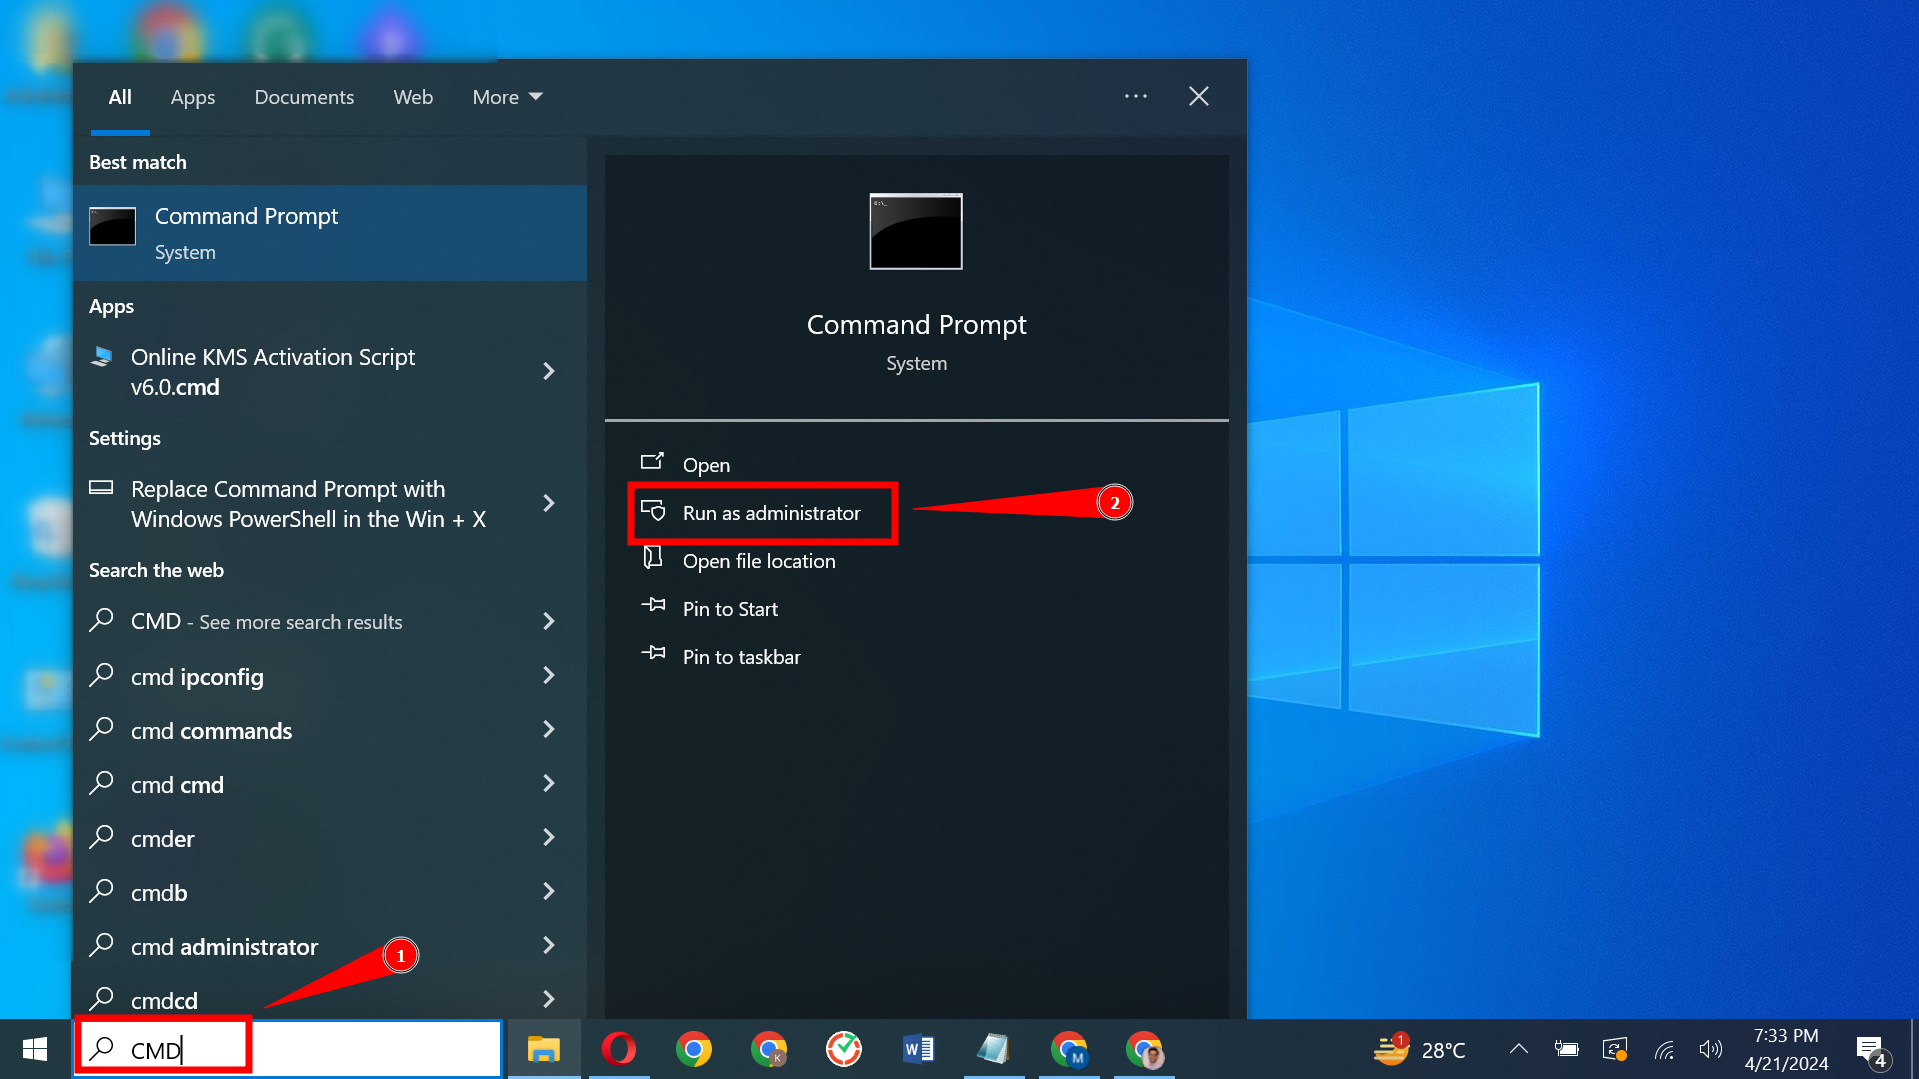
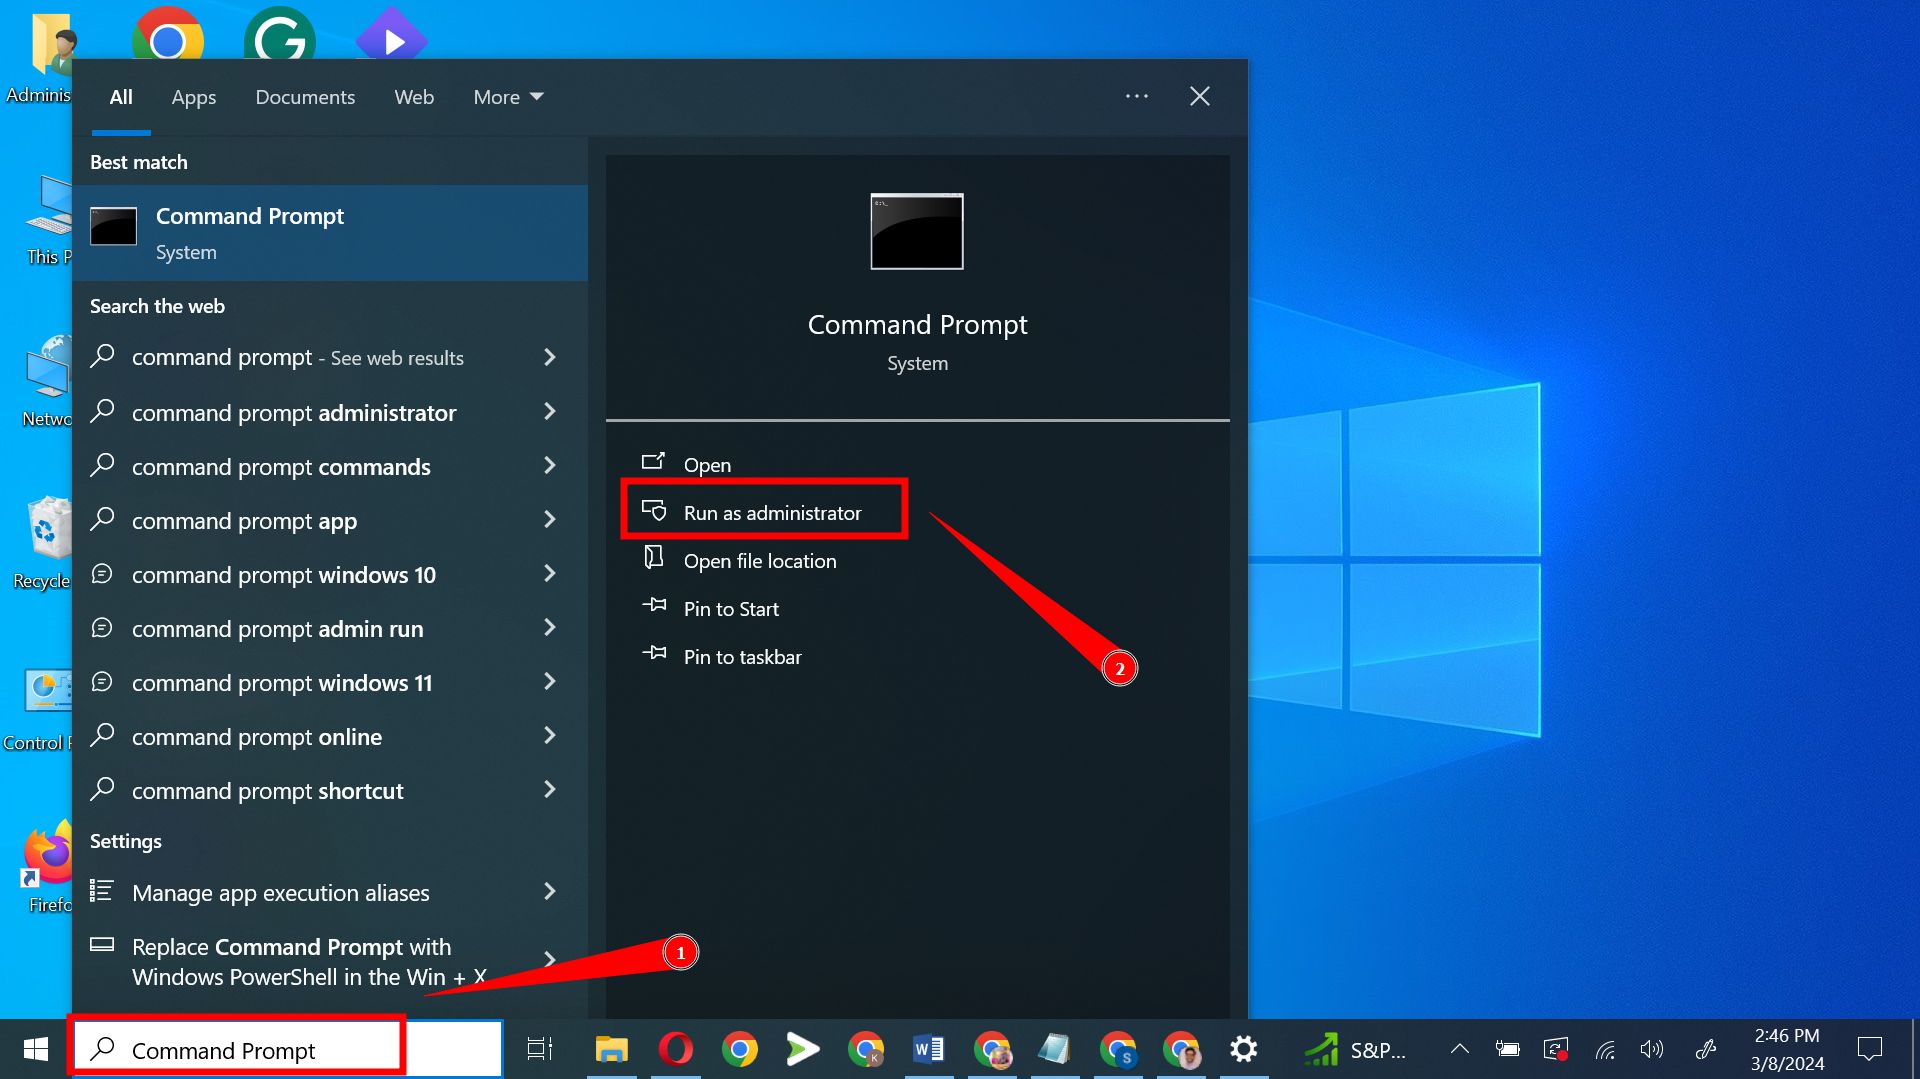
- Press the Windows key, type CMD, right-click “Command Prompt,” and select “Run as administrator.”
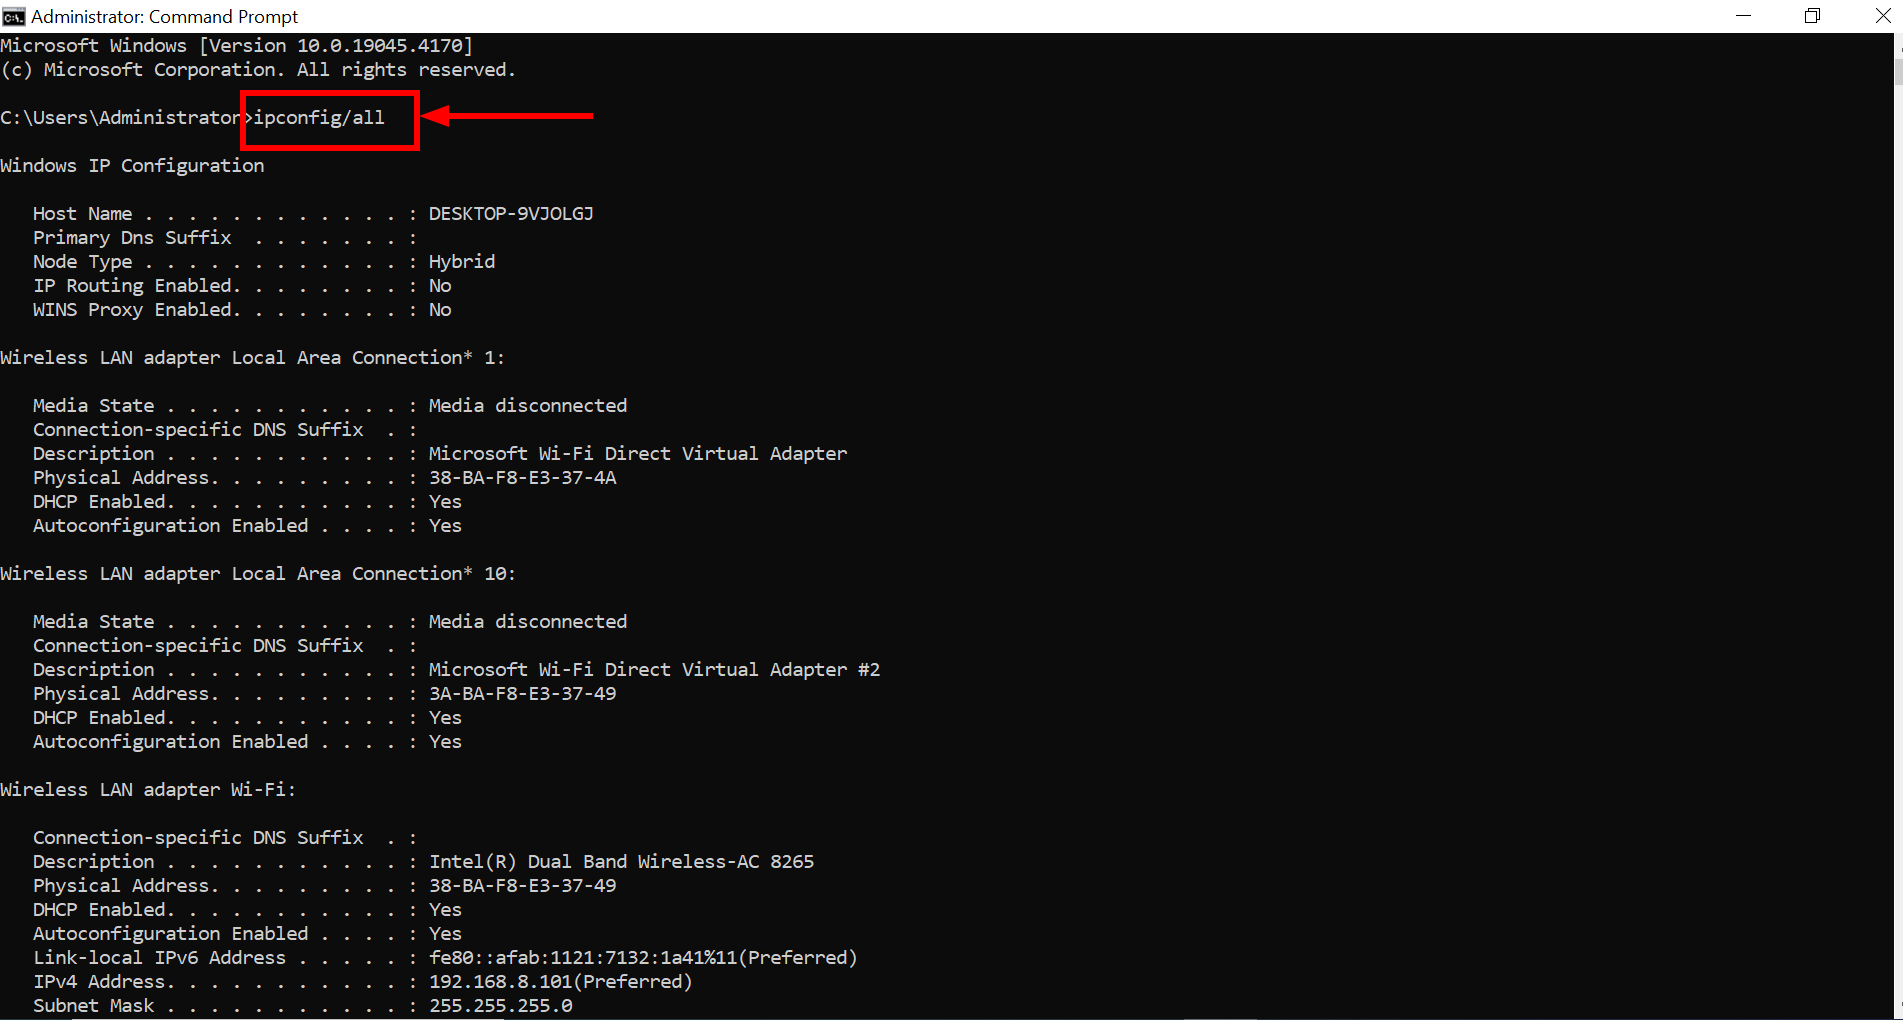
Open Command Prompt - Type “ipconfig/all” in the Command Prompt and press Enter. Identify your Ethernet adapter in the results and note the existing MAC address.
Enter the command - Press the Windows key, type “Control Panel,” and click Open.
Open Control panel - Click “View network status and tasks” under “Network & Internet.”
Open Network & Internet settings - From the menu on the left, select “Change adapter settings.”
Click on Change Adapter settings - Right-click “Ethernet” and choose “Properties.”
Click Properties - Select “Configure.”
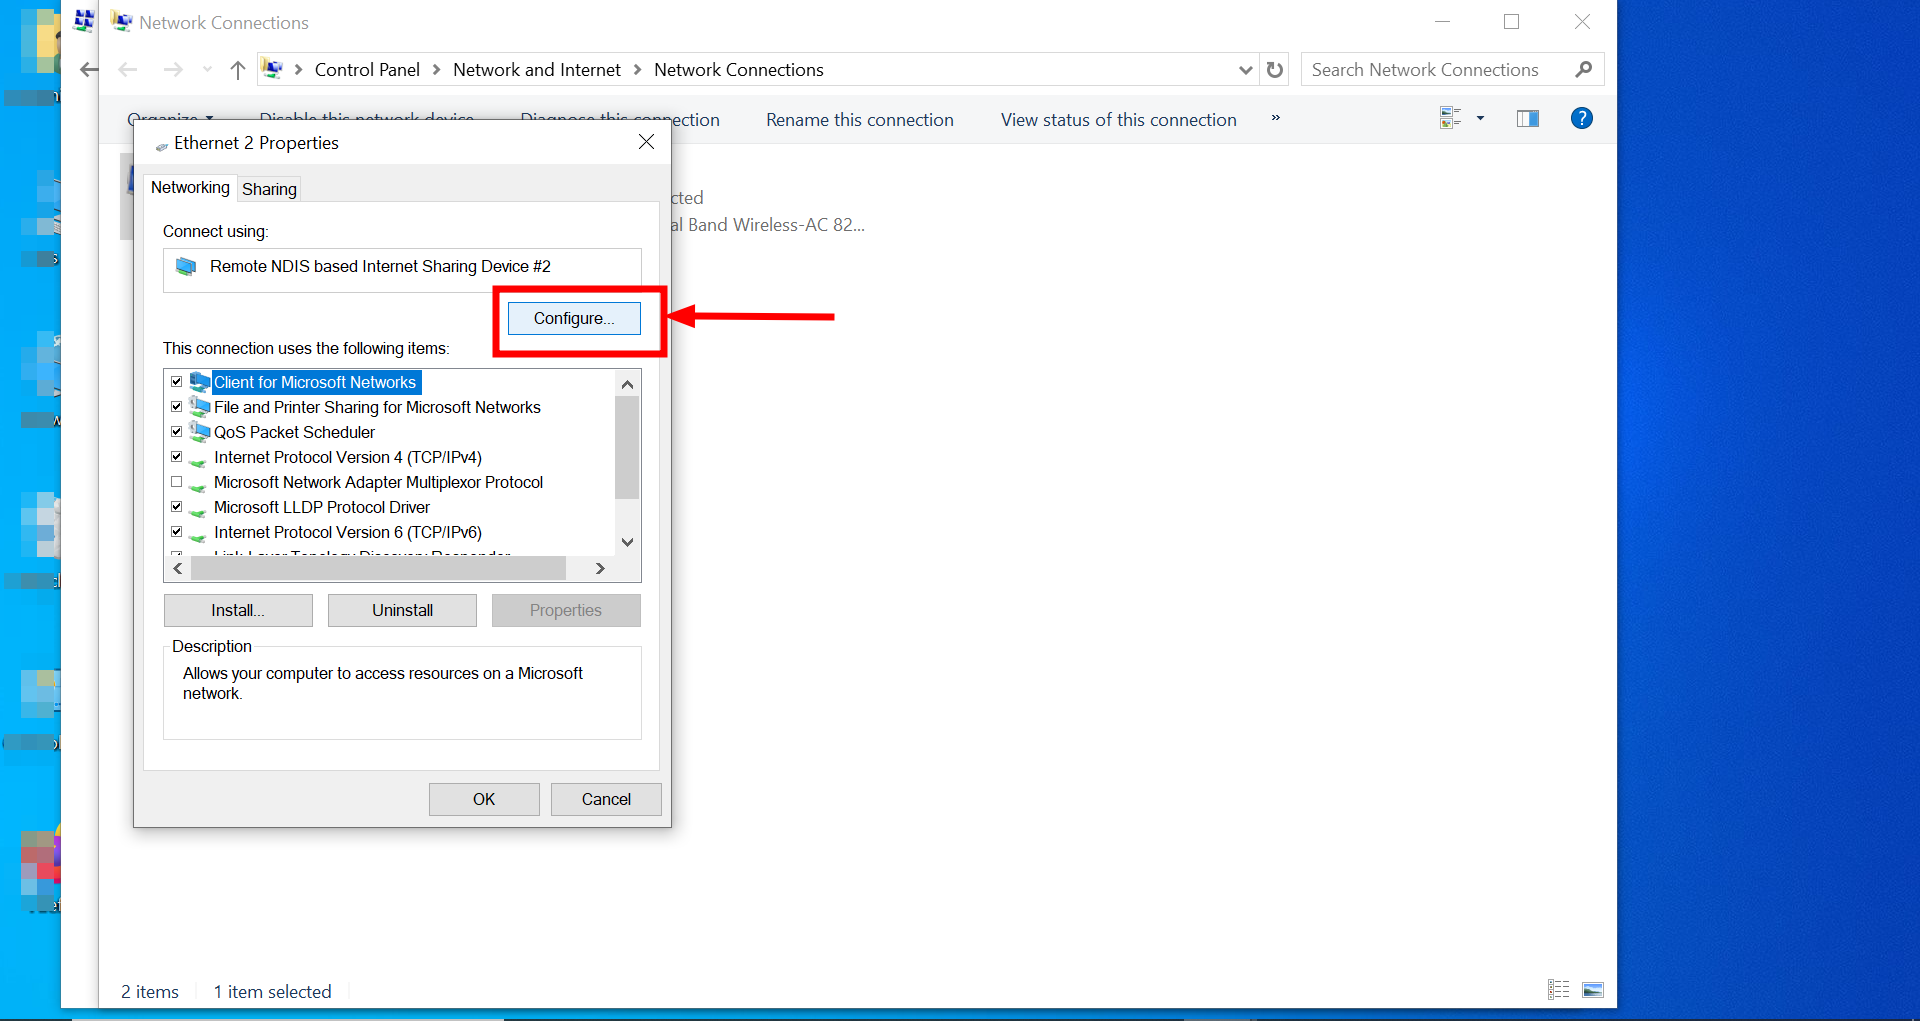
Click Configure - Navigate to the “Advanced” tab and select “Locally Administered Address” under Property.
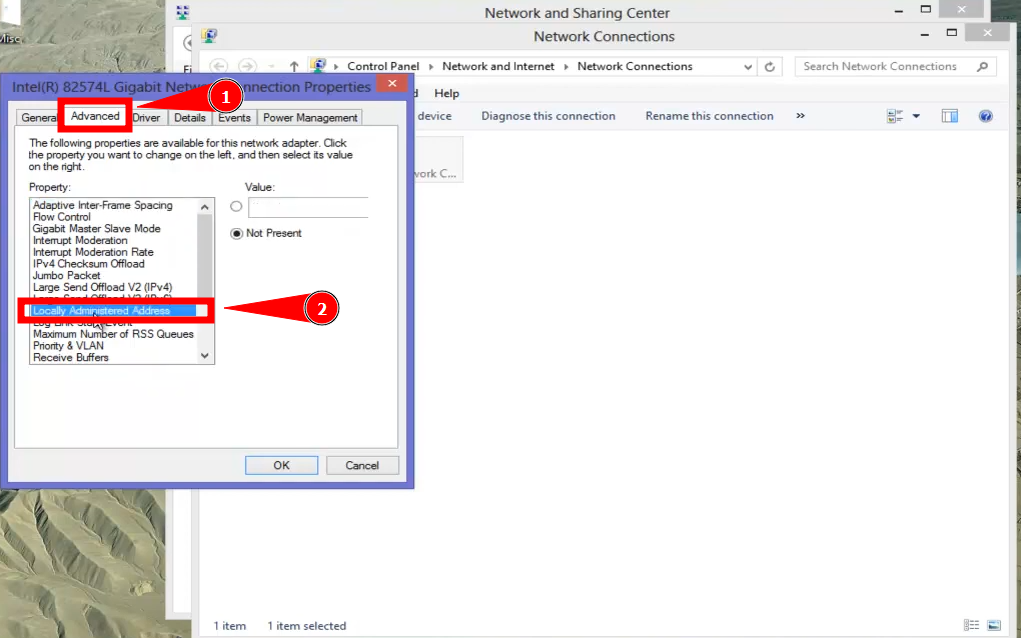
Click Locally Administered Address - In the “Value” field, enter your desired new MAC address, then click “OK.” Restart your computer to apply changes.
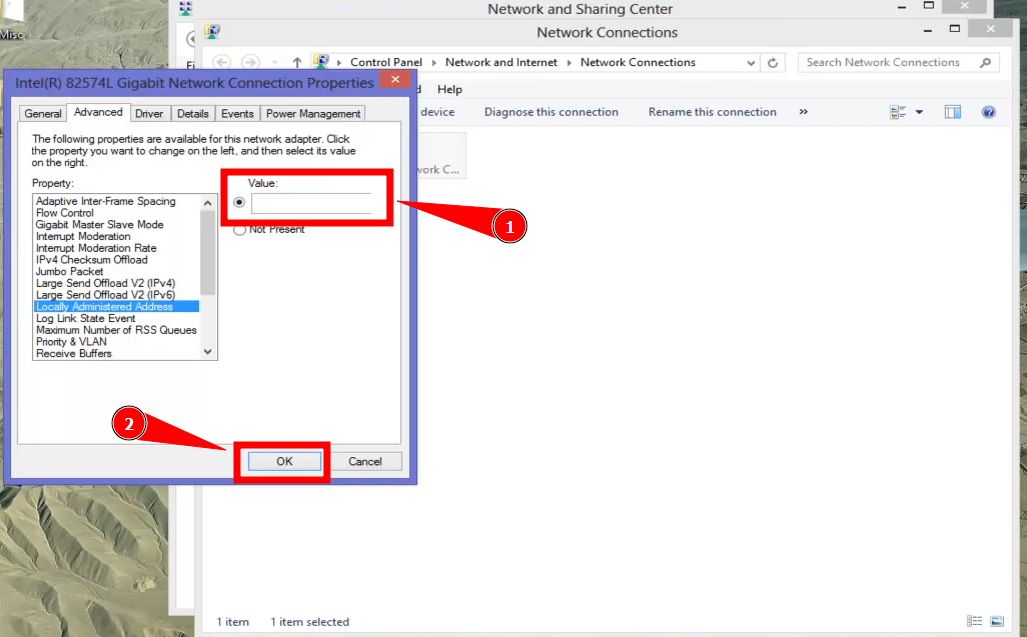
Click OK
9. Renew IP Address and Flush DNS Cache
If your Ethernet connection is faulty on Windows, renewing your IP address and flushing the DNS cache may help resolve network issues by refreshing your network settings. Here’s how to perform these actions using Command Prompt with administrative rights:
- Type “Command Prompt” in the Start search. Right-click it and select “Run as administrator.” Confirm any User Account Control (UAC) prompt by clicking Yes.
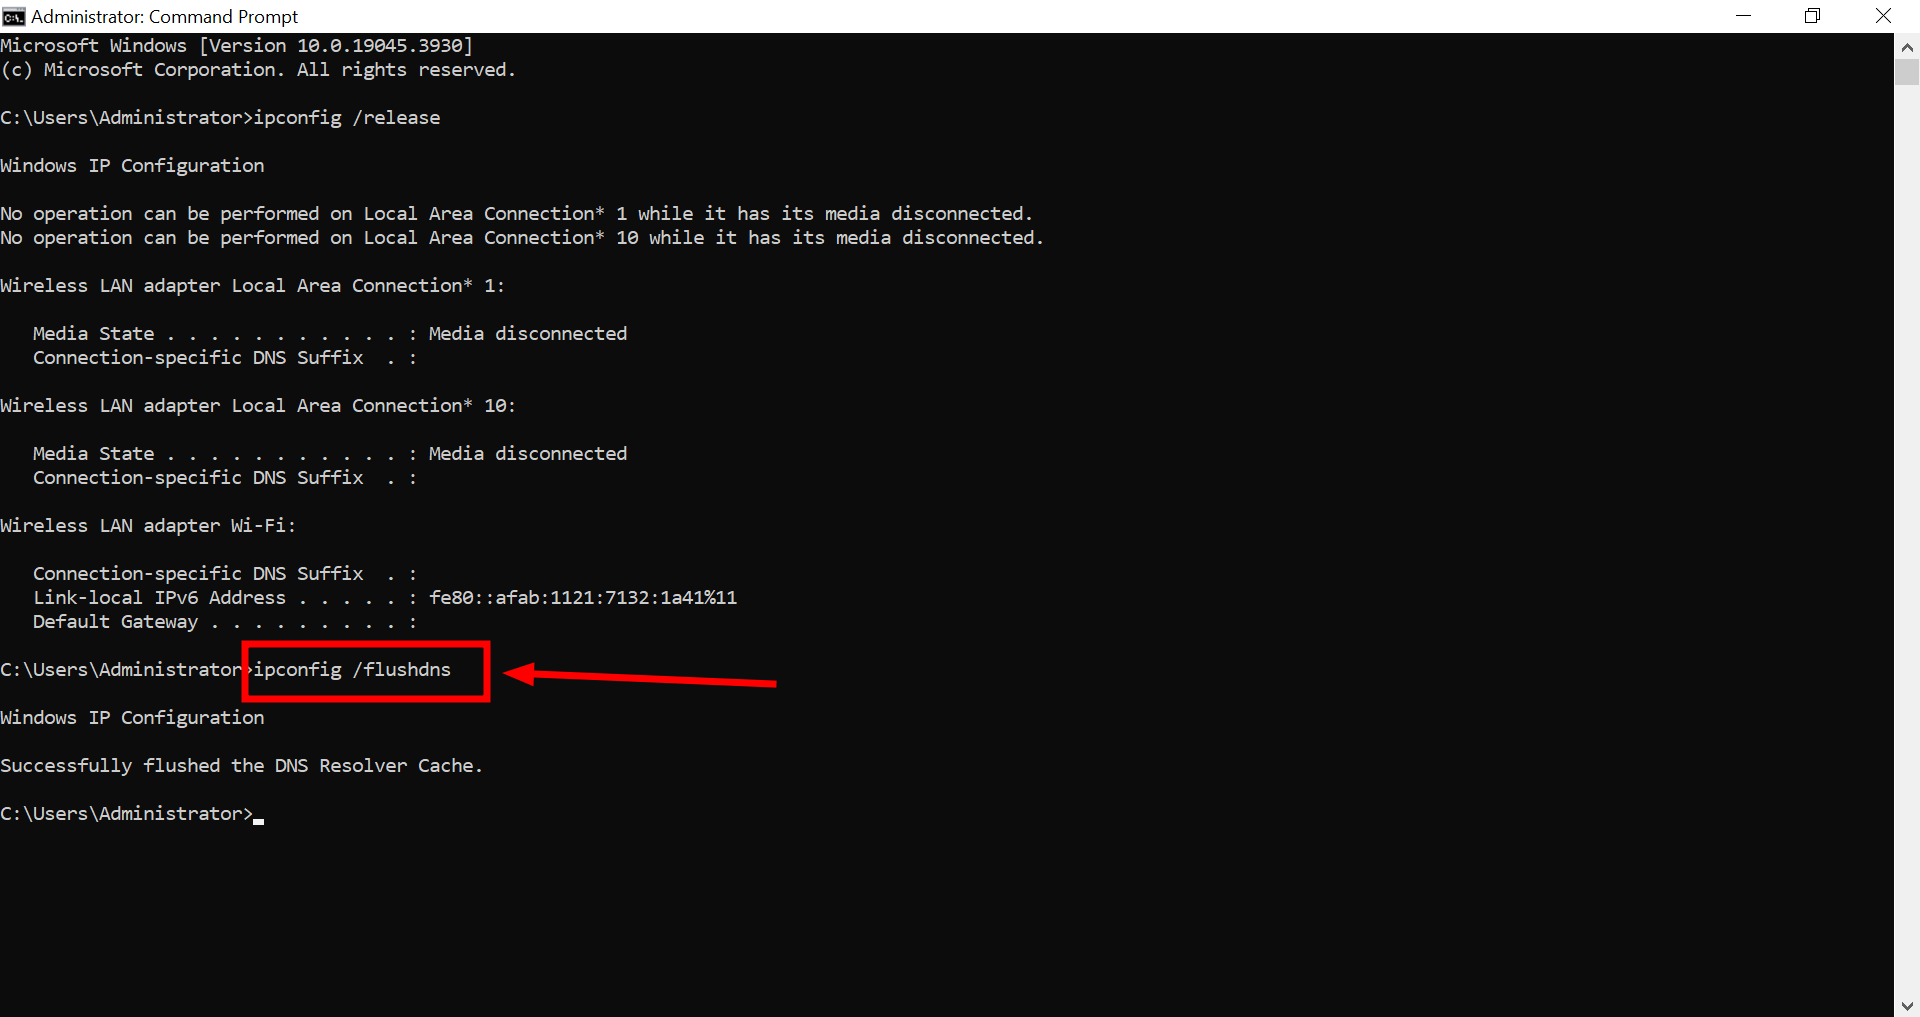
Click Run as administrator - Enter “ipconfig /release” in the Command Prompt and press Enter. This command releases the IP address currently assigned to your Ethernet adapter.

Enter the command and press Enter - Subsequently, enter “ipconfig /flushdns” and press Enter. This clears the DNS cache, possibly resolving issues from outdated or corrupt entries.
Enter the command and press Enter - Finally, type “ipconfig /renew” and press Enter. This requests a new IP address from your DHCP server, resolving potential connectivity problems.
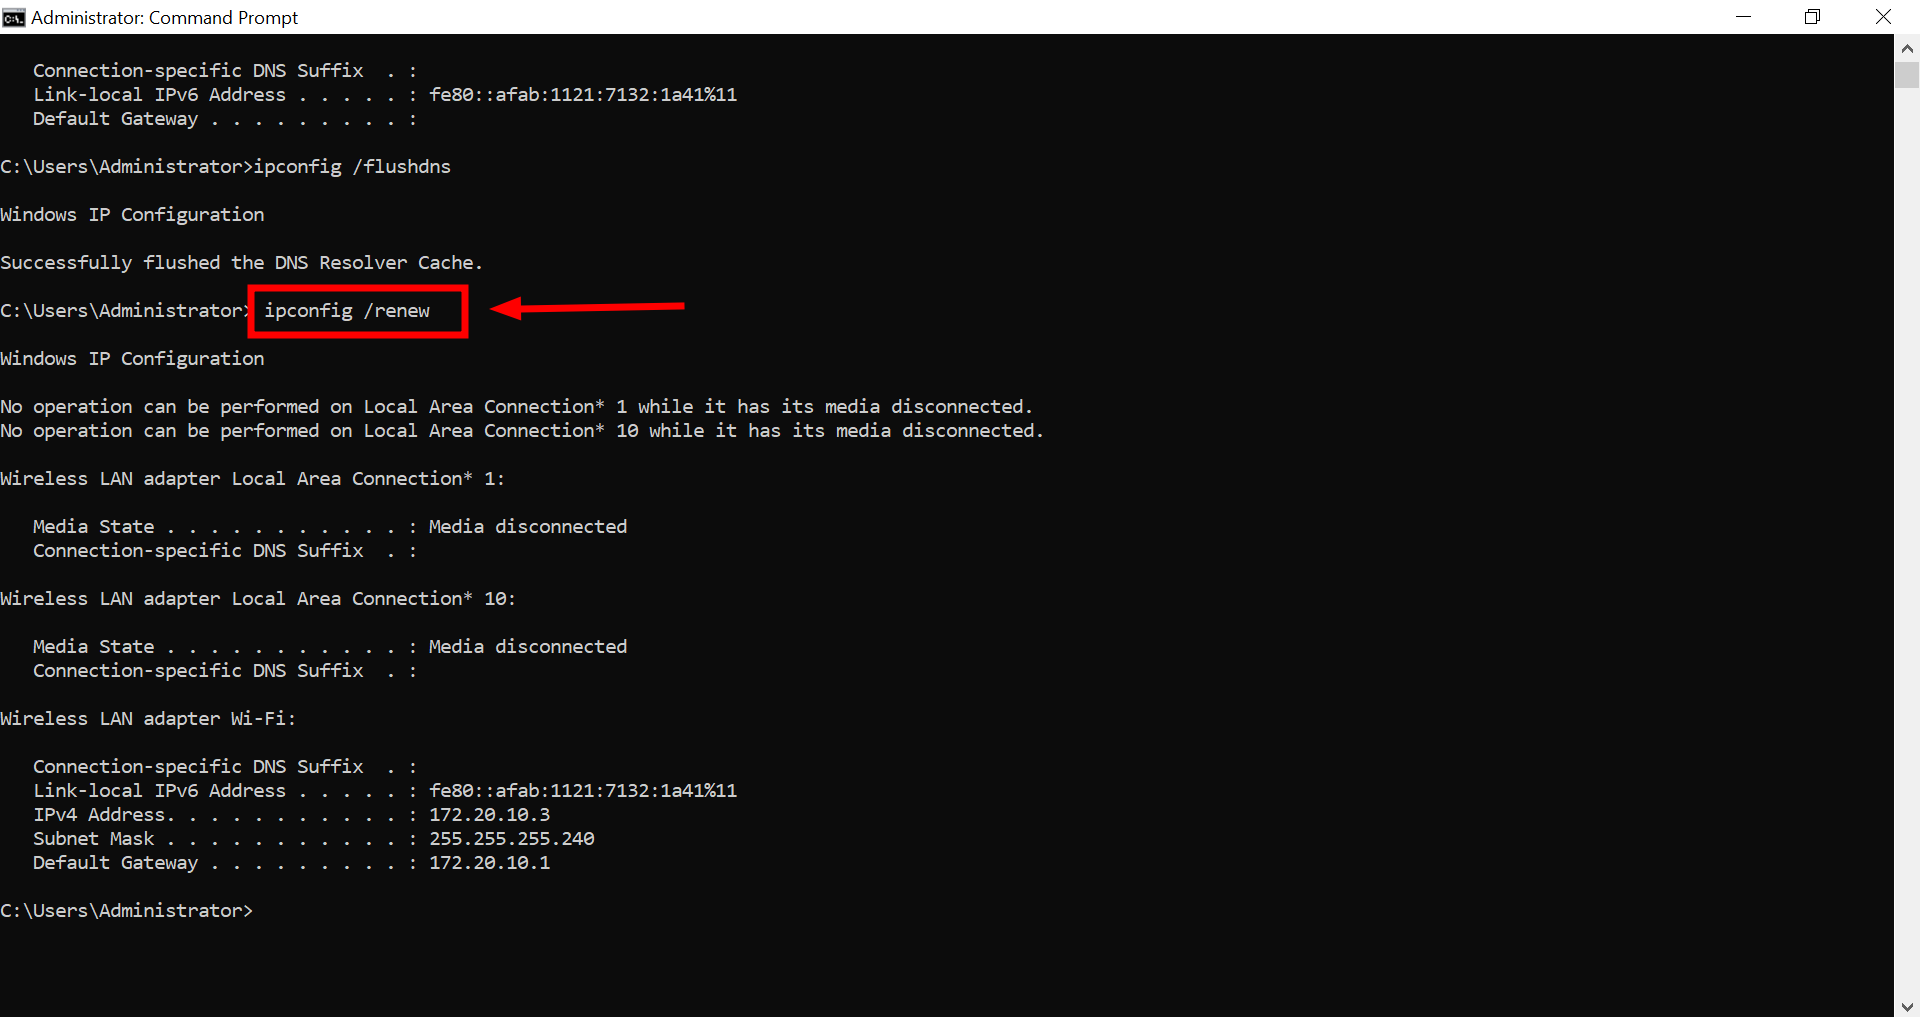
Press Enter
After executing these commands, close the Command Prompt and restart your computer to ensure all changes take effect.
10. Reinstall the Ethernet Network Adapter Driver
If previous solutions haven’t resolved your Ethernet connection issues, uninstalling and reinstalling the network adapter driver may help. This is especially valuable if problems began after recent updates.
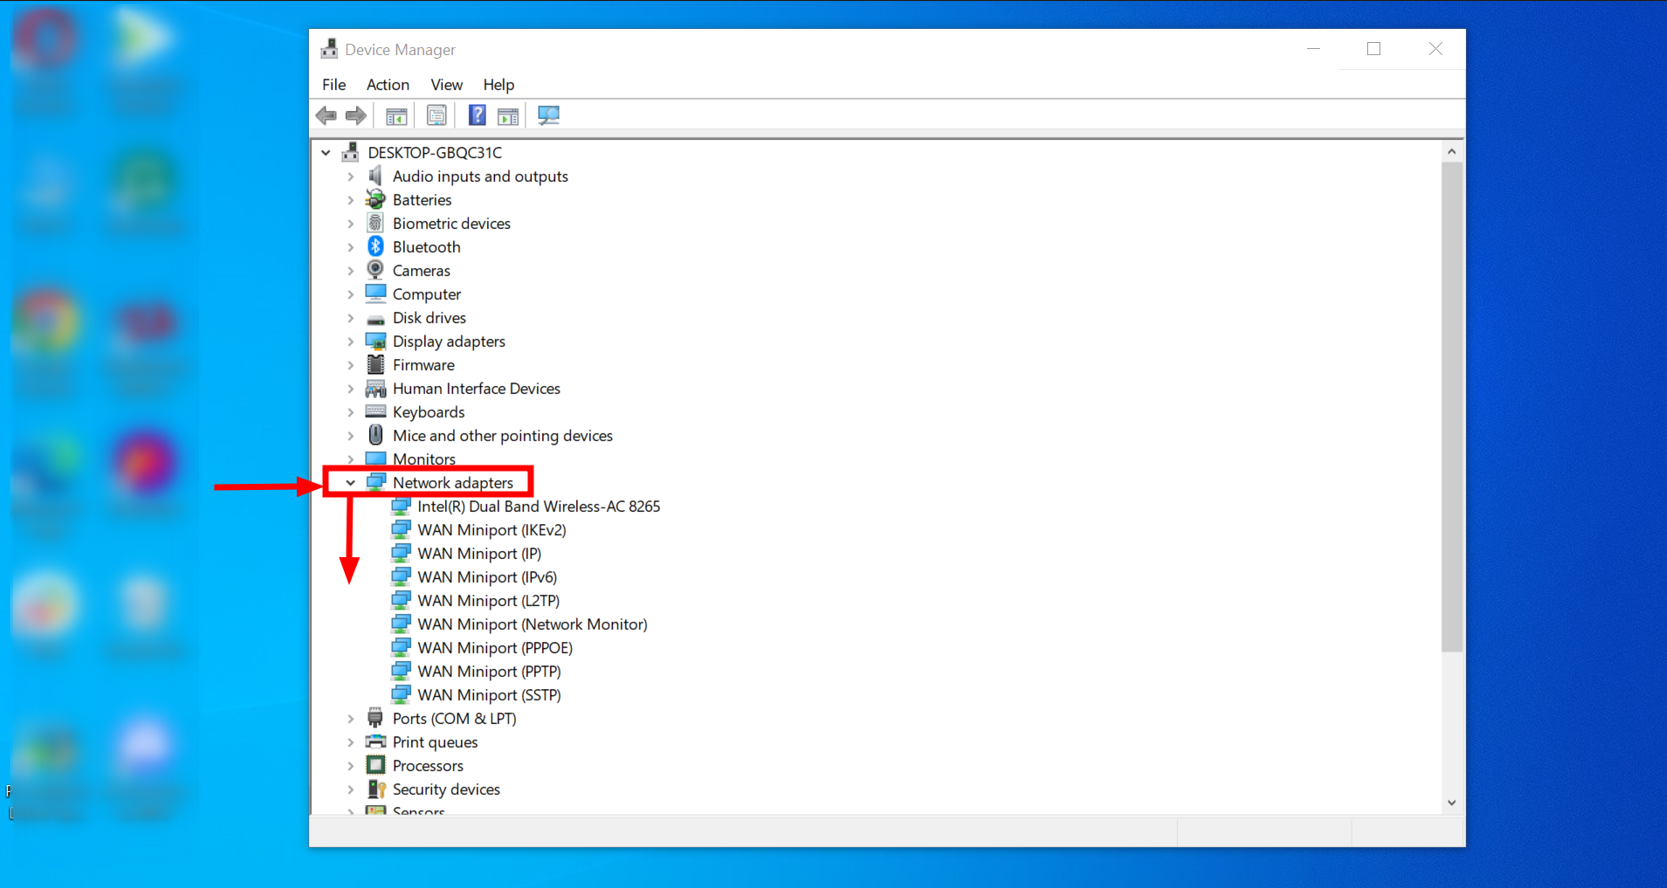
- Search “Device Manager” and open it.

Open Device Manager - Expand the “Network adapters” section, locate your Ethernet adapter, right-click it, and select “Uninstall device.”
Expand the Network adapters - In the confirmation dialog, check “Delete the driver software for this device,” and select “Uninstall.”
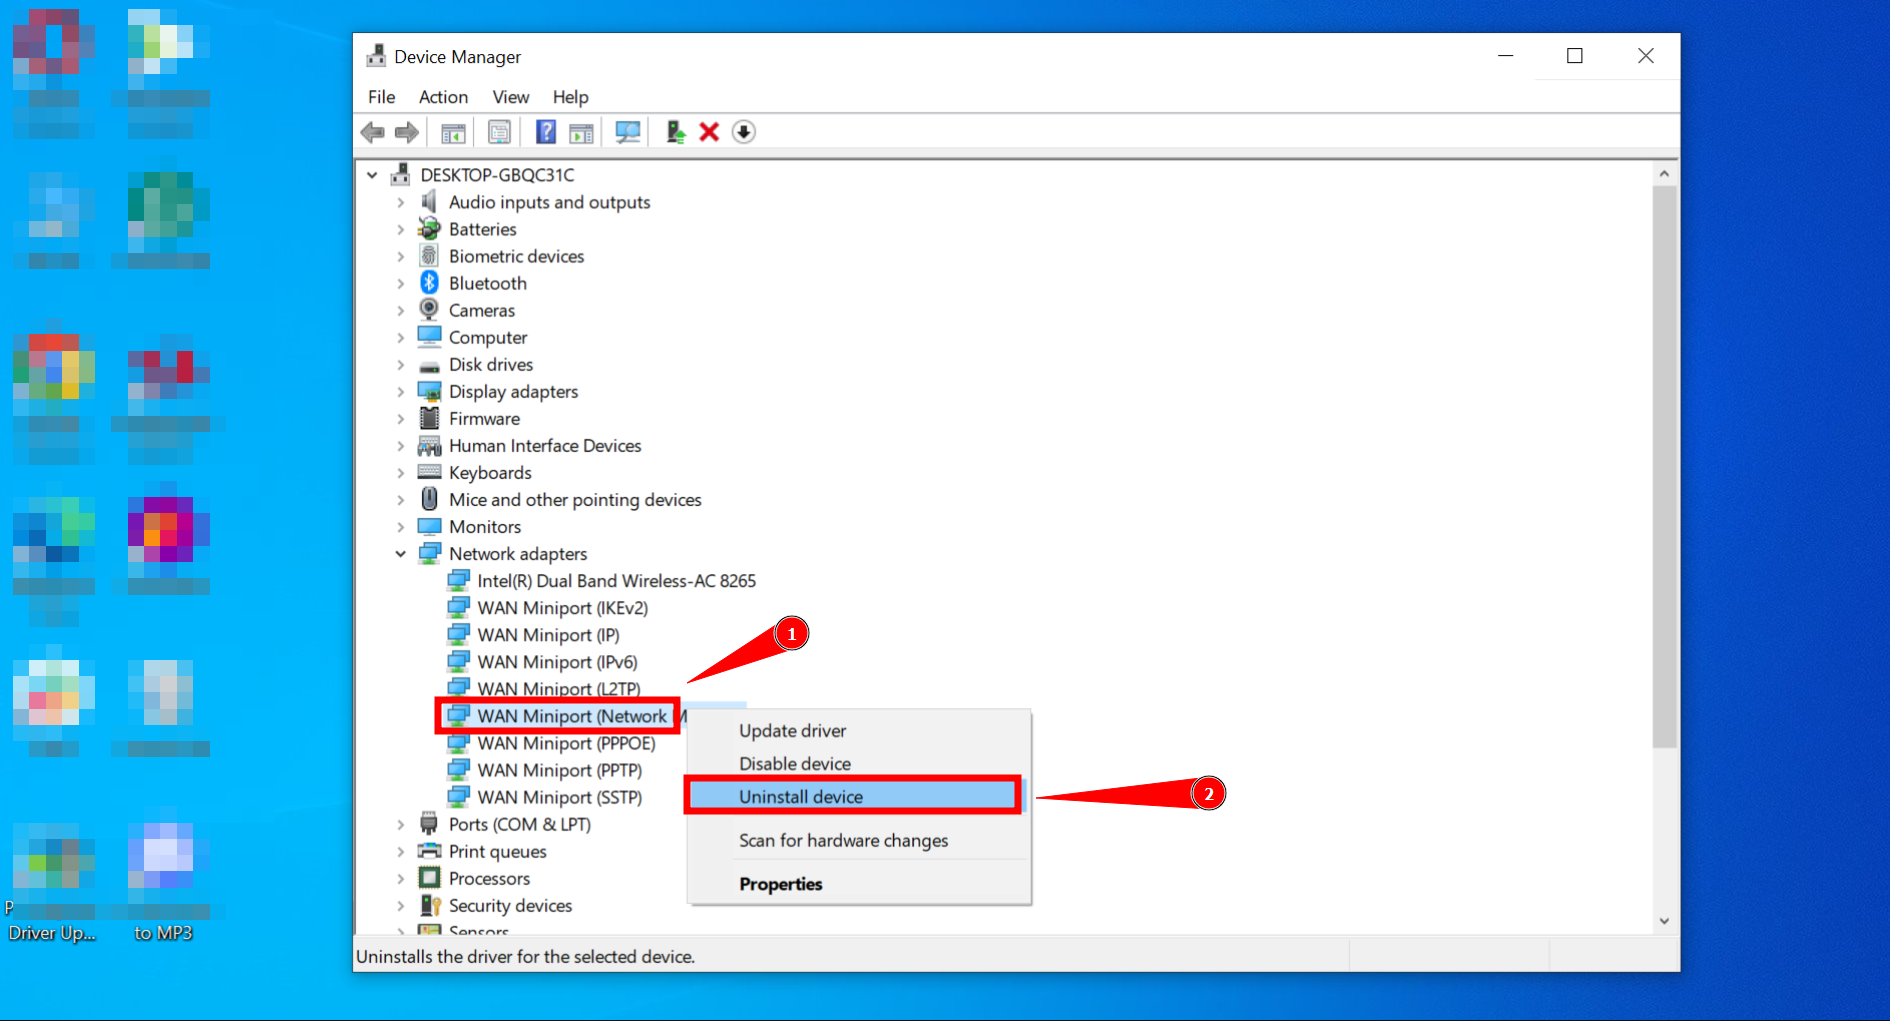
Select Uninstall device
After uninstalling the driver, restart your computer by clicking “Start,” then “Power,” and “Restart.” Windows should attempt to automatically reinstall the driver upon reboot. If not, manually install it using a USB flash drive.
11. Get Professional Help
If none of these solutions resolve the problem, consulting a professional might be necessary. A qualified technician can diagnose and fix difficult-to-resolve network issues.
You might also consider contacting your ISP, as they are familiar with your connection and may offer solutions before involving external experts.
Reviewed by Huzaifa Haroon


