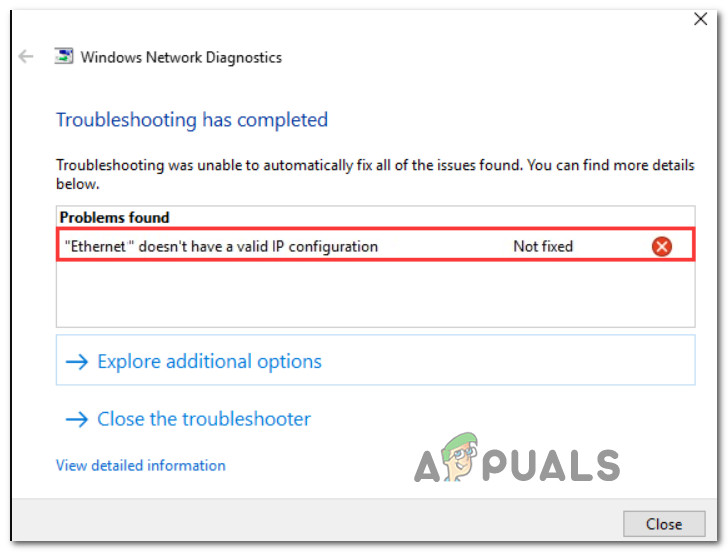
Fix: Ethernet doesn’t have a valid IP configuration on Windows
When the “Ethernet doesn’t have a valid IP configuration” error happens, users usually notice that their device can’t connect to the internet. A yellow triangle with an exclamation mark appears next to the network icon. This error indicates that Windows can’t provide a valid IP address to your device, which is essential for connecting to the network.
The most common reason for this issue is incorrect network settings, like improperly assigned IP addresses. Moreever, it could also be due to outdated or damaged network drivers.
Other causes might include problems with the router or modem, DHCP server errors, or defective Ethernet cables.
Now, let’s proceed with the detailed troubleshooting methods.
1. Change the DNS to Google or Cloudflare DNS
Switching to Google or Cloudflare DNS can help because it avoids using the default DNS from your internet provider, which might be slow or set up incorrectly and cause connection problems. Using a more reliable and faster DNS allows your computer to find website addresses more quickly and reduces the chances of network errors like invalid IP configurations.
- Open Windows Settings by pressing Windows Key + I.
- In Settings, select Network & Internet.
- Scroll down to Advanced network settings and click Change adapter options.
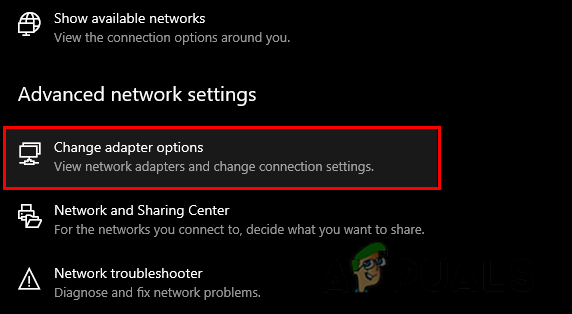
Change adapter options Note: This will show a list of all network adapters on your PC.
- Right-click your active network adapter and choose Properties.
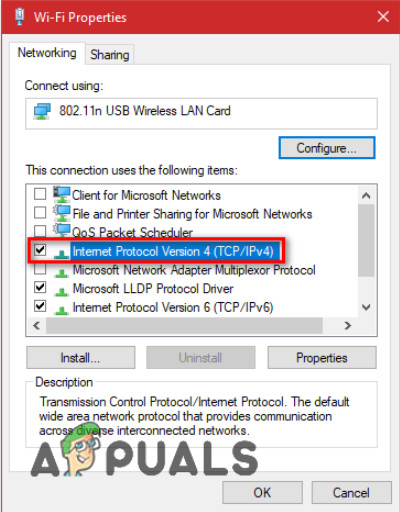
- In the Properties menu, go to the Networking tab.
- Select Internet Protocol Version 4 (TCP/IPv4) and click Properties.
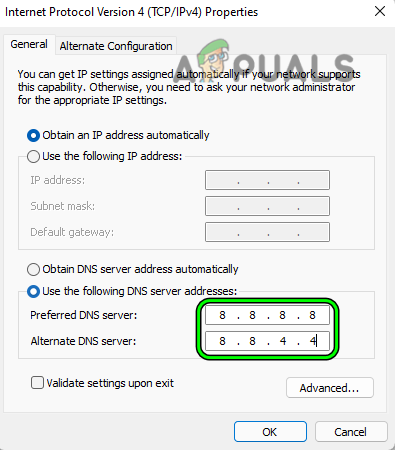
Modifying Internet Protocol settings - Select Use the following DNS server addresses and enter Google DNS or Cloudflare DNS addresses.
Configuring Google DNS - Save your changes and close the network adapter Properties screen.
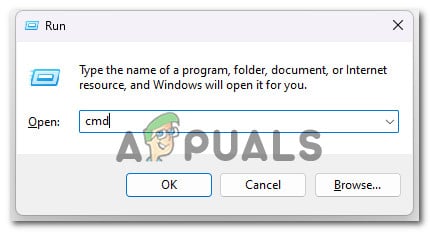
- Use Windows + R to open the Run dialog box, type cmd, and press Ctrl + Shift + Enter to open Command Prompt.

Access CMD settings - At the UAC prompt, click Yes to grant admin access.
- In the Command Prompt, type the following command to clear any cached DNS data:
ipconfig /flushdns
- Run diagnostics again to check if the issue is resolved.
3. Reset Your Network Settings
If network troubleshooting doesn’t work, resetting your network settings gives you a fresh start. This process removes any wrong settings that might be preventing a valid IP configuration. It reinstalls network adapters and resets all settings to their original state, getting rid of any custom changes that might be causing the problem.
- Press Windows + R to open the Run dialog box.
- Type cmd in the dialog box, then press Ctrl + Shift + Enter to open an elevated Command Prompt window.
Open CMD as administrator - When prompted by User Account Control, click Yes to allow permissions.
- In the elevated Command Prompt, execute these commands to reset your network components:
ipconfig /flushdns ipconfig /renew nbtstat –R nbtstat –RR netsh int ip reset c:\resetlog.txt netsh winsock reset - Restart your computer to complete the reset process.
- After restarting, press Windows + R, type control panel, and press Enter.
- Go to Network and Sharing Center and click on Change adapter settings on the left.
- Right-click your Ethernet adapter and select Disable.
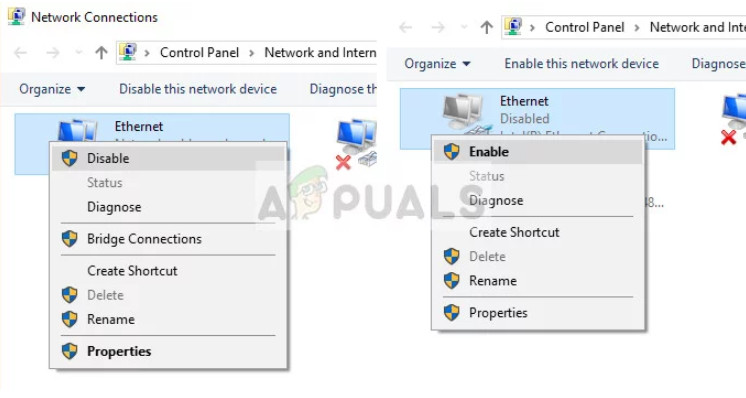
Re-enabling the Ethernet adapter - Wait a moment, then right-click the adapter again and select Enable.
4. Verify All Connected Cables
Sometimes, checking all the physical cables ensures that your Ethernet connection is secure and functional. A loose or damaged Ethernet cable can prevent data from being transmitted properly. Ensuring all cables are tightly connected and undamaged can restore a stable connection, helping your computer communicate with the router and obtain a valid IP address.
5. Disable IPv6
If your router or internet provider mainly uses IPv4, keeping IPv6 on can cause problems. Turning off IPv6 makes your system use IPv4 only, which can make the connection smoother and help fix the issue.
- To disable IPv6, press Windows key + R to open the Run dialog box.
- Type ncpa.cpl and press Enter to open the Network Connections menu.
Access Network Connections menu - Right-click your network adapter and select Properties.
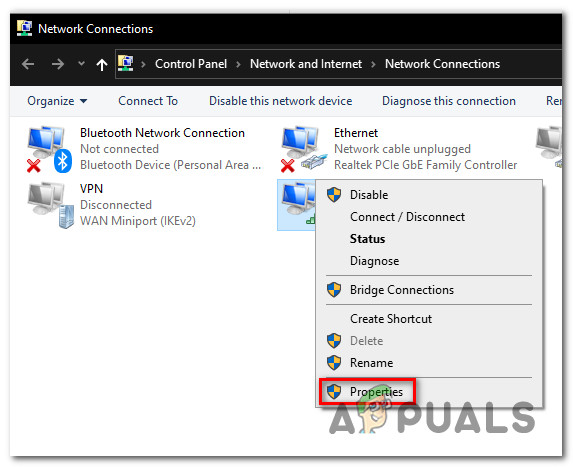
Properties of an active network Note: Click Yes if prompted by User Account Control (UAC).
- In the Properties window under Networking, uncheck the box next to Internet Protocol Version 6 (TCP/IPv6).
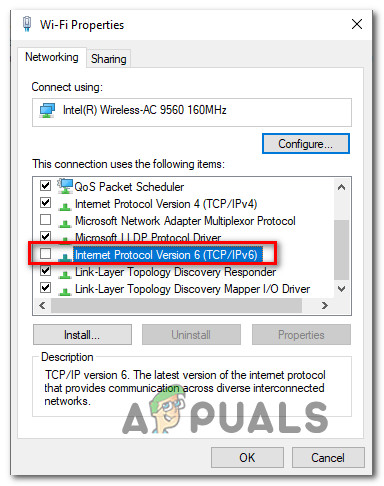
Disabling IPv6 - Click OK to save your changes, restart your computer, and check if the issue persists.
6. Disable Microsoft Kernel Debug Network Adapter
Turning off the Microsoft Kernel Debug Network Adapter can fix network problems by removing possible conflicts with your main network adapter. This virtual adapter is mainly used for system debugging, which is useful for developers but not needed for regular internet use. Disabling it helps prevent it from interfering with your main Ethernet connection, allowing the system to focus on the network it needs without getting confused.
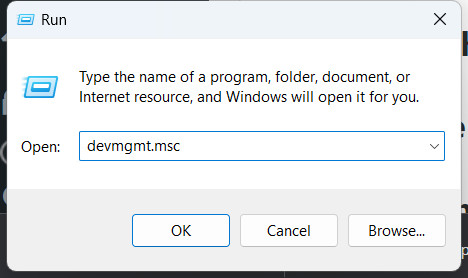
- Press Windows + R to open the Run dialog box.
- Type devmgmt.msc and press Ctrl + Shift + Enter to open Device Manager with administrative privileges.
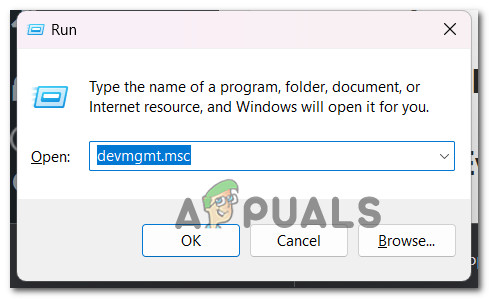
Opening Device Manager - Click Yes when prompted by User Account Control.
- In Device Manager, go to the View menu and select Show Hidden Devices.

Show hidden devices in Device Manager - Right-click the Microsoft Kernel Debug Network Adapter and select Disable.
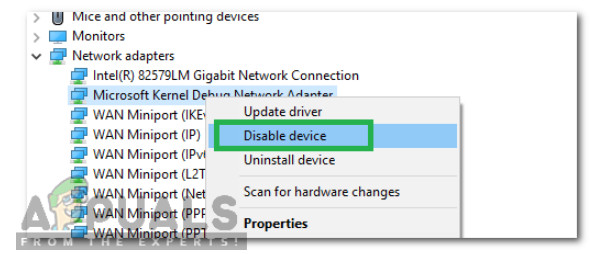
Disable the Kernel Debug adapter - Confirm if prompted, then reboot your computer to see if the problem is resolved.
7. Configure a MAC Address for Your Network Card
Sometimes, changing the MAC address can fix network problems. Every network card has its own unique MAC address, but sometimes your router or internet provider might not recognize it correctly, causing connection issues. By manually setting a new MAC address, you refresh how your device connects to the network, which can help solve the problem of getting a valid IP configuration.
- Press Windows + R to open the Run dialog box.
- Type cmd and press Ctrl + Shift + Enter to open an elevated Command Prompt.
Open an elevated Command Prompt - Click Yes when prompted by User Account Control.
- Type ipconfig /all in the Command Prompt and note the Physical Address of your active Ethernet Adapter.
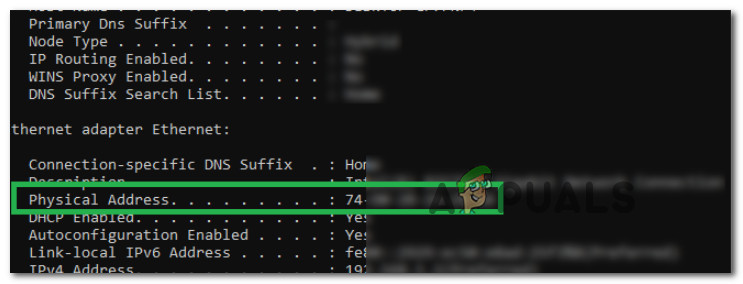
Finding the physical address - Open the Network and Sharing Center in your control panel and select Change Adapter Settings.
- Right-click your network connection and select Properties.
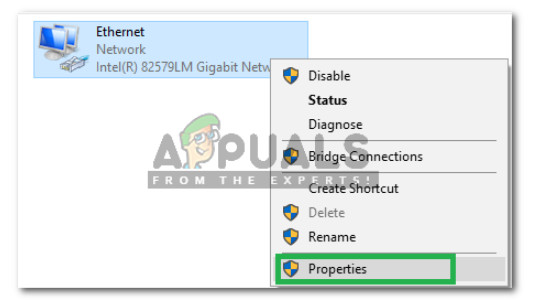
Accessing Ethernet properties - In the Networking tab, click Configure next to your network adapter’s name.
- Find Network Address in the list, select it, and enter the address you noted earlier.
- Click OK to save changes, then reboot both your PC and router to see if the issue is resolved.
8. Enable DHCP
Turning on DHCP helps your device automatically get a valid IP address from the router. Without DHCP, you have to manually enter network settings, which can cause mistakes. Letting DHCP manage this reduces errors and ensures smoother network communication, avoiding issues with invalid IP configurations.
- Press Windows Key + R to open the Run dialog box.
- Type services.msc and press Ctrl + Shift + Enter to open the Services window with administrative privileges.

Accessing the services screen - Click Yes on the User Account Control prompt to allow admin access.
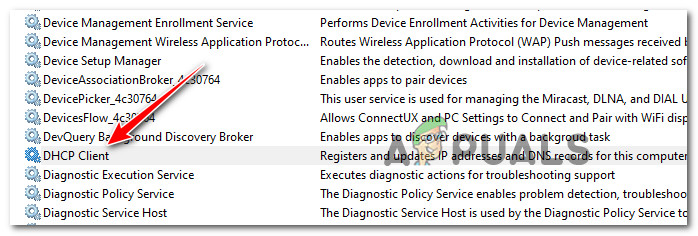
- Scroll down and find the DHCP Client service. Double-click to open its properties.
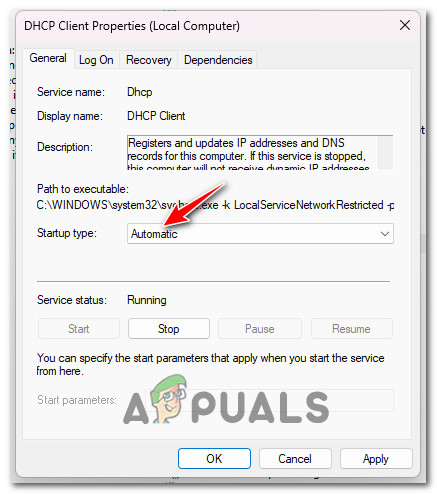
DHCP Client properties - Set the Startup type to Automatic and click Start if the service isn’t running. Click Apply to save changes.
Configuring DHCP service startup type - If the service is running, restart it by right-clicking the DHCP Client and selecting Restart Service.
- Check if the issue is resolved by retrying the task that caused the error.
9. Disable Custom Power Management Customizations
When your device tries to save energy by putting parts like the network adapter in low-power mode, it can cause connection problems. Turning off custom power settings stops this, keeping the network adapter active and preventing automatic power reduction.
- Right-click the network icon in the system tray and select Open Network and Internet Settings.
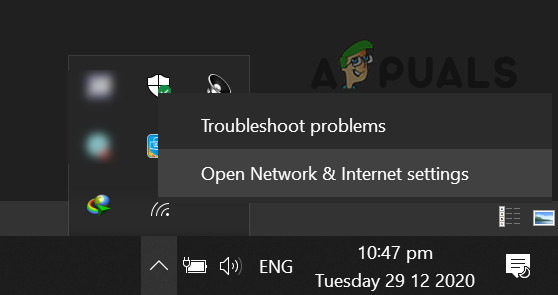
Opening Network and Internet settings - Go to the Network and Sharing Center and select Change adapter settings.
- Temporarily disable your network connection by right-clicking it and selecting Disable.
- Open the Properties of the active network connection, go to the Networking tab, and click Configure for your network adapter.
- In the new window, navigate to the Power Management tab and uncheck Allow the computer to turn off this device to save power.
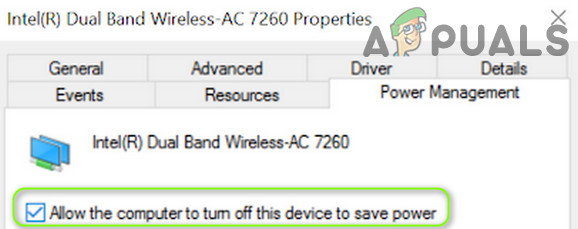
Disabling device power-saving - Click OK to confirm the changes and then re-enable your network connection from the Network and Sharing Center.
- Check if the network error still occurs after these changes.
10. Renew Your IP Configurations
When your computer’s IP address is old or clashes with another device, renewing the IP can fix it. This means giving up the current IP and getting a new one from the DHCP server.
- Press Windows + R to open the Run dialog box. Type cmd and press Ctrl + Shift + Enter to open an elevated Command Prompt.
Open an elevated Command Prompt - Click Yes on the User Account Control prompt.
- Type the following commands into the elevated Command Prompt, pressing Enter after each command to reset your IP configuration:
ipconfig /release ipconfig /flushdns ipconfig /renew - Restart your PC
11. Disable 3rd Party Antivirus
Sometimes, third-party antivirus software can mess with system tasks, like network settings. Turning it off temporarily lets Windows manage network tasks without interference, which might otherwise block or change important settings for a stable connection.
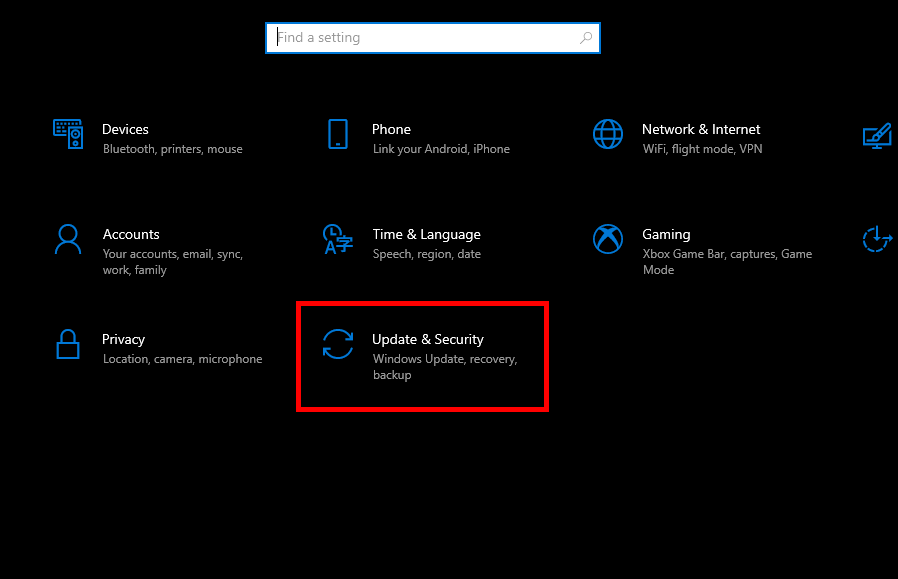
- Open the Start Menu.
- Click on Settings.
- Click on Update & Security.
- Click on Windows Security in the left pane.
- Under the Virus & threat protection settings section in the right pane, click on Manage settings.
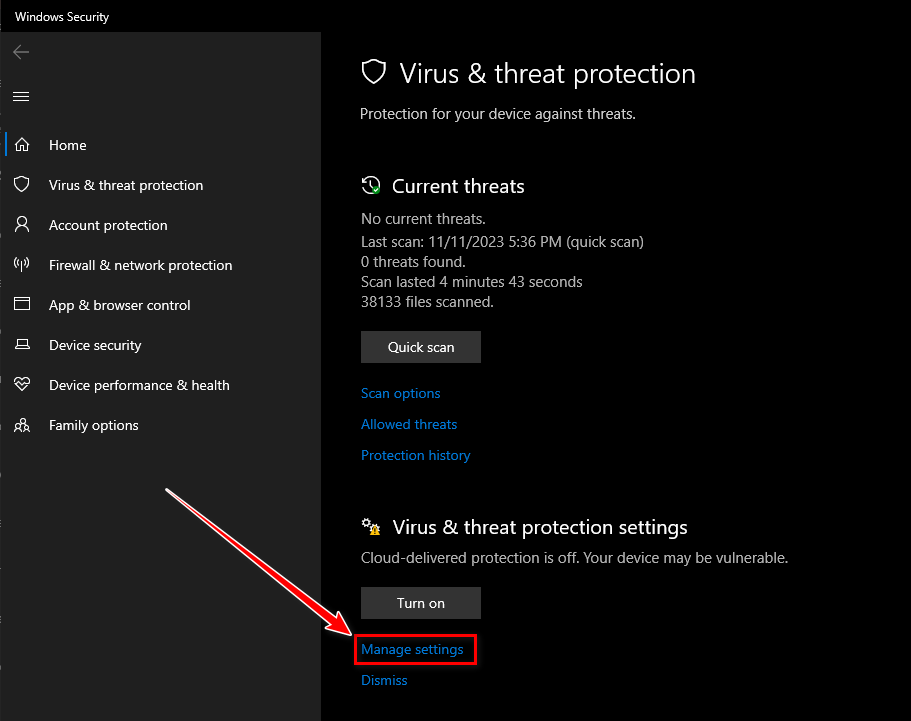
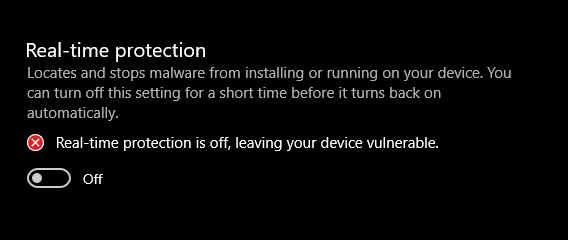
- Locate the Real-time protection toggle and set it to Off.
12. Deploy a CHKDSK Scan
When file system problems or bad sectors exist on the disk, they can prevent Windows from accessing important network files properly. A CHKDSK scan checks the health of your file system and fixes errors or bad areas, ensuring that all necessary files for networking work correctly.
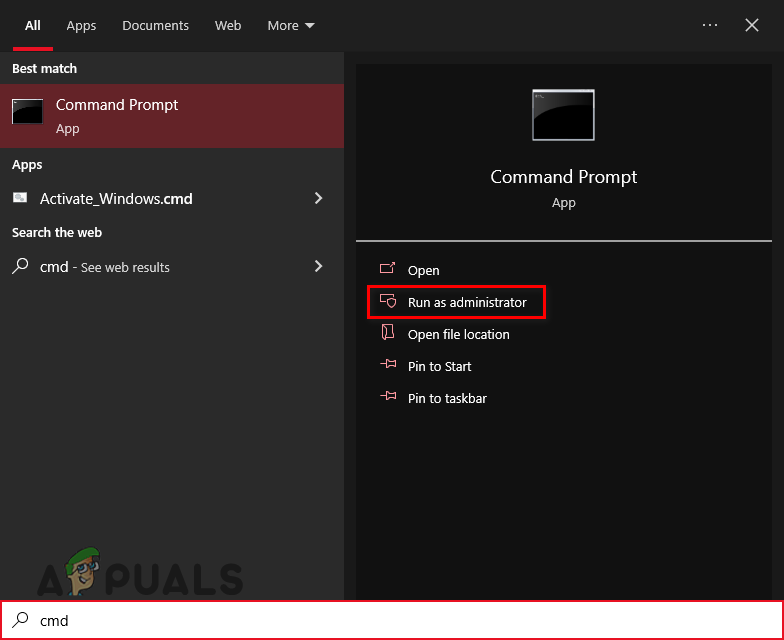
- Search for Command Prompt, right-click it, and select Run as administrator.
- Type the following command and press Enter:
chkdsk /f /r
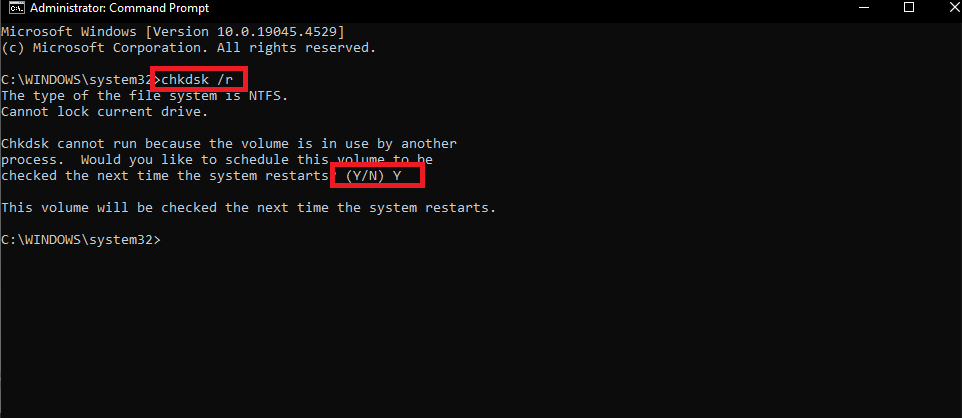
- Reboot the computer to allow CHKDSK to scan and repair any disk errors.
13. Install the Network Driver in Compatibility Mode
Running the network driver in compatibility mode lets Windows install it as if it’s on an older system, avoiding conflicts with new updates. This helps keep the driver stable and fixes IP configuration issues by skipping compatibility problems with newer Windows versions.
- Download the latest network driver for your system.
- Right-click the driver installation file, select Properties, then go to Compatibility, and choose an older version of Windows.
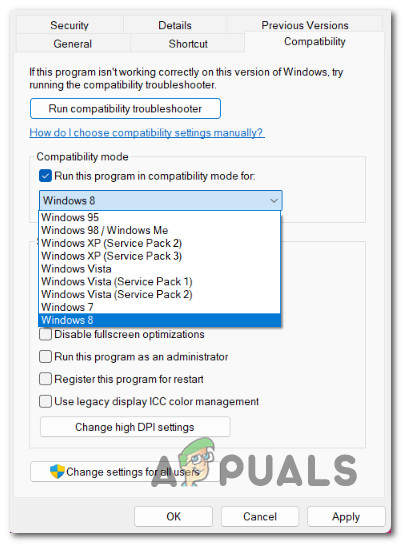
Run in Compatibility mode - Run the installation as administrator and follow the on-screen instructions.
14. Switch to the Maximum Performance Power Plan
Switching to the Maximum Performance Power Plan adjusts your computer’s power settings so that all network hardware, like the Ethernet adapter, runs at full power. This prevents power-saving features from slowing down your network adapter, avoiding problems like IP configuration errors or disconnections.
- Press Windows + R to open the Run dialog box.
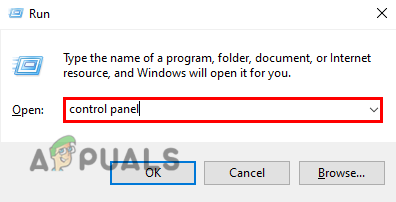
- Type Control panel and press Enter to access the classic Control Panel interface.
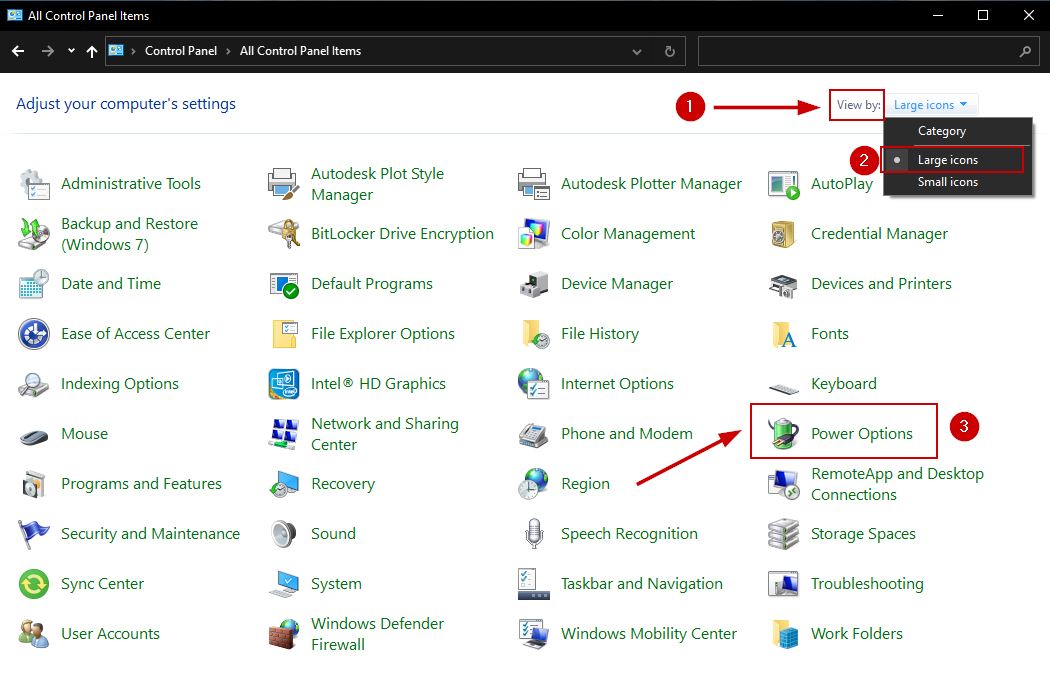
- Navigate to Power Options in the Control Panel.
- Click on Change plan settings.
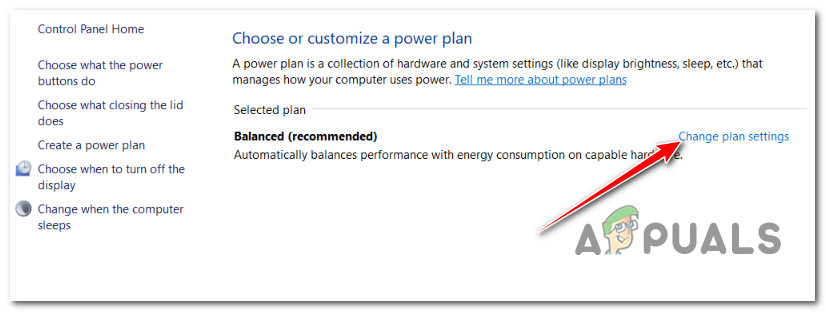
Access the Change Plan Settings - Select Change advanced power settings.

Open Change Advanced Power Settings in the Edit Plan Settings - In the advanced power options, find the wireless adapter settings and set it to Maximum Performance.
- Apply the changes, reboot your computer, and check if the issue is resolved.
15. Disable the Virtual Ethernet Devices
Virtual Ethernet adapters from programs like VPNs or virtual machines can sometimes mess with your main network connection. Turning off these virtual devices can help solve problems that stop Windows from giving your physical Ethernet connection the right IP address.
- Press Windows key + R, type ncpa.cpl, and press Enter to open the Network Connections window.

Opening Network Connections - Right-click any virtual adapters you find and select Disable to turn off these connections.
- After disabling all virtual adapters, restart your system to see if the Ethernet error is resolved.
16. Optimize your Network Power Usage
Adjusting power management settings for your network adapter can be important, as excessively high power settings might lead to instability and connectivity issues. By adjusting these settings to optimize for power efficiency, you could potentially reduce excessive power demands which may accidentally cause your network adapter to malfunction or disconnect.
- Press Windows + R, type devmgmt.msc, and press Enter to open Device Manager.
Accessing Device Manager - Expand the Network Adapters section, right-click your network adapter, and select Properties.
- Go to the Advanced tab, find the Power Output property, and adjust its value if it is set to 100%.
- Save and apply your changes, then reboot your computer.
17. Allow Ethernet Adapter through BIOS
To make sure your Ethernet adapter works right, you might need to turn it on in the BIOS. This lets the motherboard detect and use the network adapter so it can get an IP address from your router.
- Restart your computer and enter the BIOS during the boot process by pressing the designated key (commonly F2, F10, F12, DEL, or ESC).
- In the BIOS settings, navigate to the menu for integrated peripherals or onboard devices.
- Ensure that Integrated LAN, Onboard Ethernet, or similar options are enabled.
- Save changes and exit the BIOS.
After adjusting settings in BIOS, boot into Windows and check for the issue again.
18. Uninstall the latest Windows Update
Uninstalling the latest Windows update can sometimes solve the “Ethernet doesn’t have a valid IP” problem. Updates can sometimes cause issues with network drivers or settings, leading to IP address errors.
- Press Windows key + R, type appwiz.cpl, and press Enter.
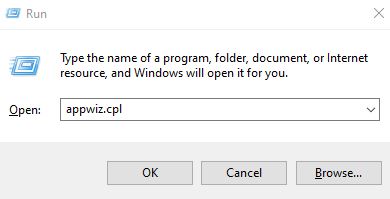
- On the left side, click View installed updates and locate the recent update you want to remove.

- Right-click the update and select Uninstall.
- Follow the prompts to uninstall the update, then restart your computer.
19. Enable QoS from Router Settings
Turning on Quality of Service (QoS) in your router can help manage network traffic better. This makes data flow more smoothly and can help fix IP configuration problems by reducing network congestion.
- Enter your router’s IP address (commonly 192.168.0.1 or 192.168.1.1) into a web browser.
- Log in using your router’s administrative credentials (default username is often admin, with a password of admin or password, unless previously changed).
- Locate the QoS settings, typically found under Advanced Settings or a similar section.
- Enable QoS and configure it to your needs, or use the default settings if unsure.
- Save the changes and reboot your router if necessary.
- Check if enabling QoS resolves your Ethernet connection error.
20. Enable the AutoConfig Service
To ensure your device can automatically configure its network settings, make sure the AutoConfig service is turned on. This service helps Windows connect to networks by applying the right settings. If it’s off, your computer might not get an IP address from the network, leading to connection issues.
- Press Windows + R, type cmd, and then use Ctrl + Shift + Enter to open Command Prompt.
Open an elevated Command Prompt - In the Command Prompt, type the following command and press Enter to enable the Ethernet AutoConfig service:
netsh lan set autoconfig enabled=yes interface=Ethernet
- After running the command, restart your computer and check if the Ethernet issue is resolved.
21. Reinstall Network-related Dependencies via Net Config
If none of the solutions work, reinstalling network parts can fix the issue. This resets important things like TCP/IP and DNS settings, which might be messed up or set wrong, causing IP address problems. Refreshing these settings removes conflicts or old settings, helping your device connect to the network again correctly.
- Press Windows + R, type cmd, and press Ctrl + Shift + Enter to open Command Prompt.
- Type the following command in the Command Prompt and press Enter:
netcfg -d
- Once the command has executed, restart your computer for the changes to take effect.
- After rebooting, Windows will attempt to reinstall any network devices and configure them to the default settings.
This method did not work for me. What else can I do?