Fix: “An Ethernet cable is not properly plugged in or might be broken”
The message “An Ethernet cable is not properly plugged in or might be broken” appears when Windows fails to detect a stable physical connection between your network adapter and the router or switch. This detection happens at the hardware level, so even minor interruptions can make Windows think the connection is missing or faulty.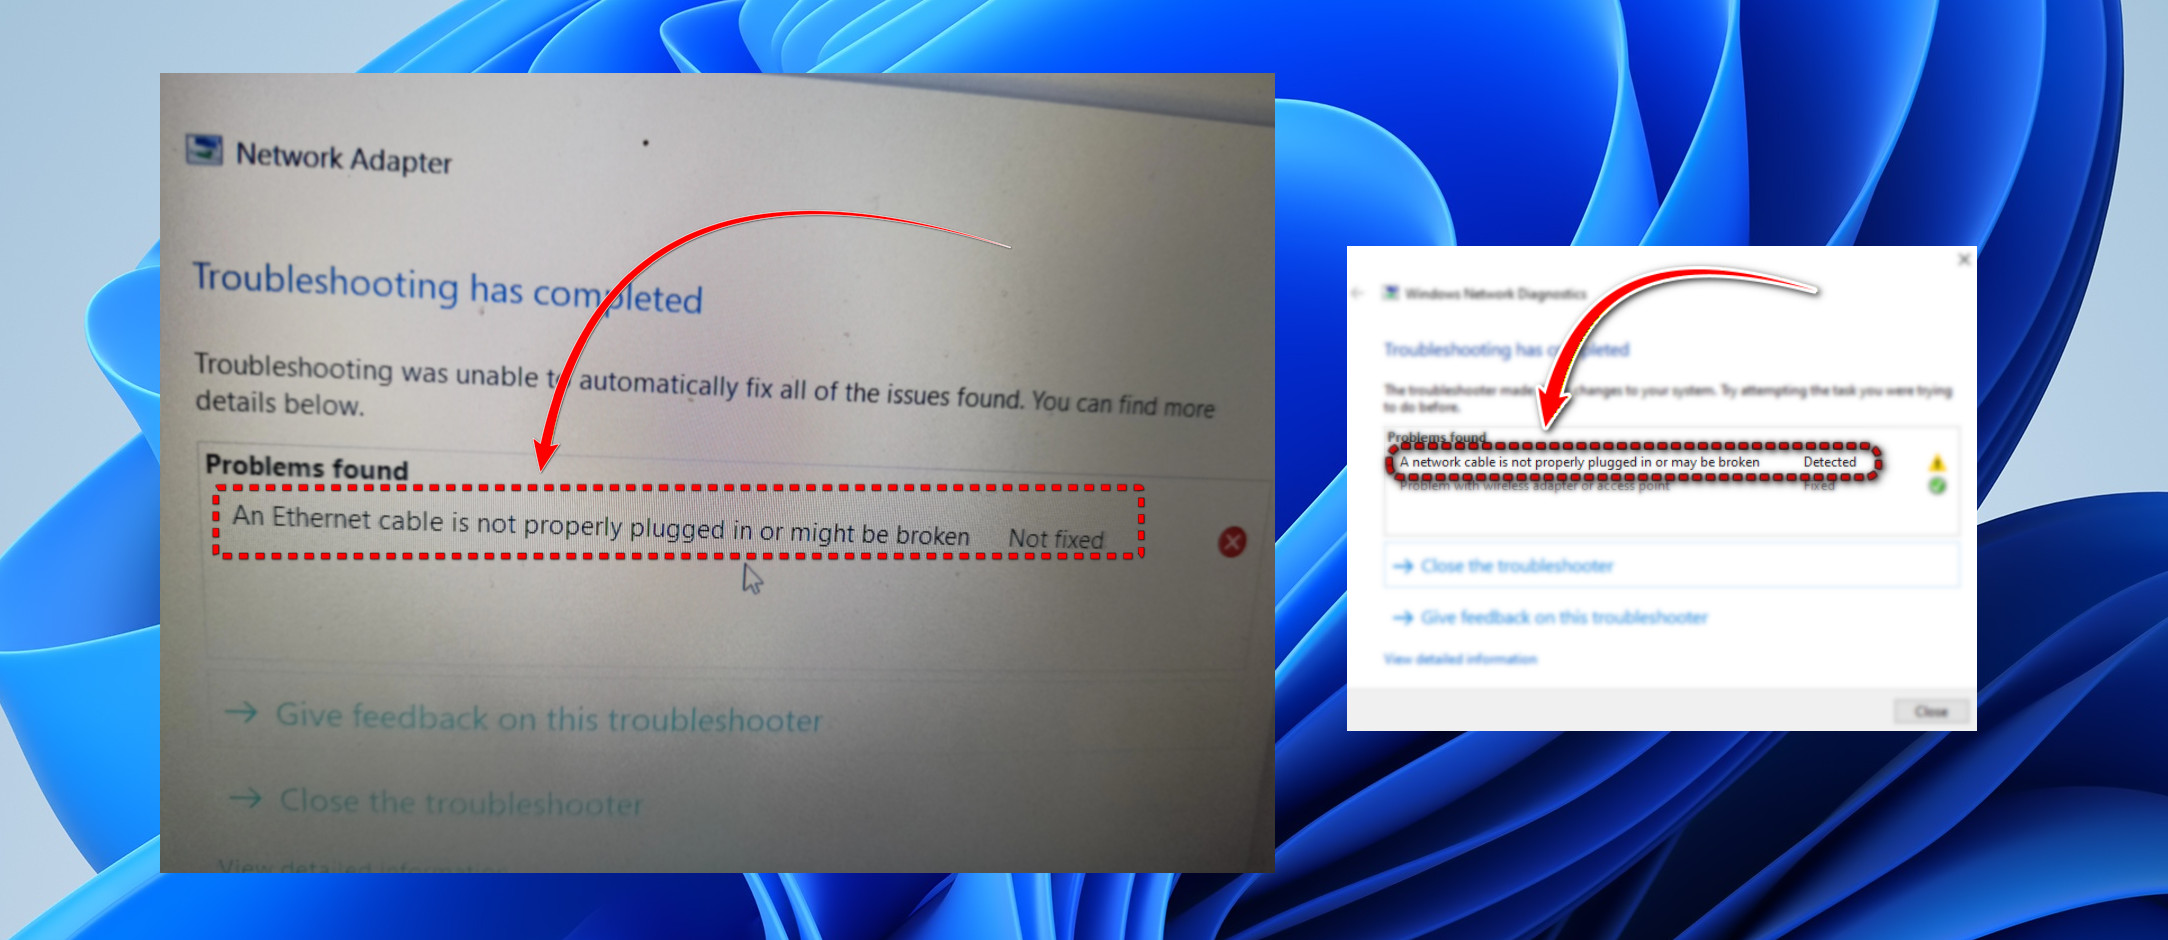 Most cases are caused by loose connections, faulty ports, driver malfunctions, or disabled network adapters. However, some users also experience it after recent system updates or power surges that reset the network stack or interfere with integrated controllers.
This guide helps you identify whether the issue is hardware-related or software-based and provides clear step-by-step solutions to restore a stable Ethernet connection.
1. Check the Cable Connection
When the connection between your computer’s Ethernet port and the cable is weak or unstable (for example, if the metal pins are misaligned), communication between your computer and the router breaks at the hardware level. Fixing any loose or weak connections helps Windows detect an active link.
- Unplug the cable from both ends, then firmly plug it back in until you hear a clear click.
- Check the link indicator lights near your computer’s port and on the router. If both are off, continue to the next step.
- Try another cable of the same type, then test with a different router or switch port.
- Use a flashlight to inspect the Ethernet port and ensure the gold pins are straight and clean.
- If the port feels loose or the clip doesn’t hold properly, use another port or replace the cable.
2. Disable Energy-Saving Options
The Energy Efficient Ethernet (EEE) feature reduces power use when your system is idle, but sometimes it causes unstable signaling between your computer and the router. Turning it off ensures your adapter stays powered and avoids random disconnections.
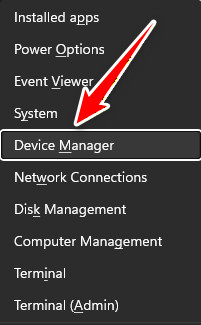
- Press Windows + X and select Device Manager.
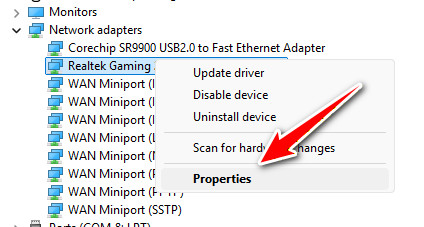
- Expand Network adapters, right-click your Ethernet adapter, and choose Properties.
- Go to the Advanced tab.
- Set Energy Efficient Ethernet, Green Ethernet, and Advanced EEE to Disabled.
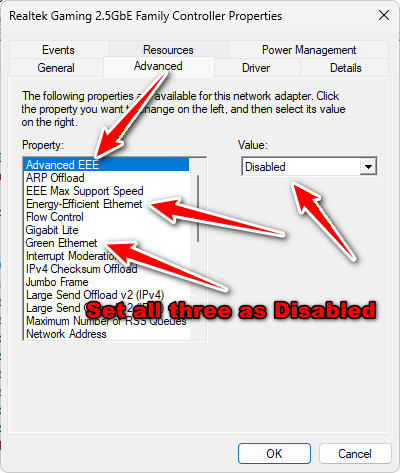
- Click OK and check if the Ethernet light or internet connection is restored.
3. Adjust Network Speed Settings
If your Ethernet adapter is manually set to 1 Gbps but your router or cable supports lower speeds, it can block the link entirely. Switching to Auto Negotiation lets Windows automatically match the correct and most stable speed.
- Press Windows + X, open Device Manager, and open your Ethernet adapter’s Properties.

- Go to the Advanced tab and find Speed and Duplex.
- Select Auto Negotiation and click OK.
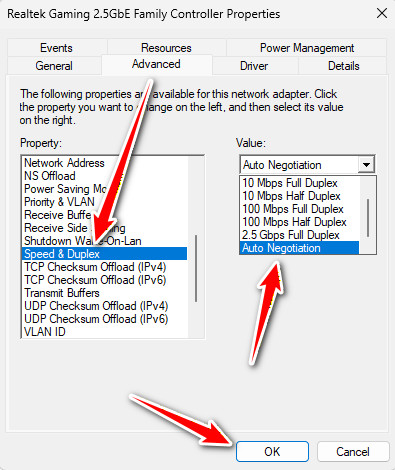
- If that fails, try 100 Mbps Full Duplex and test again.
4. Switch to the Correct Network Tab
If you are on Wi-Fi and still see this Ethernet message, Windows might be prioritizing an inactive Ethernet port. Switching to the correct network tab ensures it focuses on your active Wi-Fi instead of the disconnected Ethernet adapter.
- Open Settings and go to Network and Internet.
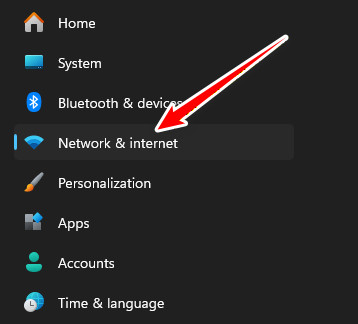
- Click on Advanced network settings.
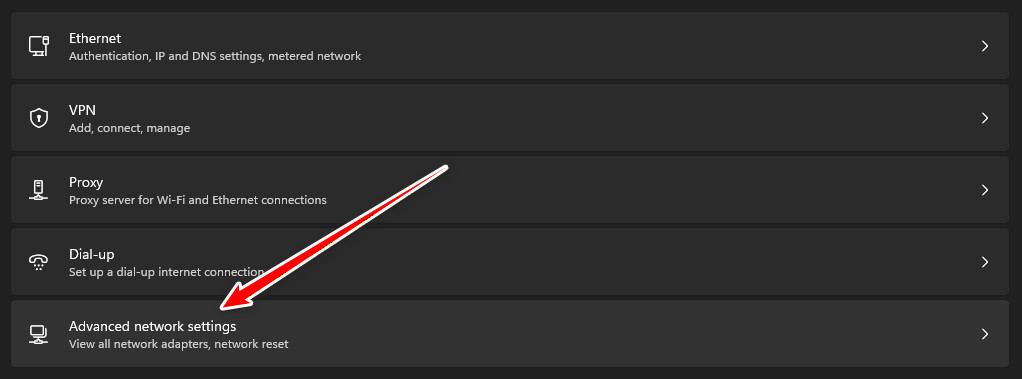
- Select Disable next to the Ethernet option (apply this to all, if there are multiple).

- Restart your PC so it connects automatically to your Wi-Fi network.
5. Power Cycle Your Computer
Sometimes, your network interface controller (NIC) stores residual electrical charge even after shutting down. This leftover charge can block proper hardware initialization and cause connection errors. Performing a full power cycle discharges this energy and gives your system a clean start.
- Completely shut down your computer.
- Unplug the power cable. If using a laptop, remove the charger and battery (if possible).
- Wait for 30 seconds to fully discharge.
- Reconnect power and turn your PC back on.
- Plug in the Ethernet cable and check for link lights.
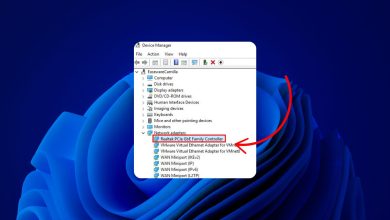
6. Reinstall or Reset the Wireless Network Card (If Applicable)
Over time, your wireless or WAN network card drivers can get corrupted, or the card might loosen slightly because of heat or vibration. Both issues can stop your system from establishing a proper connection.
Reinstalling the driver removes corrupt files, while reseating ensures a firm connection between the adapter and the motherboard, helping Windows recognize it properly.
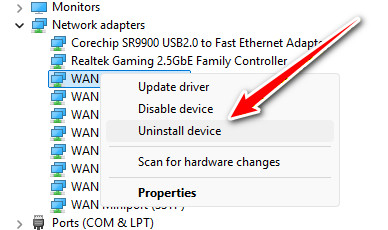
- Press Windows + X and open Device Manager.

- Expand Network adapters, right-click the wireless or WAN device, choose Uninstall device, and check Delete the driver if available.
- Restart your PC. Windows will reinstall the driver automatically, or you can download it manually from your manufacturer’s website.
- If possible, power off your laptop, remove the battery, and carefully remove and reinsert the Wi-Fi or WAN card to ensure a secure fit.
- Power on your system and test the Ethernet connection again.