How to Fix “Error Code: 0xC007000D” in Windows Update?
The Windows update error 0xC007000D can occur due to malfunctioning Windows Update components or inconsistencies in your system memory. This issue commonly arises from corruption within the update files or from the presence of outdated Windows Update components that obstruct the normal update process.
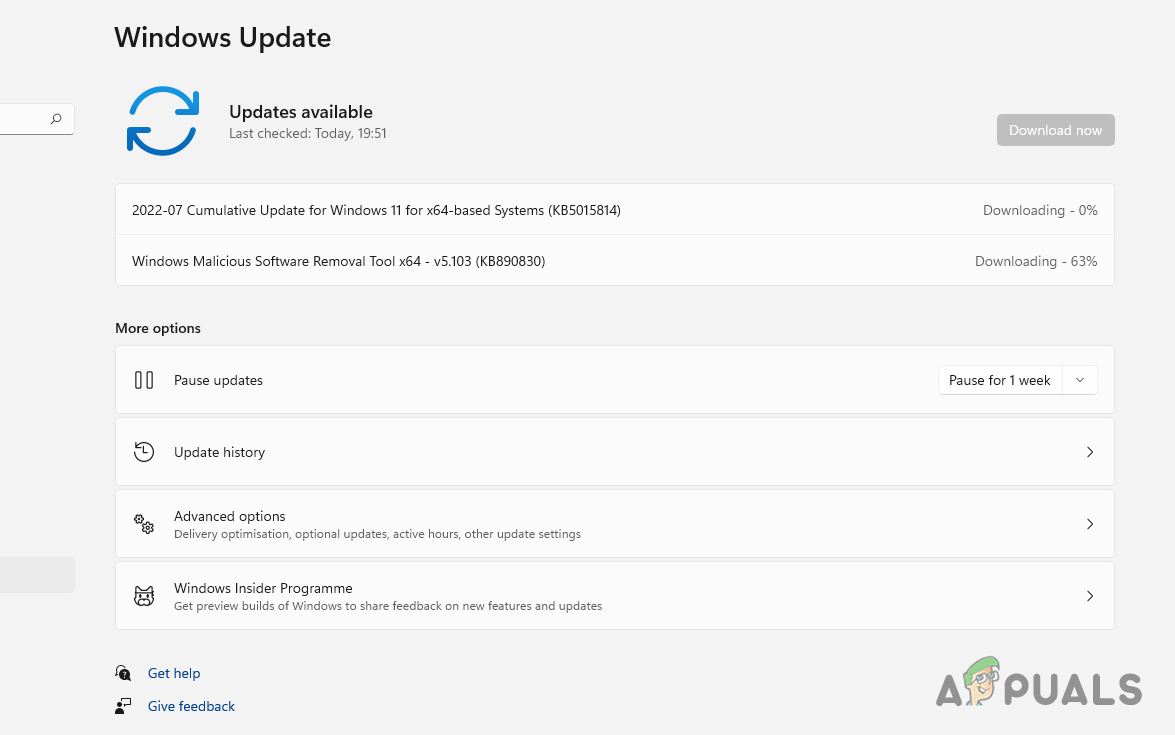
Additional factors contributing to this error can include issues with system files, network connection problems, or insufficient storage space for the update files, each of which can disrupt the update process.
It’s important to note that this error does not discriminate by device type or Windows version, affecting a wide range of systems, from desktops to laptops, across different Windows variants.
One common resolution for such issues is to manually install the update from the Windows Update catalog.
The following article provides multiple solutions that should help you resolve the 0xC007000D error code.
1. Reset Windows Update Components
If the Windows Update components are malfunctioning, they may lead to the error code mentioned earlier. The first step you should take is to reset the Windows Update components on your computer.
This involves stopping the Windows Update agent and removing any downloaded update contents on your computer.
- Open the Start Menu and search for Command Prompt.
- Select the Run as administrator option to open an elevated command prompt.
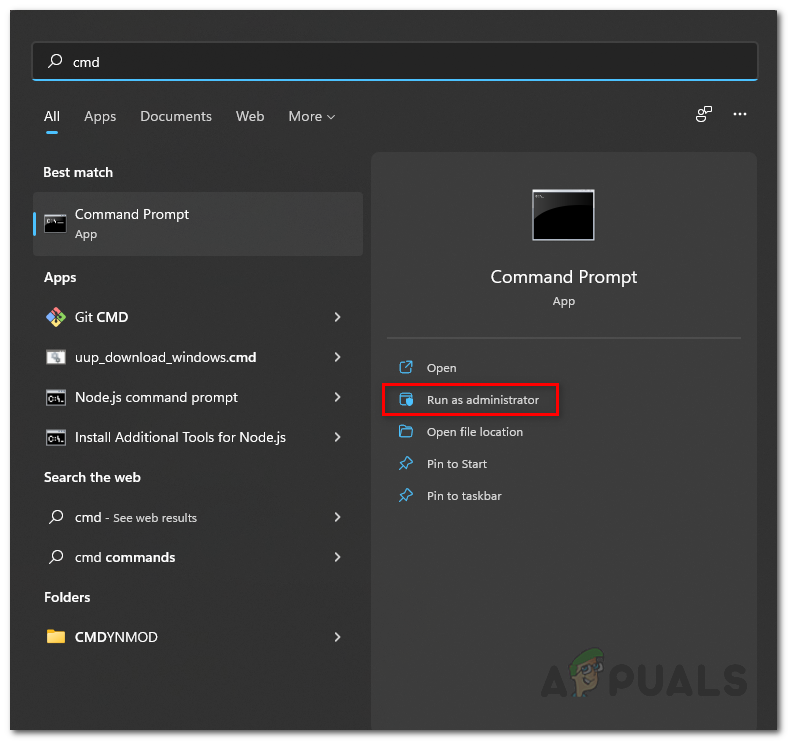
Opening Command Prompt as Admin - Click the Yes button on the User Account Control pop-up.
- Stop the Windows Update Agent using the following command:
net stop wuauserv
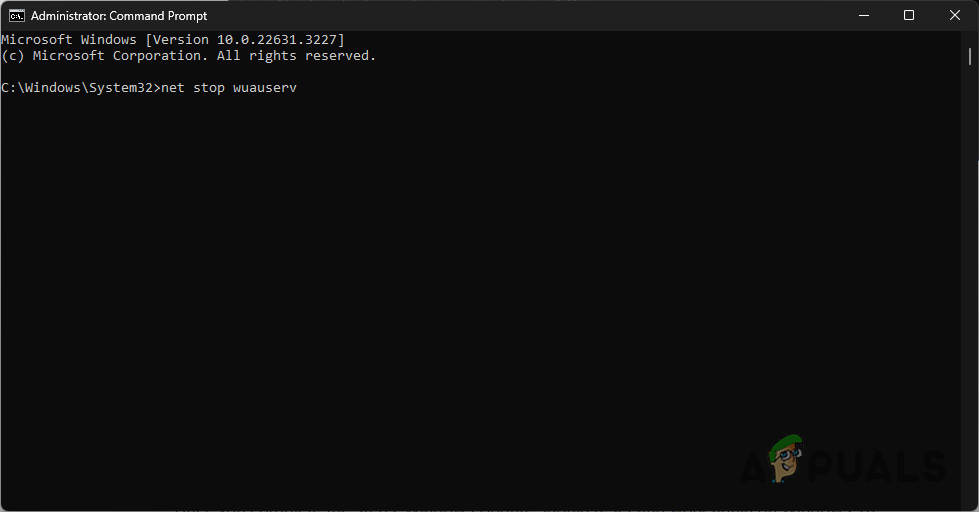
Stopping Windows Update Agent - Remove the downloaded update contents with this command:
rd /s /q %systemroot%\SoftwareDistribution
- Restart the Windows Update Agent by issuing the command:
net start wuauserv
- Lastly, restart your computer and check if the issue has been resolved.
2. Manually Install Problematic Update
To circumvent the 0xC007000D error, you might try installing the troublesome Windows update manually, particularly if the Windows Update agent keeps running into issues during the installation.
The Windows Update catalog allows you to download specific updates by their KB ID.
- Access the Windows Update Catalog by clicking this link.
- Search for the required update by entering the relevant KB ID.

Searching for Update in Microsoft Update Catalog - Download the update from the catalog.

Downloading Update from Microsoft Update Catalog - Install the update by running the downloaded file.
- Restart your computer following the update’s completion.
3. Run a Memory Test
System memory inconsistencies can prevent the installation of Windows updates. If you suspect memory issues, various problems may emerge throughout your system.
A memory test can be performed to check the health of your RAM using a tool called MemTest86, which requires a USB drive to create a bootable medium.
- Download the MemTest86 tool from the official site here.
- Insert a USB drive into your computer.
- Unzip the downloaded file to a preferred location.
- Inside the extracted folder, run the imageUSB.exe file.
- Select your USB drive and click Write.
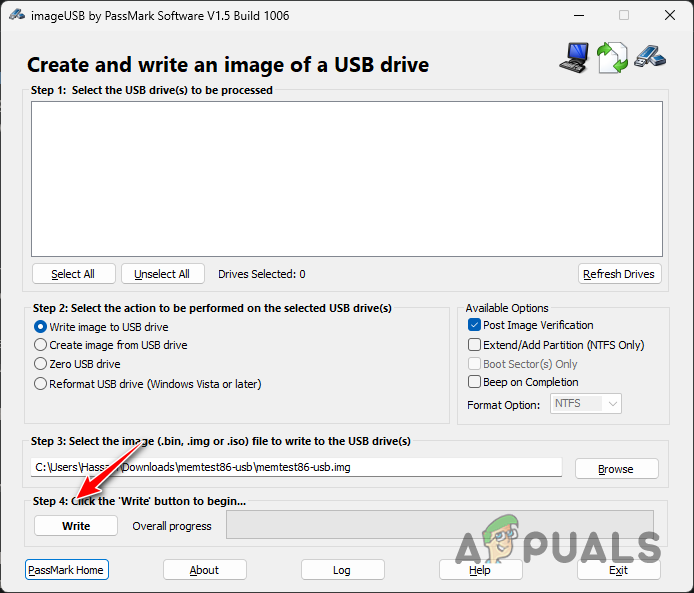
Creating Bootable MemTest86 USB Drive - Allow the utility to complete the flashing process.
- Reboot your computer and boot from the USB drive.
- Access the Boot Menu by pressing one of the keys such as ESC, F9, F11, or F12, depending on your computer’s manufacturer.
- The MemTest86 interface should appear upon booting from the USB.
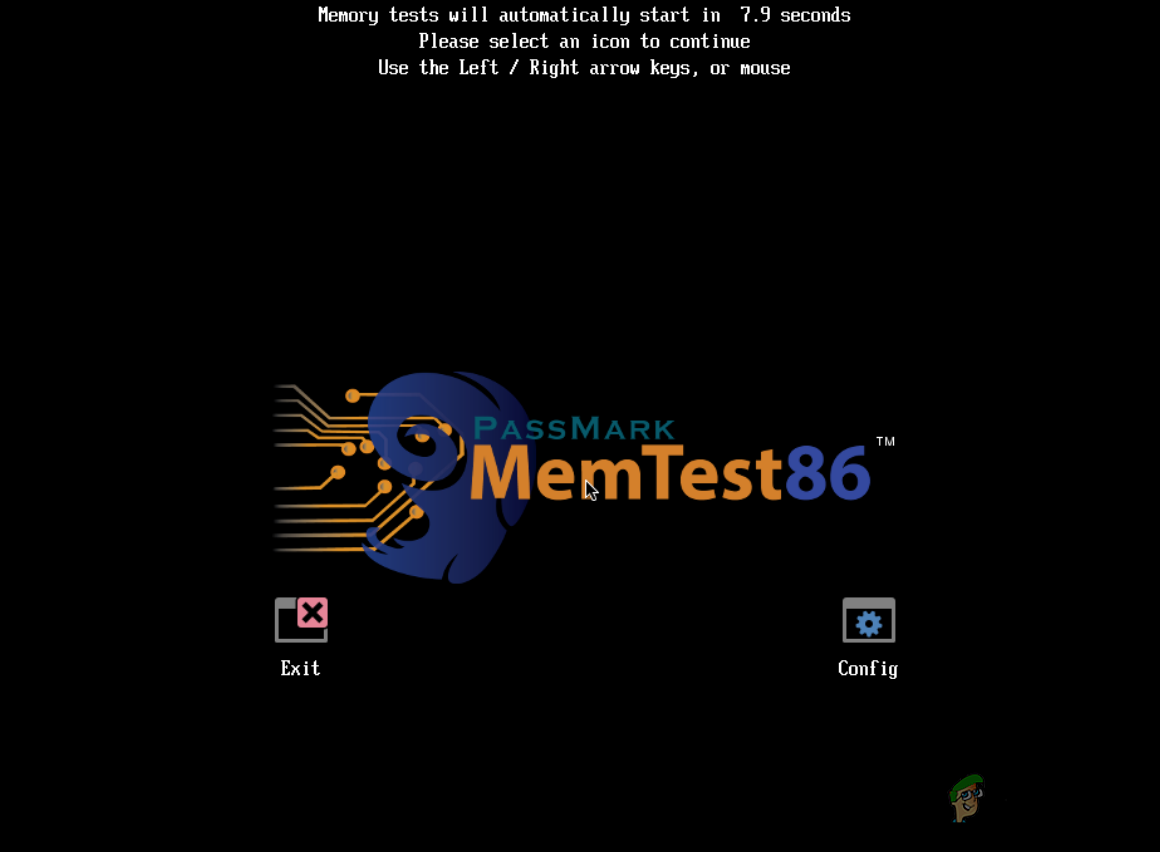
MemTest86 Boot Screen - Do not interact with any keys, allowing the timer to run out.
- The memory test will commence once the timer finishes.
- Upon completion, a test report will be displayed.
- If the test is successful, a ‘PASS’ message will appear.
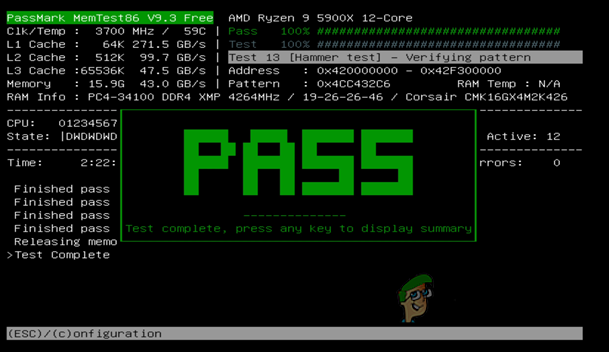
MemTest86 Memory Test Passed - If the test fails, consult the report for potential memory issues.
4. Perform an In-Place Upgrade
An in-place upgrade is appropriate if the memory test reveals no errors. This approach fixes Windows issues without erasing your data. Download a Windows ISO image to begin an in-place upgrade.
- Visit the official Microsoft website to download Windows here.
- Under the Windows Disk Image (ISO) section, select your Windows version and click Download Now.
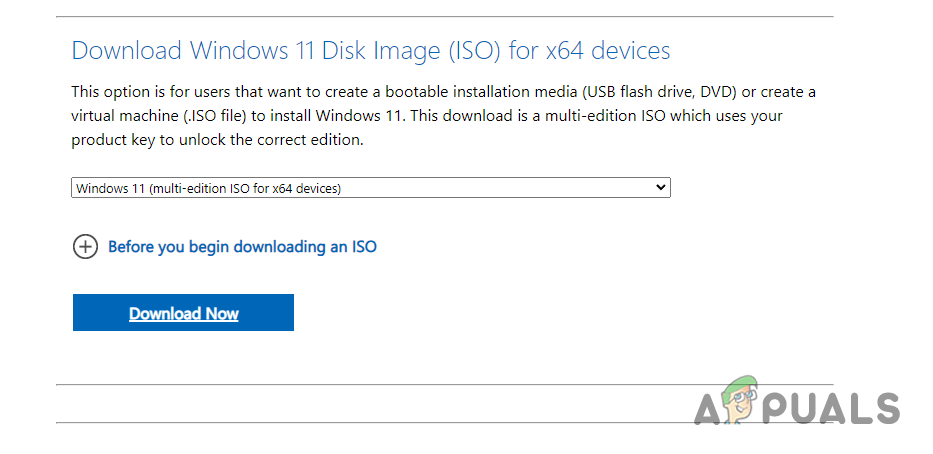
Downloading Windows ISO Image - Mount the ISO by double-clicking the image file.
- In the mounted drive, execute the Setup.exe file.
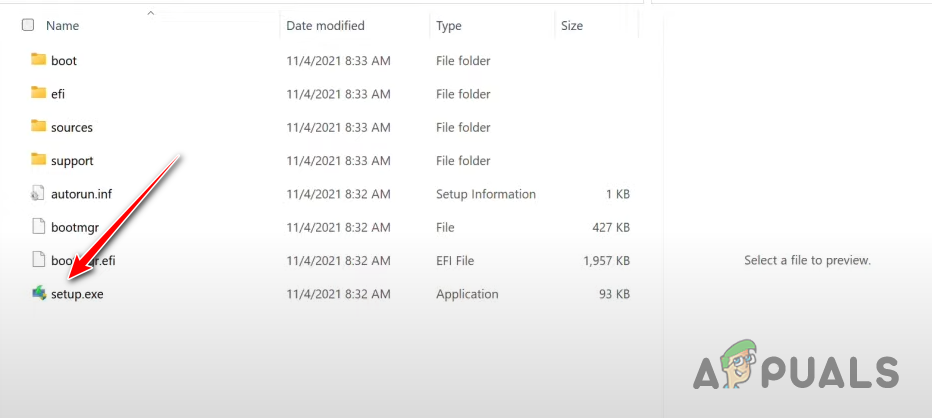
Running Windows Setup File - On the Install Windows screen, click Next.
- In the Ready to Install phase, select Choose what to keep.
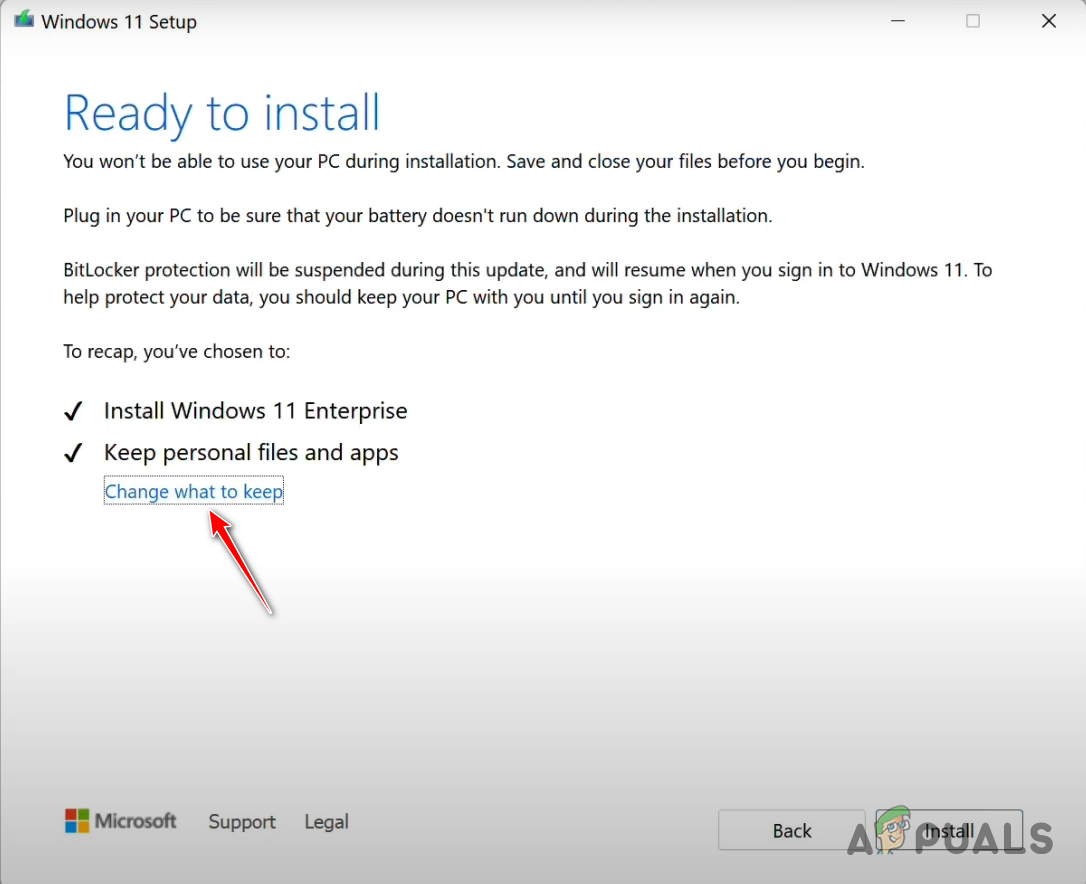
Navigating to Choose What to Keep Menu - Opt for Keep personal files and apps and click Next.
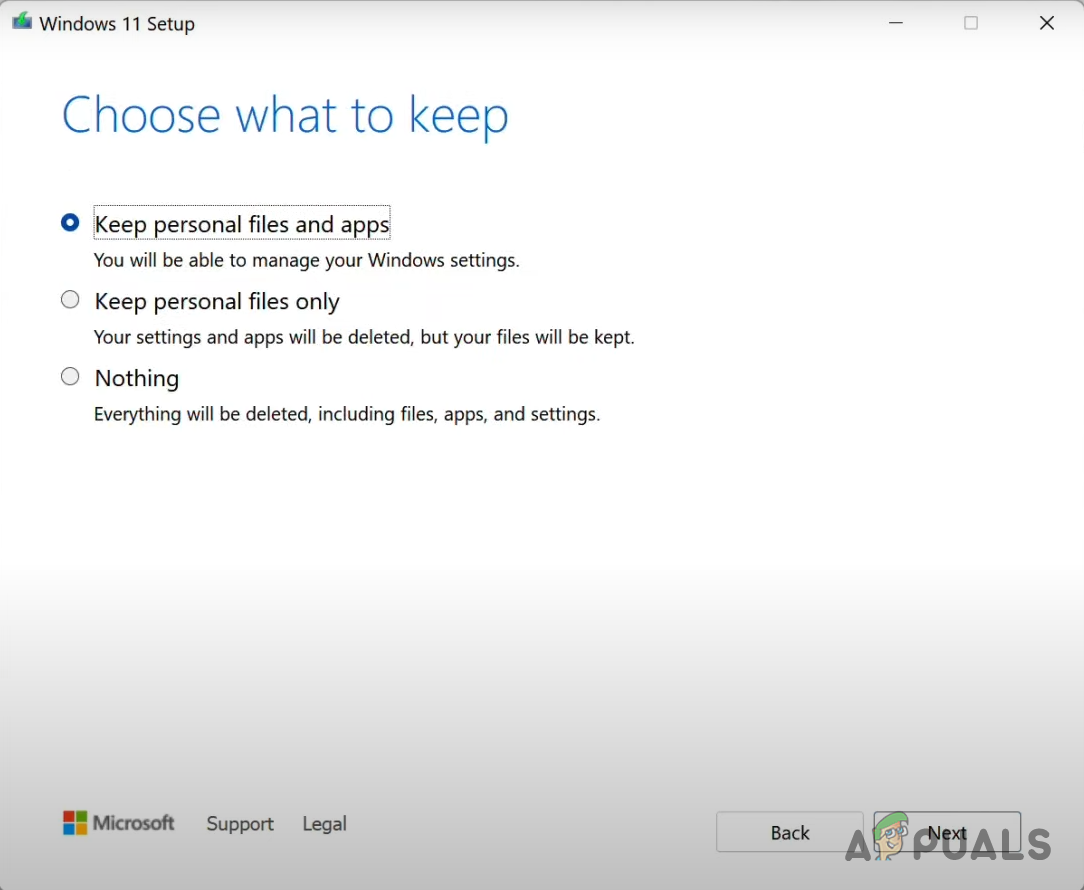
Choosing What Files to Keep - Click Install to initiate the upgrade process.
- Wait for the installation to finish.
Using the methods outlined above, you should be able to fix the Windows update error 0xC007000D. If the issue persists, consider contacting the Microsoft support team for further assistance.


