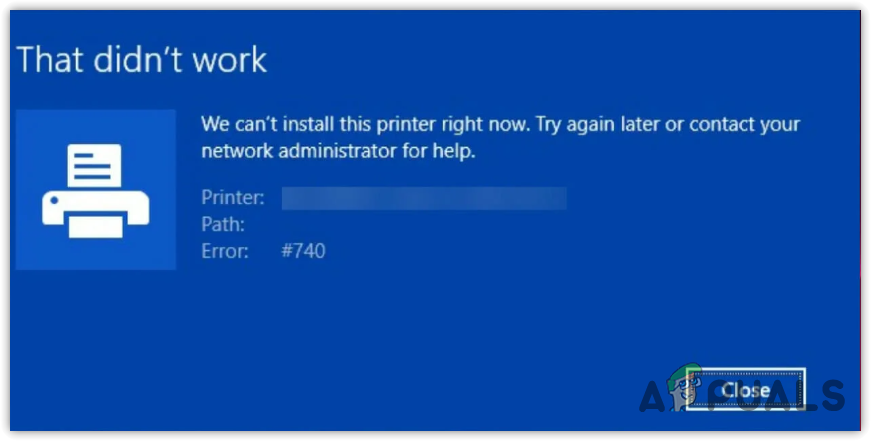
How to Troubleshoot Error 740 During Printer Setup on Windows?
Error 740 can arise due to insufficient permissions when attempting to add a printer. This can occur even when using an administrator account. Furthermore, outdated or corrupted printer drivers can also trigger this issue.
The error is commonly encountered in a domain environment, particularly with printers that use Type 3/4 PCL6 drivers. Regardless of the underlying cause, the following methods should help you resolve error 740 effectively.
These solutions are applicable when facing this error as you attempt to add a shared printer to your PC. With the potential causes in mind, let’s explore the corrective measures.
1. Add the Printer with Administrator Privileges
To add a printer, you must have sufficient permissions. It is recommended to start by adding the printer with administrator privileges using the Command Prompt.
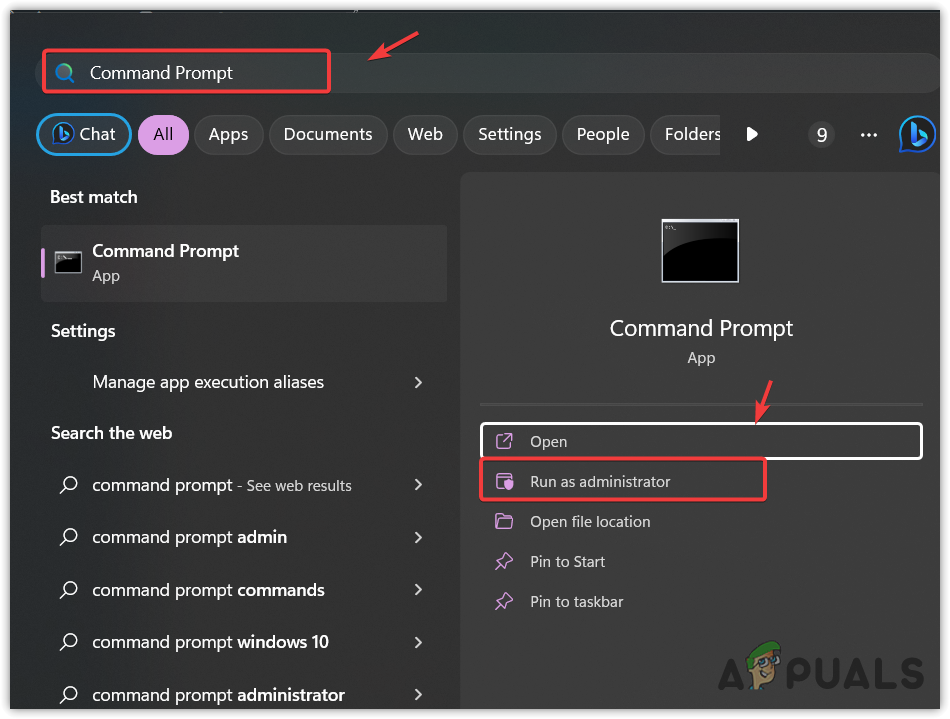
- Press the Win key to open the Start Menu.
- Type Command Prompt, right-click on it, and select Run as administrator.
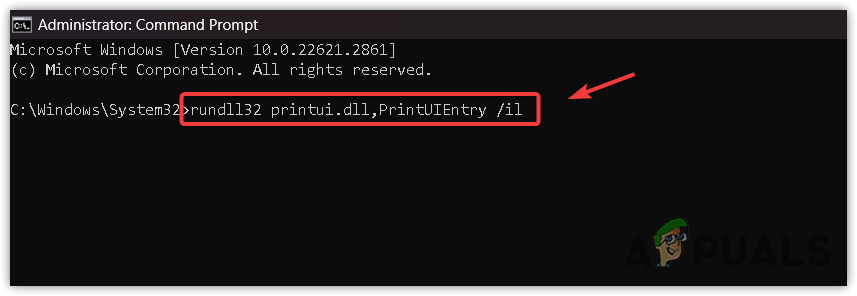
- Enter the command below and press Enter to execute it.
rundll32 printui.dll,PrintUIEntry /il
- Await the printer search completion, then select your printer and click Next to install the necessary files.
2. Disable UAC Temporarily
Disabling UAC (User Account Control) is not typically recommended, as it helps prevent unwanted system changes. However, temporarily disabling UAC may allow you to bypass restrictions when adding the printer. Remember to revert the changes in UAC settings afterward.
- Access the Start Menu and type UAC.
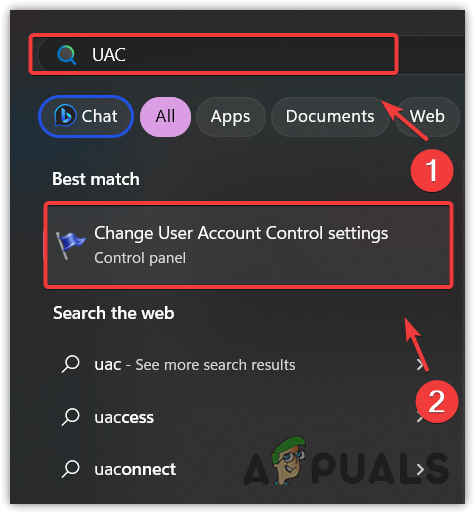
- Click on Change User Account Control Settings.
- Proceed by clicking Yes if prompted for administrative permissions.
- Alter the UAC settings by dragging the slider to the lowest setting.

- Click OK to save and exit.
- Verify whether the error still occurs.
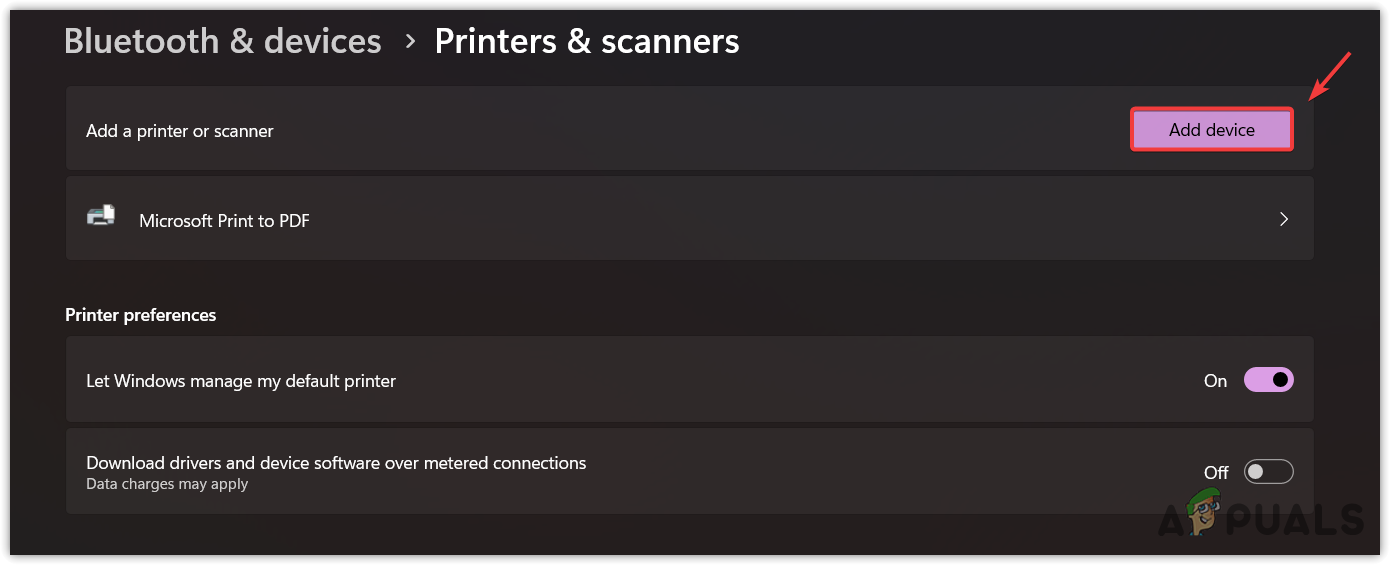
3. Add Printer from the Settings Manually
Another method involves adding the printer manually through Windows Settings:
- Press Win + I to open Settings.
- Navigate to Bluetooth & Devices > Printers & Scanners.
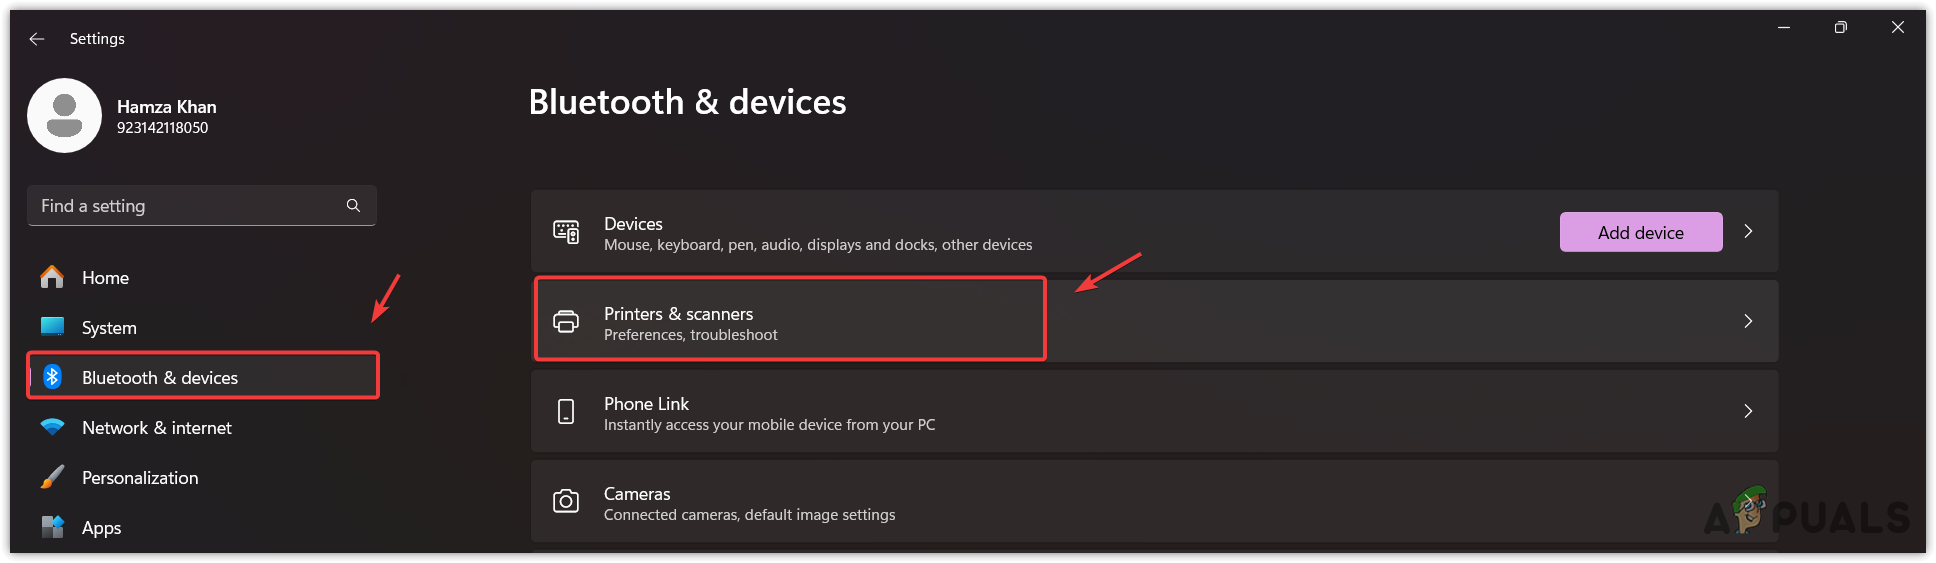
- Click on Add device and select your printer from the list that appears.
4. Run the Printer Troubleshooter
Windows includes various troubleshooters designed to automatically resolve problems. If you are unable to add a printer because of the error, running the printer troubleshooter might help:
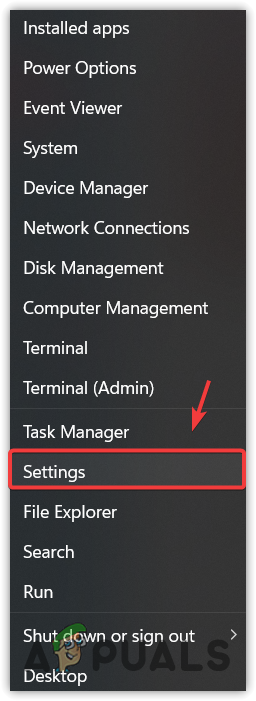
- Right-click on the Start Menu and select Settings.
- From the left pane, select System and navigate to Troubleshoot > Other troubleshooters.
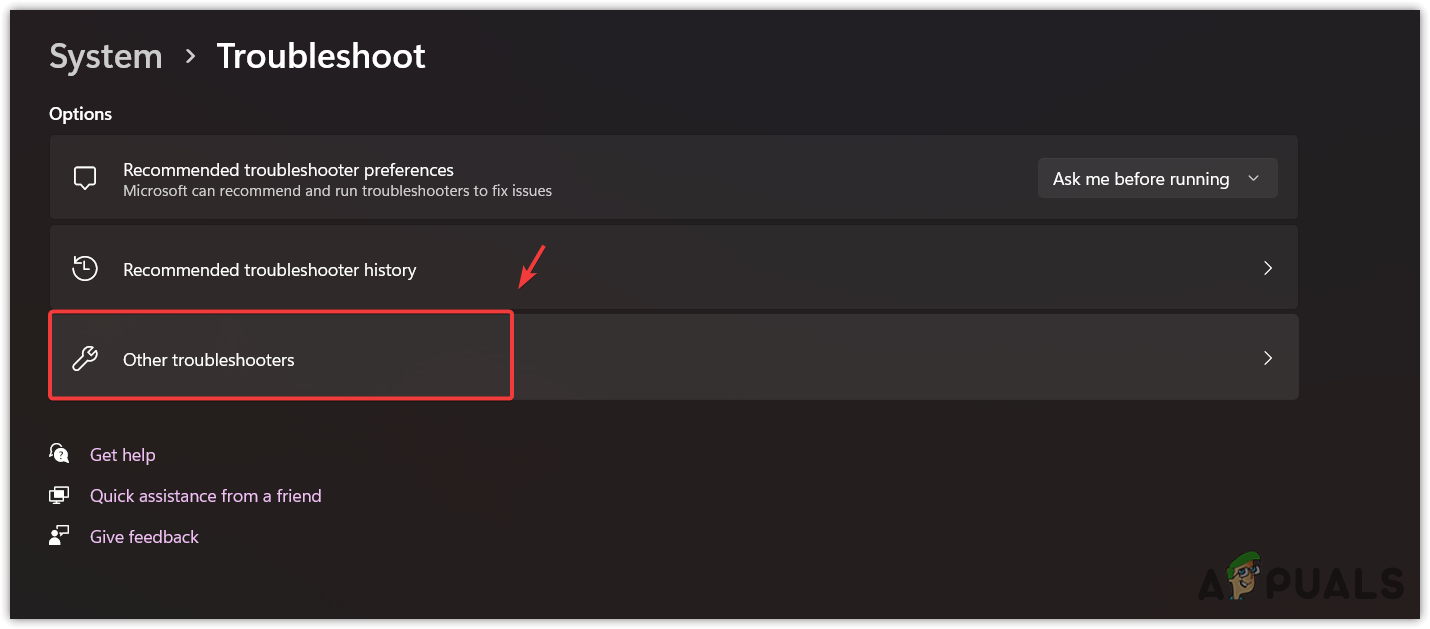
- Run the printer troubleshooter and follow the prompts to address the error.
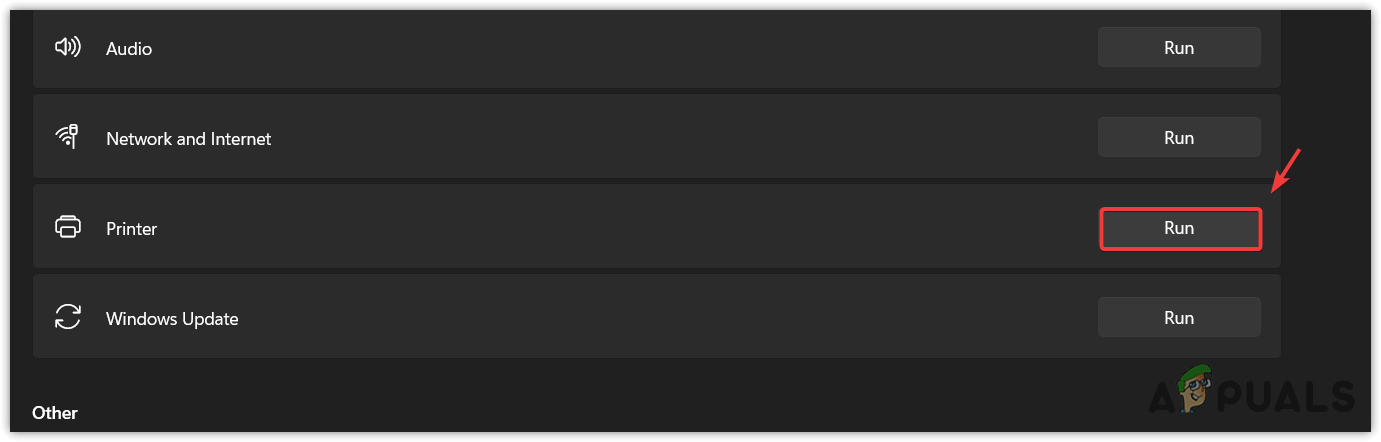
- If the troubleshooter does not resolve the error, proceed with the further steps.
5. Update Your Windows
On occasion, an incorrect update may cause error 740. A solution may involve either uninstalling the problematic update or updating your Windows again.
- Open Windows Settings using Win + I.
- Click on Windows Update at the bottom left and then click on Check for updates.
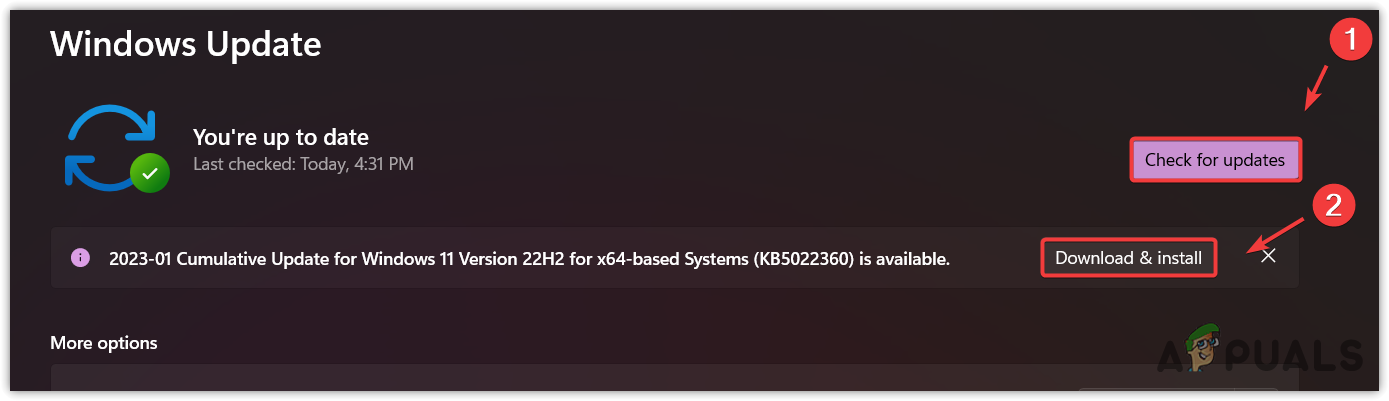
- Download any available updates and restart your computer to complete the installation process.
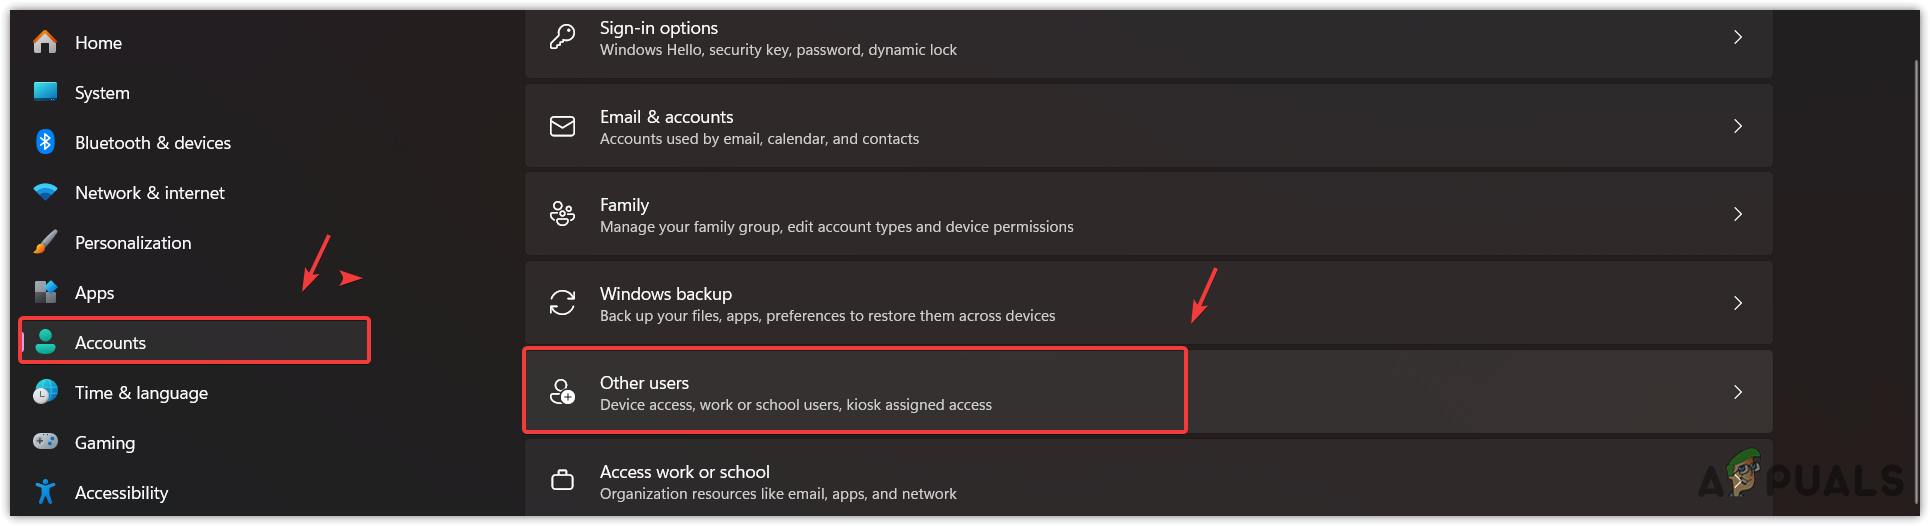
6. Create a Local Administrator Account
Insufficient permissions can sometimes be circumvented by creating a new local administrator account:
- Access Windows Settings with Win + I.
- Go to Accounts > Other users.
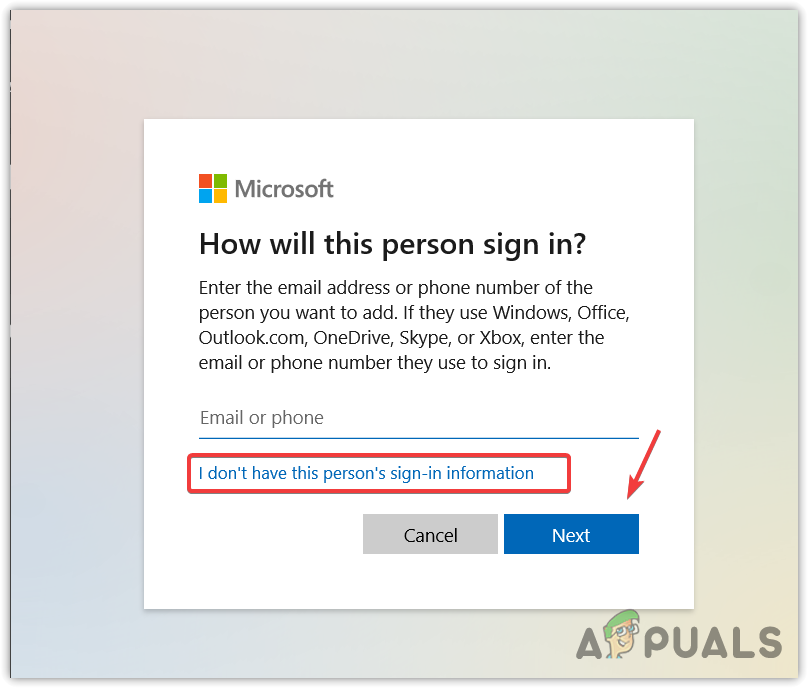
- Select Add an Account.
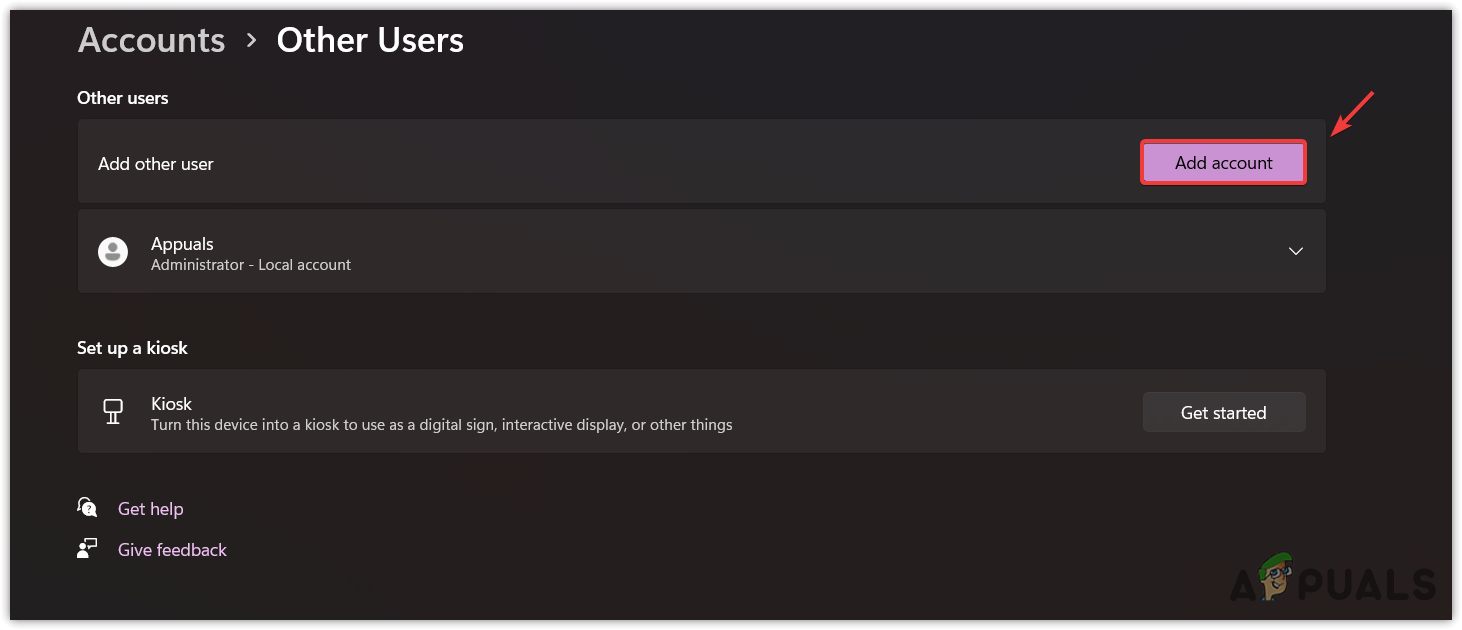
- Choose I don’t have this person’s sign-in information.
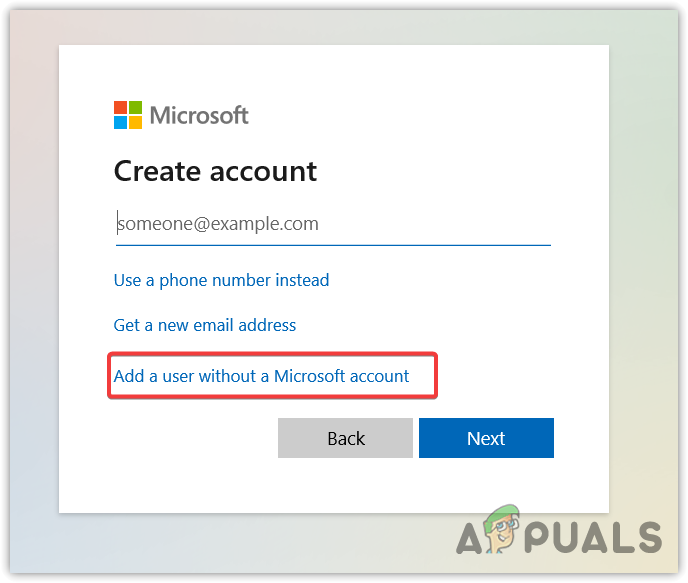
- Next, click Add a user without a Microsoft Account.
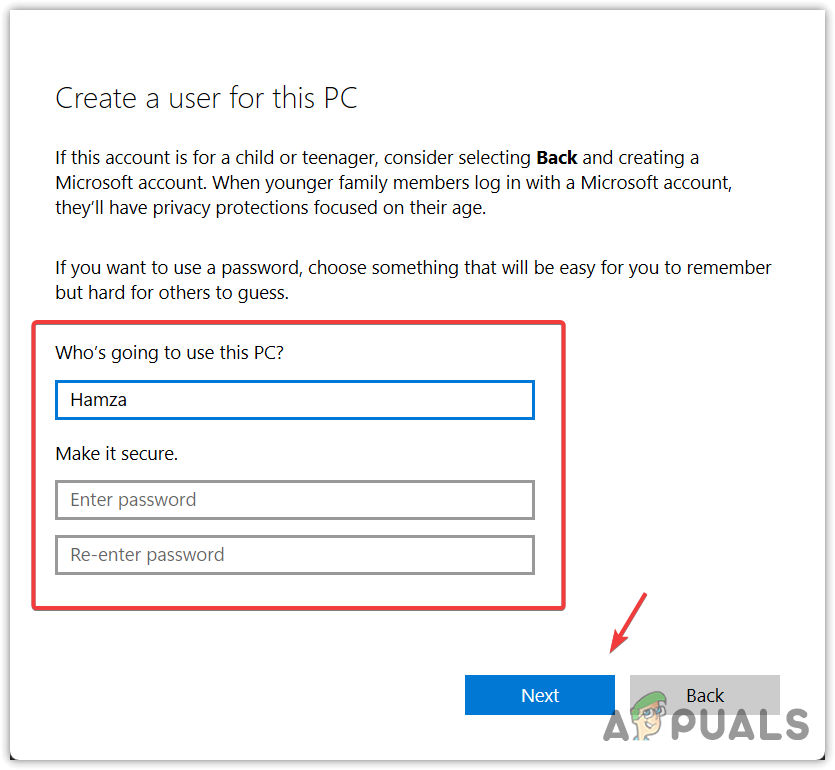
- Enter a username and password for the local account and click Next.
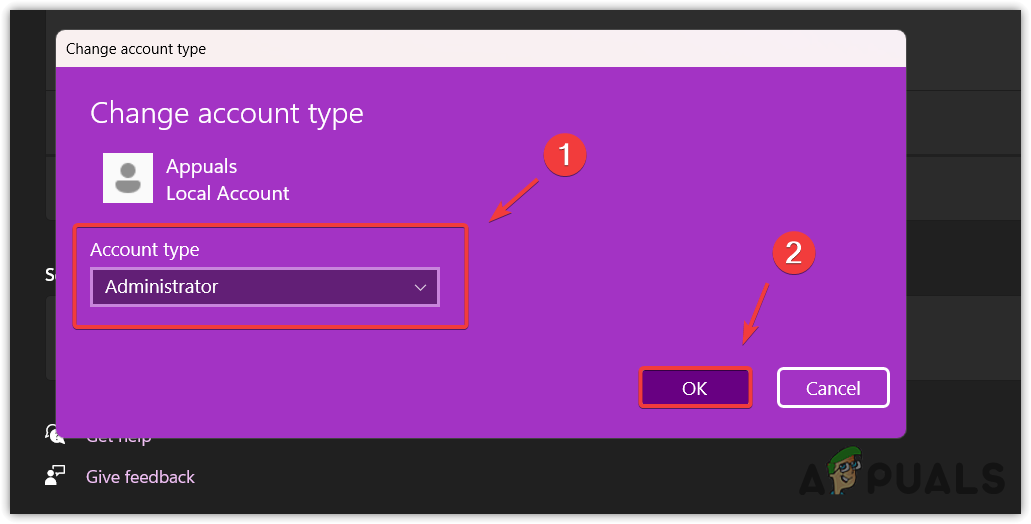
- Once the account is created, use the dropdown icon to locate Change Account type.
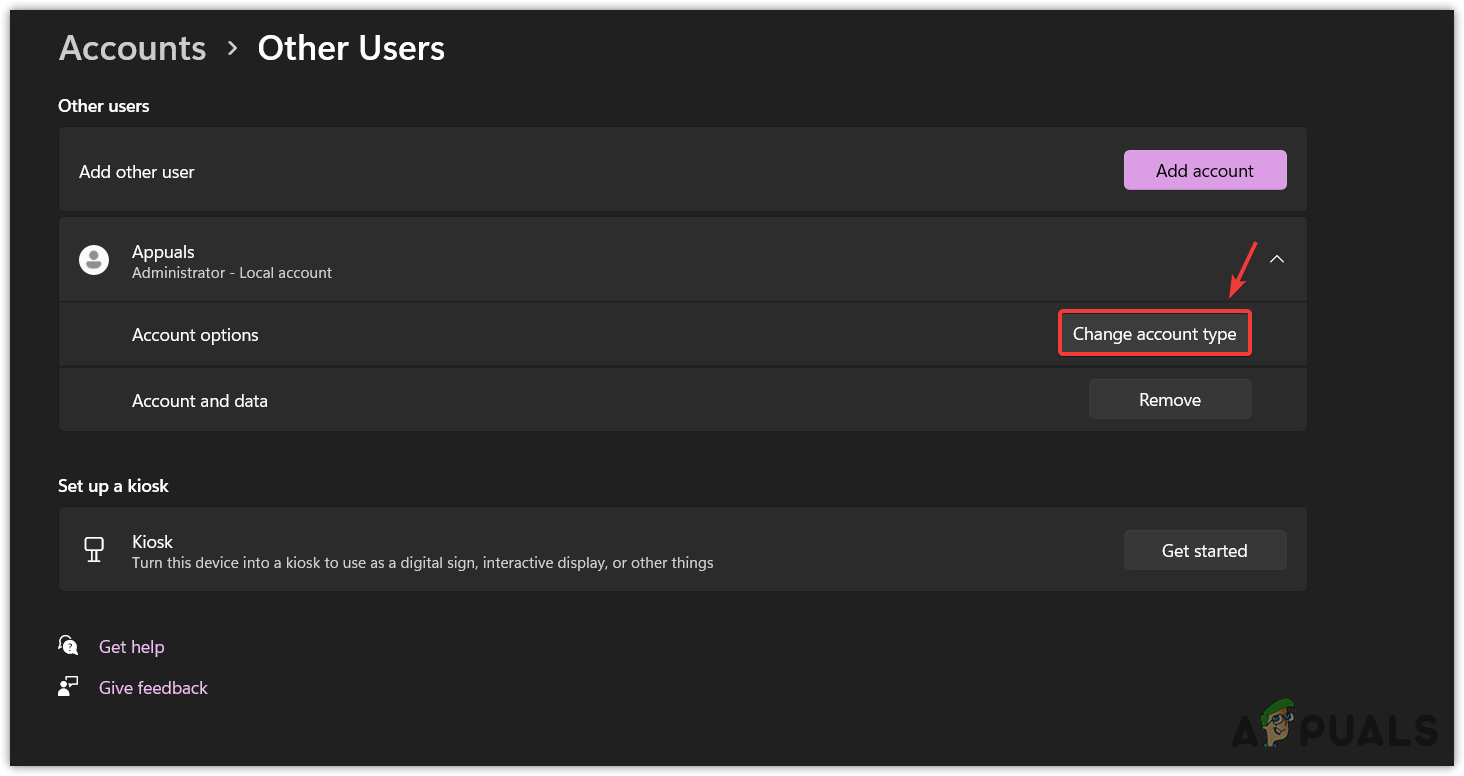
- Switch the Account type from Standard User to Administrator and click OK.
- Log into the new administrator account and attempt to add the printer via settings to see if the error has been resolved.
7. Reinstall the Printer Driver
An obsolete or corrupt printer driver can prevent the addition of a printer. Ensure that you have installed the latest driver from the official manufacturer’s website. If not, do so, and then try adding the printer again.
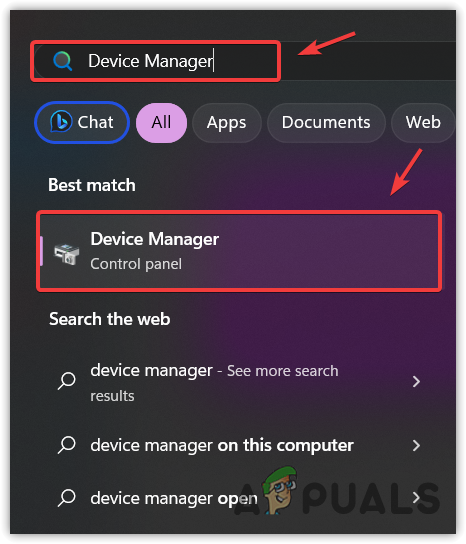
- Right-click the Start Menu and select Device Manager.
- Expand the Printers section, right-click on your printer driver, and choose Uninstall device.
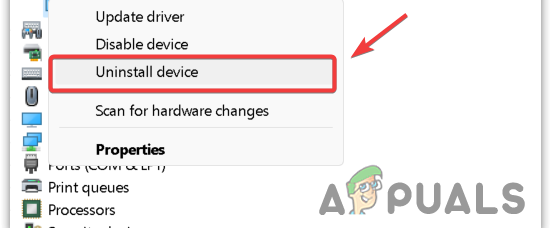
- Confirm by clicking Uninstall again.
- Visit the printer manufacturer’s official website to download the most recent driver.

- After downloading, install the driver, and attempt to add your printer.
If error 740 persists after following all the recommended steps, consider checking the printer’s connectivity to your PC. In case you encounter the same issue with multiple printers, the fault might lie in your printer. Before bringing your printer in for service, you could reset Windows, ensuring you retain your personal files to rule out any software-related issues.


