Fix: ERR_CONNECTION_TIMED_OUT on Google Chrome
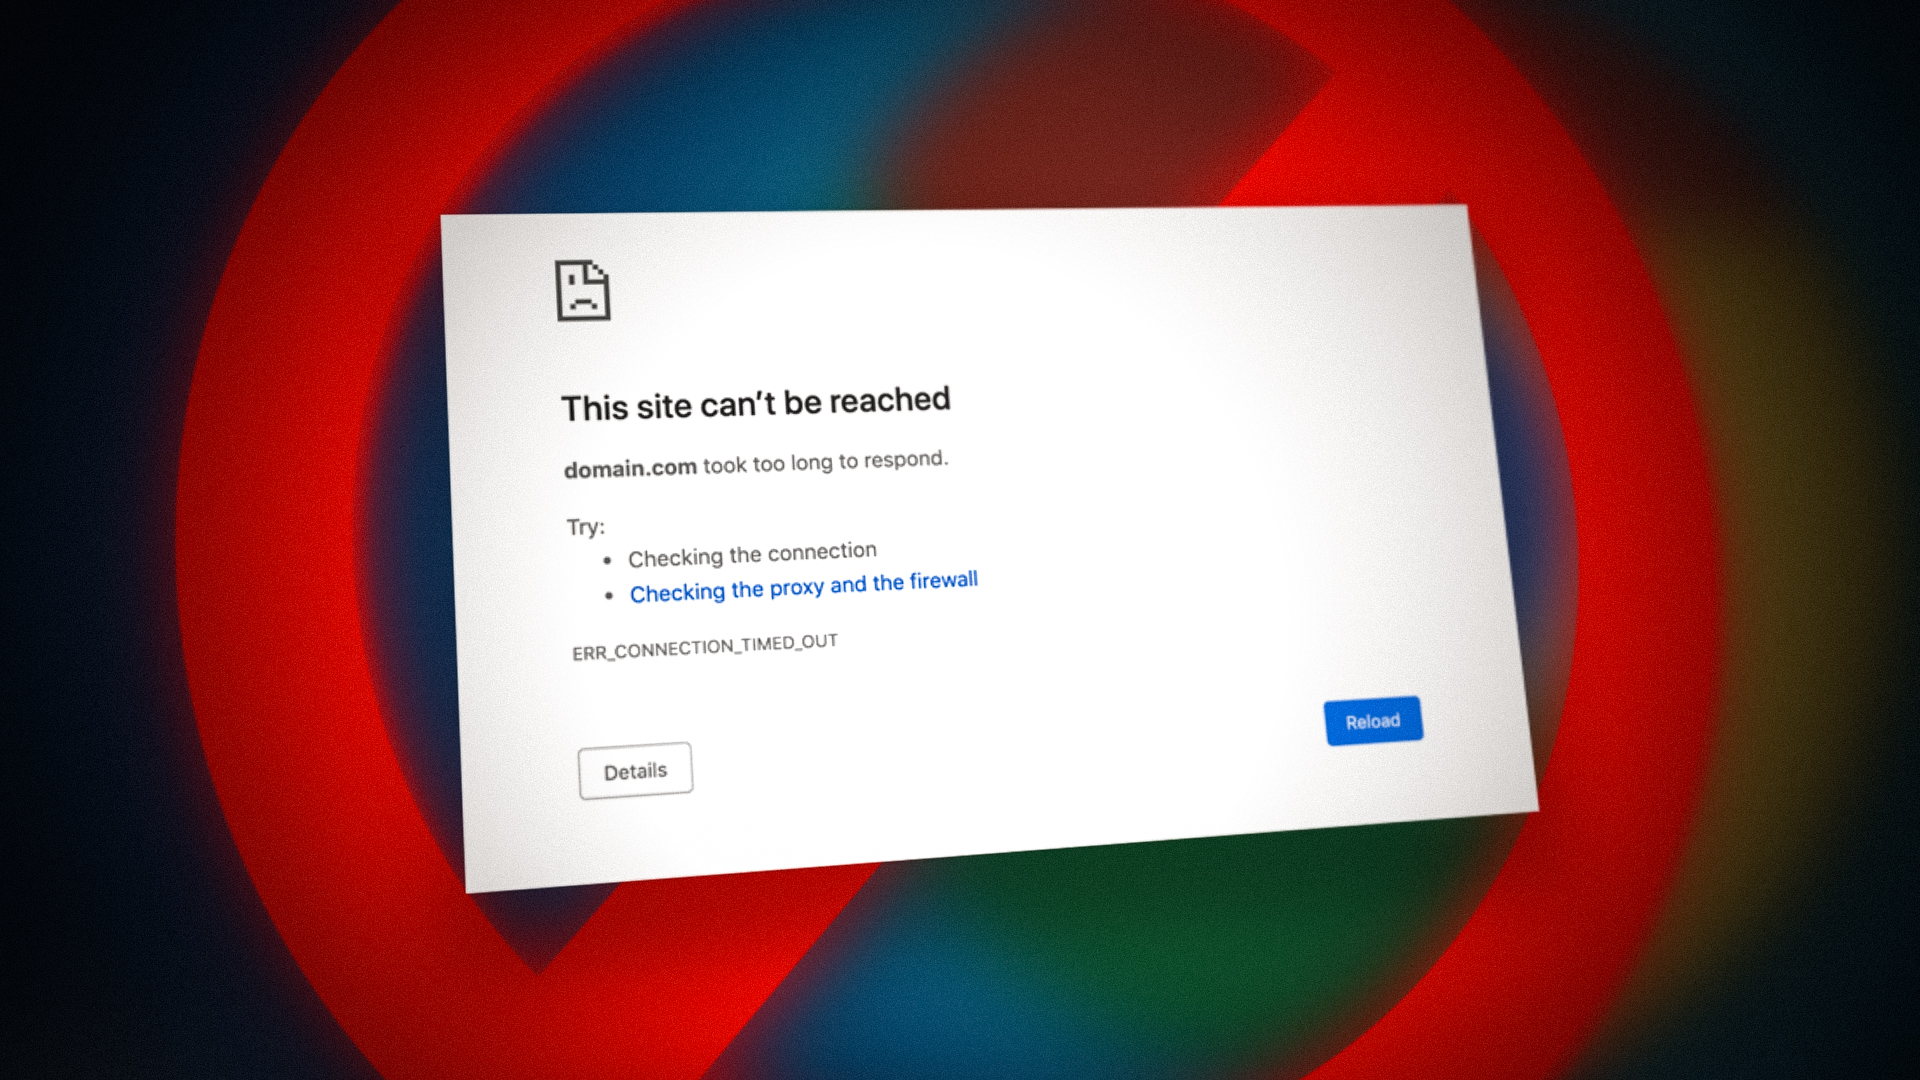
Some users while using the Google Chrome browser have been experiencing an issue where a website fails to open up. Upon trying to access a website, the ERR_CONNECTION_TIMED_OUT error code is shown along with the message “This site can’t be reached“. This issue can, at times, be specific to only certain websites while in other cases, it may be widespread. The problem in question can sometimes occur due to your local network settings which can include the DNS server or LAN configuration. In this article, we are going to show you how to resolve the problem in question so just follow through.
As it turns out, the reason that you are stumbling upon the error code mentioned above is due to your request not reaching the target server and timing out. In some cases, this behaviour can be triggered by the third-party add-ons that are installed on your browser as well. Before we begin with the different methods available, let us go through the various causes of the issue in more detail first so that you can establish a better understanding of the problem.
Now that we have gone through the possible list of causes, let us get started with the different methods that you can use to resolve the issue. So, without further ado, let us jump right into it.
Try Incognito Window
The first thing that you should do when you encounter the problem in question is to try accessing the website in the Incognito window. As it turns out, unless allowed manually, the third-party extensions are not allowed to run in the incognito mode by default. Therefore, make sure you have not enabled third-party extensions in incognito mode and then try accessing the website that is causing the issue in an incognito window to see if you are able to access it properly.
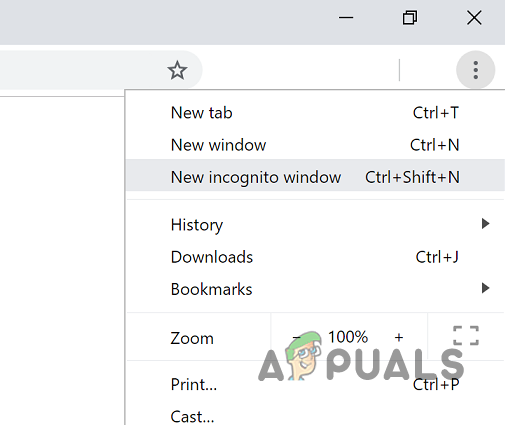
In case you are, then it will be apparent that the problem is caused by a third-party extension that you have installed. As such, disable the third-party add-ons one by one to figure out which extension is causing the problem. In case the problem persists even in incognito mode, move on to the next method.
Check LAN Settings
As it turns out, the local area network settings of your system can also result in the problem in question. This happens when your LAN settings are set to configure automatically. With that said, you can easily undo this by following a few simple instructions.
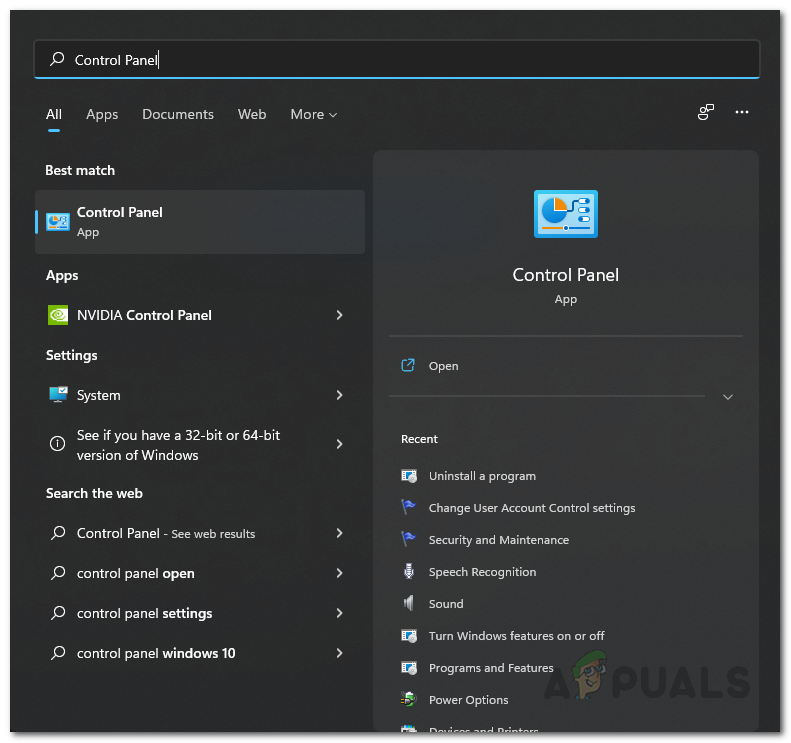
- To start off, open up the Start Menu and search for Control Panel. Open it up.
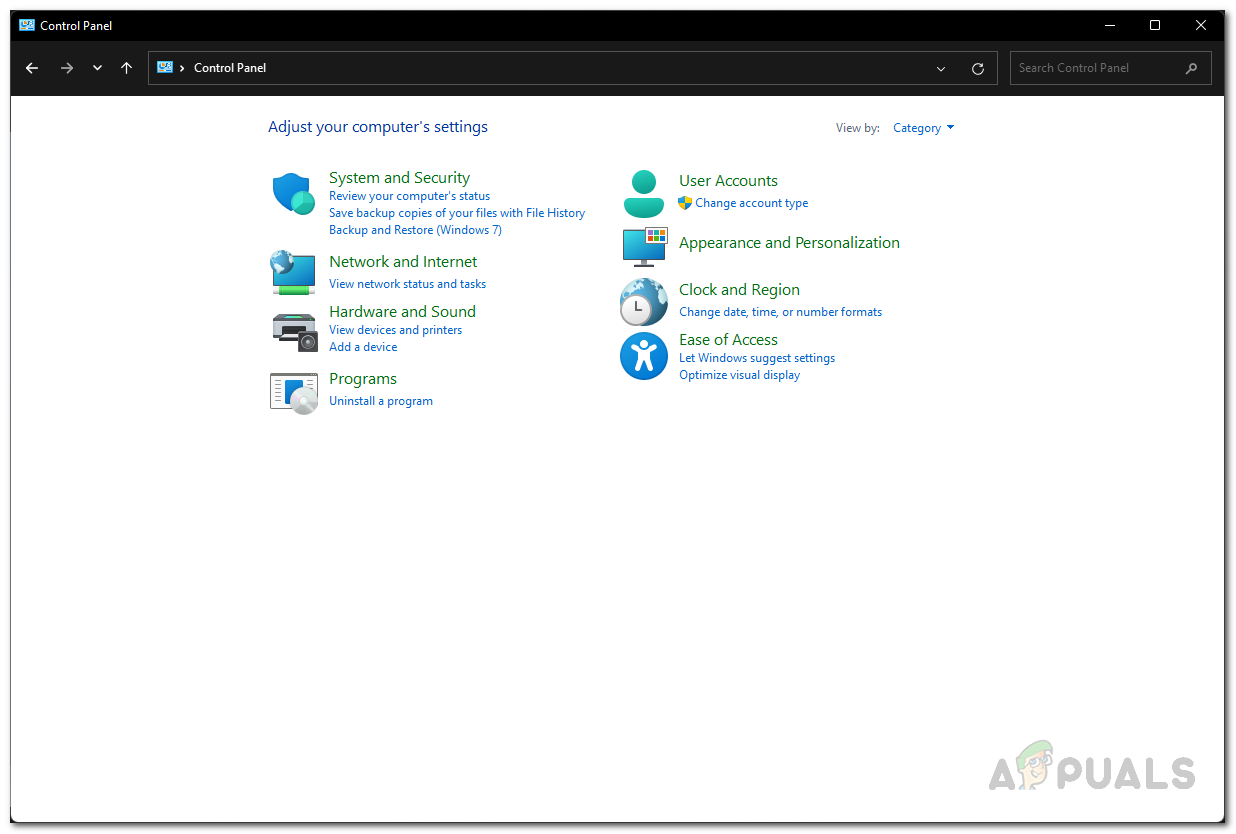
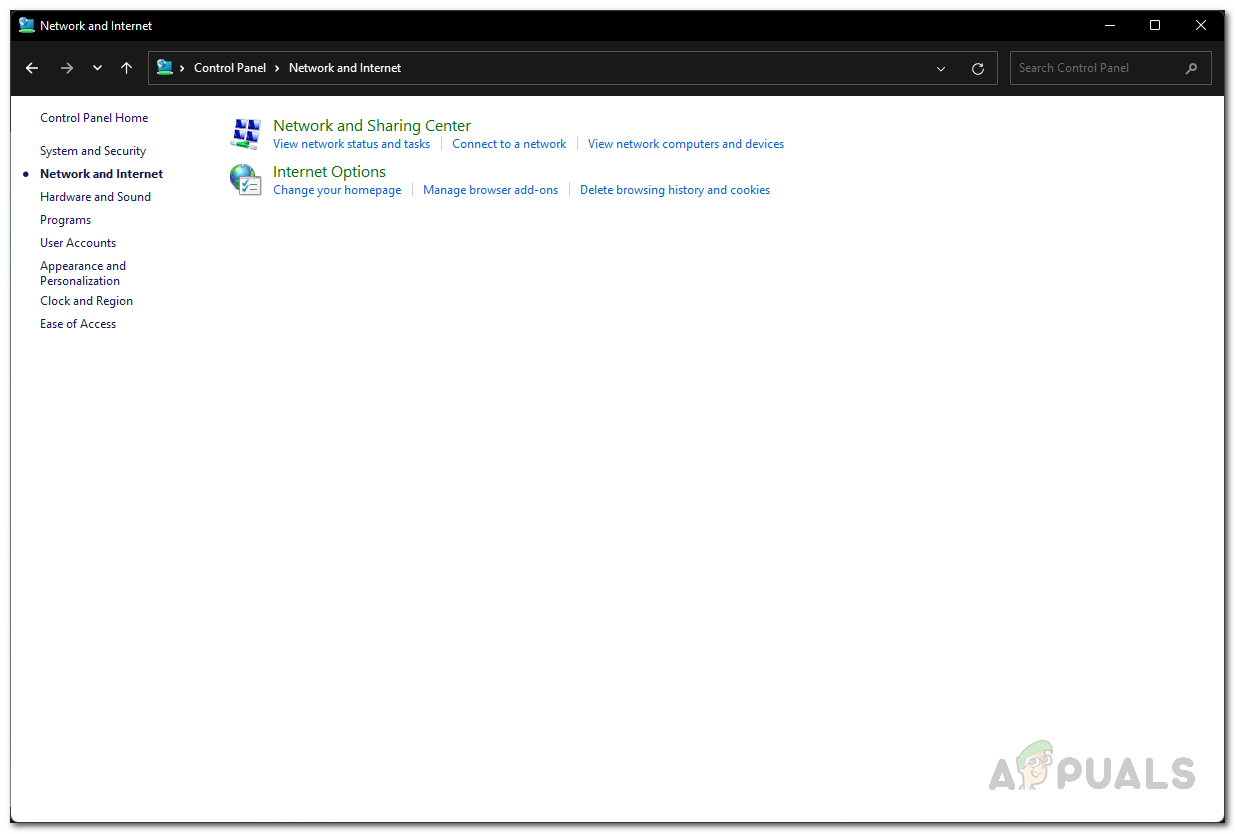
Opening up Control Panel - On the Control Panel window, make your way to Network and Internet.
Control Panel - Once you are there, click on the Internet Options option shown.
Navigating to Internet Options - This will open up the Internet Properties window. Switch to the Connections tab.
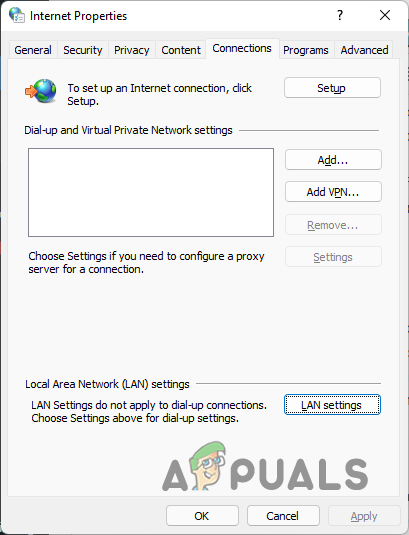
Opening up LAN Settings - On the Connections tab, click the LAN settings option.
- After that, on the Local Area Network Settings window, make sure everything is unchecked.
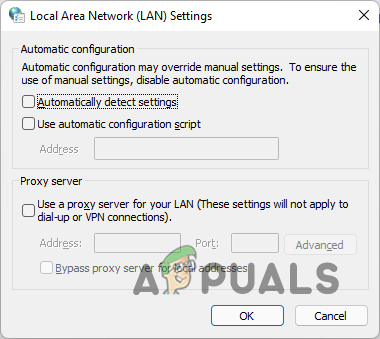
LAN Settings - With that done, click OK and then follow it up by clicking Apply and OK.
- Then, restart your computer. Once your PC boots up, see if the problem is still there.
Change DNS Server
As we have mentioned, the DNS server that you are using on your system can also cause the problem in question, at times. This happens when the DNS server is encountering some issues due to which it is not able to forward your request and thus your request never reaches its destination. In such a scenario, you can change your DNS server to a third-party one provided by Google or Cloudflare. Follow the instructions down below to do this:
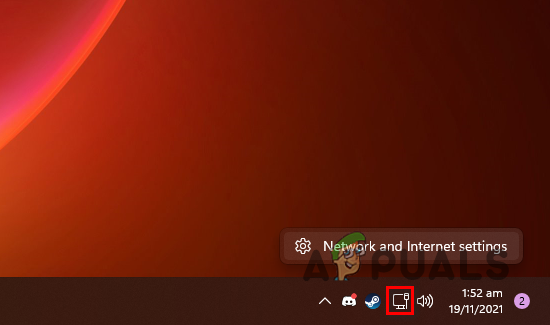
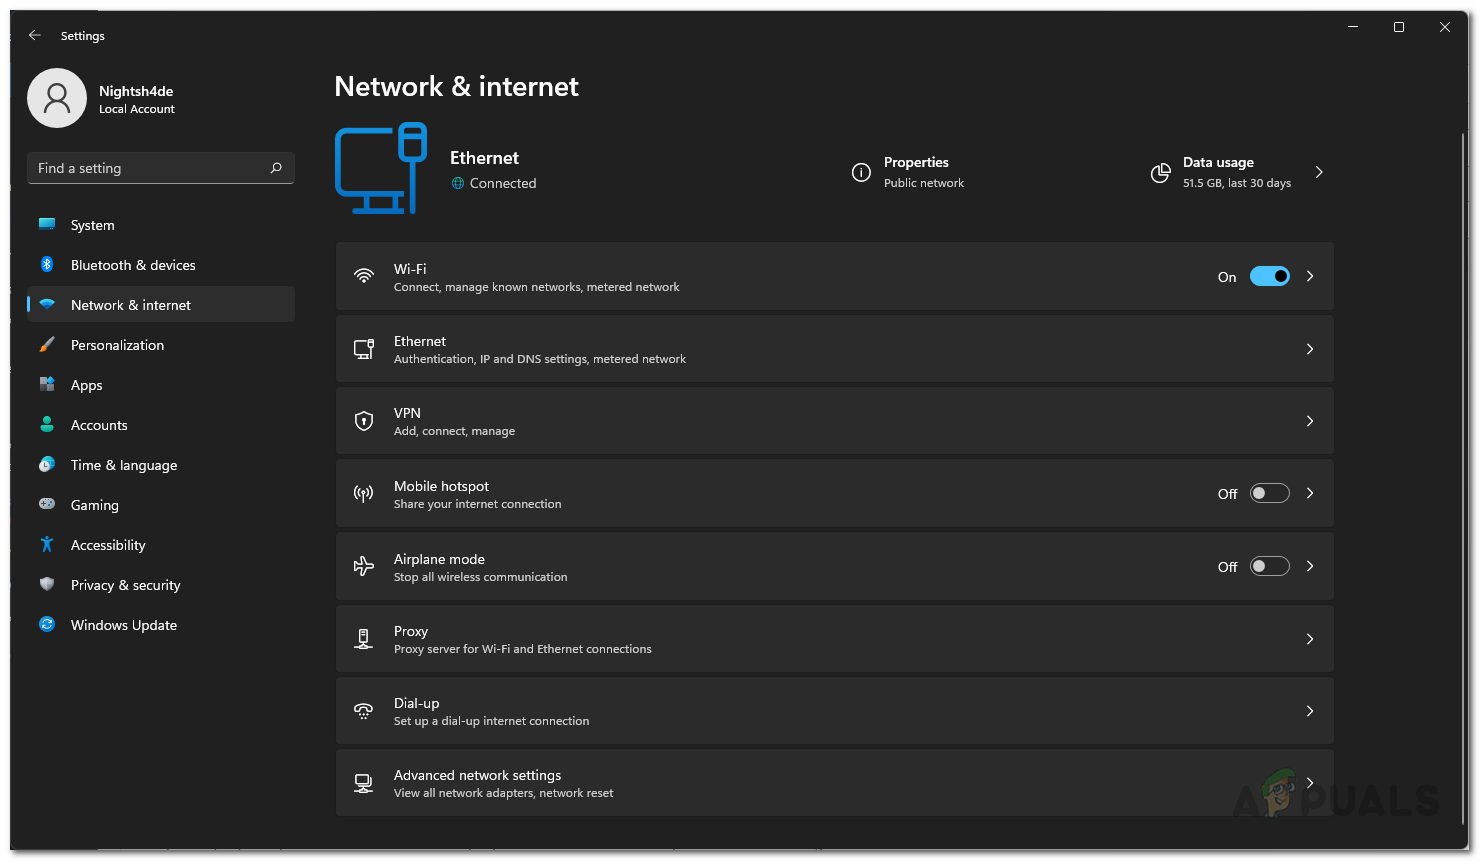
- First of all, on your taskbar, right-click on the network icon and choose the Network and Internet settings option.
Opening up Network and Internet Settings - On the Network settings window, click on the Advanced network settings option.
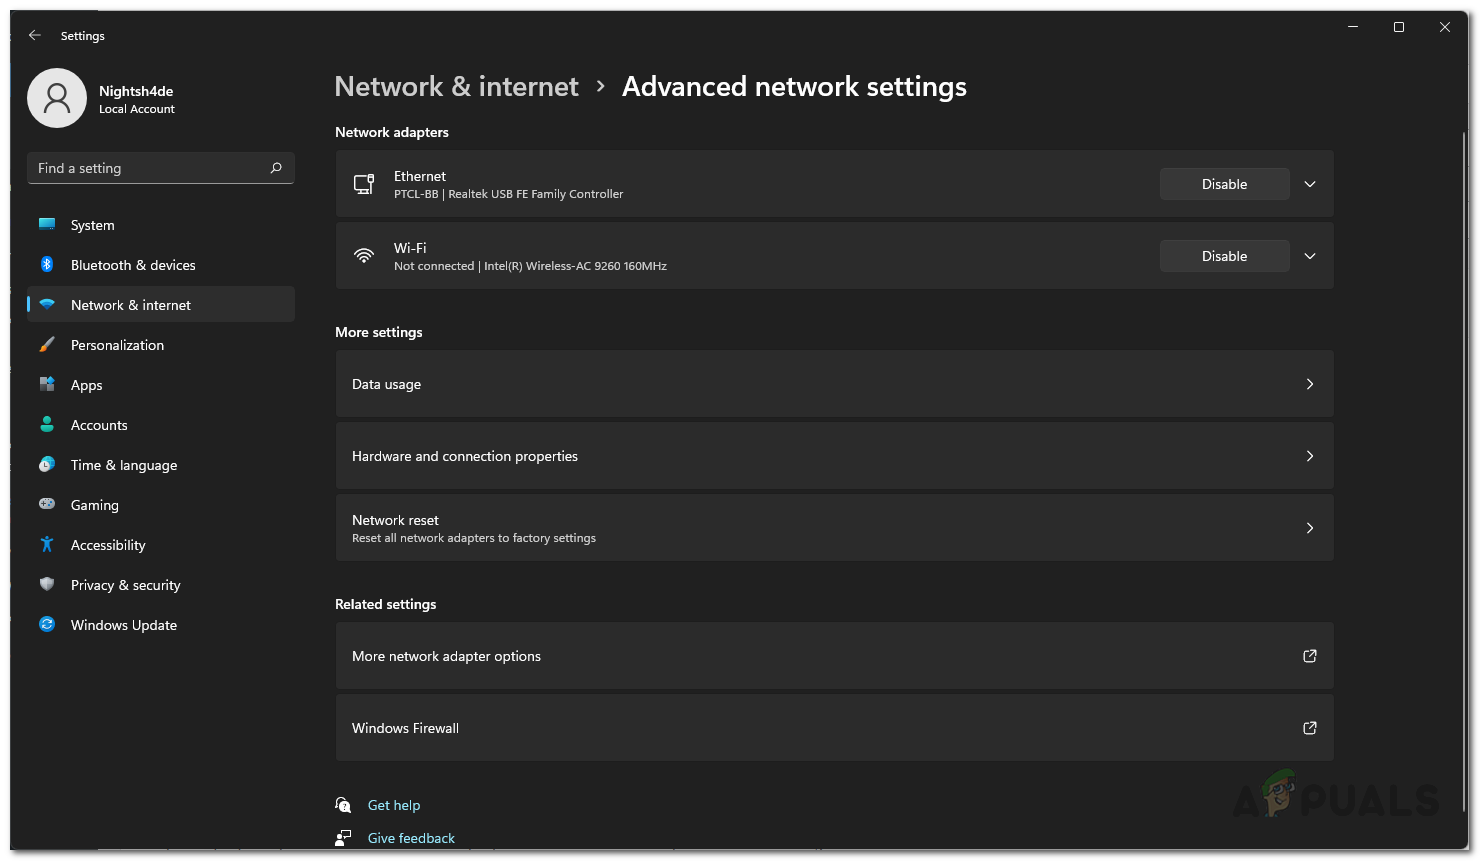
Network Settings - After that, make your way to More network adapter options.
Advanced Network Settings - On the follow-up window, go ahead and right-click on your network adapter and from the drop-down menu, choose Properties.
- Then, on the Properties window, double-click on the Internet Protocol Version 4 (TCP/IPv4) option.
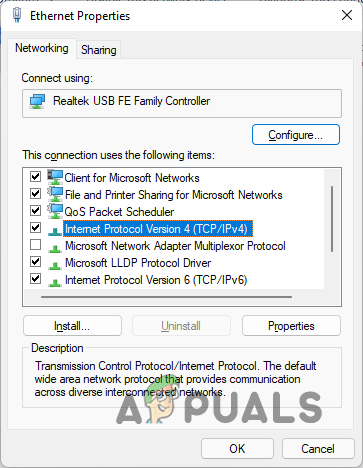
Ethernet Properties - At the bottom, choose the Use the following DNS server addresses option.
- After that, provide either Google’s or Cloudflare’s DNS server addresses.
- Google: 8.8.8.8 8.8.4.4 Cloudflare: 1.1.1.1 1.0.0.1
- Click OK. Restart your computer and then see if the error is still there.
Edit Cryptographic Service
Finally, if none of the above methods has fixed the problem for you, then you will need to edit the cryptographic service a little so that it is allowed to interact with the desktop. This service plays an important part as it provides root certificate authority management services which in return allows SSL connections and more. Follow the instructions down below to configure the service:
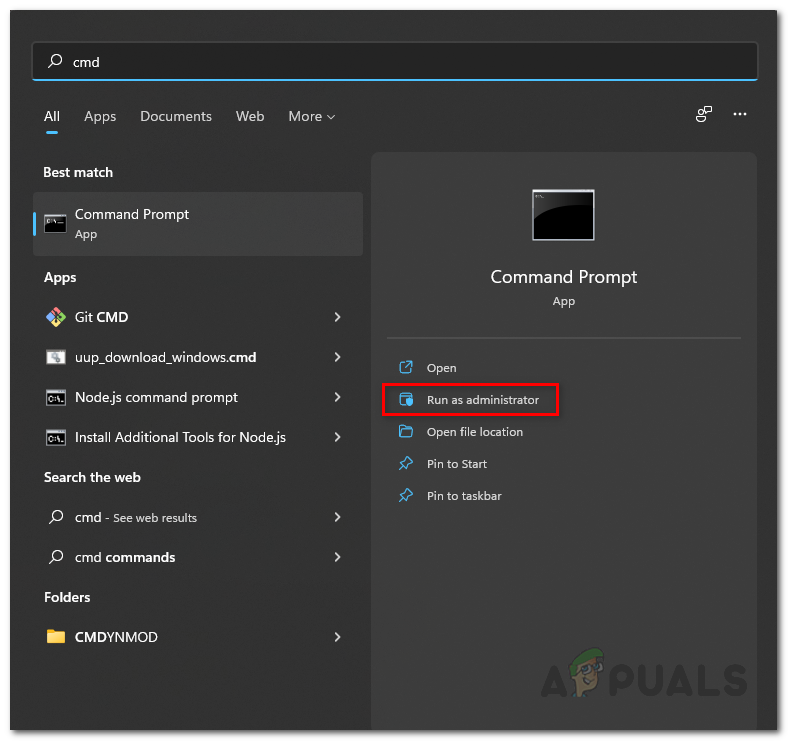
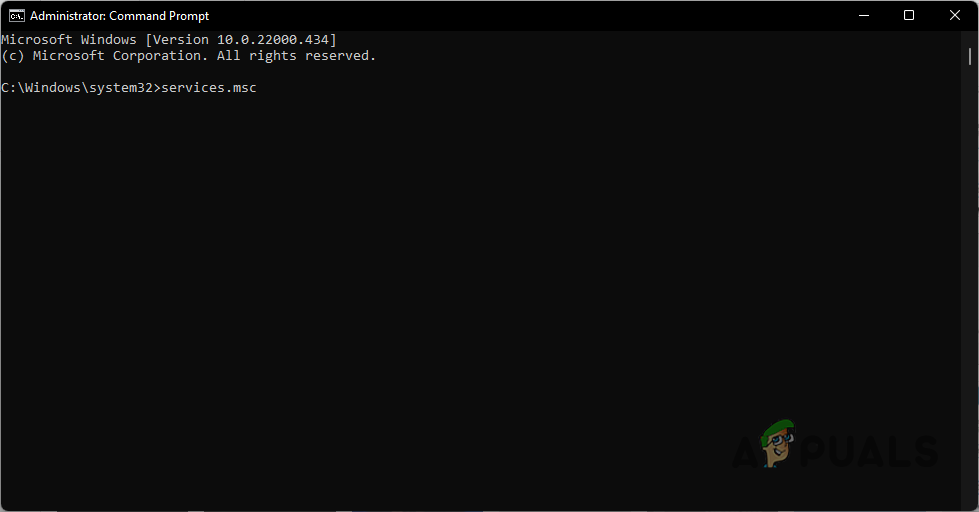
- Open up the Start Menu and then search for Command Prompt. On the right-hand side, click on the Run as administrator option provided.
Opening up CMD as Admin - In the command prompt window, type in services.msc and then hit the Enter key.
Opening Services Window as Admin - This will open up the Services window. From the list of services, look for Cryptographic Services.
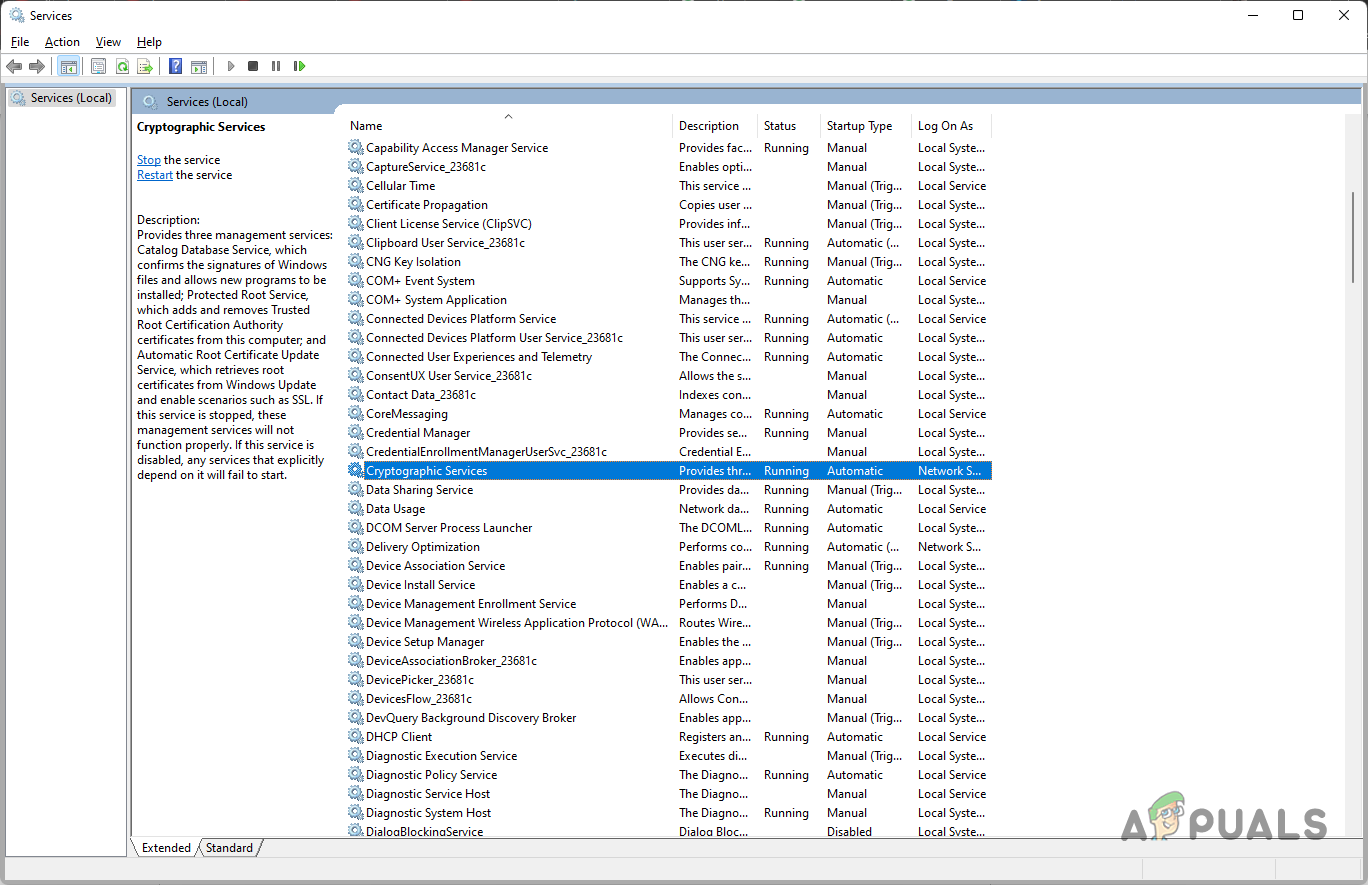
Cryptographic Services - Once you have located it, double-click on it to open up the Properties window.
- Then, switch to the Log On tab on the Properties window.
- There, choose the Local System account option and make sure the Allow service to interact with desktop checkbox is ticked.
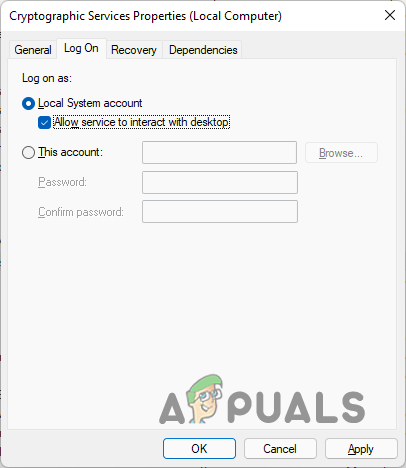
Allowing Service to Interact with Dekstop - Once you have done that, click Apply and then hit OK.
- Finally, right-click on the service and choose Restart. If it isn’t running, simply start it.
- See if the error code still persists.
still not working