How to End Navigation on Google Maps in Android & iPhone
 Reviewed by Huzaifa Haroon
In today’s world, where everything moves quickly, maps on our phones are something we all use. They help us find our way in places we don’t know and get us to where we need to go quickly. But sometimes, you might need to stop the map from navigating the path, maybe take a different path, or turn it off completely.
This guide is here to show you how to do just that. We’ll cover why you might want to stop using your map for a bit, the steps to end navigation on Google Maps, and how to handle the location settings on your devices, all in simple words to make it easy for everyone to understand.
Google Maps is an important tool for drivers, cyclists, and pedestrians. It offers precise directions and real-time traffic updates to ensure a smooth journey. However, there are instances when you need to end your current route—perhaps you’ve reached your destination sooner than expected, found a preferable alternative route, or decided to take a break.
Ending navigation on Google Maps is a simple process that can enhance your driving experience by giving you control over your route and timing. Here’s how to do it across different devices and situations.
1. End navigation using the X button or Exit option
To stop Google Maps navigation mid-journey, tap the “X” or “Exit” button on the navigation screen. This action stops the navigation and brings you back to the main screen of Google Maps.
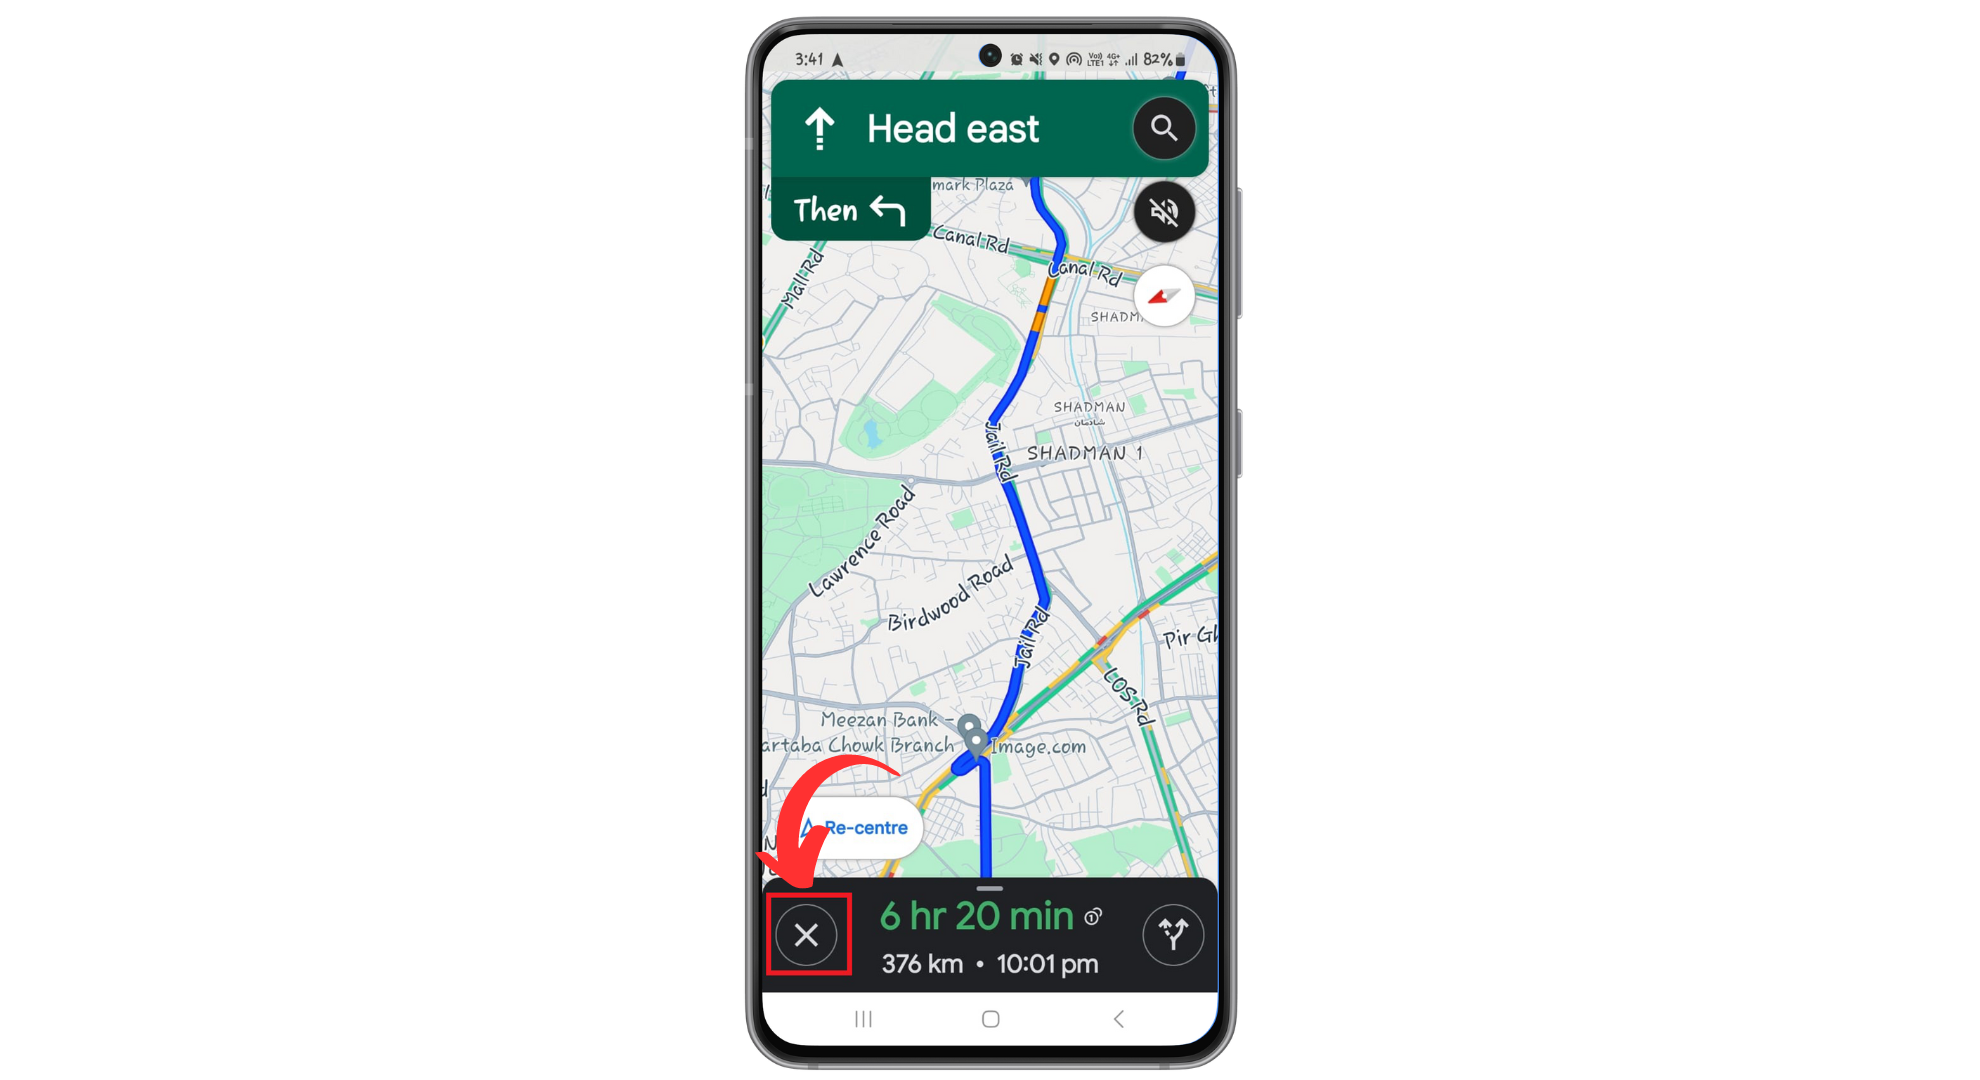
↪ For Android users
During your journey, if you wish to end the navigation, simply tap the “X” button on the navigation screen. This action is quick and immediately stops the navigation, allowing you to continue using your phone or explore other options within Google Maps.
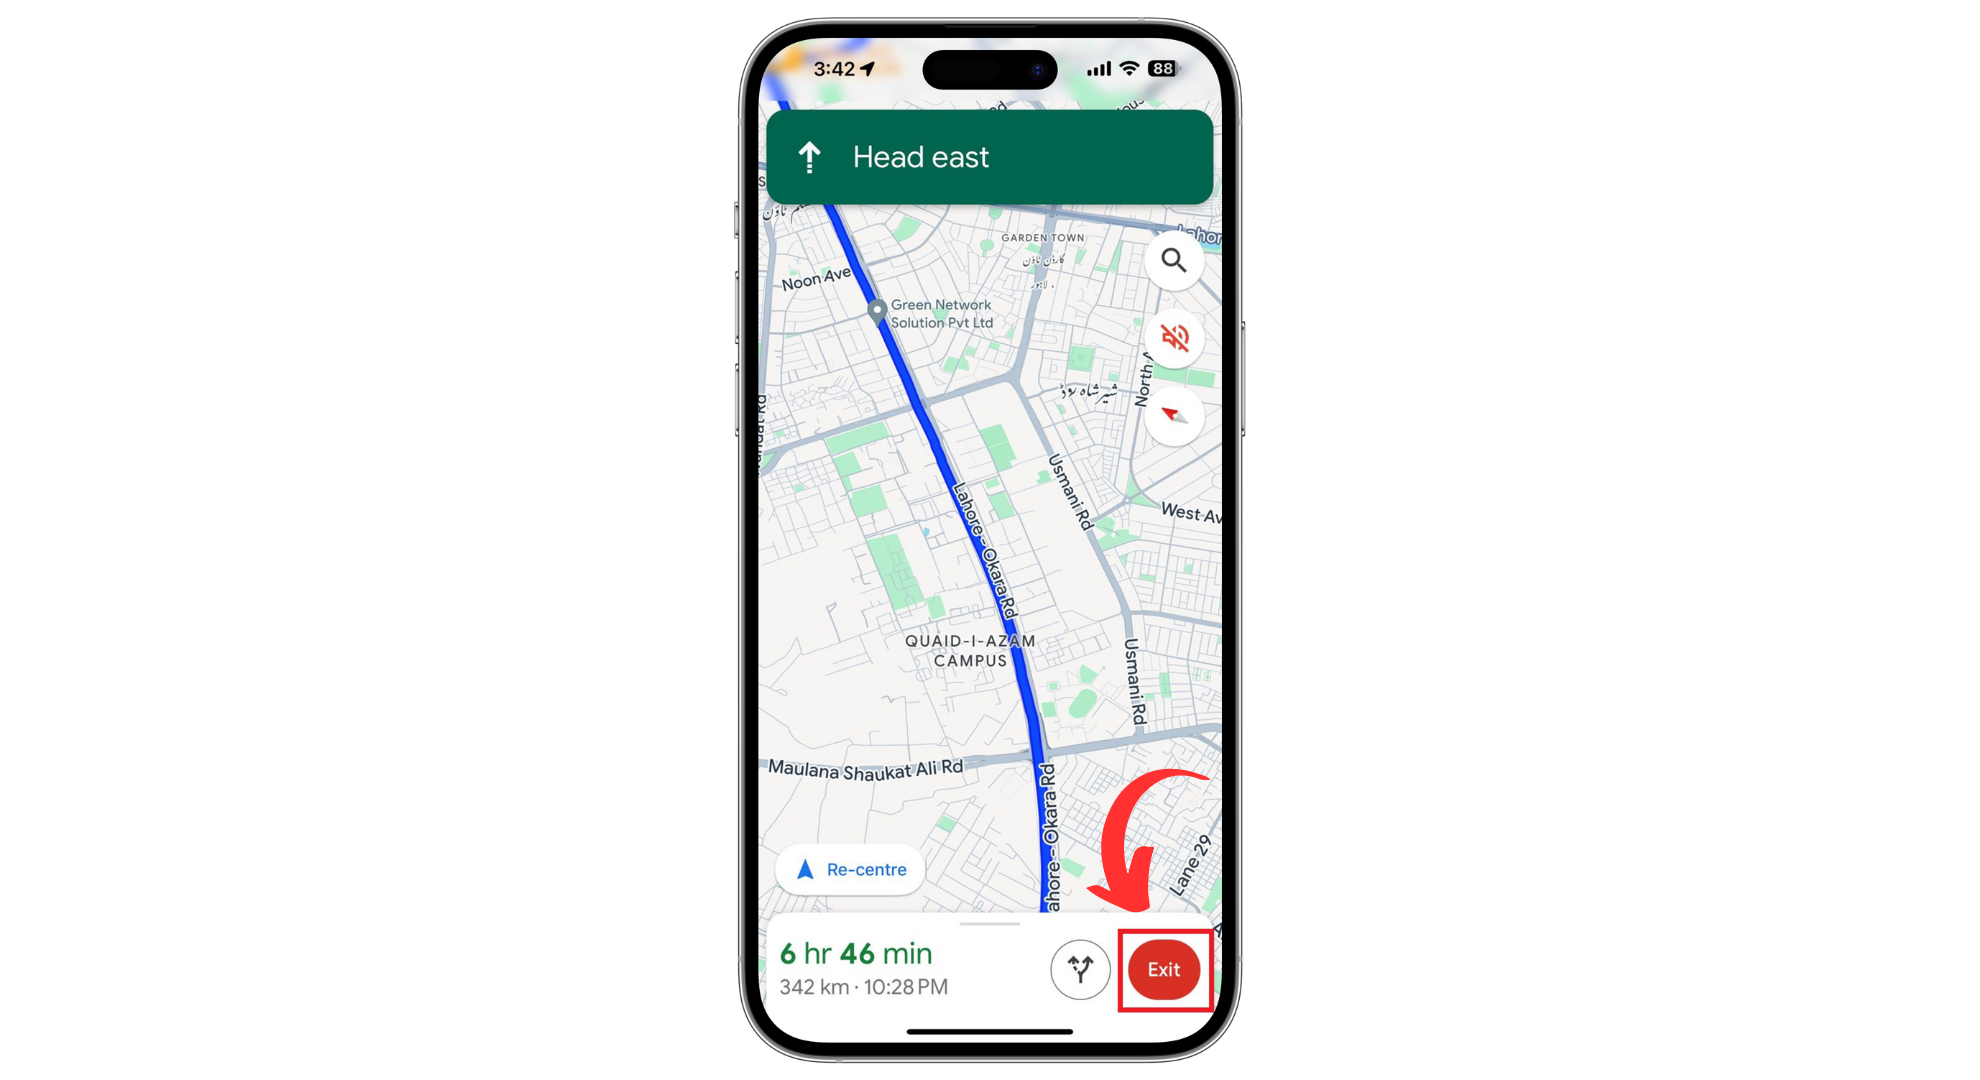
↪ For iPhone users
If you’re an iPhone user and need to end the navigation, look for the red “Exit” option on the navigation screen. Tapping this will end the navigation, letting you either take a break or decide on your next stop.
2. End Navigation with Voice Assistant
Ending navigation with voice commands on your smartphone offers a seamless way to manage your journey hands-free, whether using Google Assistant on Android devices or Siri on iOS. This feature enhances safety and convenience by allowing drivers and pedestrians to focus on their surroundings while controlling their navigation effortlessly.
↪ For Android devices
- Activate Google Assistant by simply saying “OK Google” or “Hey Google.” Ensure your device’s microphone is on and you’re in a relatively quiet environment so the Assistant can hear you clearly.
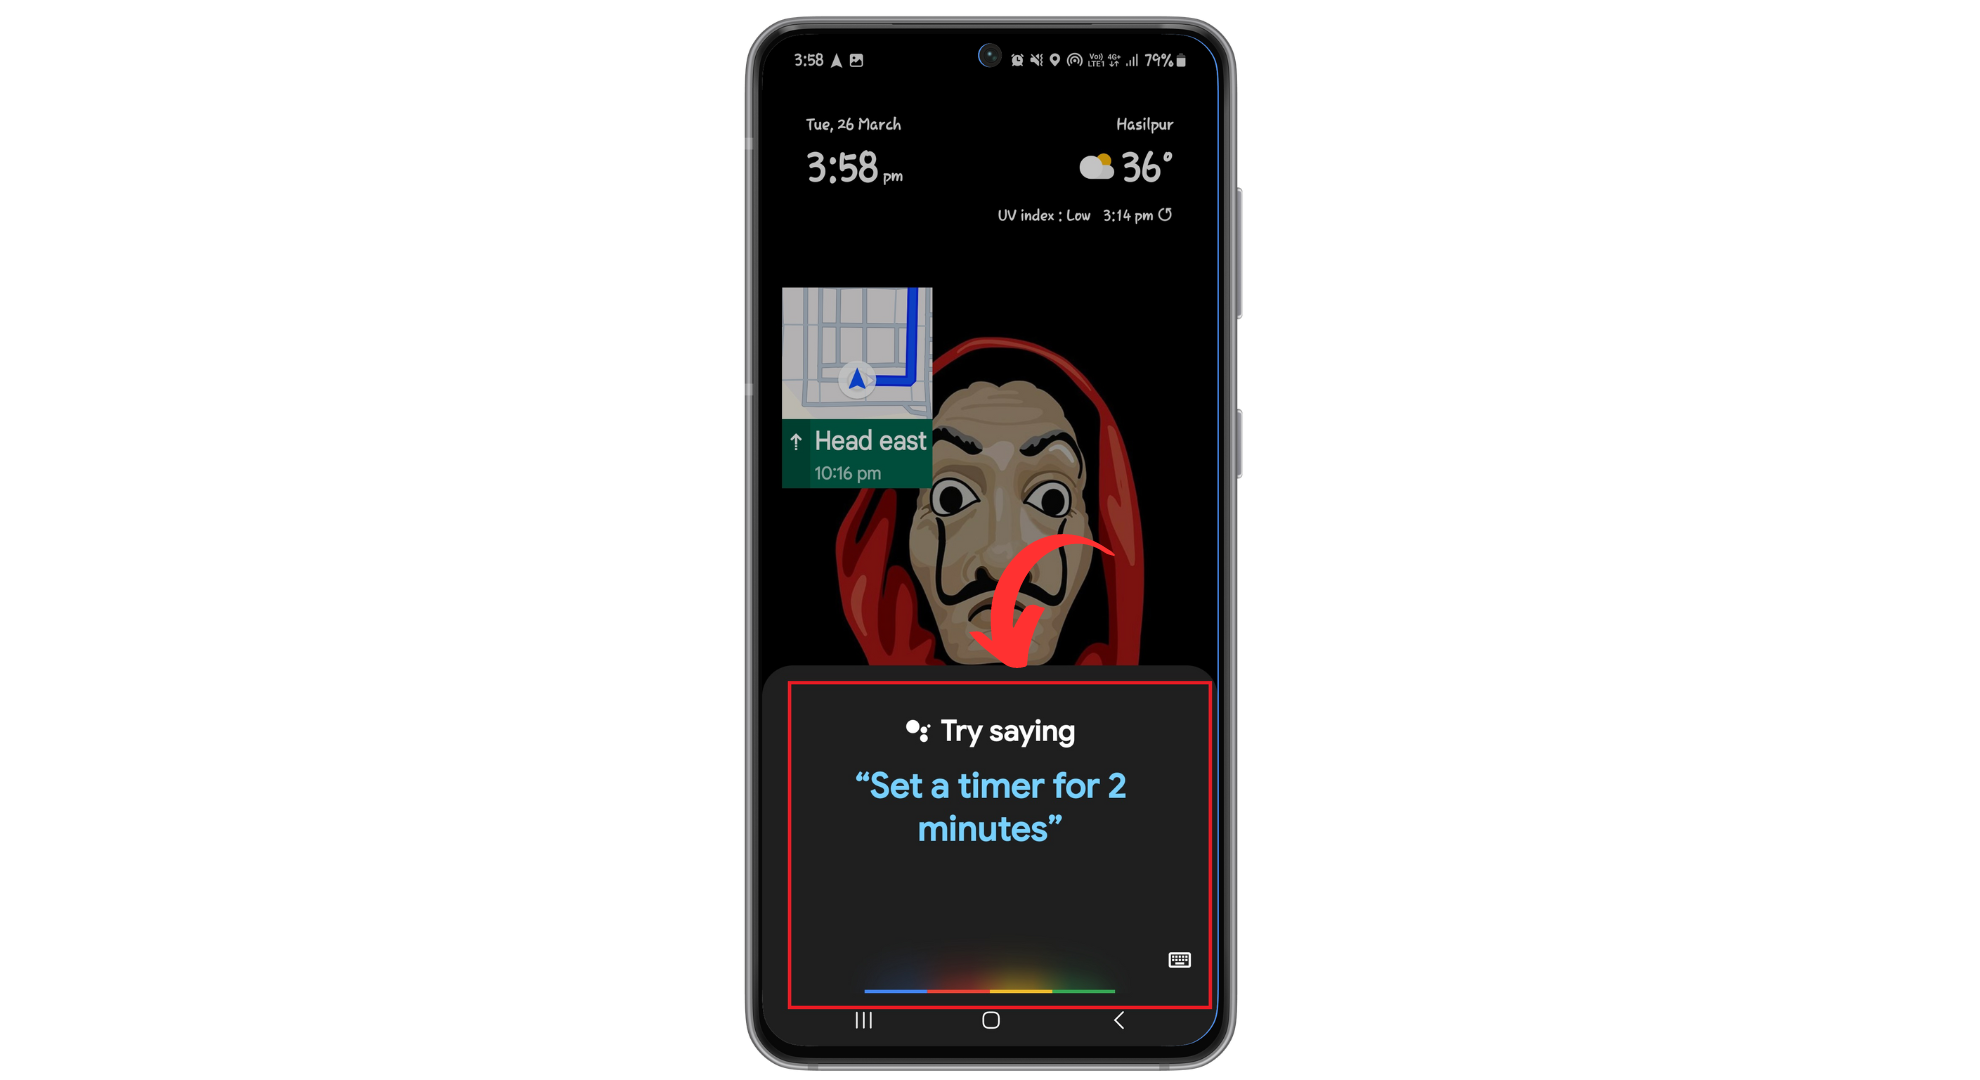
Say “OK Google” - After activating Google Assistant, clearly say one of the following commands based on your need:
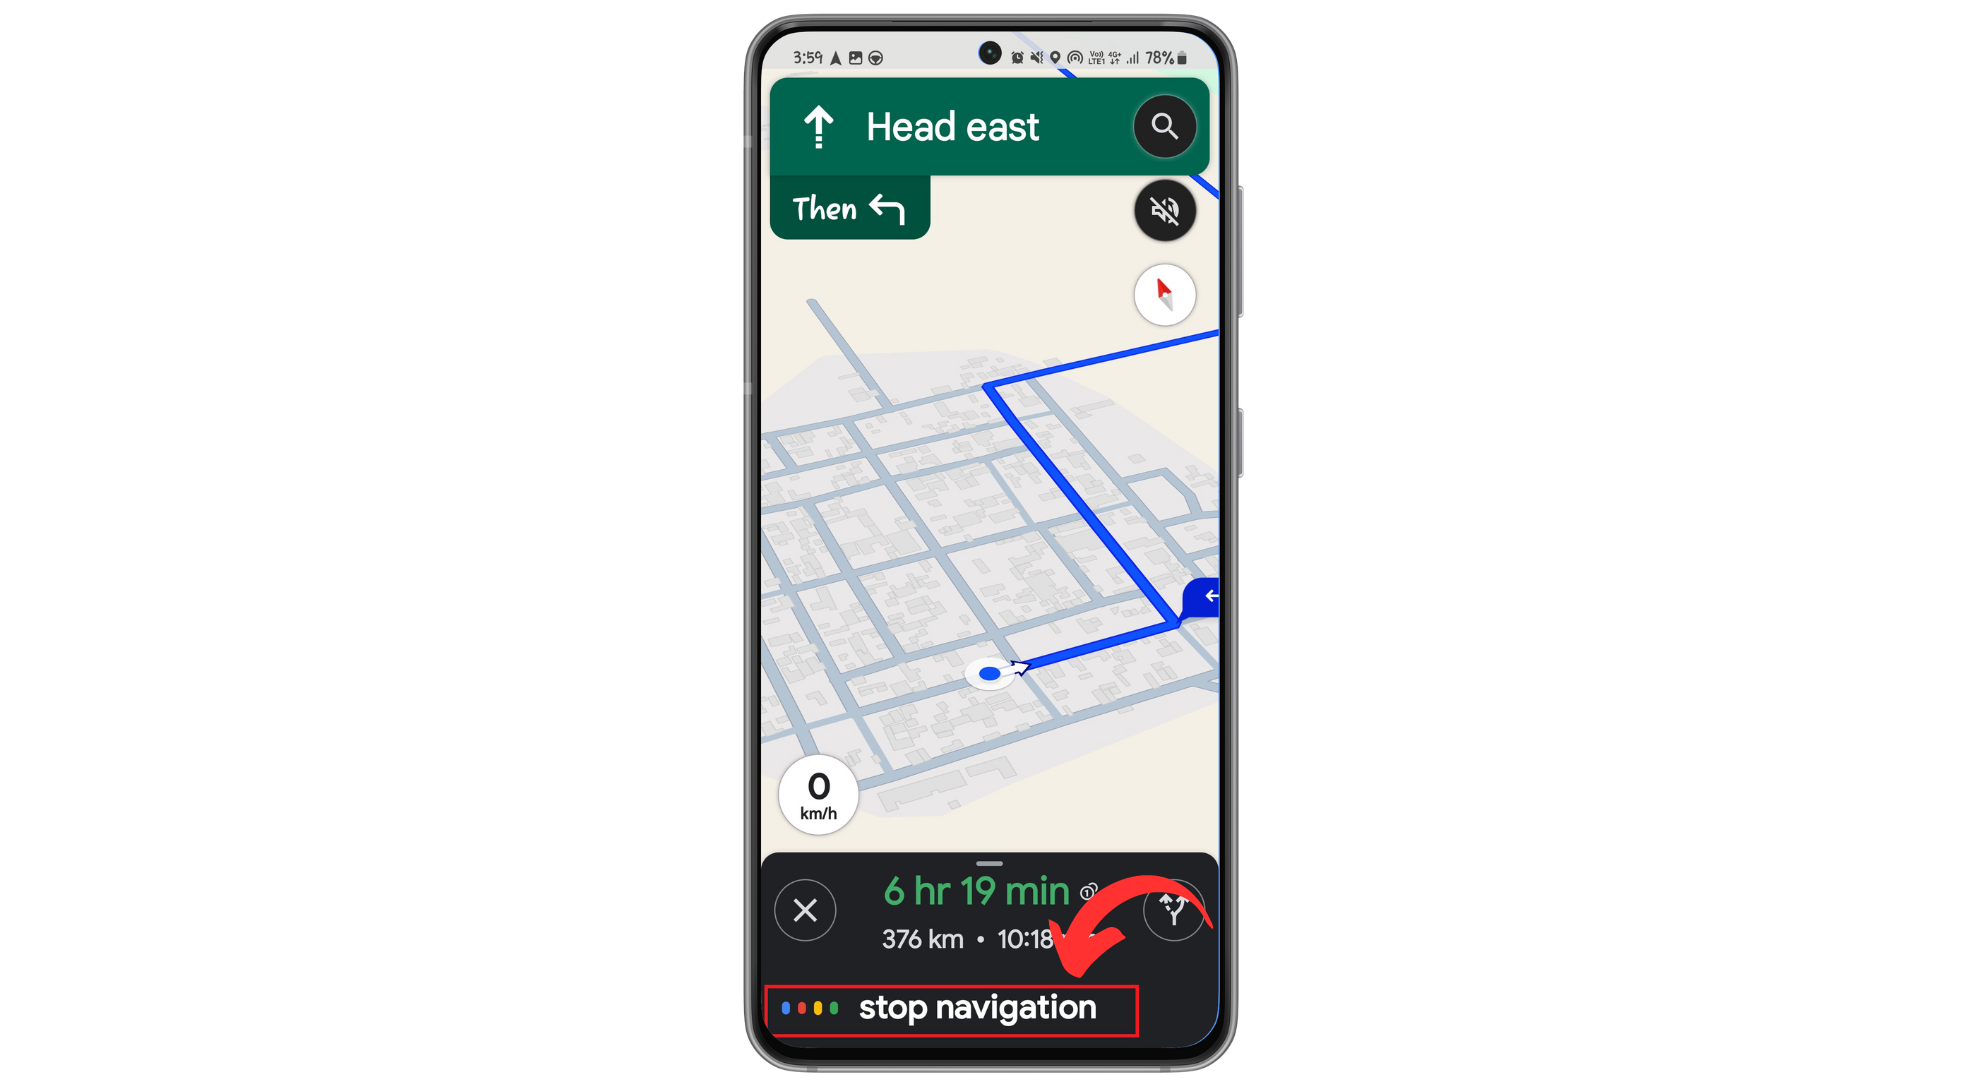
- Cancel navigation: Use this when you want to stop the Google Maps navigation completely.
- Stop navigation: This command also stops your current route guidance and exits navigation mode.
- Exit navigation: This tells Google Maps to end the navigation, returning you to the app’s main screen.
↪ For iOS devices
By using voice commands, iOS users can use Siri to stop Google Maps navigation without physically interacting with their devices.
- Say “Hey Siri” or hold the Home/Side button to wake Siri.
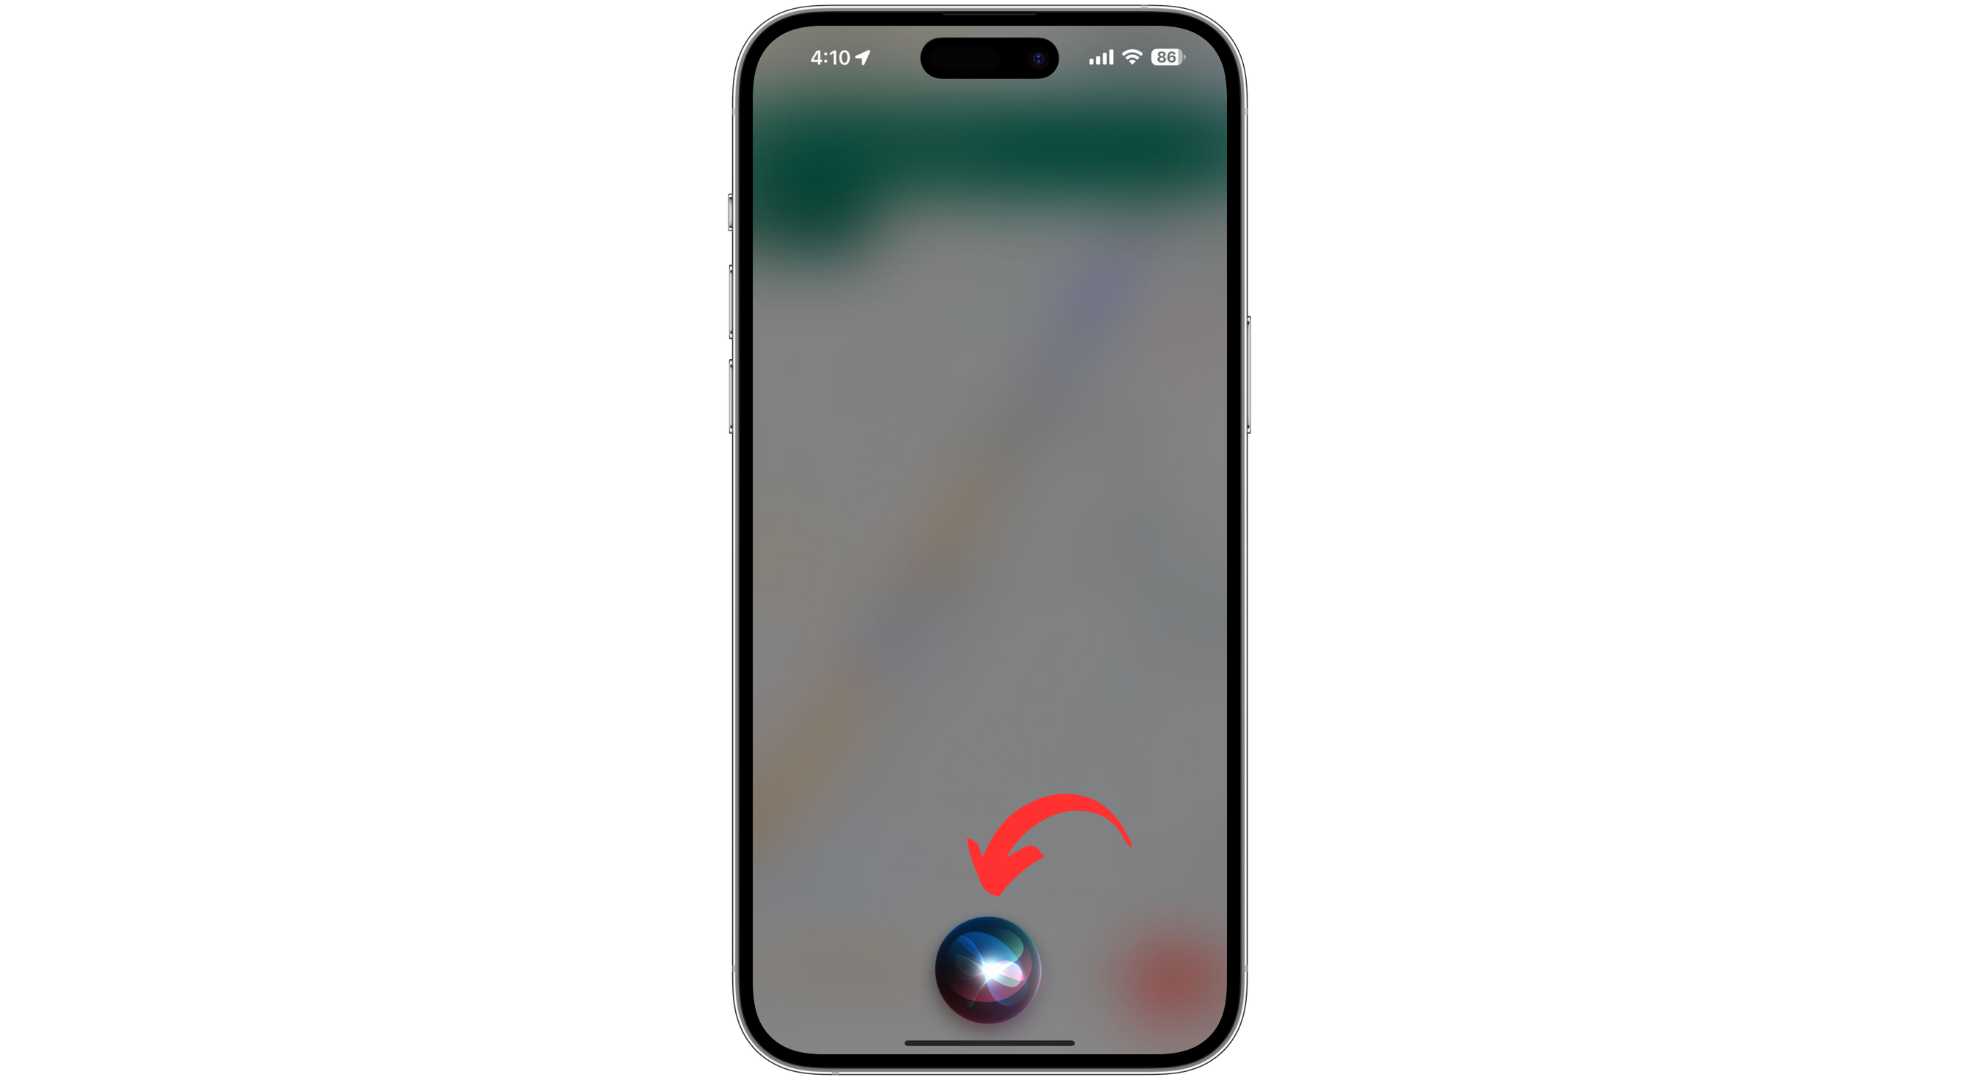
Say “Hey Siri” - Simply tell Siri to “Stop navigation in Google Maps.” Siri will handle the request by pausing or ending your current route in Google Maps, allowing for a hands-free navigation experience.
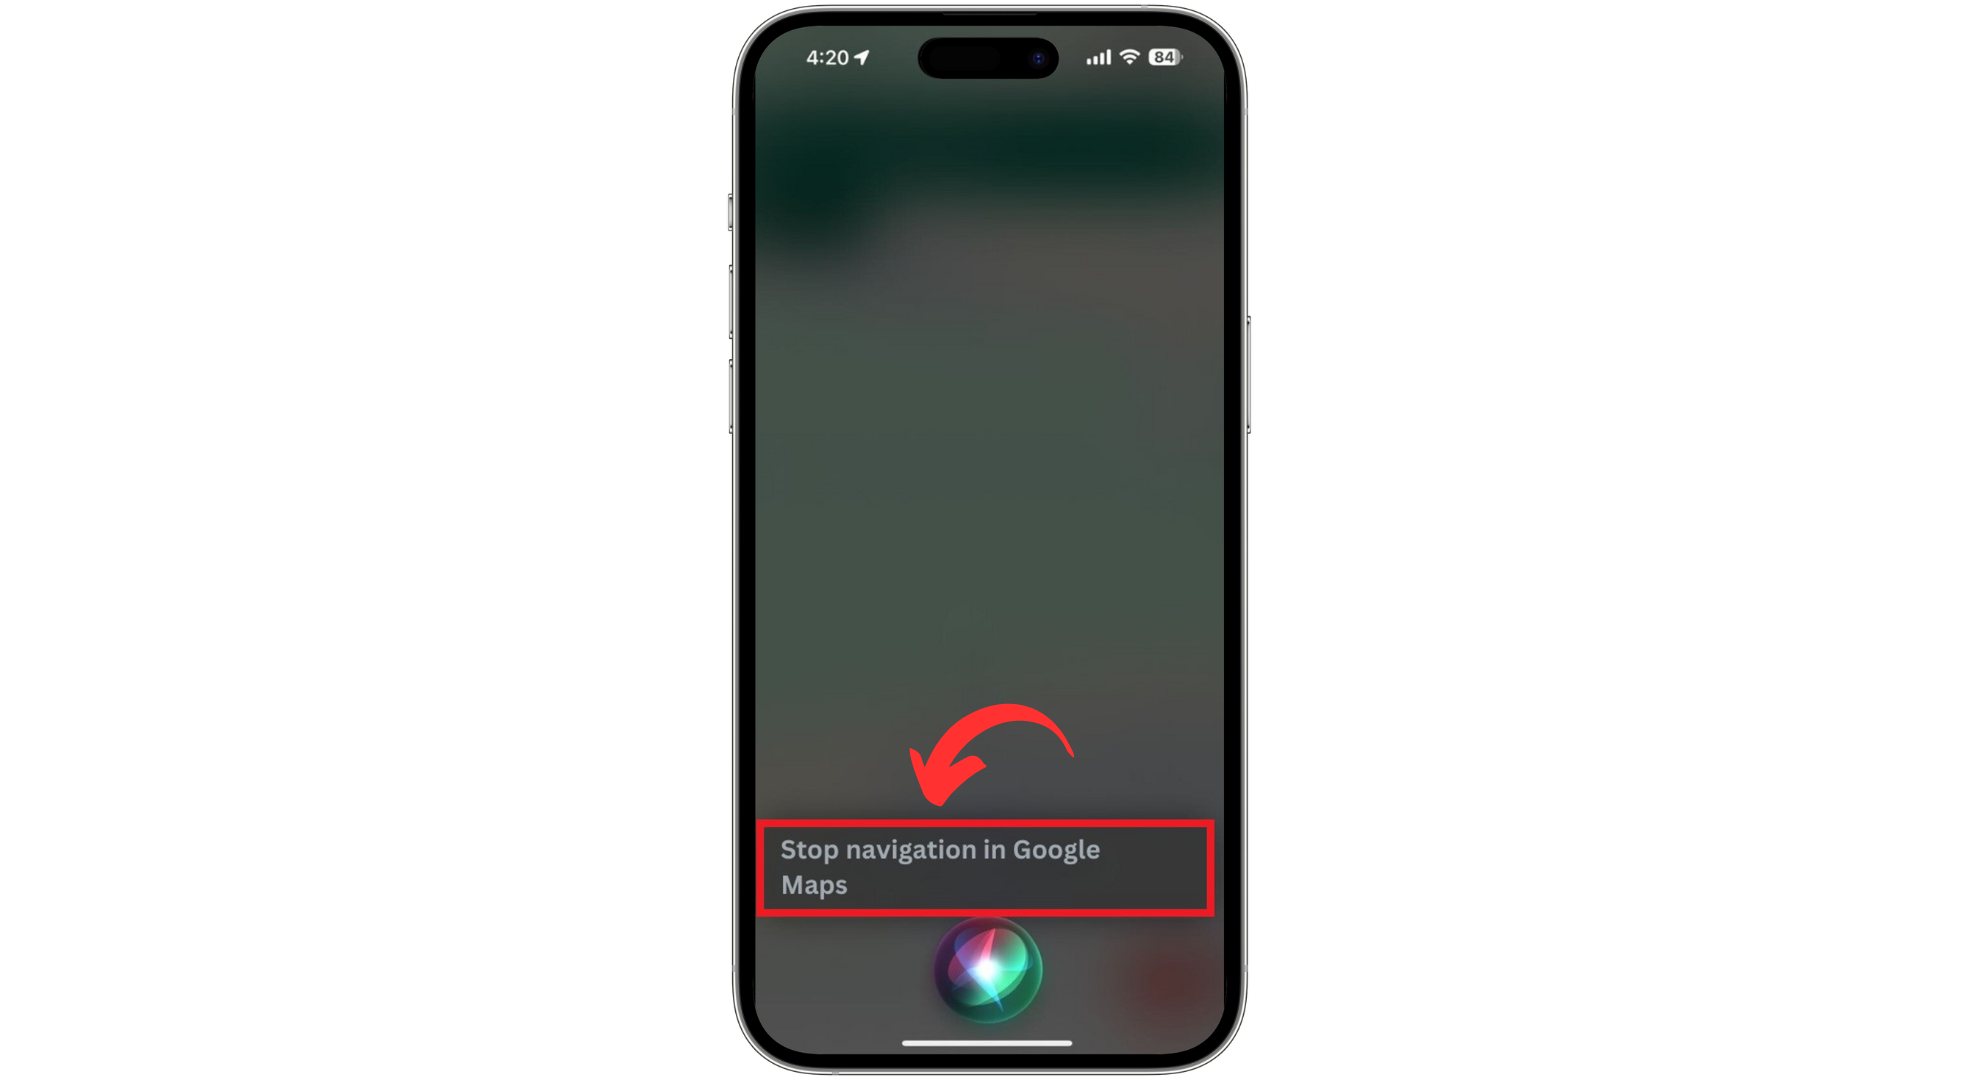
Say the “Stop Navigating” command
These voice assistants will confirm the action by either a visual cue on your screen or an auditory response, signaling that navigation has been successfully stopped. This process allows for a safer way to manage navigation while on the move.
3. End navigation through the Notification panel
For times when voice commands aren’t convenient or if you prefer a method without directly interacting with the Google Maps app, stopping your navigation through the Notification Panel on your device is a swift alternative.
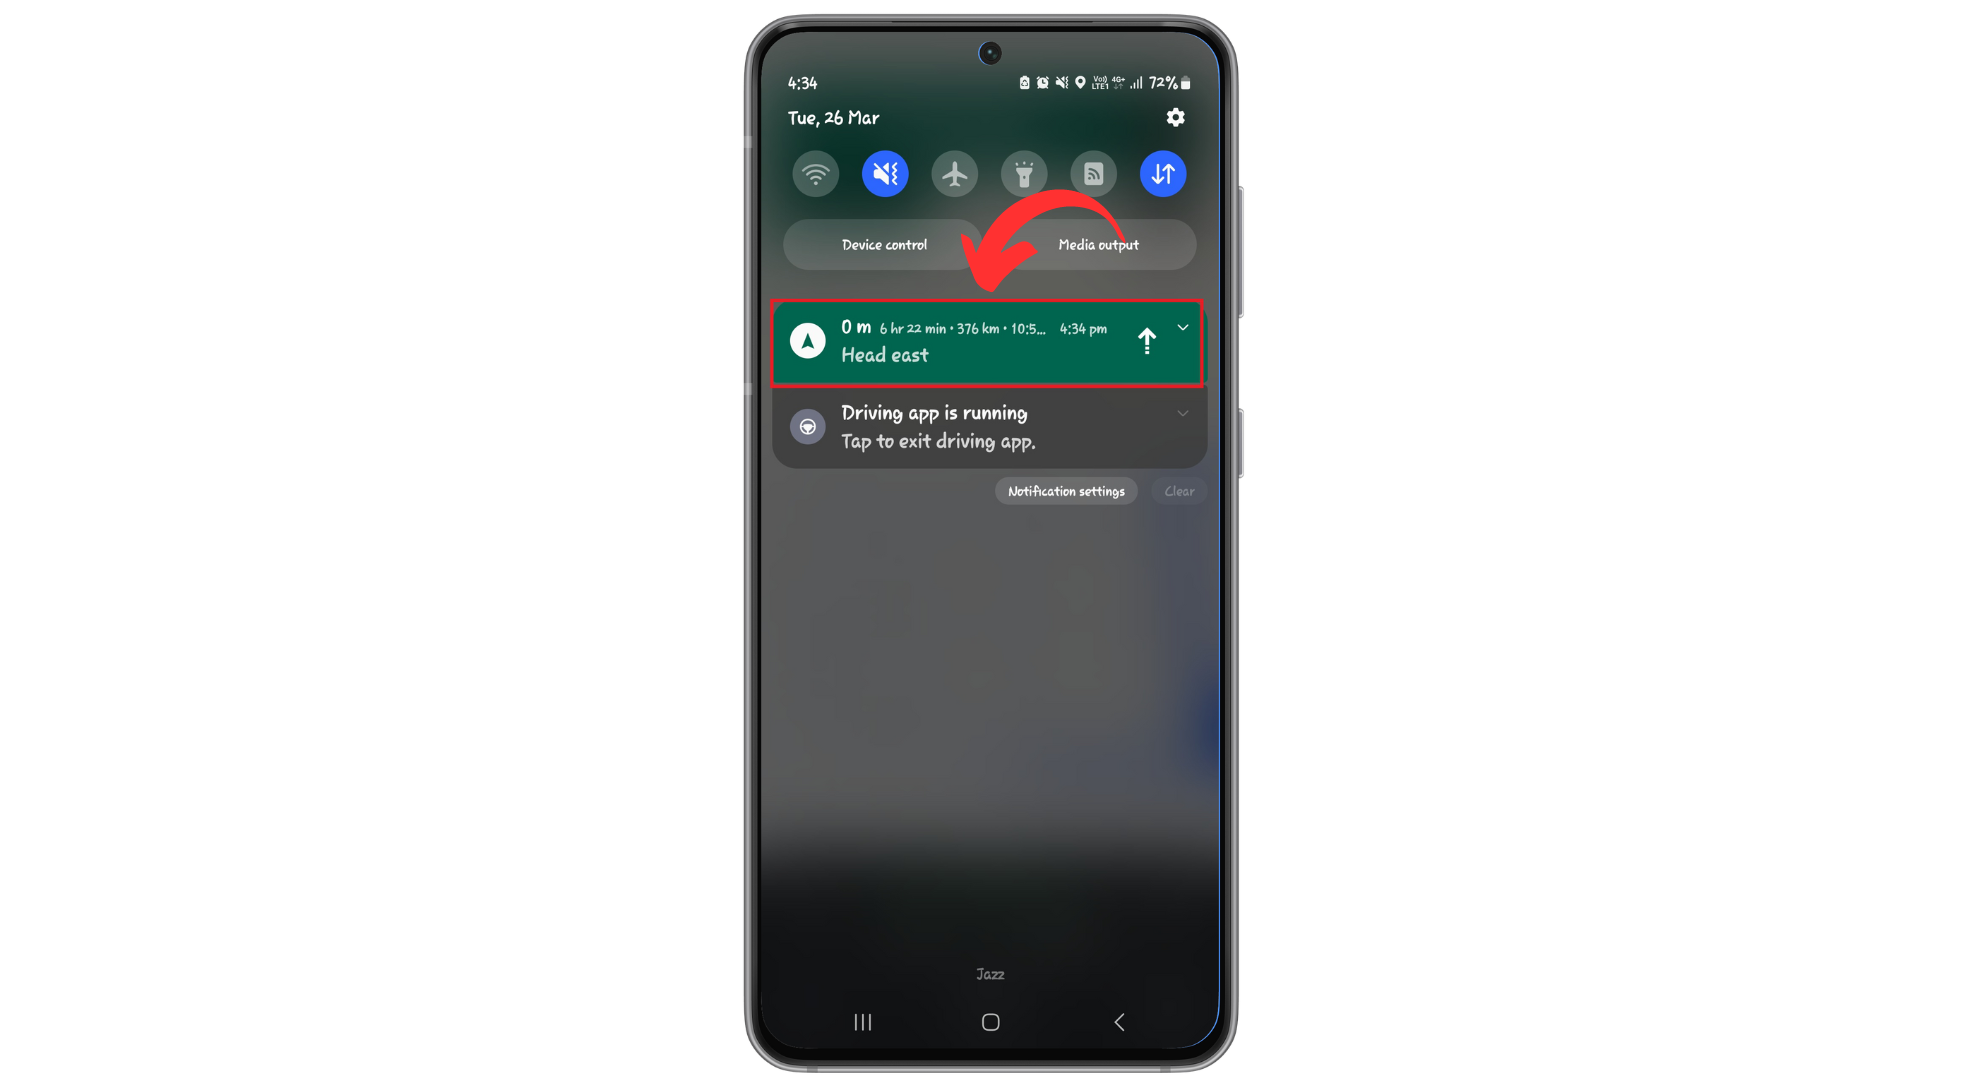
- Swipe down from the top of your screen to open the Notification Panel and look for the notification showing your current route or navigation status.
Swipe down from the notification panel - Tap “Exit navigation” or a “Stop” button within the notification to end navigation immediately.
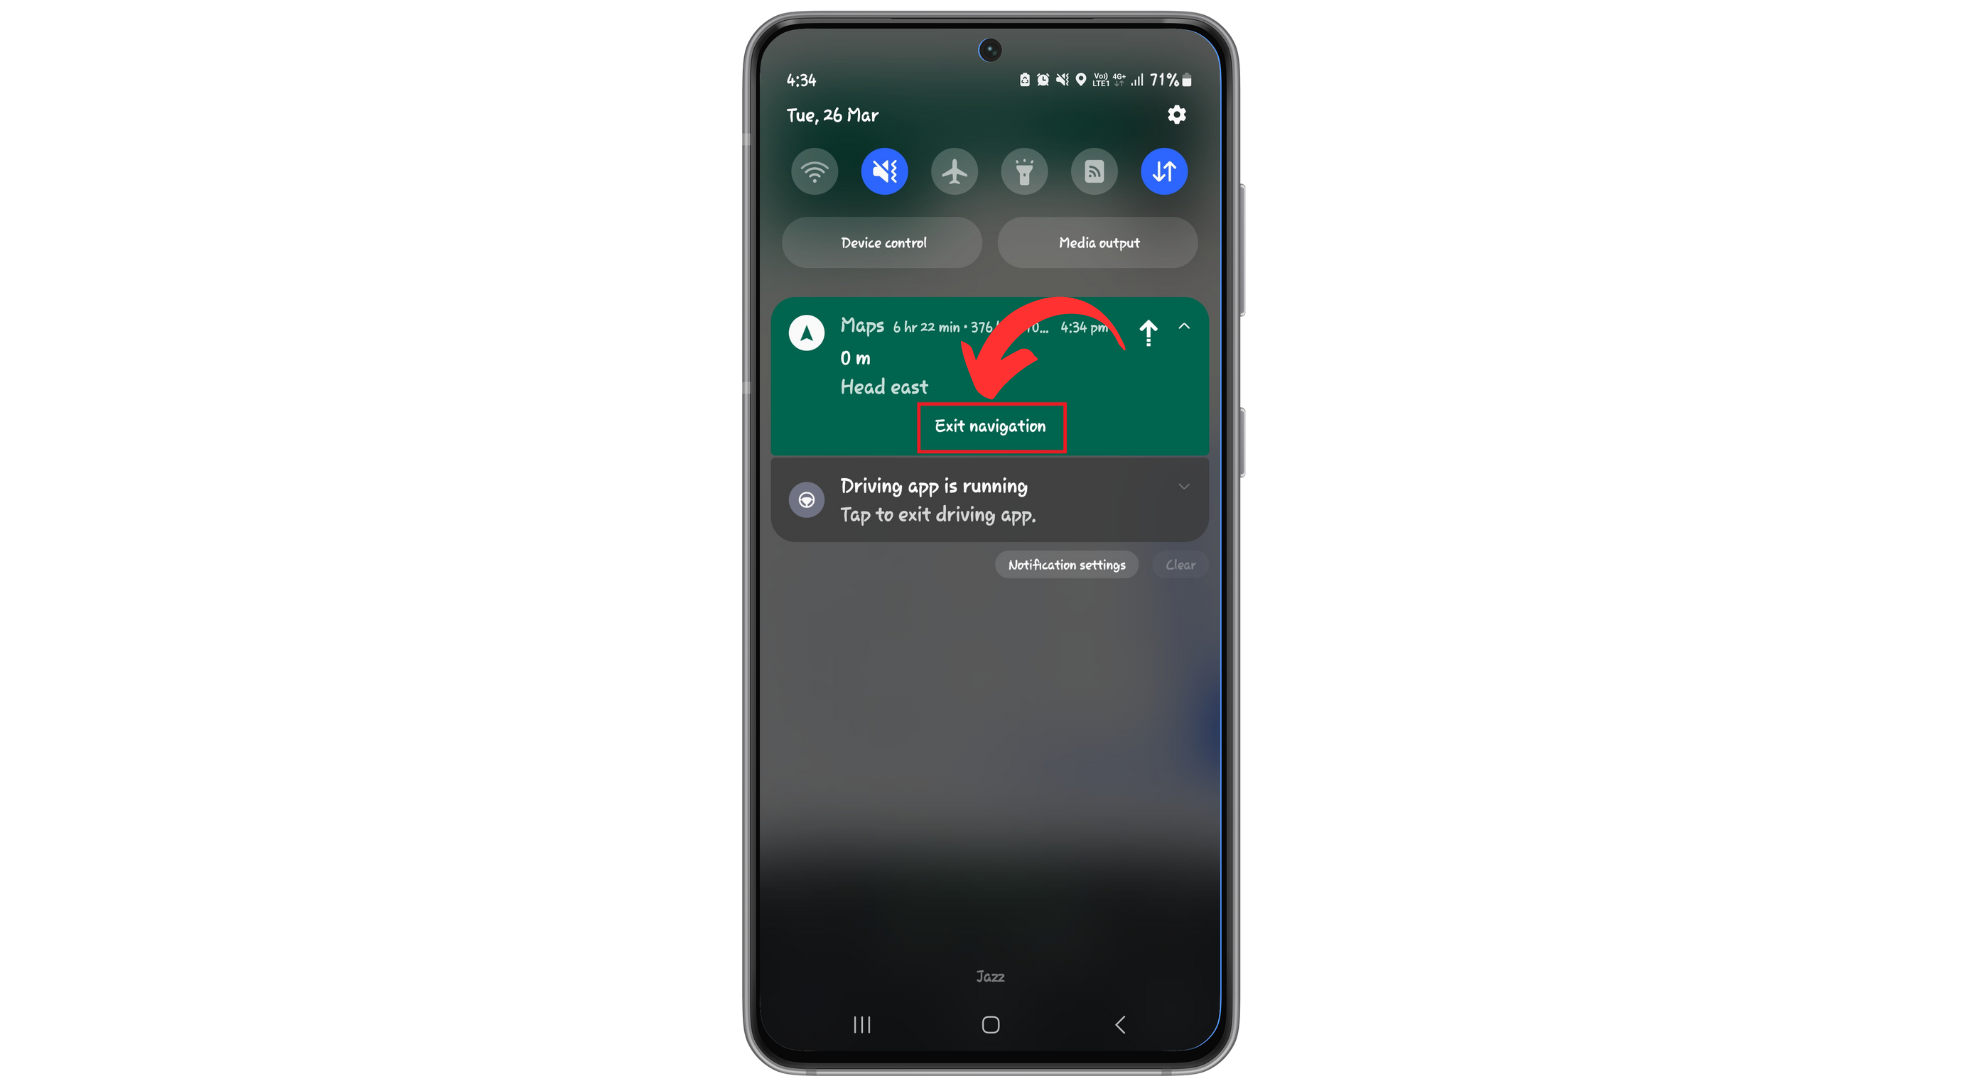
Tap “Stop Navigation”
Note: The option to end navigation through the Notification Panel is available only on Android devices.
4. End Navigation by Tapping the back Button Twice
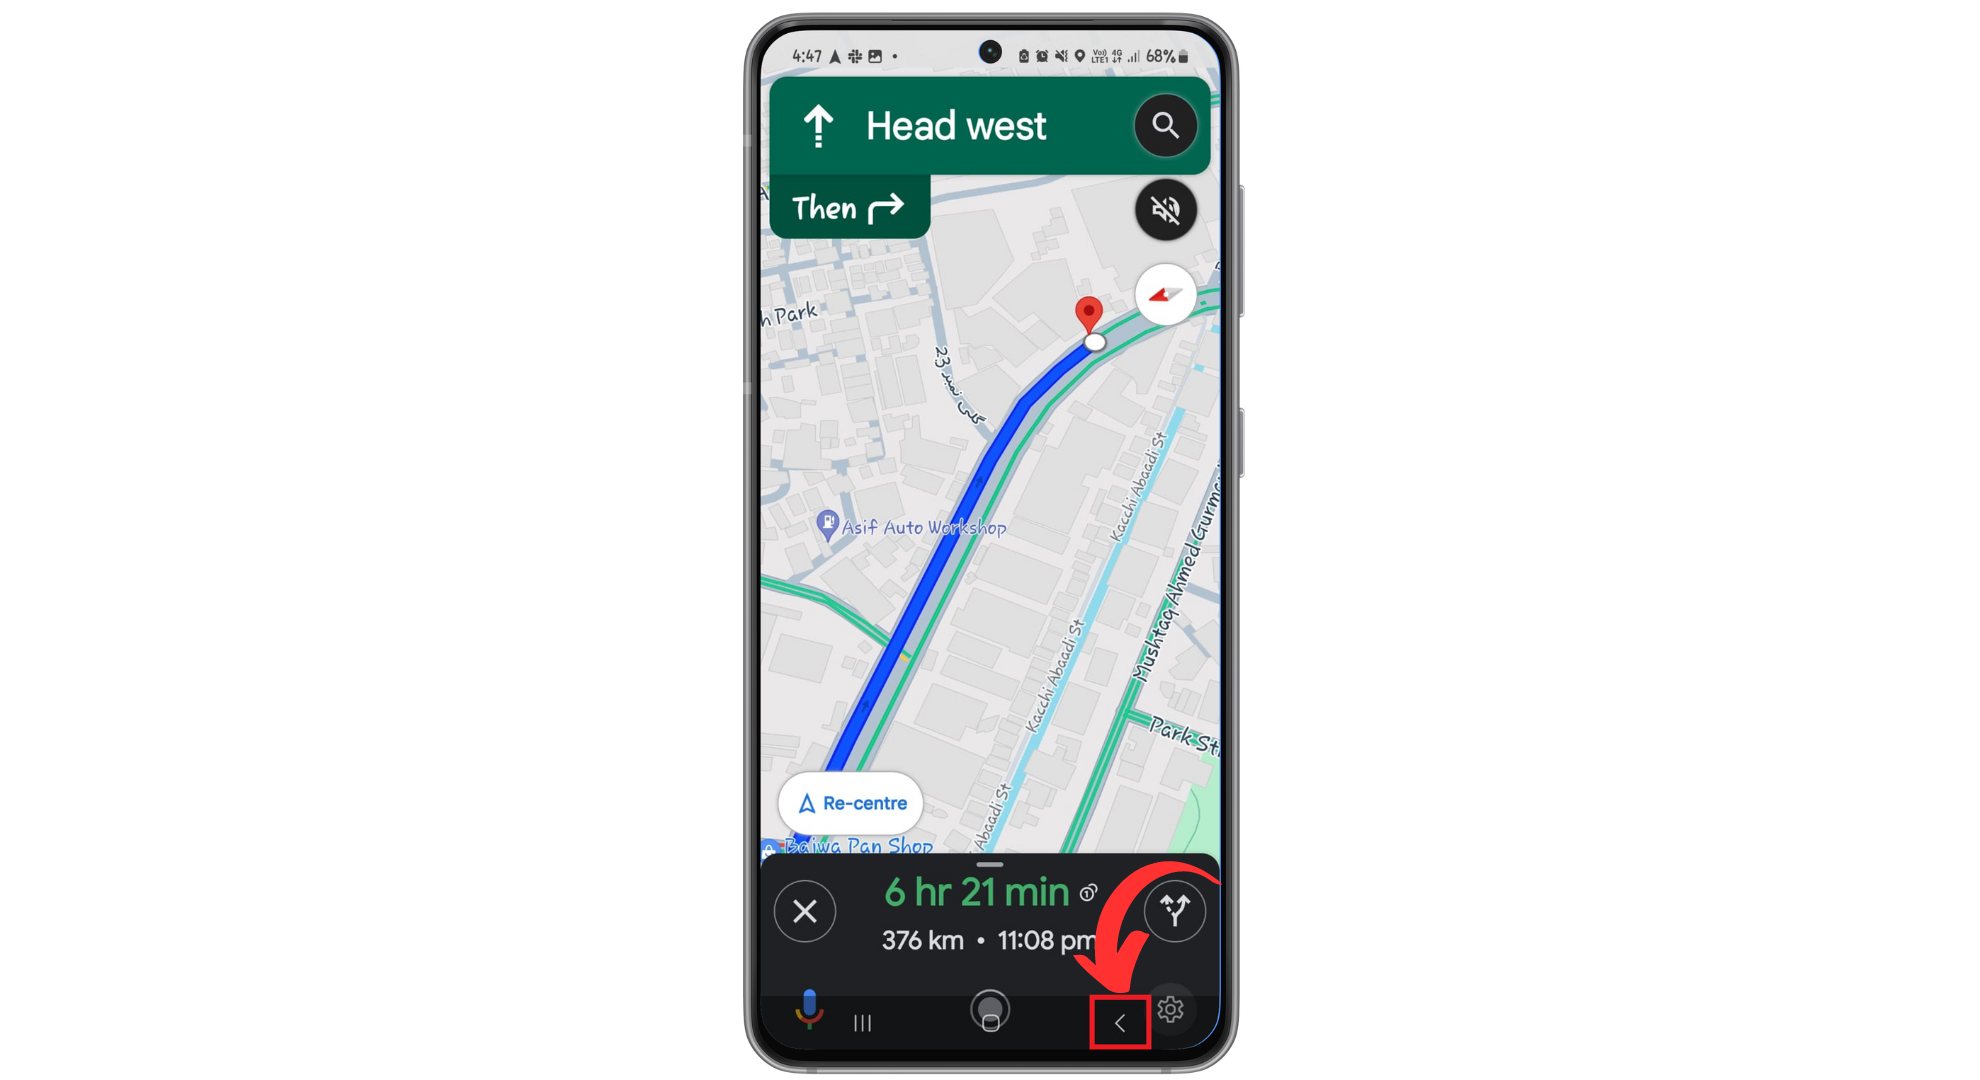
The back button on your device offers a simple solution for quickly exiting Google Maps navigation without interacting directly with the app. This button is usually located at the bottom of your screen. Quickly tap the back button twice. This action will take you out of the navigation screen and back to your previous activity or app.
5. Utilizing the Swipe-up Gesture
Both Android and iPhone devices allow users to manage running apps through a multitasking view. You can use this feature to close Google Maps quickly and thus exit navigation.
↪ iOS users
- Swipe up from the bottom of the screen and pause (for iPhones without a home button) or double press the home button (for iPhones with a home button).
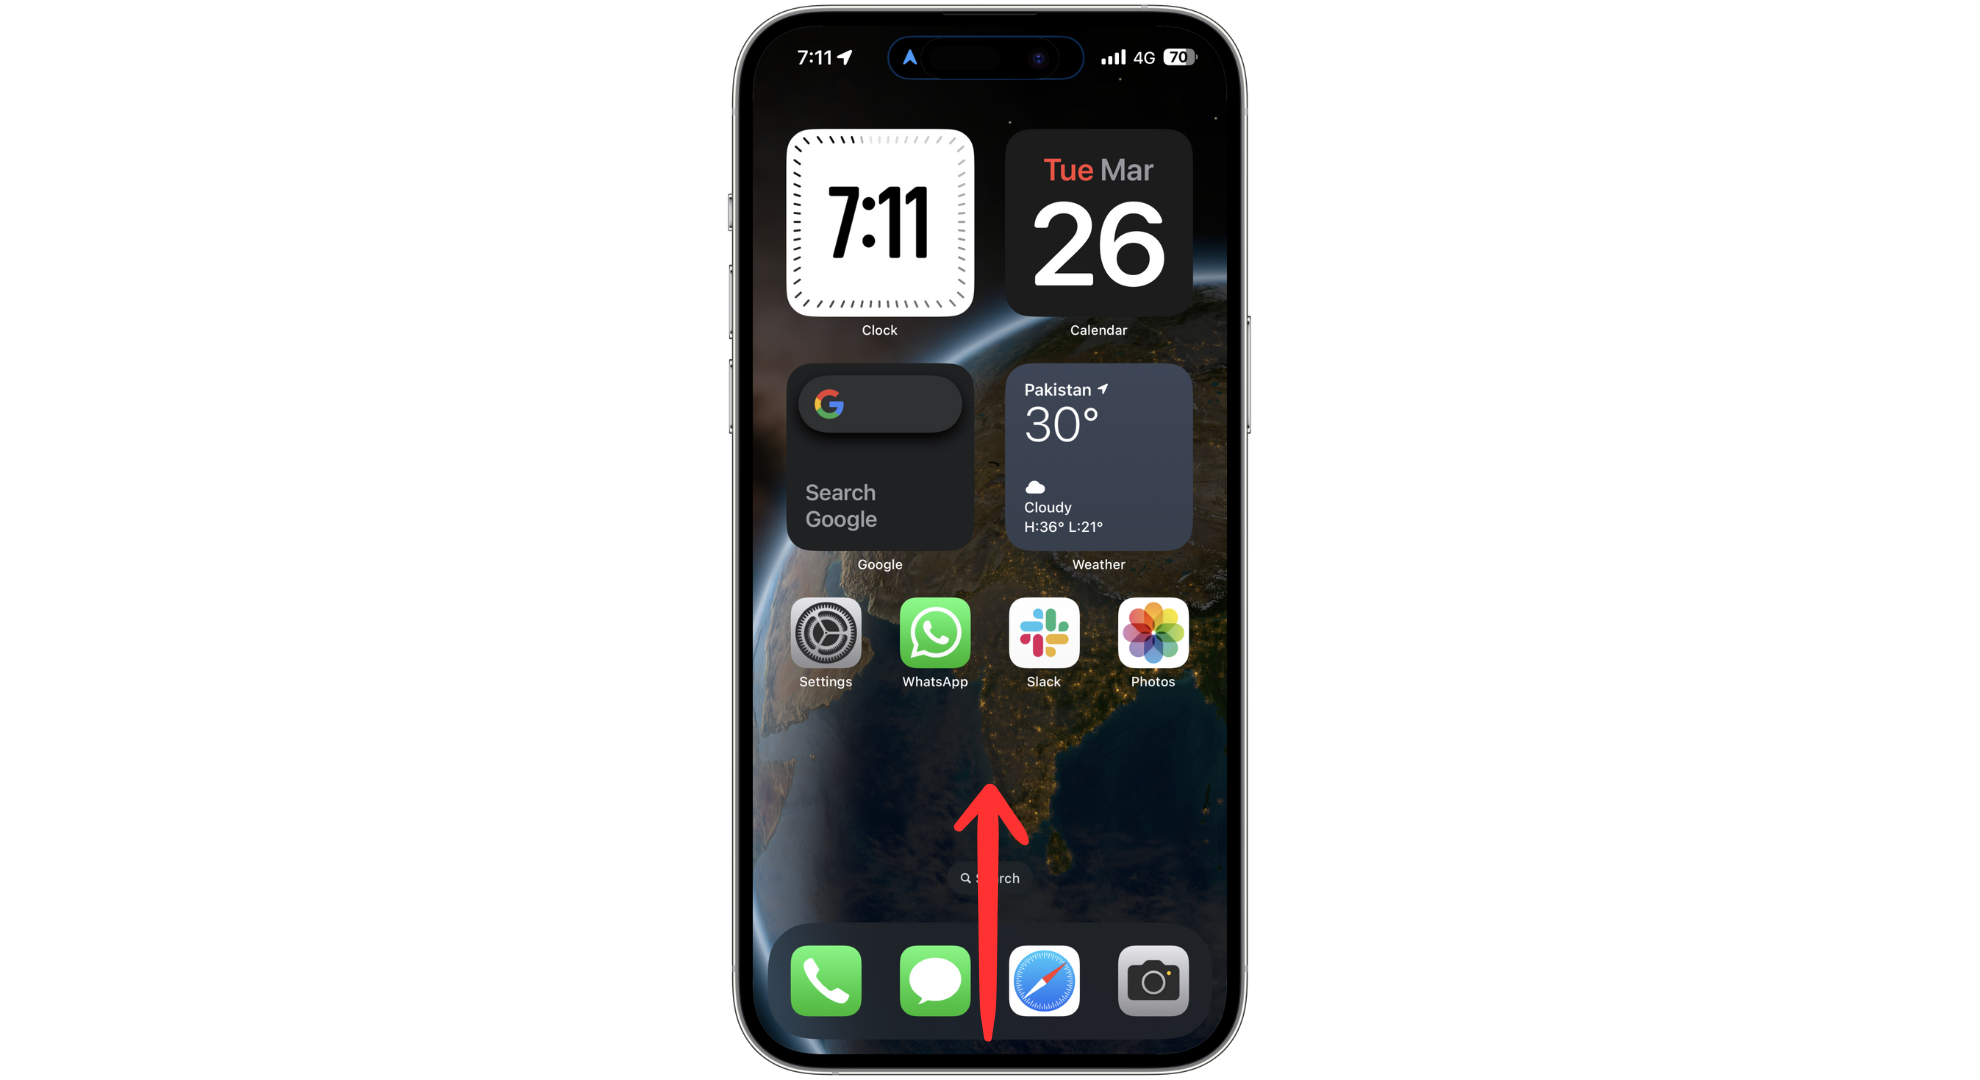
Swipe up from the bottom - Look for the Google Maps app card in the multitasking view and Swipe it up to close it, which will pause or end the navigation.
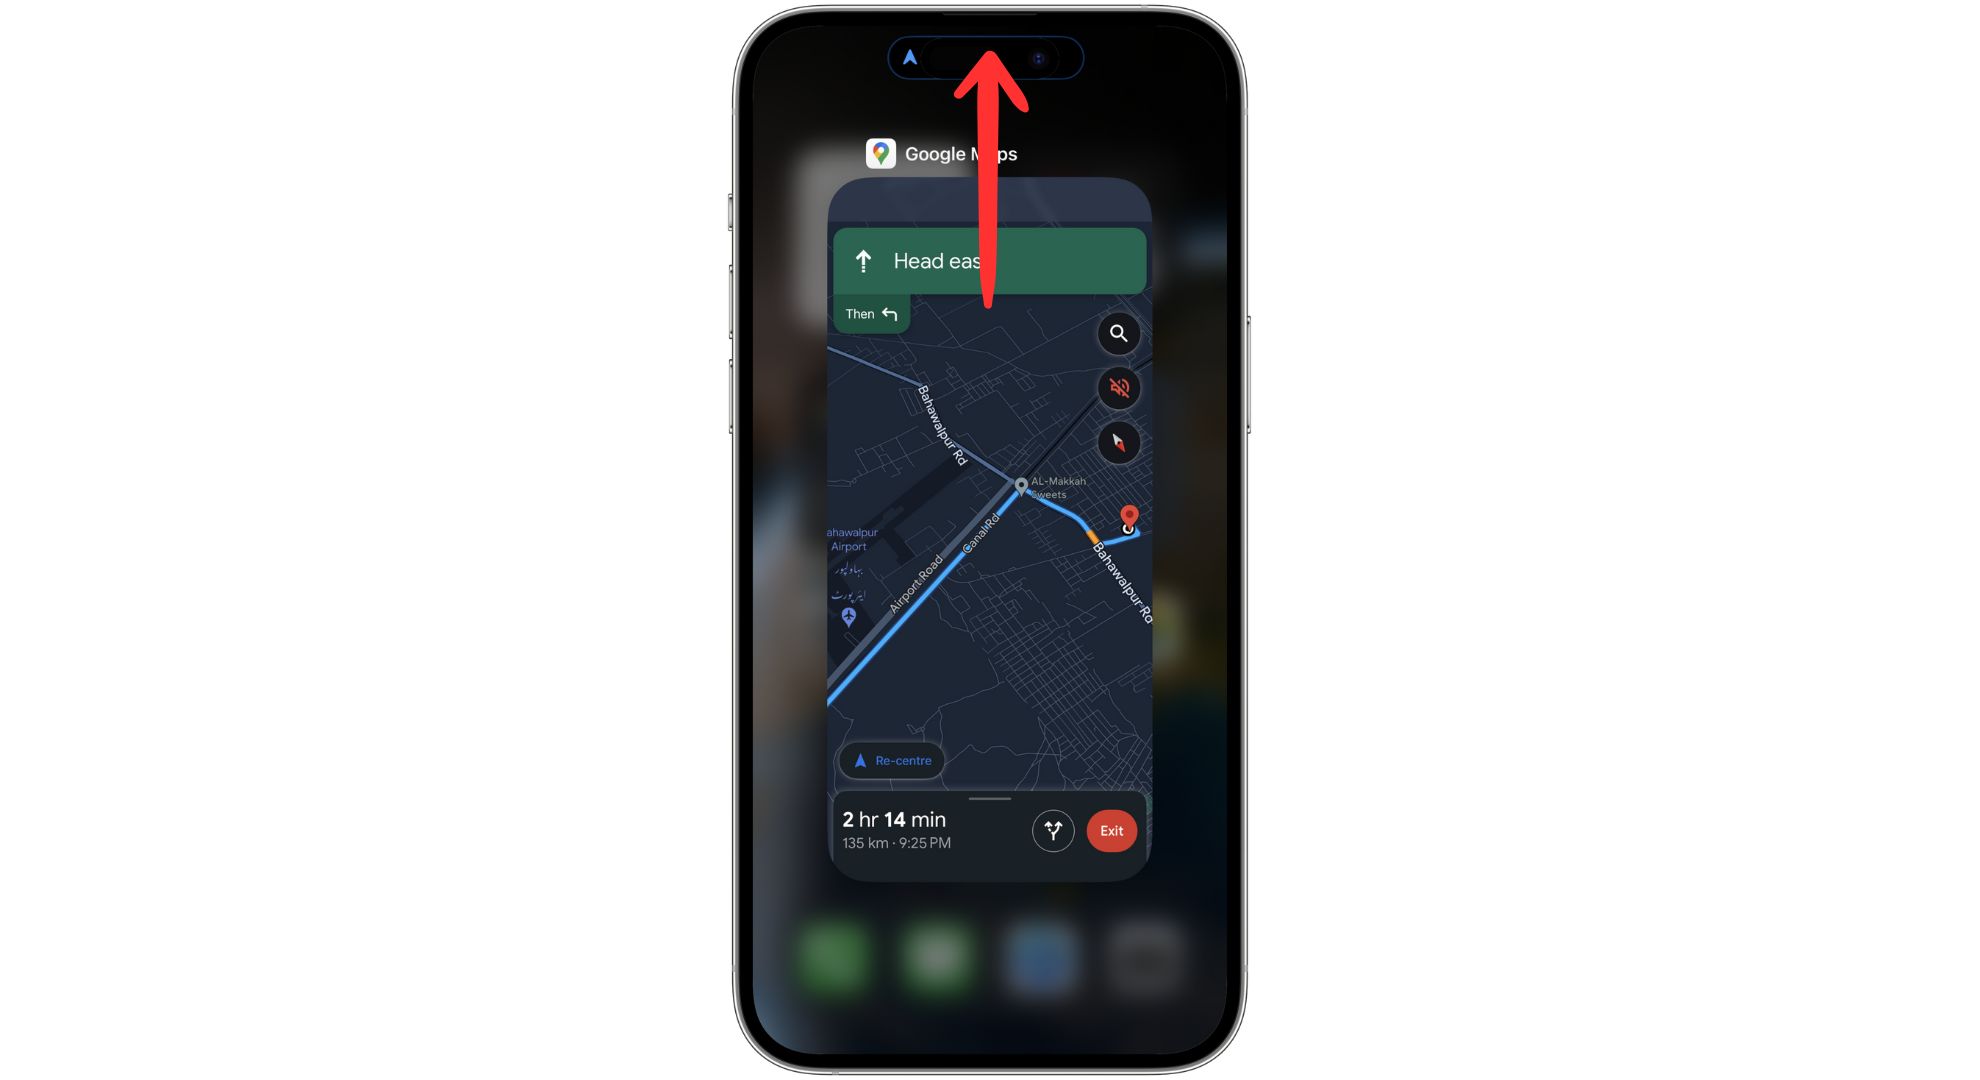
Swipe the app up to close it
↪ Android users
Android users need to press the Recents (Overview button) from the bottom of the home screen to bring up recently opened apps. Find and swipe up or down (depending upon the Android brand) the Google Maps app to end navigation.
Managing location services on devices
Getting the most out of your phone’s maps and apps depends on how you set up location services. Whether you use an iOS or Android, adjusting these settings helps your apps work better and keeps your location private.
↪ For iOS users
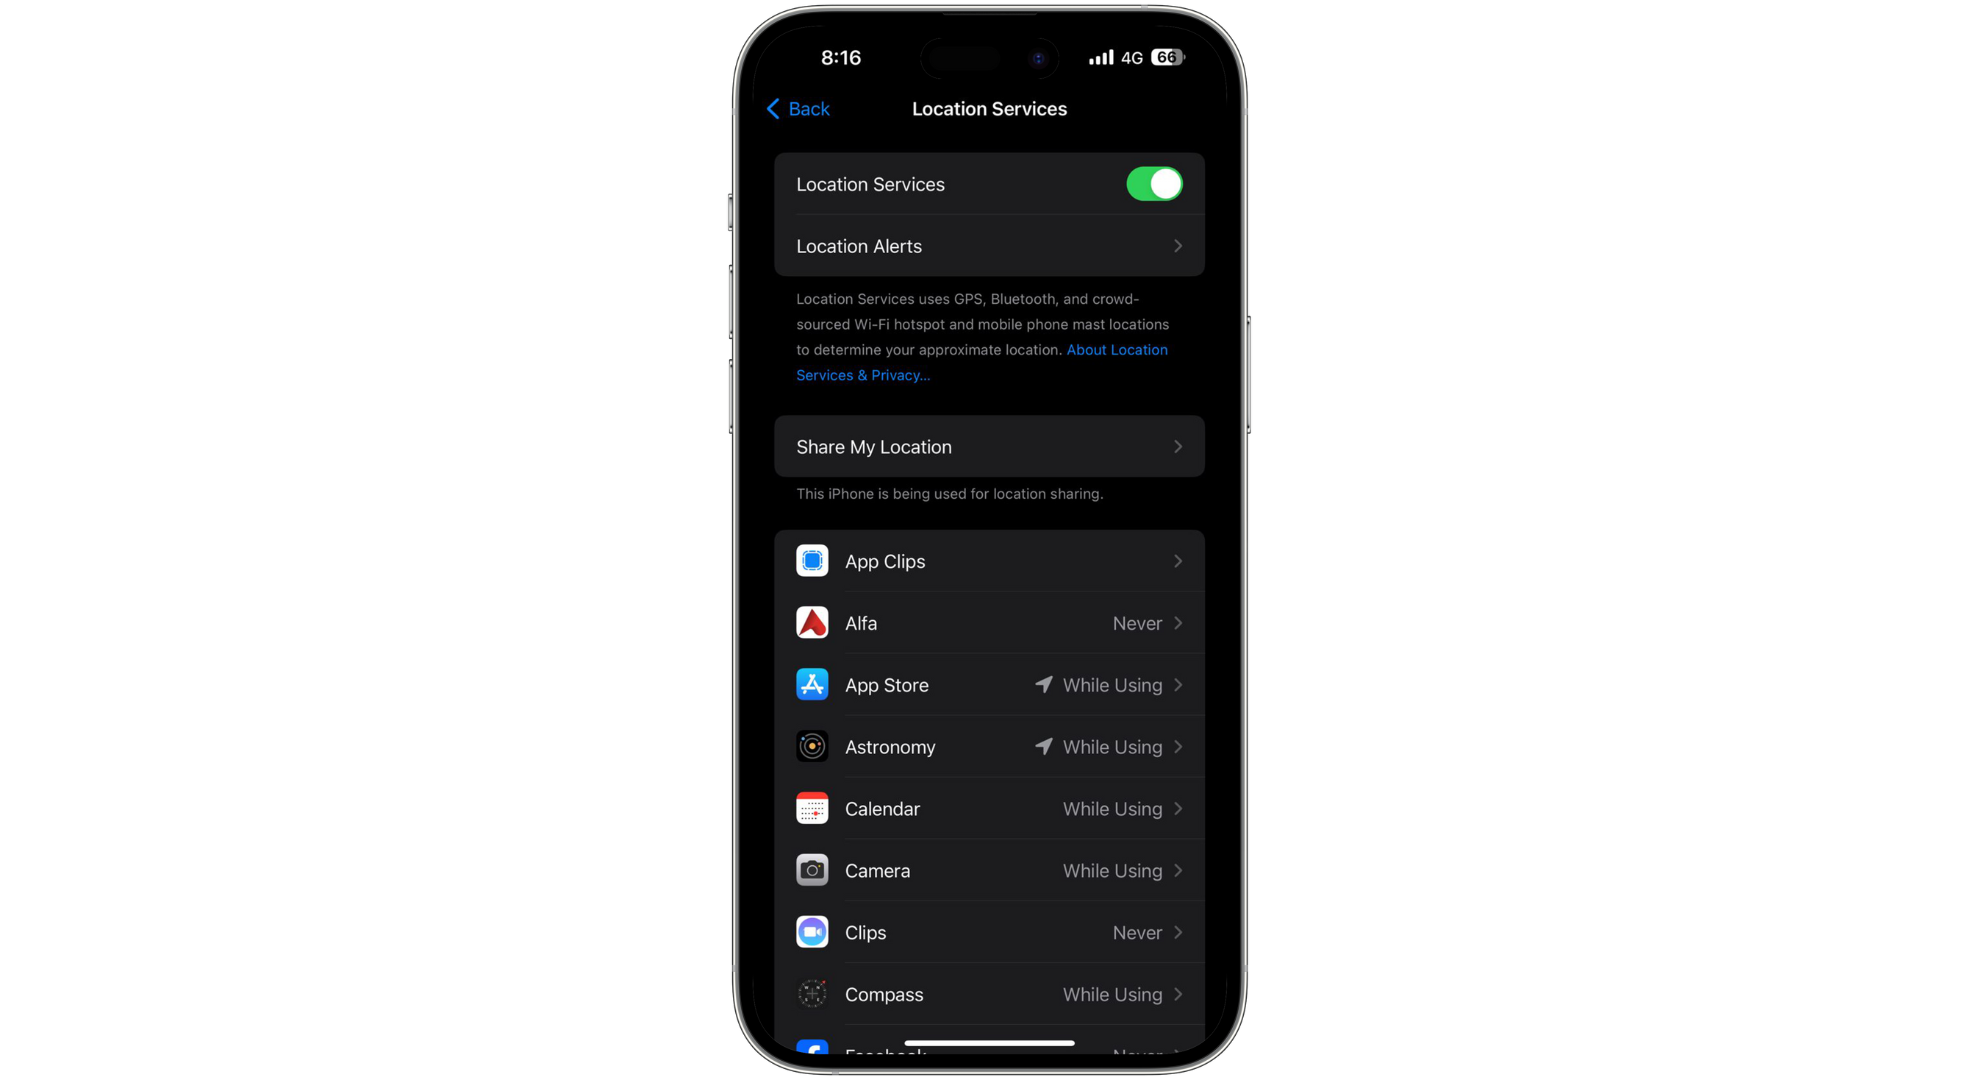
Location services on iPhones allow apps to use your location to provide features like navigation and local weather forecasts. You can control these settings individually for each app through your device’s Privacy settings.
This includes turning location services on or off entirely, selecting whether an app can always access your location while using the app or never, and deciding if you want to share your precise location. You can manage who you share your location with by adjusting the “Share My Location” settings.
↪ For Android users
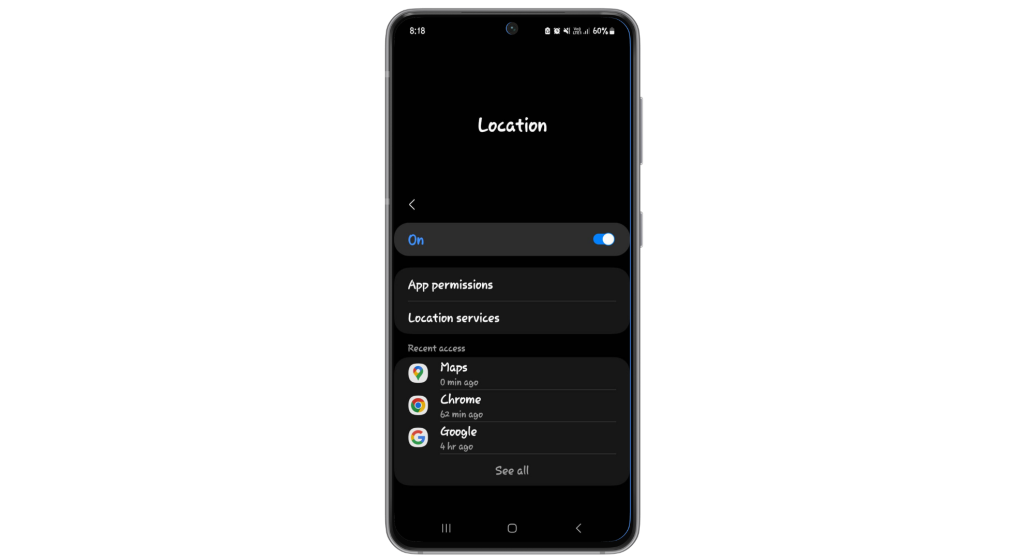
Android devices let you adjust how each app can use your location. Through the Location section in your device’s settings, you can see which apps have requested access to your location and specify the level of access for each—ranging from allowing access at all times to only when the app is in use or not at all.
Android also provides options to improve location accuracy using Wi-Fi, Bluetooth, and mobile networks, ensuring that location-based services work more efficiently.
Reviewed by Huzaifa Haroon