How to Enable and Prioritize G Sync
I’m going to let you into a big secret of Nvidia’s constant dominance. Every once in a while, it releases a technology that drastically changes the overall game experience. A perfect example of this is G-Sync. Introduced in 2013, it enables passionate gamers to achieve tear-free, highly responsive experience on their rigs.
First of all, if you have a Nvidia graphic card coupled with a G-Sync enabled monitor, there’s no reason you wouldn’t want to eliminate screen tearing. It will make the whole experience smoother and a lot more realistic.
Nvidia G-Sync is a proprietary technology that makes the GPU and monitors work together closely to achieve the best possible tear-free framerate. But before we get to configuring G-Sync, let’s understand what this technology is all about.
G-Sync explained
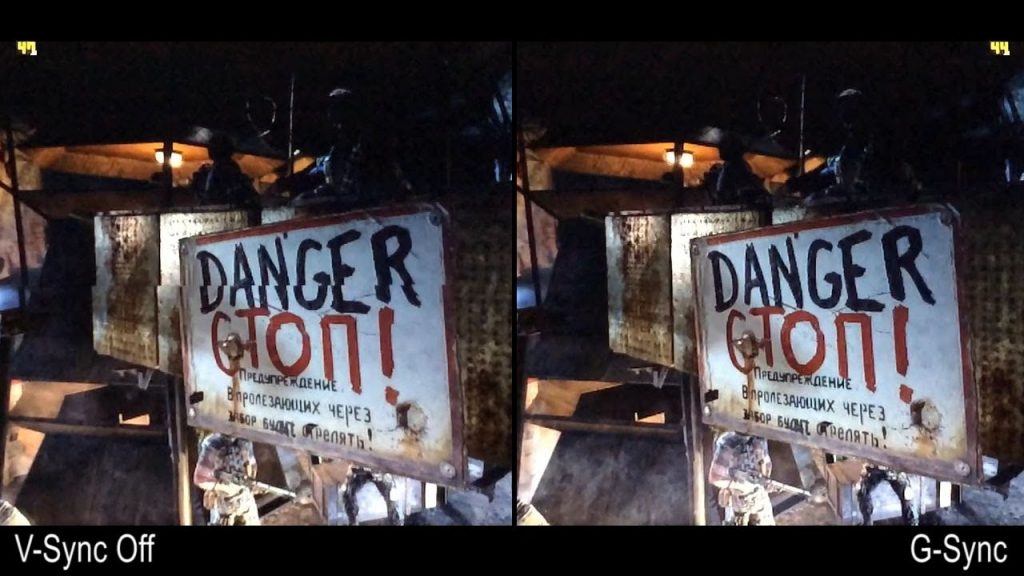
For as long as I can remember, screen tearing has always been a problem, especially on PC games. Most affordable monitors can show a maximum of 60 frames per second. Even more, if you don’t have a high-end graphics card, chances are your rig will only be able to produce 50 frames per second on the latest graphic-intensive games.
Because of this difference in frames between the GPU and monitor, you’ll notice a series of artifacts. These are also known as screen tears. Without an assisting software, the framerates between the two components almost never match up.
Before G-Sync came along, the solution was to enable Vertical Sync from within the game you played. This eliminated screen tearing by carefully sending each frame from the GPU to the monitor at the exact time. But Vertical Sync is far from perfect. The main problem is, it only works with framerates that can be divided into the monitor’s refresh rate. For example, if you have a monitor that tops at 60Hz, any superior framerate outputted by your GPU will be cut at 60 frames.
You might think “Hey, 60 frames is enough for me”. I totally agree, but in the event that the framerate produced by the GPU drops below 60, Vsync will automatically cut it to 30 frames. And 30 frames is no way for a serious gamer to play his games.
This is where G-Sync gets to shine. All G-Sync monitors have an adaptive refresh rate. This works in total contradiction with how V-Sync operates. G-Sync doesn’t need to divide any of the framerate like V-Sync does. Hence, whenever your graphic card outputs a framerate, the G-Sync monitor will immediately display it regardless on how many frames per second you achieve. This get’s rid of any tearing and brutal frame drops.
But there’s only one problem. You will need to buy a monitor that has G-Sync support because this is a proprietary Nvidia technology that uses a chip integrated into the monitor.
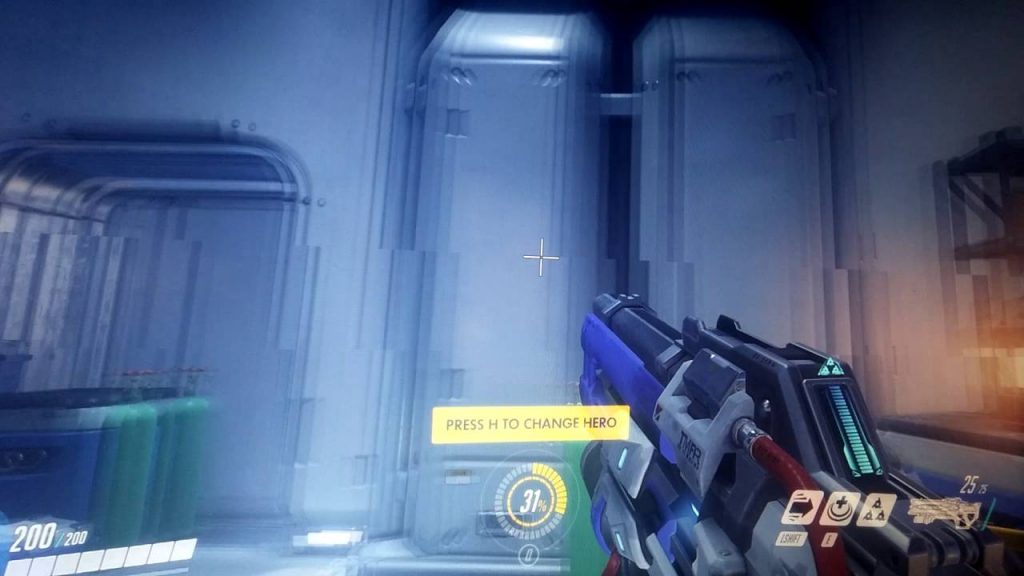
How to Enable G-Sync on PC
Finally, if you made sure you have the required hardware to support G-Sync, you still need to enable it. Even though the initial set up is straightforward, you can easily end up botching a big part of the G-Sync feature. To spare you from any inconveniences, we created a complete guide through the whole process. Make sure you follow it carefully:
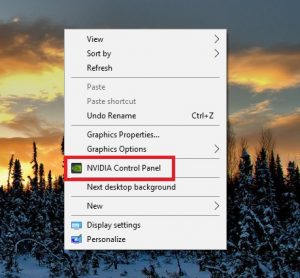
- Right-click on your desktop and click on Nvidia Control Panel.
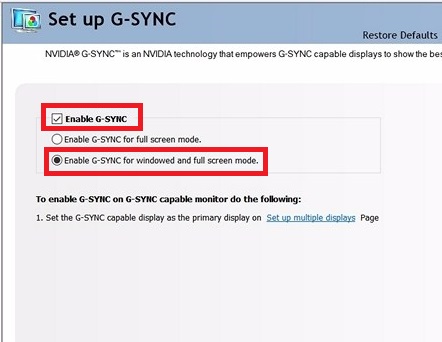
- Now search for the Set up G-Sync entry and click on it to expand. It should be located somewhere under the Display section.
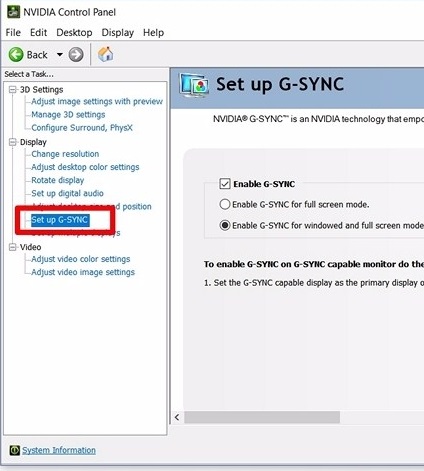
- Make sure the box next to Enable G-Sync is checked. Also, it would be a good idea to select “Enable G-Sync for windowed and full-screen mode”. As you probably know, some games run borderless or in window mode and this will ensure G-Sync is enabled for them too.
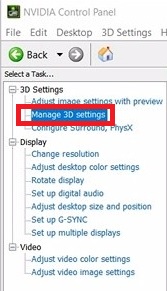
- Now make your way to Manage 3D settings. It’ located under 3D settings.
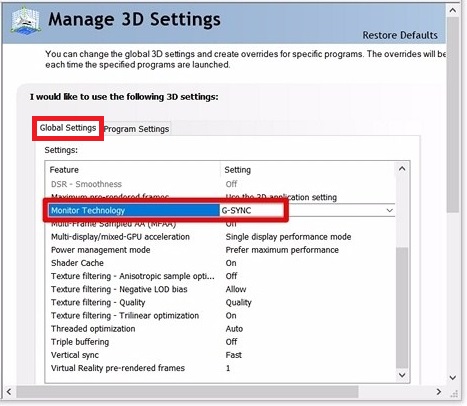
- Under Global Settings, make sure the Monitor Technology is set to G-Sync. In the event that it’s set to Fixed Refresh Rate, switch it to G-Sync.
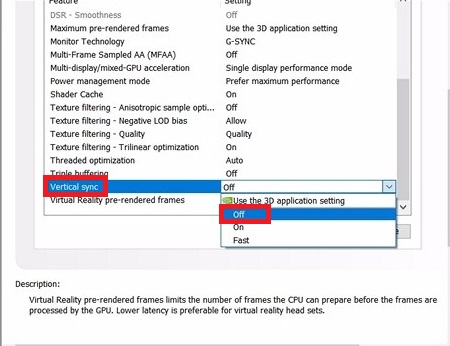
- Now scroll all the way down in the Global Settings. You’ll notice an entry called Vertical sync. Make sure you set it to Off. As we already discussed above, Vertical Sync is very inferior to G-Sync because it will cause a lot of pointless input lag. If you can use G-Sync on your monitor, make sure Vertical Sync is not an option.
Making Sure G-Sync has priority
Now if you followed the guide above, your G-Sync should be in place. Some games have built-in features that will hinder G-Sync by capping the refresh rate at a lower level than your monitor can handle.
As a rule of thumb, you want to make sure that every game you play is set to the maximum refresh rate that your monitor can handle. If you have a 144Hz monitor, your in-games settings should reflect precisely that.
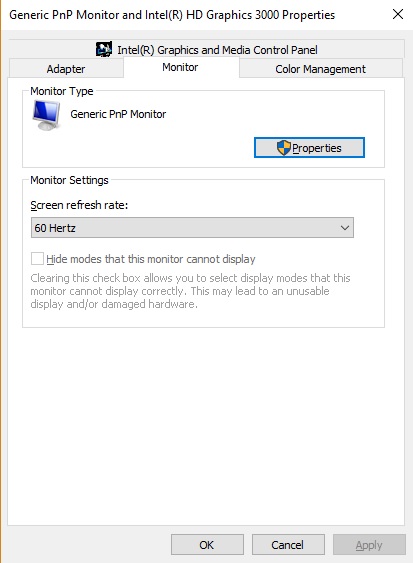
For starters, you should make sure that your Windows is actually set to the maximum refresh rate supported by your monitor. You can do that easily on Windows 10 by going to Settings > System > Display > Advanced Display Settings and clicking on Display Adapter Properties. From there you want to click the Monitor tab and select the maximum Screen Refresh Rate from the list and hit OK.
After you’ve made sure Windows is told which refresh rate to use, it’s time to tweak your games to do the same. Fire up the game you want to play with G-Sync enabled and go to the graphic Settings. The first thing you want to do is to make sure Vertical Sync is disabled. We already enabled G-Sync from the Nvidia application.
![]()
Also, some games have a Limit FPS option. If you see a setting like that enabled, make sure you disable it right away. Furthermore, this setting can also be found under the name of Framerate Limiter.

Conclusion
Now you should have a fully working G-Sync monitor. If you don’t see any screen tearing, it means that it’s working properly. However, if you run into unexpected framerate drops, be sure to do some investigations. Start by checking the built-in setting menu of the game and make sure V-Sync and FPS Limiter aren’t enabled. With that being said, settle back and enjoy your tearing-free gaming sessions.
Vsync in Nvidia should be ON!