How to Enable Nvidia Image Scaling (NIS) for Higher FPS in Games?
Nvidia Image Scaling (NIS) is a brand new feature that is somewhat similar to existing scaling features like DLSS from Nvidia and FidelityFX from AMD. Image upscaling has become the norm these days as game titles become more demanding. As a result, technologies are being introduced that let you enjoy the high image quality while also having the ability to play the game properly. It is no secret that as you increase the quality of the graphics in your game, the bigger the hit on your frame rate. Similarly, increasing the resolution of the game also has a toll on your FPS and that’s a problem. 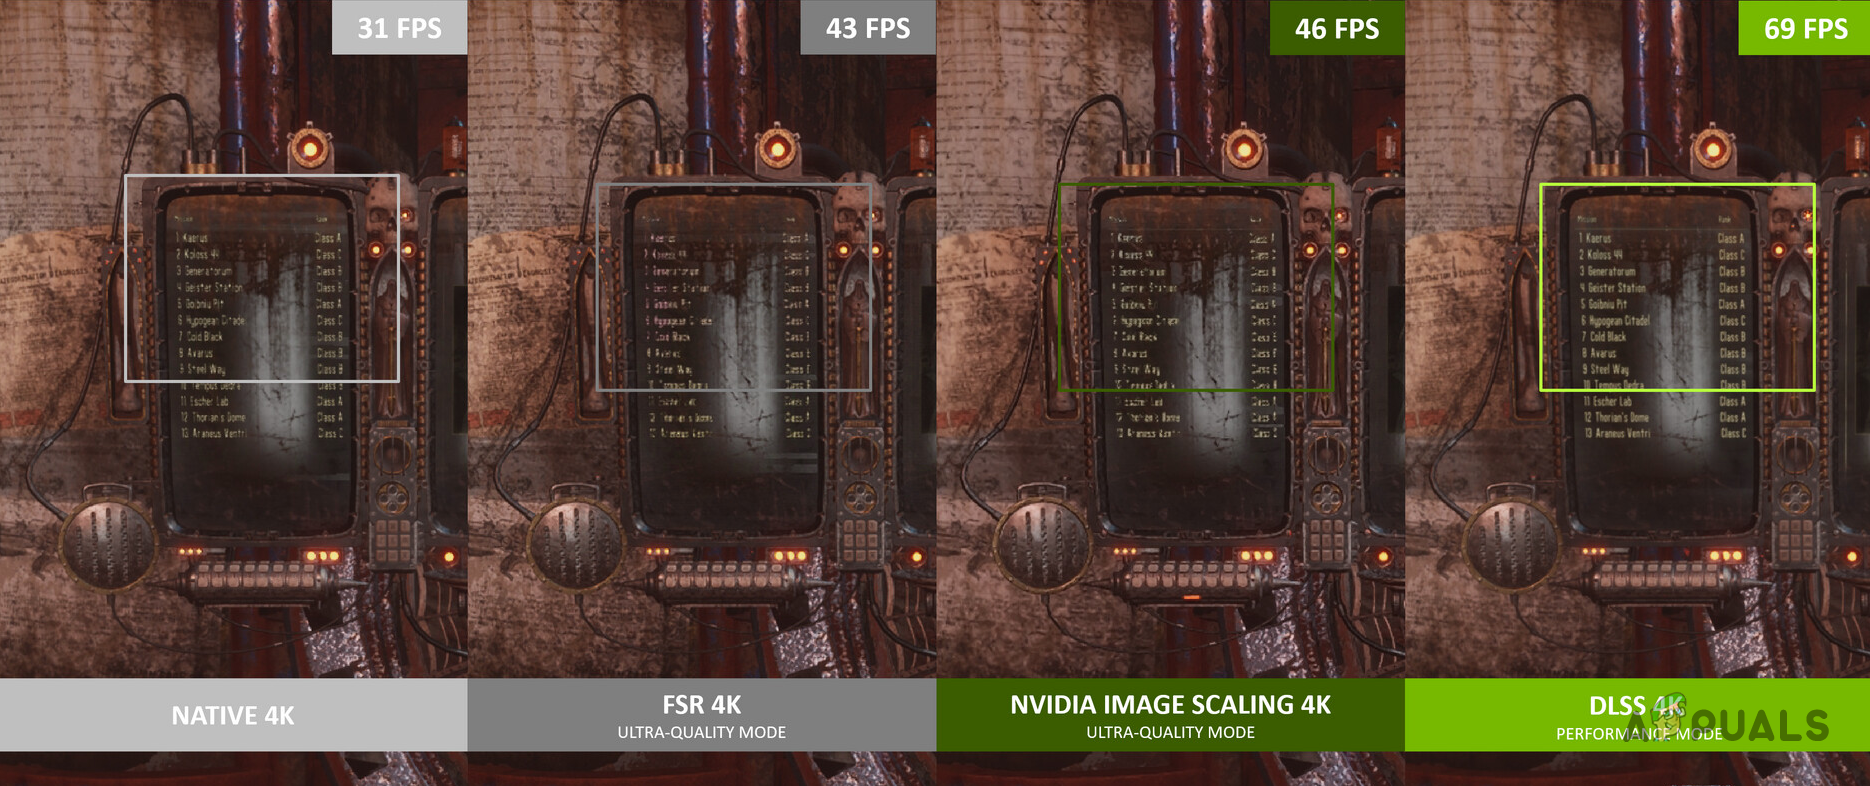
As it turns out, Nvidia Image Scaling is a feature that is available in the newest Nvidia drivers update. Before we proceed and show you how to make use of the NIS feature, let us first discuss how this is different from the existing features like DLSS and how it compares with AMD’s FidelityFX. As it turns out, while the functionality of the three may sound the same, there’s a difference in how they actually work.
NIS vs DLSS vs AMD FidelityFX
To start off, DLSS uses A.I to upscale but it is only available on Nvidia 20 or 30 series graphics cards. This is because these cards have dedicated cores for the purpose of A.I acceleration that are referred to as Tensor cores. The drivers include an A.I. models that utilize these tensor cores in order to upscale the images.
When it comes to FidelityFX and Nvidia Image Scaling, the working is much different. Both of these features do not use A.I., rather they work on the current rendered frame by upscaling it. After upscaling the frame, a sharpening filter is applied to make the image look like it would on a higher resolution. In addition to that, unlike DLSS, NIS does not require you to have a 20 or 30 series graphics card from Nvidia but rather you can use it on older GPUs as well. Now, obviously, DLSS is a much superior feature as it uses A.I. and as a result offers better results. Nvidia Image Scaling is the green’s take on AMD’s FidelityFX.
With that out of the way, let us get started and show you how you can enable NIS on your system. So, without further ado, let us jump right into it.
Download Latest NVIDIA Drivers
As it turns out, the first thing that you would need to do is to install the latest NVIDIA drivers on your computer. NVIDIA Image Scaling is only included in the new driver that is available now. As such, it isn’t something that you can enable on an older version of the drivers. Downloading and installing the drivers on your computer is really easy and straightforward. To do this, follow the instructions that are given down below:
- First of all, in your browser window, head to NVIDIA’s download web page by clicking here.
- Once you are there, provide the details of the graphics card that you have and then download the latest driver available.
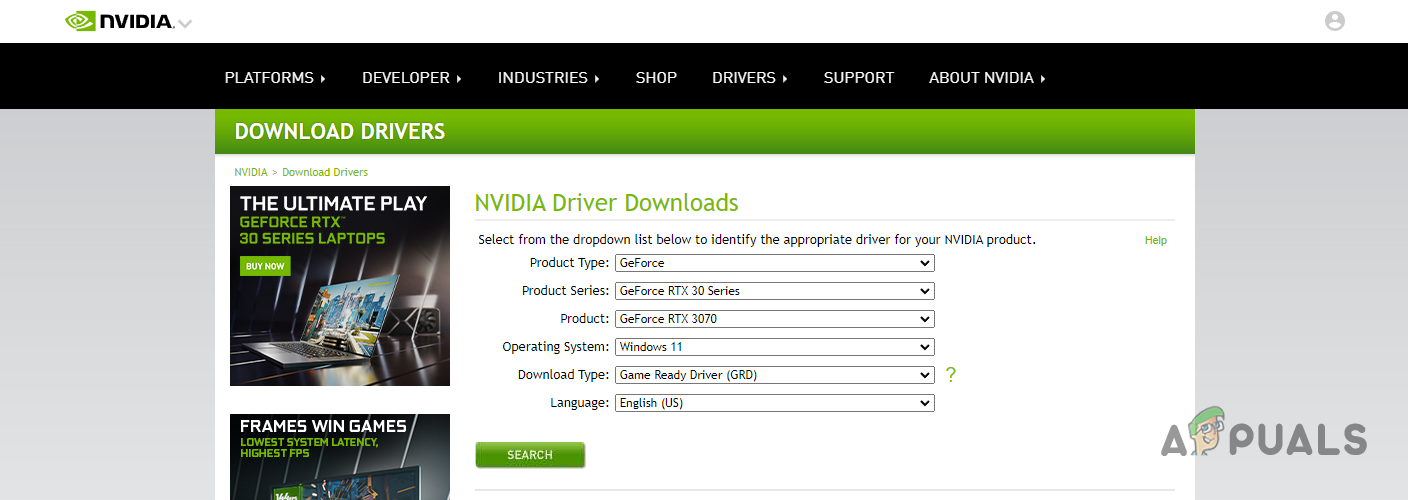
Downloading Latest NVIDIA Drivers - After you have downloaded the driver, install it on your system.
- Once the installation is complete, you are done and move on to the next step down below.
Enable NVIDIA Image Scaling
Now that you have installed the latest drivers on your computer, you are ready to get started with NVIDIA Image Scaling. Since this feature is new for now, you might come across some issues. As of now, there have been reports of the feature not essentially improving the FPS for users that have an ultrawide monitor. Apparently, this is because NIS is first upscaling the image to 16:9 aspect ratio and then going up to 2k or so, which results in a performance hit.
To enable NVIDIA Image Scaling, follow the instructions that are given down below:
- First of all, go to your desktop and right click. From the drop down menu, click the NVIDIA Control Panel option provided.
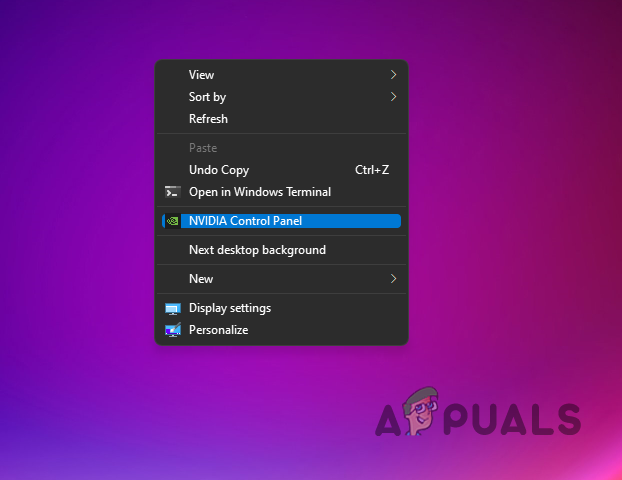
Opening up NVIDIA Control Panel - Once the Control Panel window is up, on the left hand side, click the Adjust image settings with preview option.
- There, make sure that the Use the advanced 3D image settings option is selected and then click the Apply button.
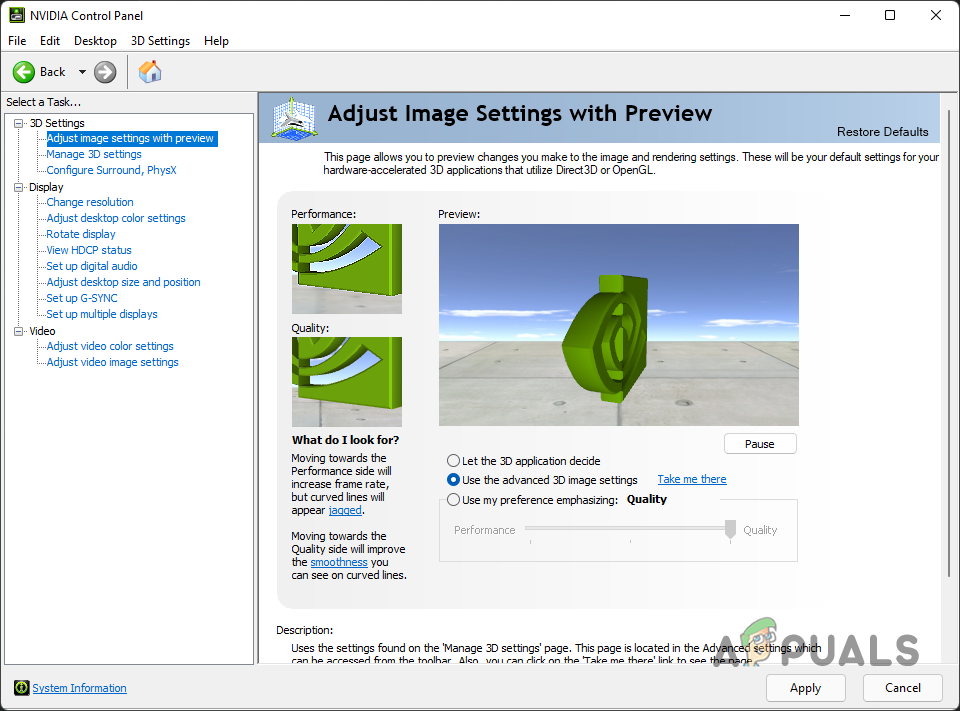
Using Advanced 3D Image Settings - After doing that, on the left hand side, go to Manage 3D settings.
- Once you are there, you can choose to enable NIS globally or for a specific game. In case of a specific game, you will have to switch to the Program Settings tab and choose the game that you wish to enable NIS for from the drop down menu provided.
- After you have done that, under Settings at the top, you will find Image Scaling.
- Highlight the option and change it from Off to On.
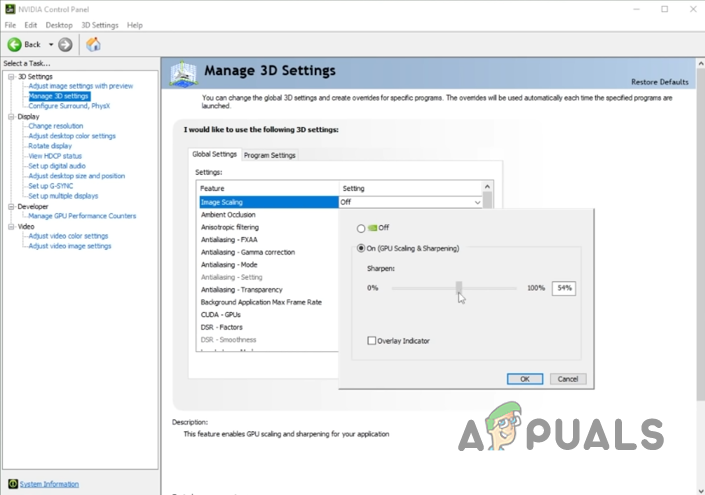
Enabling Image Scaling - In addition to that, you will have to use a sharpening percentage using the slider provided.
- We would recommend to choose between 20 to 30 percent as anything more than that looks too sharpened.
- You can also choose to tick the Overlay Indicator checkbox which will indicate when NIS is in action.
- Finally, click the Apply button provided.
With that, you have successfully enabled Nvidia Image Scaling. If you wish to benchmark the difference in performance, you can do so by playing the game with and without NIS enabled. If there is a performance boost, leave it enabled and enjoy the extra frame rate.


so do i run the game at a lower resolution and let NIS put it at 1080p, or if i run the game at 1080 native, it adjusts behind the scenes to give me better frames?