How to Enable Google Assistant on Any Android (Without Root)
When it first launched, Google Assistant was Google’s answer to Amazon’s Alexa. Slowly but surely, it evolved into the world’s smartest personal assistant. Google Assistant has now expanded to a lot of platforms since it’s initial unveiling.
Even though it was designed to be a Google Pixel exclusive, some XDA users have quickly been able to force Google Assistant on some rooted Android devices running on Nougat. This forced Google to rethink their strategy. Shortly after that event, a limited version of Google Assistant has made its way into the Google Allo app.
With each update, Google Assistant grew into more powerful voice assistant, and it’s currently the best the world has to offer. When compared to other assistants like Siri or Alexa, Google Assistant is capable of carrying long dialogs with an unmatched contextual awareness. I remember being heartbroken when I read that Google Assistant launched on iOS while my Android Marshmallow still didn’t have it.
Google set things straight in March 2017 and announced that Assistant will be made available for all Android devices running on 6.0 or above. Sadly, there’s a major inconvenient – Google Assistant is only officially available in certain countries.
Despite Google promising that Assistant will become available worldwide in the near future, the rollout has been painfully slow. But as you can expect, that didn’t stop the Android community from finding workarounds on installing Google Assistant on every device.
Below you have three different methods of installing Google Assistant on your Android device. If you have Android Marshmallow (6.0) or above, kindly start with the Method 1. If you’re still on Lollipop (5.0 or 5.1) or beyond, concentrate on Method 2 and Method 3. Regardless of which method you follow, none of them require you to have a rooted device. Let’s begin!
Method 1: Enabling Google Assistant with Beta Apps (Marshmallow and above)
We are going to sign in for the beta versions of the Google app and Google Play Services. This will enable you to add the Google Assistant functionality on your device, even though it’s not officially supported. The entire process is quite long but is confirmed to work with most smartphone manufacturers. I tested it succesfully on a Huawei P10 Lite. Here’s what you need to do:
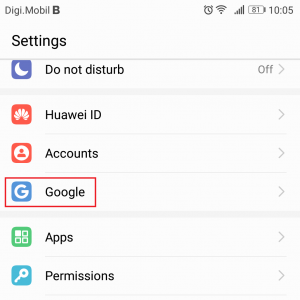
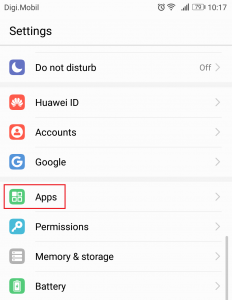
- We are going to start by signing to the beta versions. Go to Settings > Google.
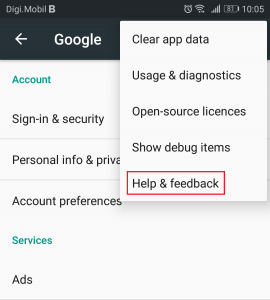
- Now tap on the three-dot menu icon located in the top-right corner of the screen. Select Help & feedback from the next menu.
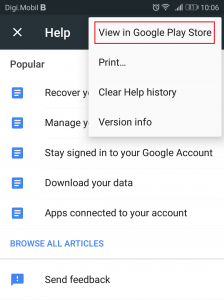
- Once you’re on the Help page, tap the three-dot menu icon again and select View in Google Play Store.
- This will open up a new Google Play window with Google Play Services. Ignore the fact that it needs to update, we’ll deal with that later on.
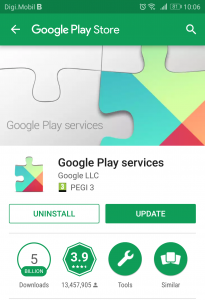
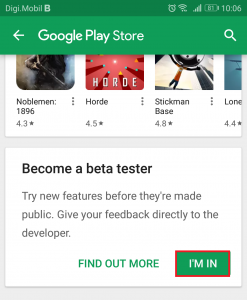
- Scroll all the way down to the Beta program and tap on I’m in.
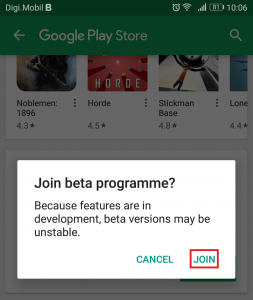
- After a while, you will be invited to complete the beta sign up. Do so by tapping on Join. After you hit Join, it will take at least 5 minutes until the sign up is complete. In my case, it took over 10 minutes.
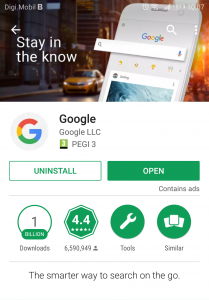
- Now go to the home menu of Google Play Store and search for the “Google App”.
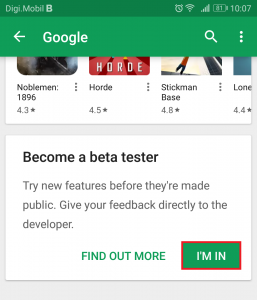
- Scroll all the way down to the beta program and tap on I’m in. Confirm again by tapping Join.
- Now, wait for a few good minutes to make sure the beta signup completes on both apps. After a while, tap the action button inside Google Play Store and go to My apps & games.
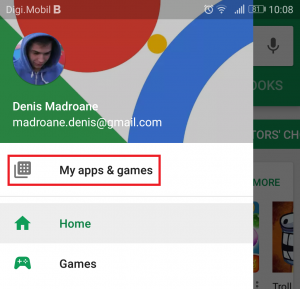
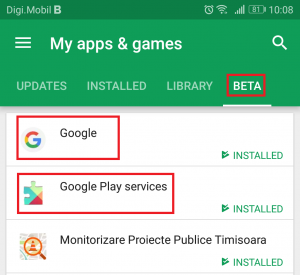
- From the following screen, expand the Beta tab and locate Google and Google Play Services.
- Tap on the Google app hit the Update button after making sure the beta signup is complete. You can for that by looking right under the Update tab. If it says “You’re a beta tester for this app“, then you’re good to go.
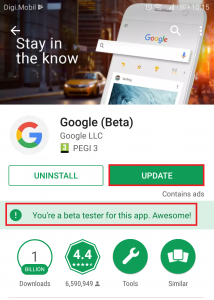 Note: In the event that it says “Beta Sign up in progress” do NOT update the app yet. Instead, close Google Play Store and come back to this screen after a few minutes.
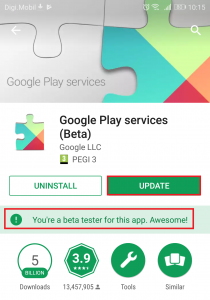
 - After you’ve successfully updated the Google app, repeat the same procedure with Google Play services. Remember to make sure that the beta sign-up is complete before hitting Update.
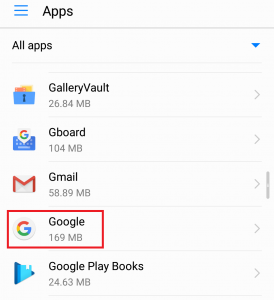
- Once you got both apps updated, go to Settings > Apps (Applications) and make sure you select the All apps filter. Scroll down and tap on the Google entry.
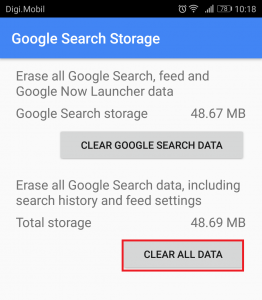
- Go to Storage tap on Manage space and hit Clear All data.
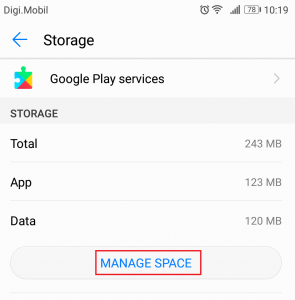
- Now go back to Settings > Apps (Applications), enable the All apps filter again and tap on Google Play Services.
- Go to Storage > Manage Space and tap on Clear All Data.
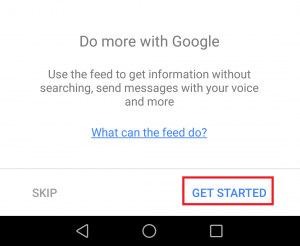
- Now the setup is almost complete. You can finally open the Google app. You will be asked to insert your credentials straight away. After you insert them, tap on Get Started.
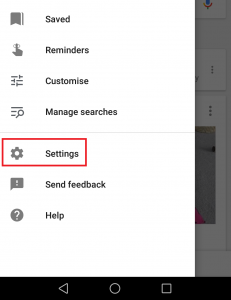
- Expand on the action menu (located in the top left corner) and tap on Settings.
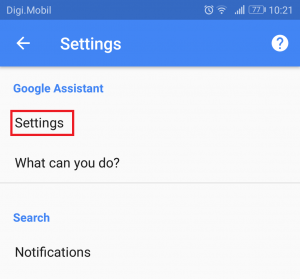
- Now tap on Settings (under Google Assistant) and select Phone (under Devices).
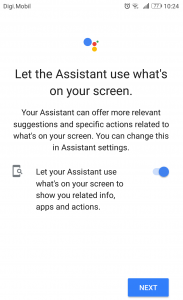
- Now make sure Google Assistant is enabled. If it isn’t enabled, tap on the toggle next to it.
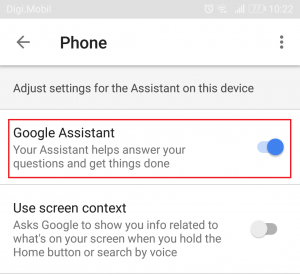
- That’s it. Google Assistant should now be enabled on your device. You can test it by saying “OK, Google” near the microphone. You don’t necessarily have to be in the Google app, it works in every screen.
Method 2: Sideloading Google Assistant via APK (Lollipop)
If you’re still on Lollipop, the above method will most likely not work. But there’s still hope for you. This method implies installing Google Assistant from an external APK. It should work as long as you remember to enable Unknown Sources. Here’s what you need to do:
- First things first, go to Settings > Security & Privacy and tap on additional settings.
- Now make sure Unknown sources (under Device Administration) are enabled.

- Now visit this link from your Android device and download the Google Assistant APK.
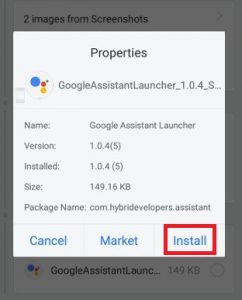
- Open the APK file on your Android device and go through with the whole installation process.
- Now go to the home menu of Google Play Store and search for “Google App”. Make sure you update it to the latest version, otherwise this method won’t work.
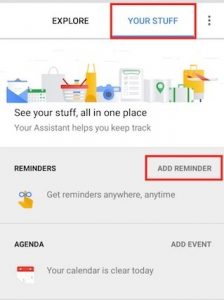
- Launch the Google app and go to Your Stuff ( near the Explore tab). From there tap on Add reminder. It’s just a failsafe in case this method fails.
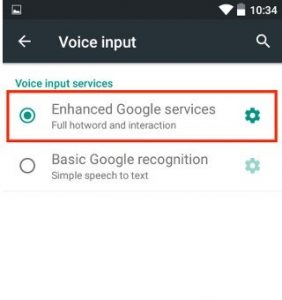
- Android Lollipop ships with Google Now as the default voice input method. In order to allow Google Assistant to take over, we need to do some tweaking. Go to Settings > Language & input and tap on Voice input.
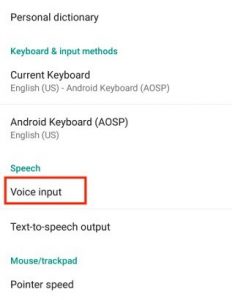
- Once you’re into Voice input, change the default service from Basic Google recognition to Enhanced Google Services.
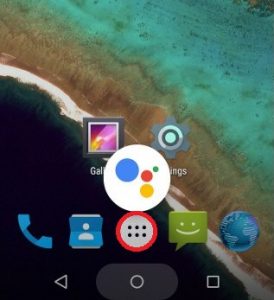
- Your Google Assistant should now be configured. You can start the assistant by long pressing the home button. You can also set it as the default program.
In the event that this method fails, move over to Method 3. Some older smartphones (especially Samsung devices) are known to have problems with sideloading Google Assistant. Luckily, they are compatible with Method 3.
Method 3: Installing Google Assistant via Nova Launcher (Lollipop and beyond)
If you followed the first two Methods to no avail, it probably means you have an older version of Android than Lollipop or a device from Samsung J series. If that’s the case, this method will allow you to install Google Assistant.
This method implies using a launcher capable of adding activity shortcuts to the home screen. We have used Nova Launcher, but feel free to use another equivalent app. Here’s what you need to do:
Note: If you already installed the Google Assistant APK, skip steps 2 to 4.
- Download & install Nova launcher from Google Play Store.
- Make sure Unknown sources (under Device Administration) is enabled.
- Visit this link from your Android device and download the Google Assistant APK.
- Open the APK file on your Android device and go through with the whole installation process.
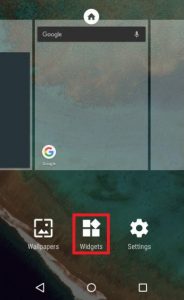
- With Nova as your default launcher, long press anywhere on the home screen and tap on Widgets.
- Under Nova Launcher, tap on the Activities button.
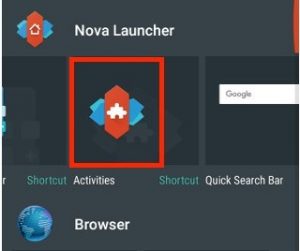
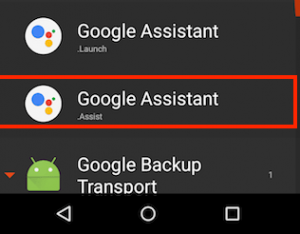
- Now you should see a list of Activities. Scroll down until you see a Google Assistant Launcher entry. In the event that you spot two entries, tap on the one that has a “.Assist” under it.
- Not the shortcut we needed was successfully created. You can start Google Assistant by long pressing the home button. From there, select Google Assistant. This will also set Google Assistant as the default voice assistant.
Concussion
I certainly hope that you manage to install Google Assistant using one of the methods above. I’m a big advocate of virtual assistants and I believe you will see the power of Assistant the more you use it. In the event that you managed to install Google Assistant using a different method, tell us all about it in the comment section below so we can spread your knowledge.
Are the 2nd and 3rd methods supposed to work also for 1GB RAM devices?