How to Enable a Contact Folder as an Outlook Address Book
Besides the default Contacts folder, Outlook allows the creation of multiple contacts folders. If you have a lot of connections in Outlook, it’s a good idea to sort them properly by creating multiple contacts folders and enable them in your address book.
This makes a lot of sense if you want to separate your workgroup or business contacts from personal contacts like friends or family members. Another idea is to create a separate folder for contacts that you don’t reach that often and leave the people that you converse with frequently in the main Contacts folder.
In Outlook, the Address book will include the main Contacts folder and any other folders you might add. The contacts from it are being automatically fetched when you click the To box and start typing a button.
In normal conditions, when you create a new contacts folder inside the Contacts Pane, the new folder will automatically be added to the address book. But that’s not always the case. Sometimes, you’ll see that some contact folders displayed in the Navigation Pane will not show inside the Address book. To help you resolve this issue, we have created a guide on enabling a contact folder as an address book.
If you’re looking for a way to make some order in your contact lists, keep reading below. You’ll find detailed guides on creating a new contact folder in Outlook and enabling it as an Address Book. Let’s begin.
Note: The steps below are compatible with every Outlook version from Outlook 2007 to Outlook 2016.
How to create a new Contacts folder in Outlook
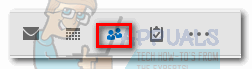
- In the left-hand side of Outlook, click on the Contacts icon to bring forward the Contacts Pane.
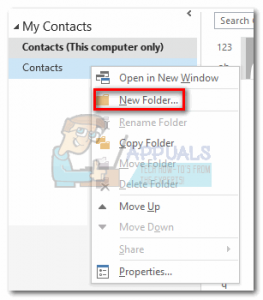
- Right-click on Contacts and select New Folder.
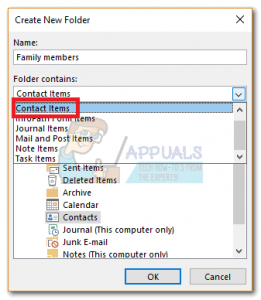
- Insert the name of your contact folder under the Name field, then tap the drop-down menu under Folder contains and select Contacts items.
- Now, click on Contacts to specify where you want the folder placed and click OK.
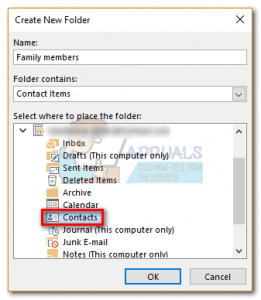 Note: Keep in mind that you could have placed the folder in any other parent folder, not just Contacts. If you want to place the folder in the root path, select your email address at the top of the list.
That’s it. Your contact folder is now created.
How to Enable a folder as an Address Book in Outlook
Now that you created the new contact folder, it should automatically get recognized as an Address book if you click the TO button when you’re typing a new message. But if it doesn’t, you’ll need to take some extra steps. Here’s what you need to do:
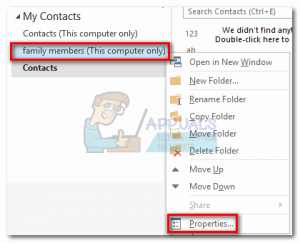
- Click the Contacts icon in the bottom-left corner of Outlook.

- Right-click on the folder that isn’t getting recognized as an address book and select Properties.
- Once you’re inside New Contacts Properties, click the Outlook Address Book tab and make sure that the box next to Show this folder as an email Address Book is enabled.
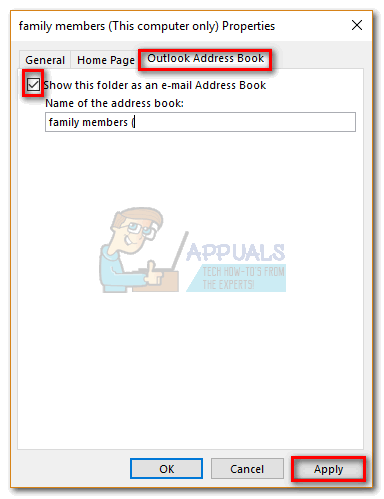
- Insert a name for your Address book and hit Apply to enable this folder as an Outlook Address Book.
kevin
i can’t get started on developing a distribution list
glennemail list