Elden Ring Won’t Install on Console and PC? Here’s the Fix
Elden Ring is one of the fastest-selling triple-A game titles that got released this last year, but technical issues affecting the launch have left a lot of people that preordered the game very disappointed. Apparently, there’s an ongoing issue affecting both consoles and PC builds that prevents users from installing the game.

We’ve investigated this issue thoroughly and we realized that this problem might be rooted in several different scenarios (depending on the platform that you’re using when attempting to play the game).
Here’s a list of potential culprits that you should be aware of:
- Installation is busy installing Data0.bdt – If you’re attempting to install the game on PC and the installation always seems to get at installing ‘Game/Data0.bdt’ don’t be so quick to retry the installation. Data0.bdt is by far the largest file of the game installation, so if you’re using a traditional HDD, you can expect the installation to take several minutes (10+ minutes in some cases) until this file is copied.
- Day 1 physical copy is partially incompatible with Windows 11 – As it turns out if you’re trying to install the game from a physical copy on PC and you’re using Windows 11, you might be suffering from an incompatibility issue that’s only affected Windows 11 users. In this case, you should be able to bypass the problem by forcing the installer to open in incompatibility mode with Windows 8 or Windows 7.
- Enable the game installation RAM limited – If you’re using a PC with limited RAM (8 GB or less) and you’re installing the game from a physical copy, chances are all the available resources end up being allocated to the installation and your computer ends up freezing. In this case, use check the RAM Limiter option at the beginning of the installation in order to prevent this from happening.
- Antivirus interference – If you’re experiencing this issue on PC, you should know that the problem can also occur due to some kind of interference caused by your Antivirus that ens up interfering with the installation. In this case, you should be able to fix the problem either by temporarily disabling the antivirus (prior to the installation) or by whitelisting the game installer.
- Temporary file glitch – As it turns out, a lot of the problems reported on consoles (Playstation and Xbox) are rooted in some incorrectly passed temporary files that end up affecting the game installation. This only seems to affect people with preorders and can be fixed by performing a power cycle procedure on your console.
- Corrupted game file – If you’re experiencing this issue on PC after the initial Steam installation was interrupted, don’t try to reinstall the game from the game listing as you’ll likely become stuck on the same point. Instead, deploy an integrity check via Steam’s settings.
- Console installation bug – In case you’re experiencing this issue on the console, make sure the installation was not attempted at a time when your console was in rest mode. If it was, uninstall the game and repeat the installation while making sure your console does not enter rest mode during the installation.
Now that we went over every potential cause that might trigger this installation problem with Elden Ring, let’s go over a series of fixes that other affected users have successfully used to get to the bottom of this issue.
1. Wait until the installer unfreezes (PC Only)
If your Elden Ring installation seems to always get stuck at Game/Data0.bdt while attempting to install on PC, don’t be so quick to stop the installation and repeat it.
We’re getting a lot of user reports signaling that they fixed the installation simply by waiting as the installation eventually unfreezes for them.
Keep in mind that Data0.bdt is the biggest game file that you’ll find inside the Elden Ring installation folder. It’s a big file, so it will take some time for the file to be copied successfully.
Your installer might look like it froze while Data0.bdt is being copied, so just sit tight and leave it installed.
Note: This scenario is much more likely if you’re using a traditional HDD instead of the newer SSD. The read / write speeds on an HDD are much slower, so the installer will take much more time to install the big data files.
Allocate at least 20 minutes and see if the installation proceeds any further. If it still shows that it’s installing Data0.bdt after more than 20 minutes, or you’re experiencing this issue on a console, move down to the next potential fix below.
2. Force the installer to work in Compatibility mode (if applicable)
In case you get this issue on a PC with Windows 11 while attempting to install Elden Ring from a physical copy, it’s very likely that you’re dealing with a compatibility issue that countless other gamers are currently experiencing.
As it turns out, physical day 1 copies of Elden Ring are not fully compatible with Windows 11. There’s a weird glitch that prevents the installation from completing on certain versions of Windows 11 (particularly N versions).
Note: This does not refer to digital purchases, just physical ones.
But according to a lot of affected users, you should be able to bypass the problem completely by customizing the launching options of the game setup in order to run in compatibility mode with Windows 7 and Windows 8.1.
If you’re using Windows 11 and this scenario seems like it could be applicable, follow the instructions below for step by step instructions on forcing the Elden Ring installer to work on Windows 11:
- First things first, start by inserting the physical disc of Elden Ring in your PC and wait until your reader identifies it.
- Once the Elden Ring DVD appears inside File Explorer, close the autorun window if it appears. Instead, open File Explorer, right-click on the Elden Ring disc and choose Open in new window.
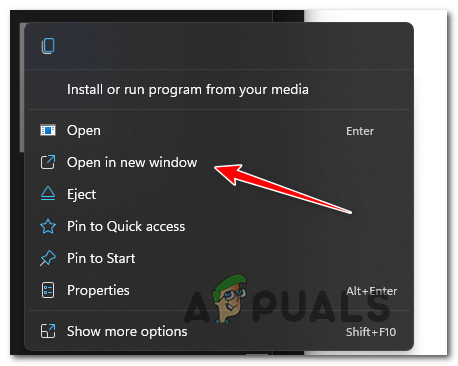
Open in a new window - Next, once you’re inside the game folder, look for the setup.exe and right-click on it.
- From the context that just appeared, click on Properties.
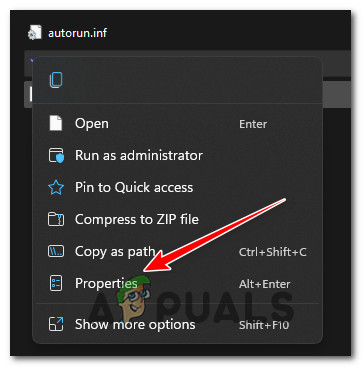
Accessing the Properties screen - Once you’re inside the Properties screen, access the Compatibility tab from the menu at the top, then check the box under Compatibility mode and select Windows 7 from the associated context menu.
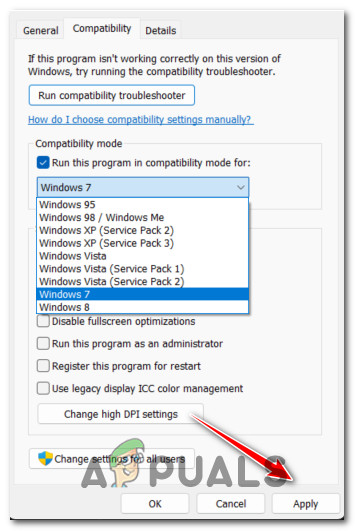
Applying the new Compatibility mode settings - Once these modifications have been operated, double-click on setup.exe once again and see if the installation is successful this time around.
In case the same kind of issue is still occurring, move down to the next potential fix below.
3. Use the RAM limiter (if applicable)
If you’re using a PC with limited available RAM (8 GB or under), there’s a very big chance that the installation gets stuck because all the available resources are concentrated for the installation and the OS ends up freezing.
Fortunately, FromSoftware has through this and included a solution that will allow you to prevent all the available system resources to become allocated to the installation of Elden Ring.
If this scenario is applicable and you’re using a low-end PC, check RAM Limiter at the initial Elden Ring installation screen. This option will ensure that the installation won’t end up freezing your PC.
If this method was not applicable or you’re experiencing the installation issue on a different platform (or when installing a digital copy of Elden Ring), move down to the next method below.
4. Disable, Uninstall, or Whitelist Elden Ring Files in AV (if applicable)
As it turns out, there are certain AVs that are known to interfere with the installation of Elden Ring files on PC. BitDefender is often mentioned as an AV that is causing this type of issue on Windows 11.
The widely accepted explanation is that some AV suites are apparently messing with the setup.exe file of Elden Ring which ends up affecting the game installation.
Important: This particular issue is mainly reported to occur with 3rd party Antivirus suites. We haven’t been able to find any user reports confirming this issue for Windows Security.
If you find yourself in this scenario and your antivirus is to blame, there are 3 main ways that you can use to fix the issue:
- Disable the Real-time protection of your AV
- Set a whitelisting rule for the 3rd party antivirus
- Uninstall the interfering 3rd party antivirus suite.
To cove every potential resolution, we’ve created 3 different sub-guides that will cover the full instructions for every fix.
Whitelist Destiny’s executable inside your Antivirus
The ideal way to deal with a genuine 3rd party AV interference is to access your antivirus settings and establish an exception rule that excludes the main Elden Ring setup executable from any security scans.
Of course, the exact instructions for establishing a whitelisting rule will be different across every antivirus tool You can search online for specific instructions on how to do this according to the AV that you’re using.
However, if you’re using BitDefender (the AV that most people point their fingers at), follow the instructions below to establish a whitelisting rule for Elden Ring setup.exe:
- Open up BitDefender or bring it forward in case the tool is already running in the background.
- Next, click on the Protection icon from the vertical menu on the left.
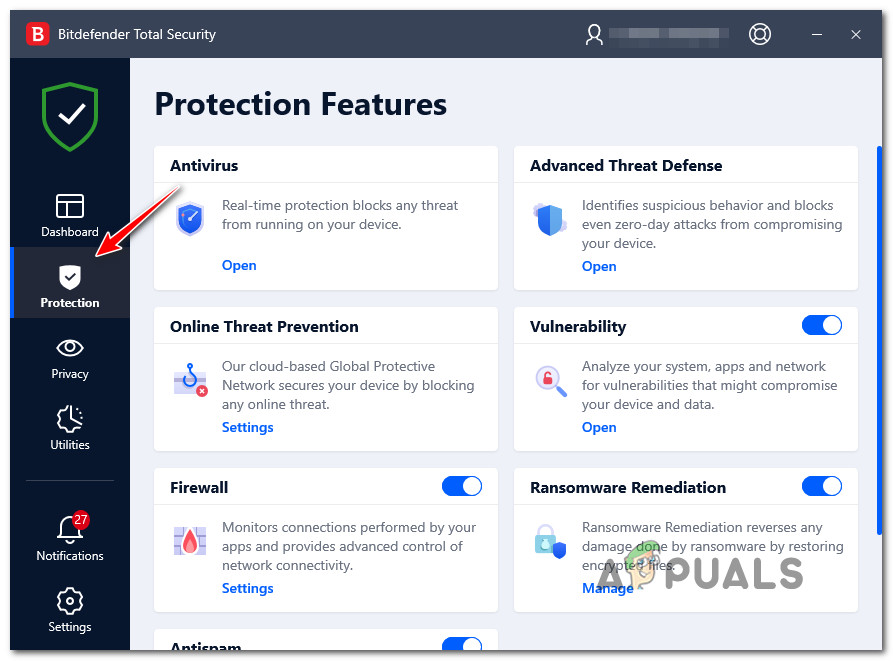
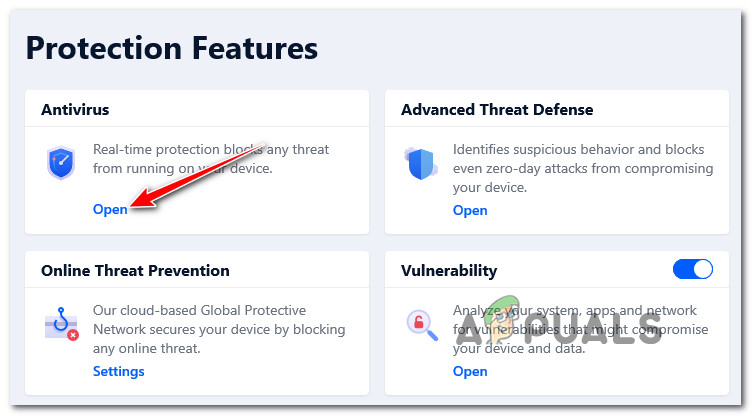
Accessing the Protection tab - Once you’re inside the dedicated Protection menu, click on the Open hyperlink under Antivirus.
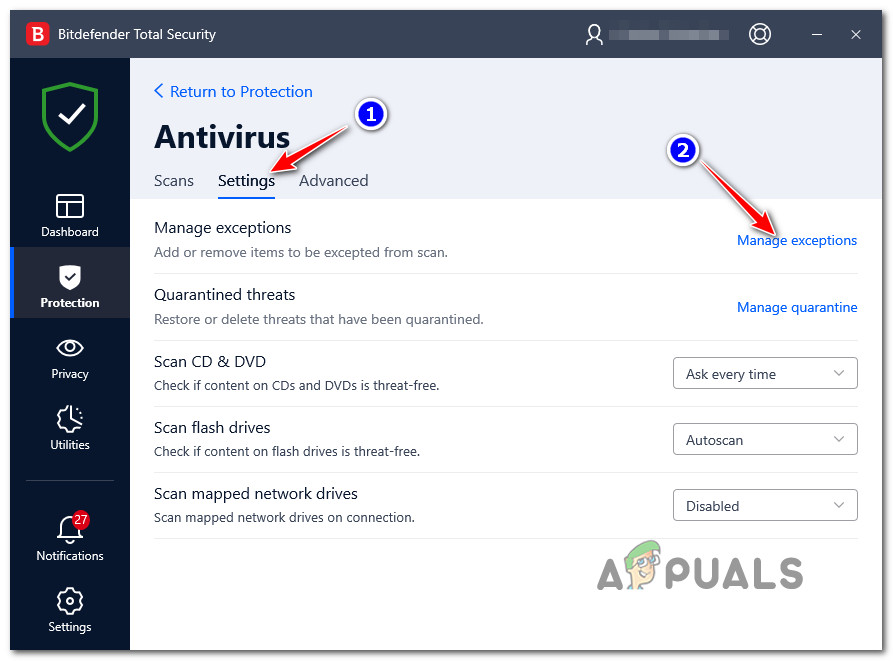
Open the Network Protection features - Inside the Antivirus tab of BitDefender, click on the Settings menu, then click on the Manage exceptions hyperlink.
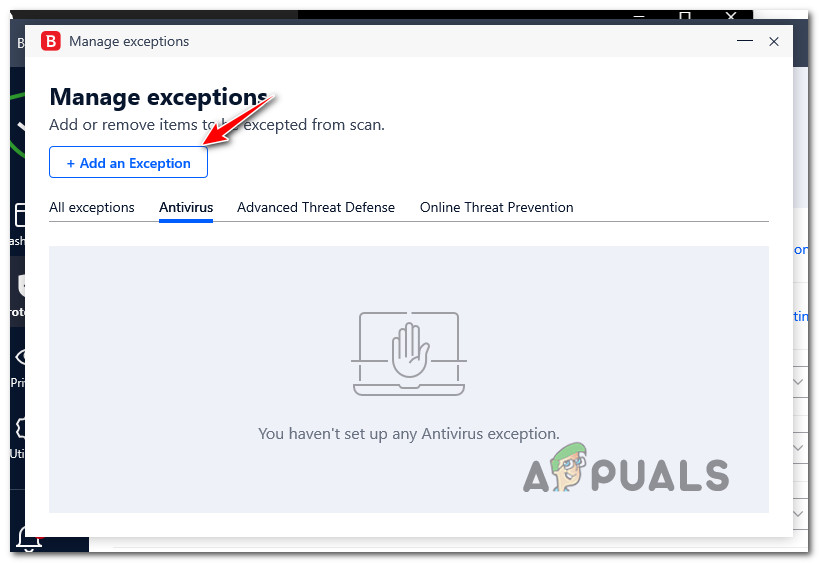
Managing Exceptions - Next, ensure that the Antivirus is selected as the main directory, then click on Add an Exception.
Adding an exception in BitTorrent - Next, click on the browse icon, then browse to the disc location where you setup.exe is located and select the entire folder and click OK.
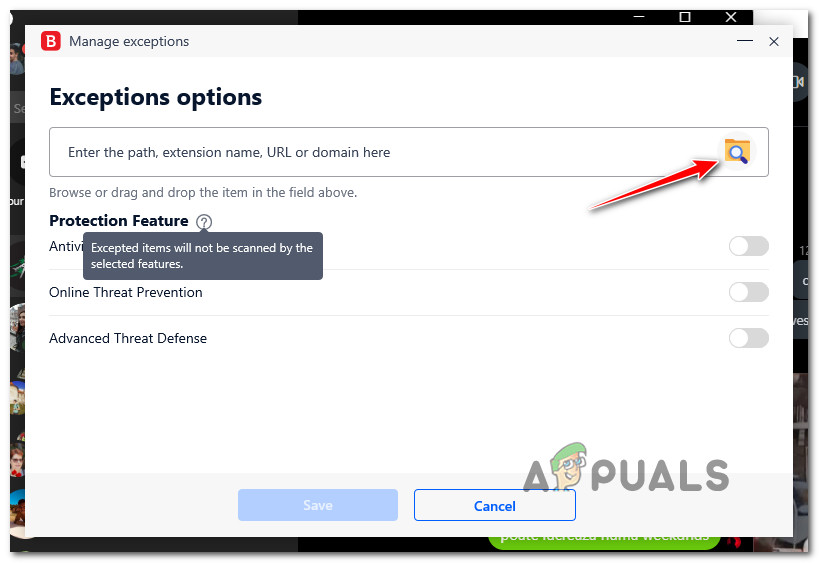
Exceptions options - Next, click Save to make the exception rule permanent in BitDefender.
- Attempt to install Elden Ring once again and see if the problem is now fixed.
Disable the Real-time protection of your AV
Perhaps the quickest fix (if your antivirus is to blame) is to simply disable the real-time protection. This is not the ideal resolution, but it’s certainly the quickest fix if your AV is the root cause of your Elden Ring installation issues.
Note: Instructions for disabling the real-time protection of your AV antivirus will of course be different from tool to tool, but in the vast majority of cases you can turn this feature off by right-clicking on the AV icon and looking for an option to disable the real-time connection.

It’s important to remember that with other AV suites like BitDefender, you will actually need to access the Advanced Settings menu in order to be able to disable the real-time Antivirus shield.
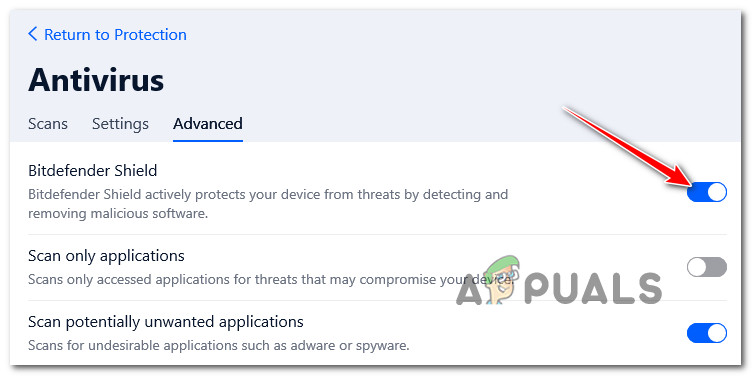
After you successfully ensure that the real-time protection is disabled in your 3rd party antivirus, run the installation executable of Elden Ring once again and see if the problem is now fixed.
Uninstall the interfering 3rd party antivirus suite
If the first two sub-guides we’re not effective for you, the only course of action left at your disposal is to uninstall the interfering 3rd party antivirus completely via the Programs and Features screen.
Follow the instructions below to uninstall the antivirus that you suspect might be interfering with the installation of Elden Ring:
Note: The instructions should be universal. They will work on every recent Windows version.
- Start by pressing Windows key + R to open up a Run dialog box. Next, type ”appwiz.cpl’ and press Enter to open up the Programs and Features screen.
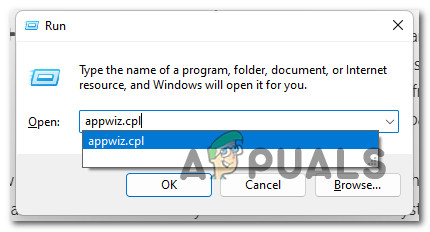
Open up the Programs and Features menu - Inside the Programs and Features screen, move over to the section on the right, scroll down through the list of installed programs and locate the 3rd party AV suite that you’re attempting to uninstall.
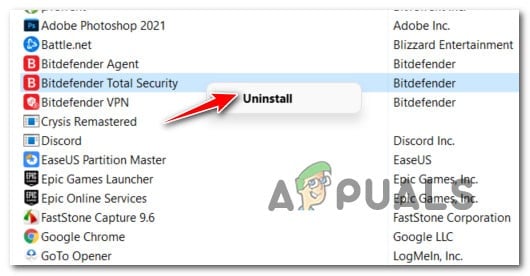
Uninstalling the Antivirus suite - Inside the uninstallation screen, follow the on-screen prompts to complete the uninstallation.
- Attempt to install Elden Ring once again and see if the installation still gets stuck with the same symptoms.
If the problem is still not resolved, move down to the next potential fix below.
5. Restart PC or Power-Cycle your console
If none of the methods above have proven to be effective in your case and you’re experiencing this problem on a console (Xbox or PlayStation) or PC, the next step should be to investigate if the temporary file cache is causing this problem.
Note: The instructions for power-cycling your console will be different from platform to platform, so we’ve created a series of sub-guides that will walk you through the exact steps. If you’re experiencing this issue on PC, your job is easier since you only need to do a restart.
From the sub-guides below, pick one of the guides below to power-cycle your PC, Playstation 4, Playstation 5, Xbox One, or Xbox Series S / X console:
Restart your PC
If you’re experiencing this issue while attempting to install Elden Ring on PC, the only thing you should do is perform a simple restart and retry the installation once the next startup is complete.
To do this, click on the power button, then select Restart from the available power options.
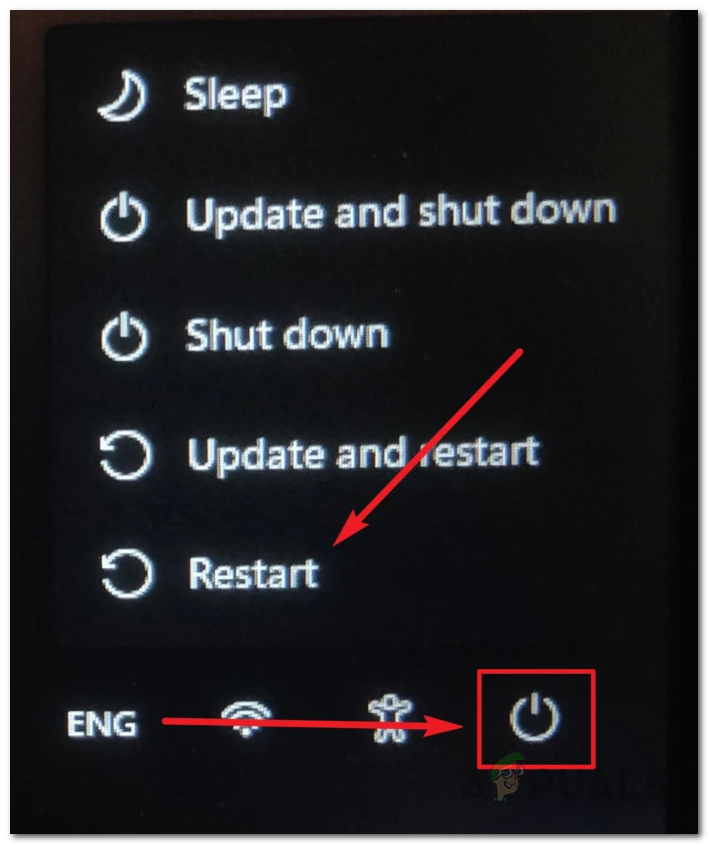
Once the next restart is complete, see if the installation is now completed with no issues.
Power Cycle Xbox One / Xbox Series S
Power-cycling your Xbox One or Xbox Series X/S console is quite different than on PlayStation because you’ll be required to hold a physical button pressed for 10 seconds or more in order to trigger a power cycle procedure.
Here’s how to do this:
- Start by making sure that your console is fully-powered on.
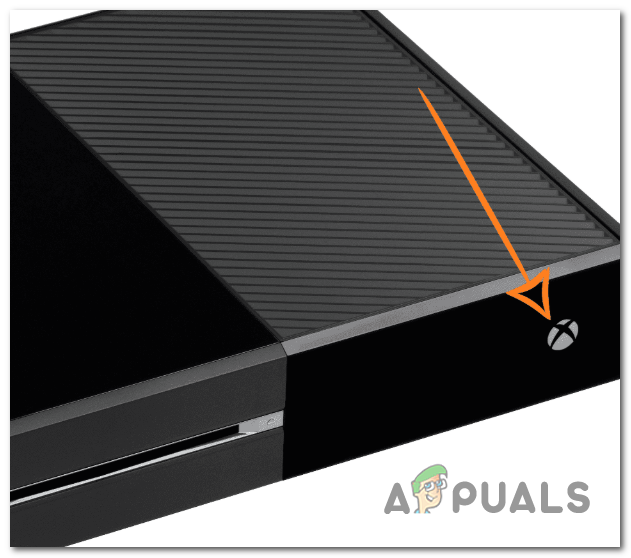
- Press and hold on the power button (on your console, not your controller) for about 10 seconds or until you notice the front LED starts flashing intermittently.
Power cycling the Xbox machine - Wait for more than one minute and give your console enough time in order to drain themselves before you attempt to start your console back conventionally.
- While you wait, make sure to physically disconnect the power cord from the power cord.
- Next, boot your console back up again and see if you spot the longer startup animation sequence.

Startup animation Note: If you do get to see the longer animation format, it’s proof that the power-cycling procedure was successful.
- Once your console boots back up, attempt to install Elden Ring once again and see if the problem is now fixed.
Power Cycle Playstation 4
If you’re still on PlayStation 4, power-cycling your system is to give the power capacitors enough time to clear any cached data.
Here’s how to do this:
- Ensure that your Playstation 4 system is on and not running any game.
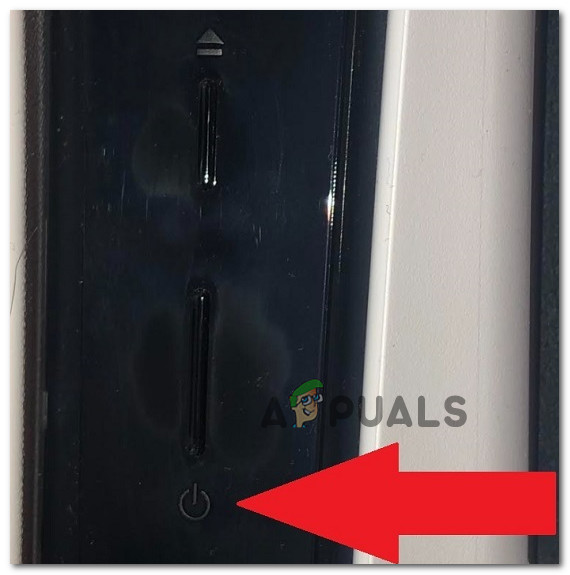
- Press and hold on to the power button on your console.
 Power cycling the PS4 console
 - Release the power button when you hear the console fans turning off.
- After you can’t hear any sound coming from your console, go ahead and physically unplug the power cord from the outlet.
- Wait for a minute or so before allowing the power capacitors to drain completely.
- Finally, connect your console back to the power source and boot it up conventionally.
- After your console boots back up, attempt to reinstall the game once again and see if the issue is now resolved.
Power Cycle Playstation 5
A power-cycle procedure on your Playstation 5 console is simple thanks to the UI overhaul. In this case, you need to do is press and hold on to the power button until the console is fully turned off.
Important: As an extra precautionary layer, disconnect the power cable to allow the power capacitors to drain themselves.
Here’s what you need to do:
- Make sure your console is turned on and in idle mode.
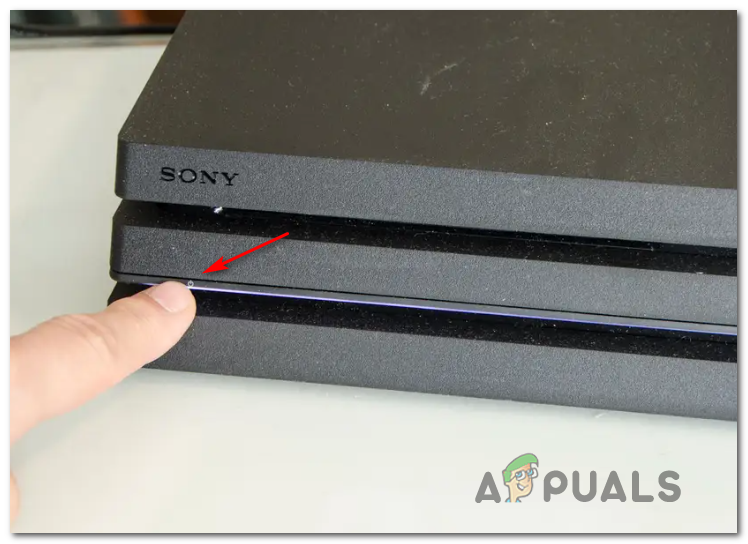
- Press and hold on to your Playstation 5 power button (on your console) until you hear the main fan turning off.
Pressing the power button on PS5 Note: Don’t short press this button because you’ll end up triggering a sleep cycle instead.
- When the power light stops flashing, remove the power cable and leave the system like this for 2 minutes to ensure that the power capacitors are completely drained.
- After the 2 minutes pass, connect the power cable once again boot your console normally.
- Attempt to reinstall Elden Ring once again and see if the issue is now fixed.
If the problem is still ongoing even after you restarted or power-cycled your gaming machine, move down to the next method below
6. Verify Elden Ring files on Steam (PC Only)
If you’re encountering this issue on Steam after a failed installation, chances are an integrity check will fix it.
A few players have reported that this error could be caused by some corrupted files located inside the game installation folder. Fortunately, there are a few ways to verify them, and if the files are corrupted or missing, they will be reacquired or replaced with healthy equivalents. This method has helped a lot of players who encountered this issue.
Here are the steps on how to verify the integrity of the Elden Ring game files:
- Open the Steam app and go to the game’s library page.
- Search for Elden Ring on the left-sided list of games, then right-click on it and open the Properties menu.
- After that, click on Local files, on the left side section of the screen.
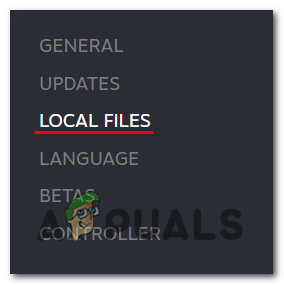
Accessing the Local Files - Then, click on Verify integrity of game files to start the verification, and wait until it is complete.
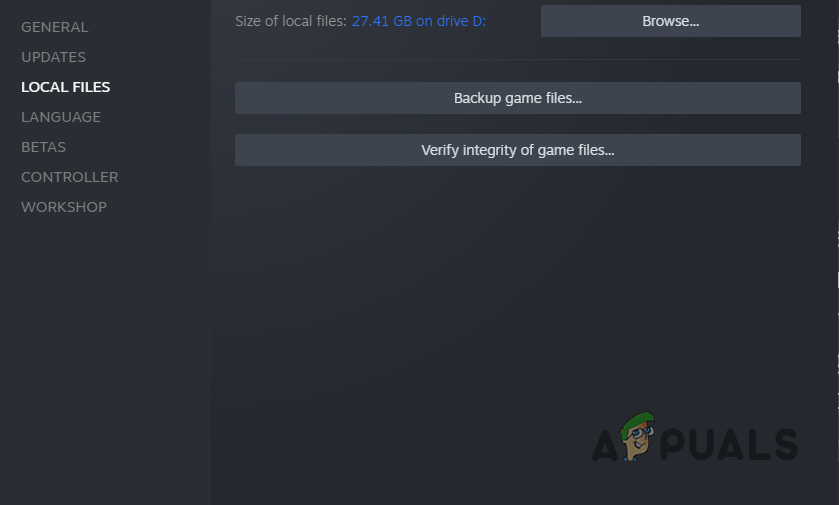
Verify the integrity of the game - After the verification is done, a message will appear on your screen and it will tell you if it finds any corrupted files. If there were files that failed to validate, Steam will reacquire them automatically.
If the problem is still not fixed, move down to the final fix below.
7. Reinstall Elden Ring without putting the console in rest mode (if applicable)
If none of the methods above have proven to be effective in your case, you should start troubleshooting against a potential corruption issue that is affecting the game files.
Several users that we’re also unable to launch the game have confirmed that reinstalling it finally fixed the problem in their case.
As it turns out, this type of issue is created when the installation is performed while the Xbox or Playstation 5 console is is in rest or hibernation mode.
To help you avoid this issue, we’ve created a series of sub-guides that will guide you through the process of reinstalling the game regardless of what console you’re using.
Follow the applicable sub-guide below and see how to reinstall the Elder Ring and make sure that the installation completes while the console does not enter rest or hibernation mode.
Reinstall the game on PlayStation 4
If you’re on a Playstation 4 system, you’ll need to uninstall the game from the Library menu, then redo the installation from the same location (but from a different tab). During this procedure, make sure your console doesn’t enter hibernation mode.
Here are the full instructions on doing this:
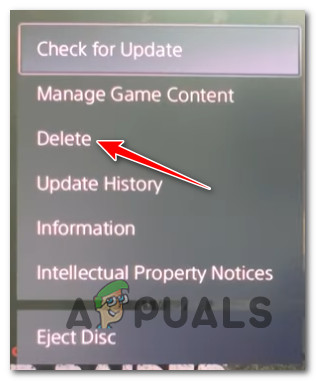
- From the home screen of your PlayStation 4 system, swipe through the games that you have installed and select Elden Ring.
Note: It should appear even if the installation is incomplete. - With the game selected, press the Options button on your controller, then select Delete from the context menu that just appeared.
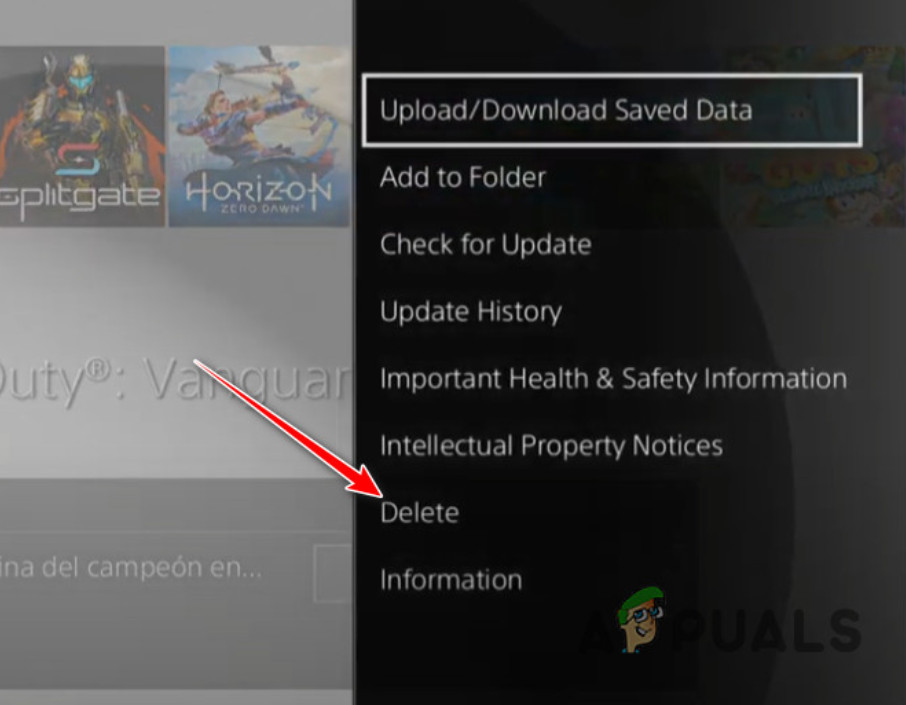
Deleting the game installation - After the game is uninstalled and you’re back to the home screen of your PlayStation 4 system, use the left thumbstick on your controller to swipe left until you find the Library menu.
- Next, then press the X button.
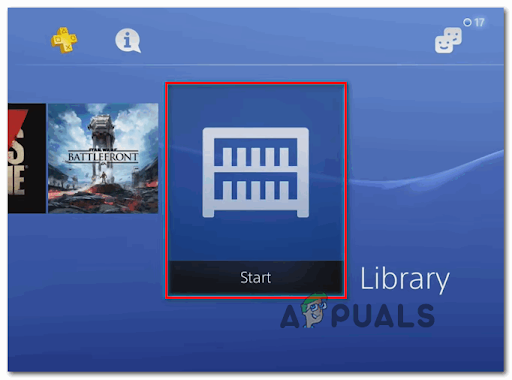
Accessing the library menu - Inside the Library menu, use the vertical menu on the left to select Purchased, then move over to the right-hand menu and locate the game that you want to reinstall.
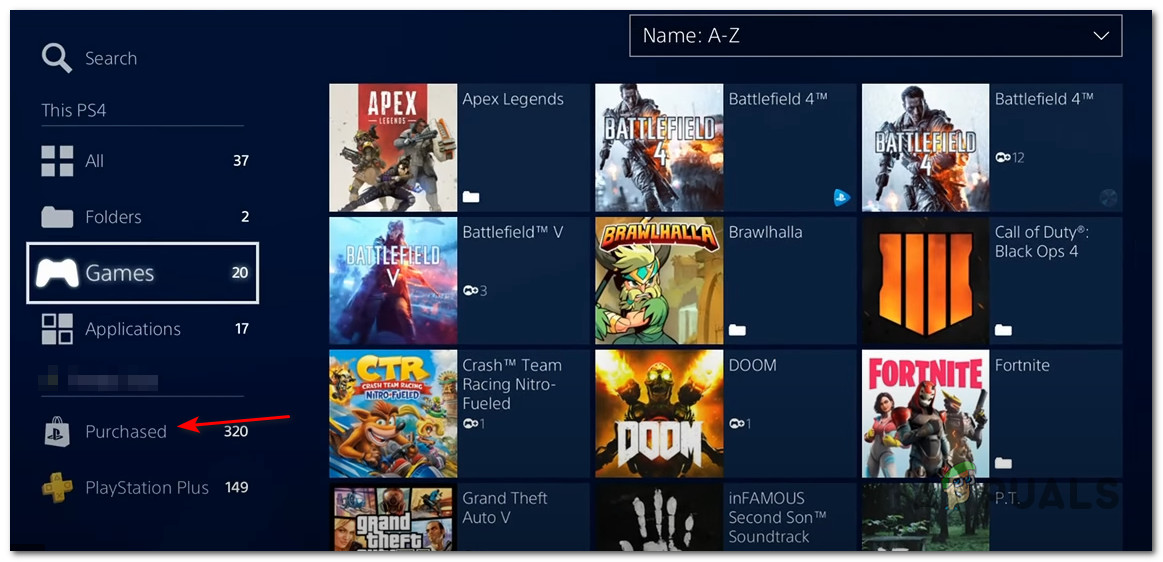
Reinstalling Elden Ring - From the list of items, select Elden Ring and press the Options key and select Download from the context menu, and wait until the game is uninstalled.
- See if the installation now completes successfully, then move down to the next potential fix below.
Reinstall the game on PlayStation 5
Because Sony has revamped the operating system for Playstation 5, the instructions for uninstalling the game and reinstalling it again will be quite different from Playstation 4.
Here’s how to do it:
- From the home screen, use the left thumbstick (or the arrow keys) to select Elden Ring, then press the Options button on your controller.

Open the Options menu - From the context menu that just appeared, select Delete, then confirm the choice and wait until the game gets uninstalled.
Deleting the game - After the game is successfully uninstalled, access the Game Library from the home screen of your PS5 system.

Redownloading Elden Ring - Next, from the Your Collection menu, find and select Elden Ring.
- From the context menu that just appeared, select Download – once you do this, the game will begin installing automatically.
- See if the installation is completed without issues at this point.
Reinstall the game on Xbox One / Xbox Series S & X
Since Xbox One and Xbox Series X pretty much share an identical OS, the steps of reinstalling the game on this system are almost the same.
Here’s what you need to do:
- Press the Xbox button, then use the menu on the left-hand side to select My games & apps.
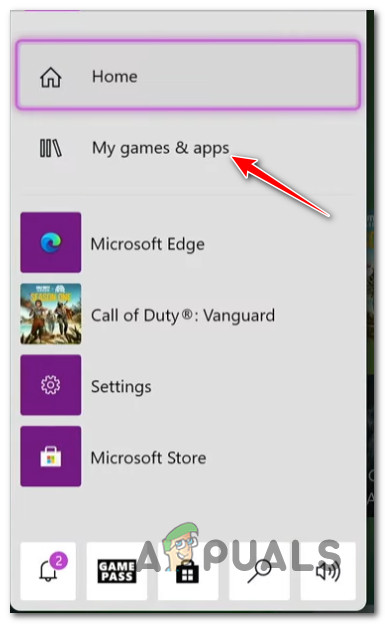
My Games and App - From the next screen, select the Games to tab from the menu on the left and scroll down through your library until you find the Elden Ring installation.
- Next, click the menu button on your controller to bring up the context menu.
- From the context menu that just appeared, access the Manage game and add-ons menu.

Managing the game - From the next menu, highlight the Uninstall all option from the menu on the left.
- Confirm the operation, then wait until the operation is complete.
- Once the game is uninstalled, access your Library from the home screen, then access the All owned games section and re-download Elden Ring.
- See if the installation is complete without issues now.


