How to Easily Draw in Microsoft Word Document?
Draw using Microsoft Word
Microsoft Word is a word processing program that is used for creating professional documents quickly and easily. It is used all around the world for creating letters, tests, assignments, and official documents. Microsoft Word is not limited to only text, but users can also add images and draw in the documents. Most of the time some shapes or freehand drawings are required in documents to make it perfect. However, some new users will have a hard time finding the drawing options in Microsoft Word. In this article, we will provide you methods through which it is easy to draw in Microsoft Word.
Draw Tab Missing in Word?
By default, the draw tab will be missing Microsoft Word. This is disabled by default when a user installs Microsoft Office. However, you can easily enable it by going through the Microsoft Word options. You must enable this before using the pen tools in the below methods. Follow the below steps to enable the Draw Tab in your Microsoft Word:
- Open Microsoft Word by double-clicking the shortcut or searching it through the Windows search feature.
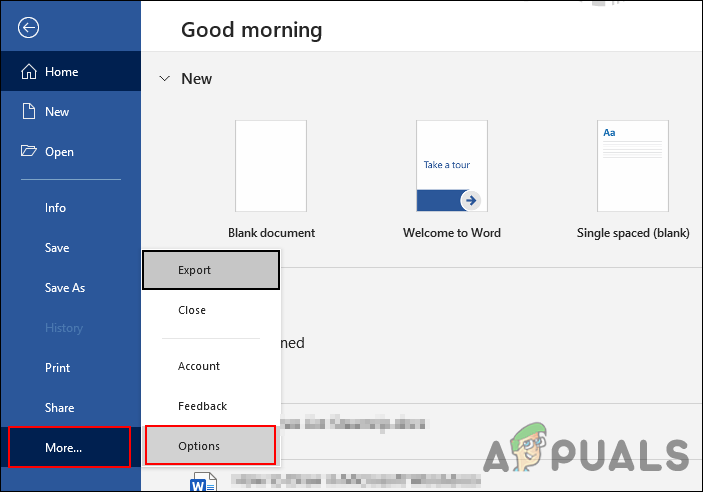
- Click on the File menu in the menu bar and click on the Options in the left pane.
Opening Microsoft Office options - In the Word Options window, click on the Customize Ribbon in the left pane. Now under Main Tabs tick the Draw option as shown in the screenshot.
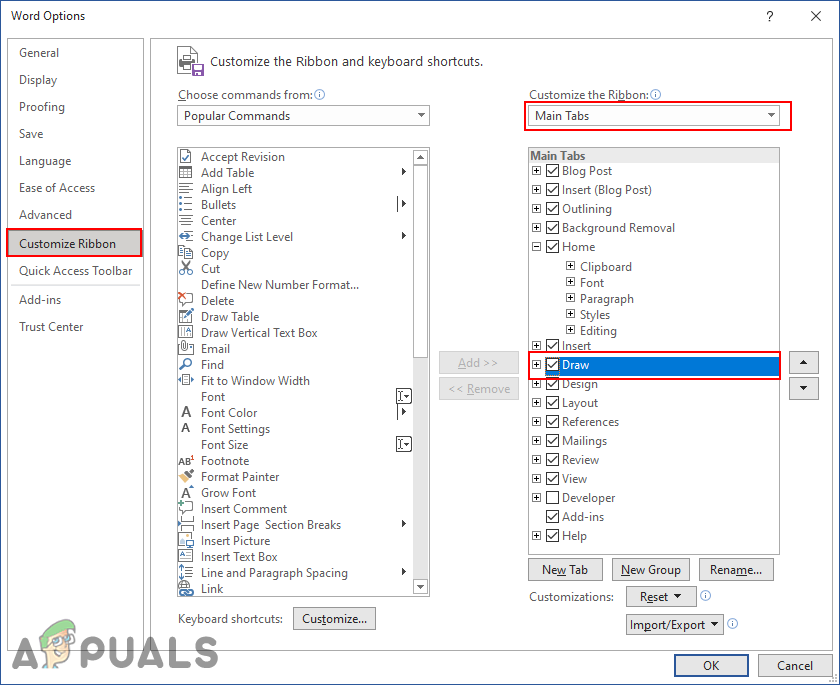
Enabling Draw tab in Microsoft Word - After that, click on the Ok button and now you have the Draw Tab in your Microsoft Office.
1. Using the Shapes to Draw
Shapes in Microsoft Words are pretty useful to draw in the documents. There are many shapes that you can use to draw something that you need. It also provides the freehand and curved shapes through which you can draw something new. Microsoft Word also has the anchor points feature through which you can easily edit any shape accordingly. We are providing you steps through which you can learn how to use the shapes in Microsoft word. Further creativity in the drawings is up to each user.
- Open Microsoft Word by searching it through the Windows search feature. You can also open it by double-clicking the shortcut if available.
- Open a new document or an existing one. Now click on the Insert tab, click on the Shapes option, and choose any of the shapes that you want to draw with.

Inserting Shapes in document - You can also choose some shapes like curves or scribble to draw with them. It works similarly to any other drawing program.
- Click in the document with a mouse and hold if necessary. Then continue to make shapes of any kind that you want.
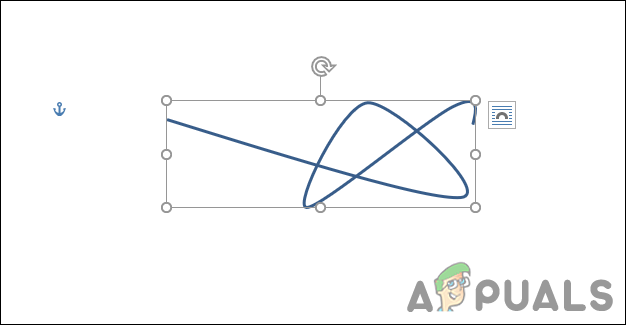
Drawing new shape with curve shape Note: If you are drawing with the curve tool, double-click to complete the shape.
- You can also click on Edit shape and choose the Edit points option under the Format tab. This will bring anchor points in the shape that you can move around to adjust the shape.
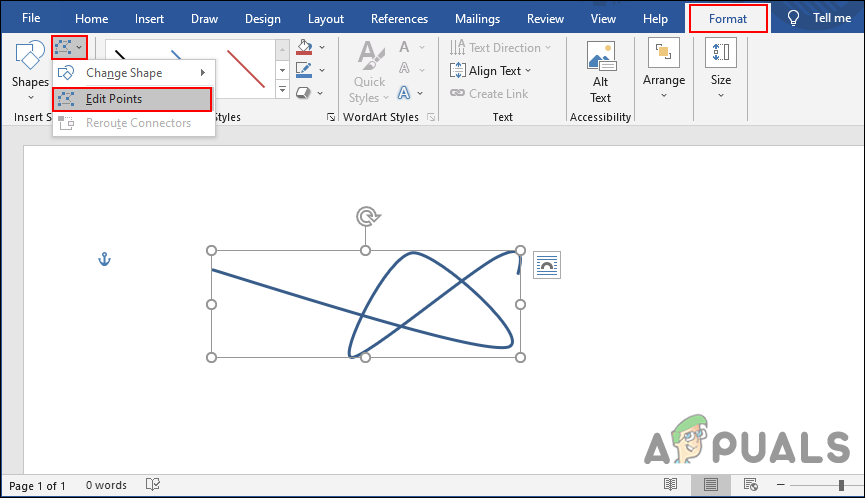
Adjusting shape with anchor points - You can also change the color of the line or fill the shape with any color. There are many more settings under the Format tab that you can use to customize the shapes.
2. Using the Freehand Drawings
Microsoft Word has a Draw tab that many users are unaware of it. This tab is not available in the Tabs menu by default. You have to enable it from the options as we showed at the start of this article. This will bring pens, pencils, and a highlighter for the document. You can draw freehand using this option. Follow the below steps to see how it works:
- Open your Microsoft Word program by double-clicking the shortcut or searching it through the Windows search feature.
- Create a new document or open an existing document in Microsoft Word.
- Click on the Draw tab in the above tabs. Now you can choose one of the following pens or highlighter to draw with it.
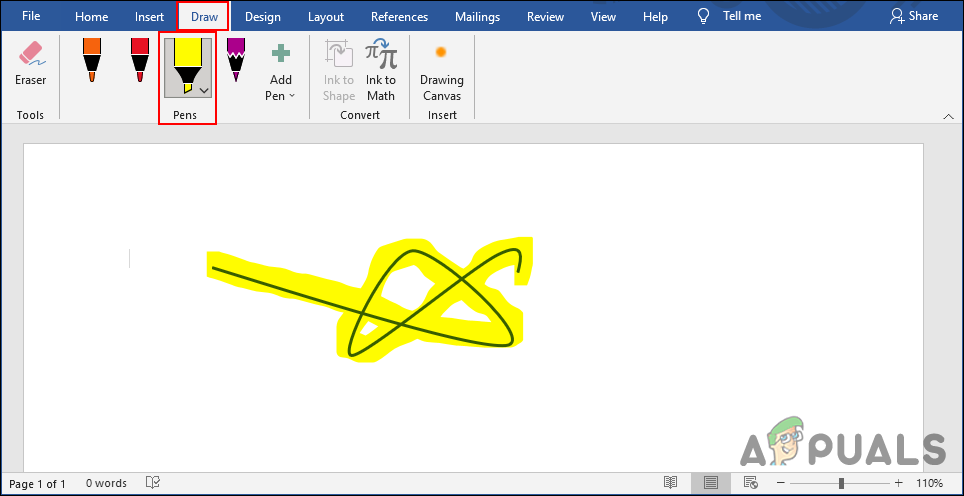
Drawing with pen tools Note: You can also add more pens with different colors and sizes to the menu.
- It also provides an eraser tool to remove any place in the drawing. You can also use the Canvas to draw in it only rather than all the documents.
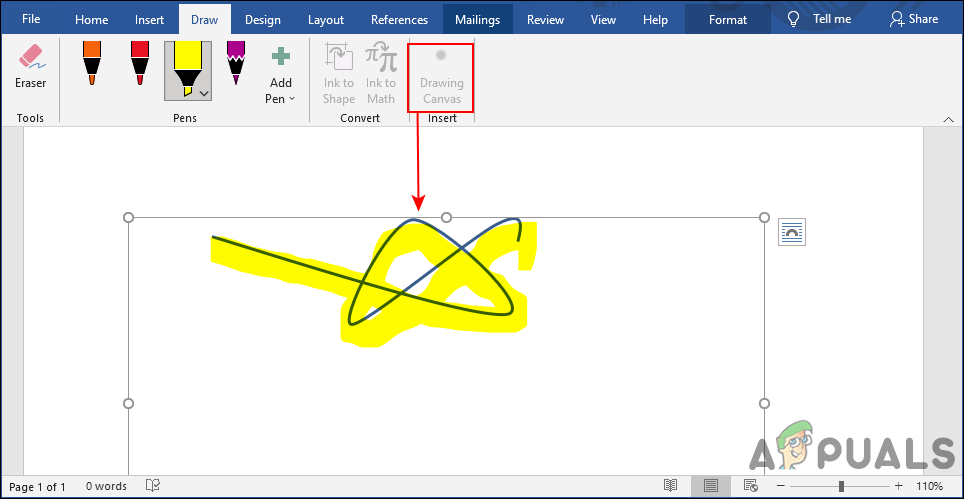
Adding canvas to document - You can also use the Ink to Shape or Ink to Math options. You can draw the math formulas or numbers and it will convert them into text easily. This is also a pretty useful feature in Draw Tab.
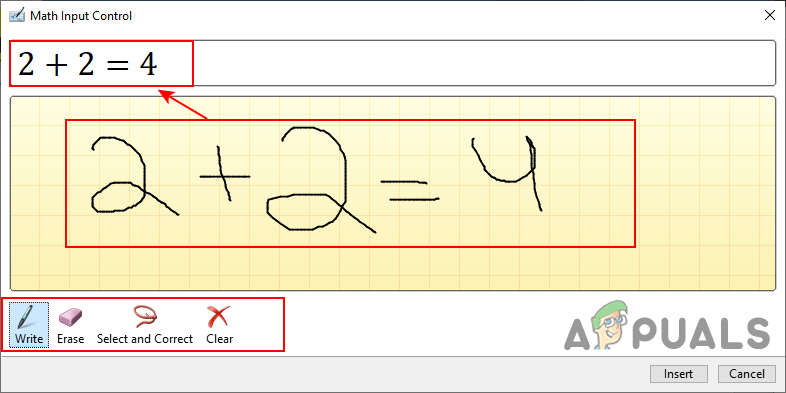
Using the Ink to Math tool


