FIX: DVD/CD Drive Error 19 on Windows 10
Many Windows 10 users report issues with their DVD/CD drives not functioning, with the Device status section on the General tab of the DVD/CD-ROM’s properties in Device Manager displaying Error 19. This issue can appear suddenly or following a system upgrade and is typically caused by either driver issues with the DVD/CD drive or irregularities in the computer’s registry. Below are the most effective solutions to rectify this problem:
Solution 1: Update your DVD/CD drive drivers.
Press the Windows Logo key and R.
Type ‘hdwwiz.cpl‘ into the Run dialog and press Enter to open the Device Manager. Expand the DVD/CD-ROM Drives in Device Manager, then double-click on your DVD/CD drive. Navigate to the driver and click on ‘Update Driver‘.
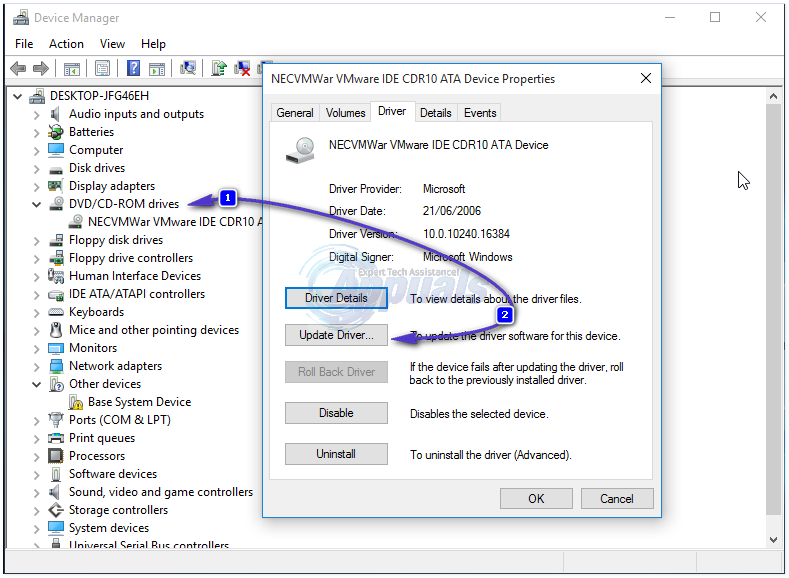
Select ‘Search for update driver automatically‘ and wait for your computer to check for available updates for your CD/DVD drive’s drivers. If updates are available, download and install them.
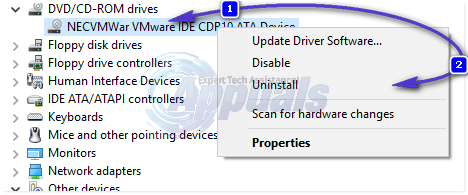
Solution 2: Uninstall your DVD/CD drive.
Press the Windows Logo key + R. Type “hdwwiz.cpl” into the Run dialog and hit Enter to activate the Device Manager. Expand the DVD/CD-ROM Drives in Device Manager. Right-click your DVD/CD drive and select Uninstall, confirm the action if prompted.
Click ‘Action‘ on the toolbar at the top of the window, then select ‘Scan for hardware changes‘.
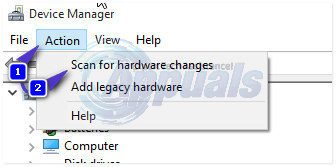
Wait for Windows to detect and reinstall your DVD/CD drive, including its drivers. Upon reinstallation, the drive should reappear in the DVD/CD-ROM Drives section of the Device Manager. Restart your computer and check if the issue has been resolved.
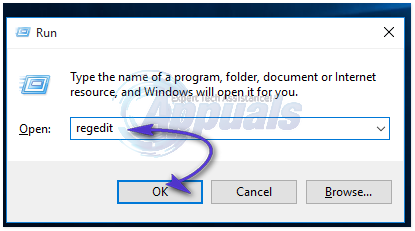
Solution 3: Resolve this issue by modifying the registry.
The most common solution for error 19 on a DVD/CD drive, or any other computer hardware, is to remove specific values from your registry. Press the Windows Logo key + R, type ‘regedit‘ into the Run dialog, and hit Enter to open the Registry Editor.
While this solution is highly effective, remember the registry is a sensitive part of the computer, with an erroneous deletion likely leading to system failure. Therefore, you should backup your registry before proceeding. In the Registry Editor’s top left corner, click ‘File‘, then ‘Export‘, and save the aptly named backup (e.g., ‘RegistryBackup’) on your desktop. This way, if anything goes wrong, you can overwrite the affected registry with the unaltered backup.
In the Registry Editor’s left pane, navigate to the following directory:
HKEY_LOCAL_MACHINE\SYSTEM\CurrentControlSet\Control\Class\{4D36E965-E325-11CE-BFC1-08002BE10318}
Click on the {4D36E965-E325-11CE-BFC1-08002BE10318} key in the left pane to view its contents in the right pane.”
In the content of {4D36E965-E325-11CE-BFC1-08002BE10318}, search for the values named UpperFilters and LowerFilters.
If either or both of these values exist, delete them. Close the Registry Editor and reboot your computer. Upon restart, verify if the issue has been resolved.