How to Fix ‘POST’ DRAM Light on Any Motherboard
- Power On Self Test (POST) verifies PC components during startup. Q-LEDs on modern motherboards indicate issues with CPU, DRAM, VGA, or boot drive.
- If your DRAM light is on, try reseating the memory, disabling XMP, resetting the BIOS, updating the BIOS, or checking if the memory itself is faulty. Other potential culprits include the CPU, power supply, or motherboard.
- To fix POST errors, test each component one by one. Memory issues might be due to other parts like the power supply. If you're stuck, contact your PC vendor for help and possible warranty support.
If the DRAM light (Q-LED) on your motherboard remains lit or flashes, it indicates an issue with your RAM. There can be numerous causes for this error, such as poorly seated memory, incompatible memory modules, or even faulty RAM. Let’s go over these cases one by one:
1) Reseat Your Memory
If you’ve just built your PC, it’s possible that your RAM isn’t in proper contact with the motherboard. To fix this issue, attempt to reseat the RAM sticks, which simply means to remove and then properly insert the memory again.
- Shut down your PC and disconnect it from the wall.
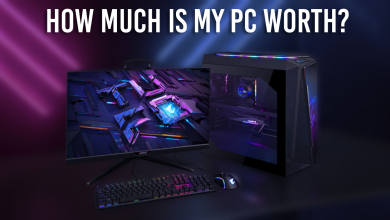
- Open your PC’s case, and atop the motherboard, you should find your RAM modules, typically beside the CPU cooler. (Image Credit: G.Skill)
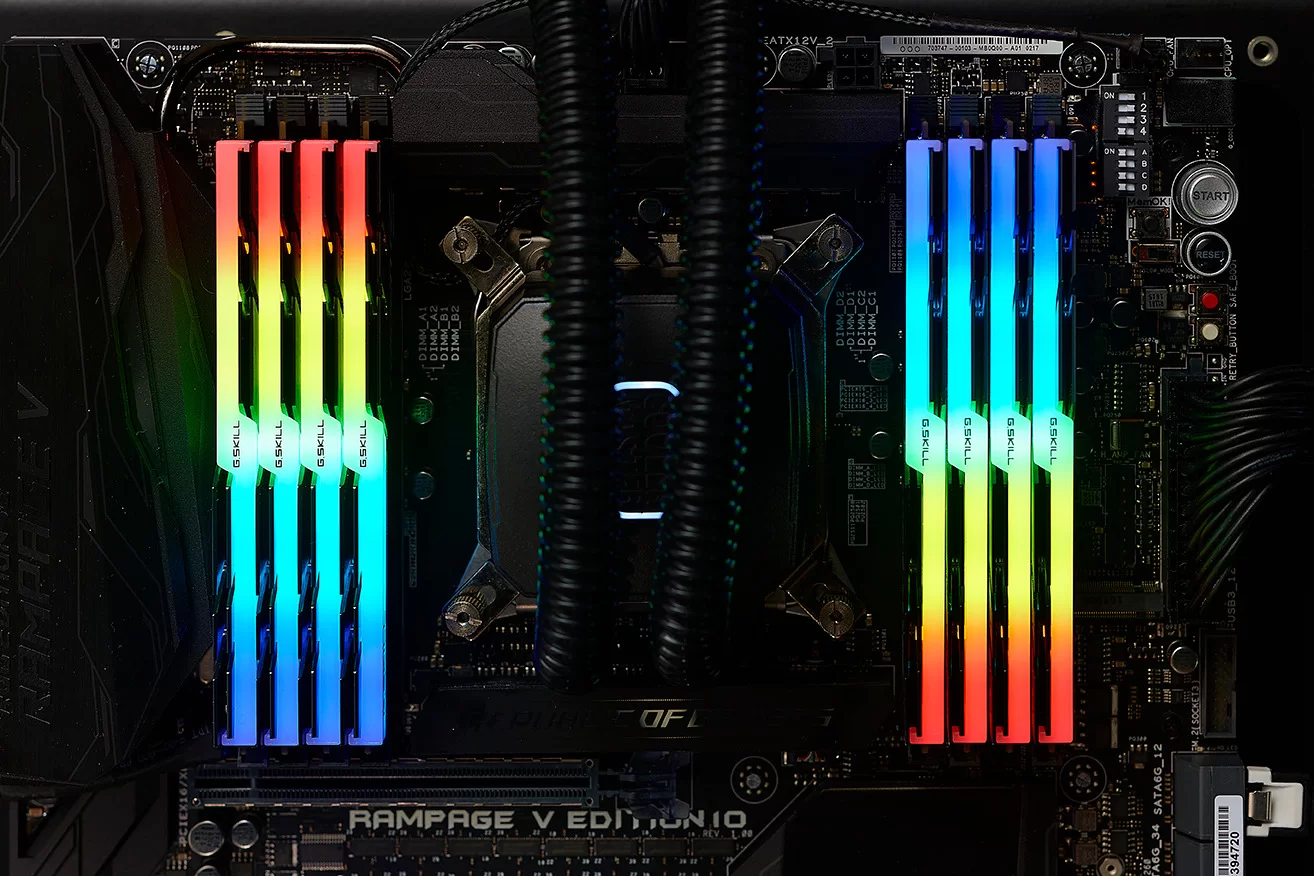
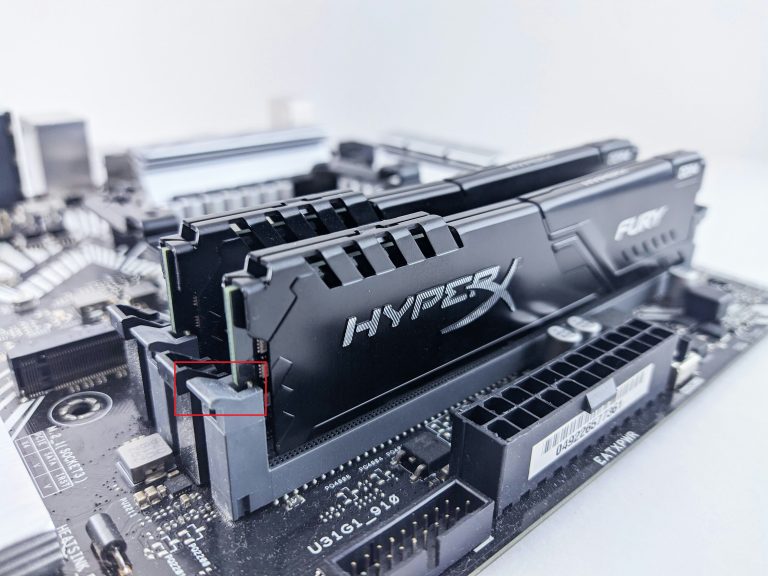
- Disengage the memory retaining mechanism, generally in the form of small clips next to the RAM modules as shown.
- Take the memory modules out and place them in the A2 and B2 slots for optimal results. Make sure you hear an audible click when you reinsert them.
2) Disable XMP
XMP enables memory to run at higher than JEDEC specifications, which is essentially a form of overclocking. This can introduce instability, and disabling XMP can fix any memory issues you’re facing. The option is literally a few clicks away from you.
- Shut down your PC and open the BIOS by pressing the “Delete“, “F1“, “F2“, “F5“, or “F10” keys. Consult your manufacturer’s guide for more details.
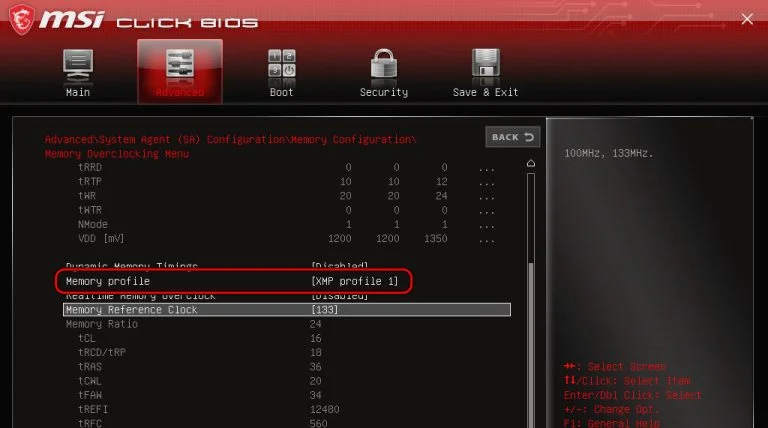
- Since the BIOS/UEFI is different for every vendor, do a bit of research regarding your specific motherboard model and locate the “XMP Settings“, which in our case was under the “Advanced” tab.
- Set the “Memory profile” to “Disable“.
- Another method is to reset your BIOS to factory settings, but you may lose other preferences as well.
3) AM5 Specific “Memory Training” POST Error
If you have a new AM5 build and you’re facing the same RAM issue, it may be that your memory is still in its “memory training” phase. As silly as it may sound, your system’s memory controller needs to learn the various parameters of the DDR5 kit used to ensure stable operation.
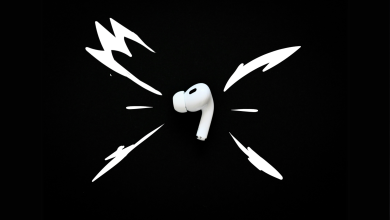
- If you have multiple DIMMs, follow the steps in our reseating guide (Method 1) and place only 1 DIMM in either slot 2 or slot 4. (Image Credit: Crucial)
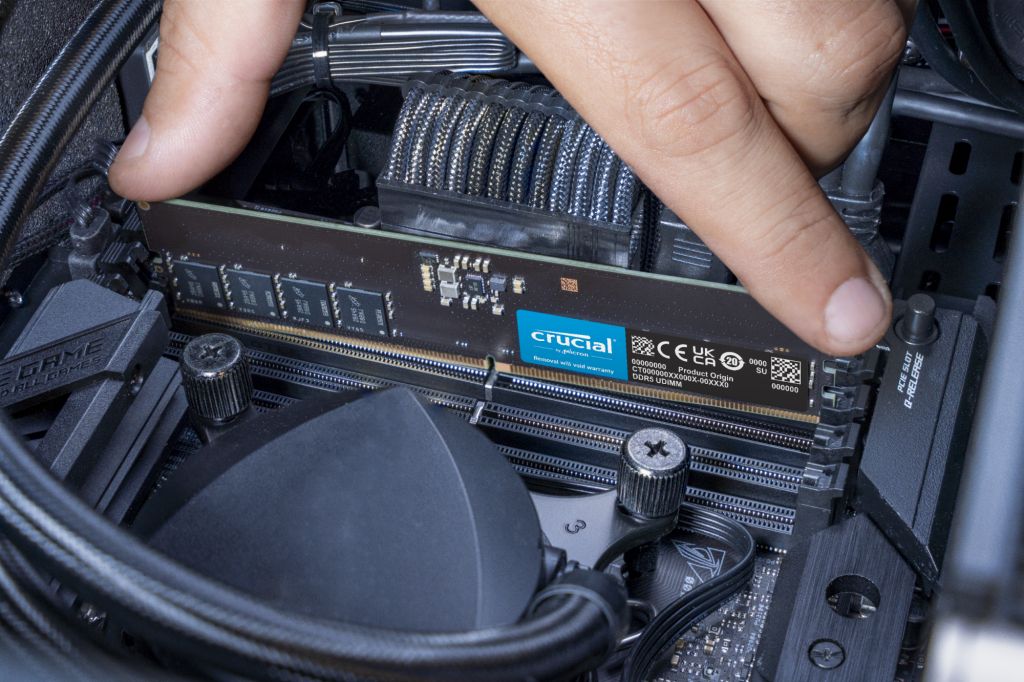
- Boot your PC as you normally would and sit tight for 5-10 minutes while memory learning/training takes place. Afterward, the DRAM light should go out.
- Repeat the same process with your second DIMM.
- Your PC should boot normally.
4) Remove the CMOS Battery / Reset BIOS
Resetting the BIOS by removing the CMOS battery can resolve DRAM issues. To reset your BIOS, follow these steps:
- Turn off your PC, disconnect it from the wall, and take necessary ESD measures.
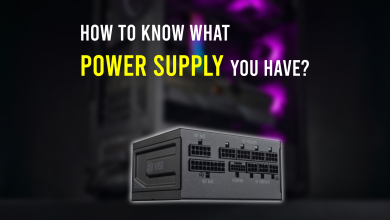
- Open your PC’s case and locate the motherboard, where you should find a CMOS battery beneath the GPU. If not there, refer to your board manufacturer’s guide.
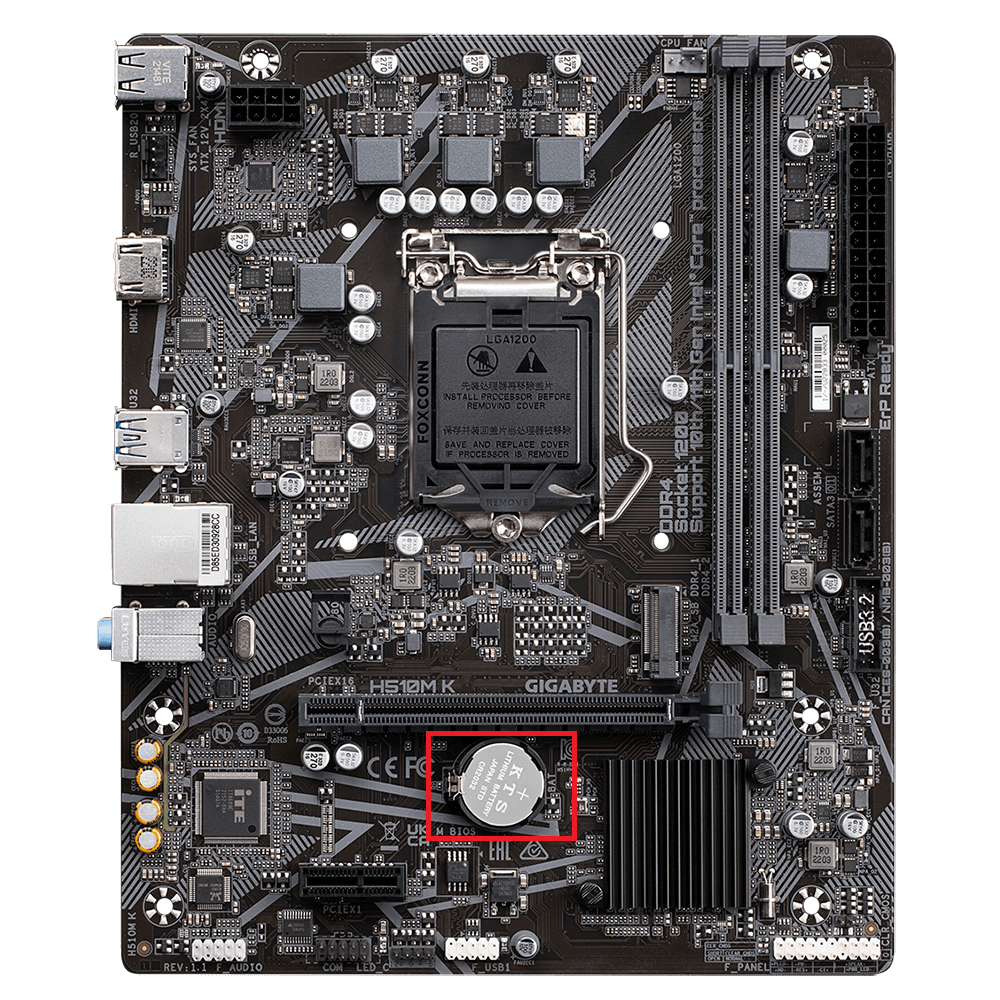
- Using your fingers, gently pull the CMOS battery out. In some motherboards, you may find a clip mechanism that you have to pull up to remove the battery.
- After 10-15 minutes, reinsert the CMOS battery, and your BIOS should have been reset. Check to see if the error is still present.
5) Update Your BIOS
We are gradually approaching the more complex steps, and one of them is to update your BIOS. Board manufacturers often release newer BIOS revisions that improve RAM compatibility and stability. Updating your BIOS can be both easy and difficult, depending on how recent your motherboard is.
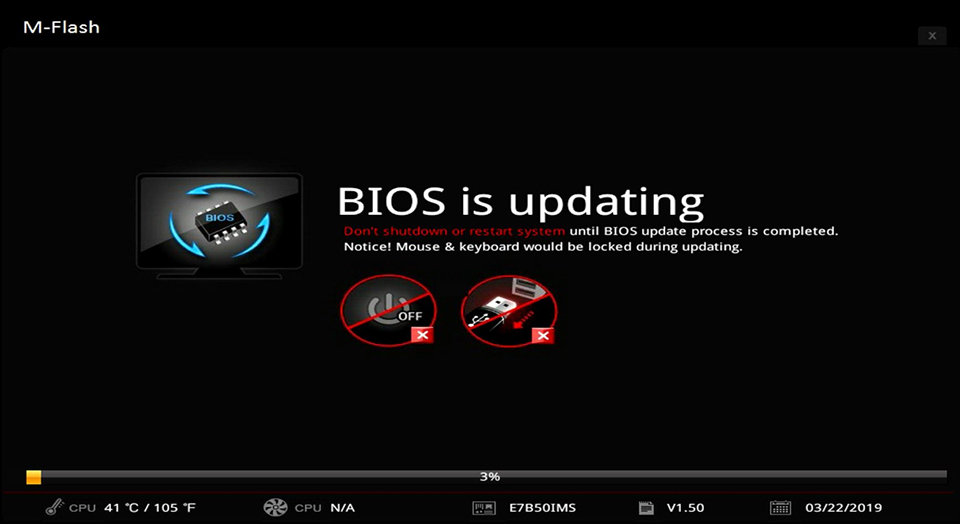
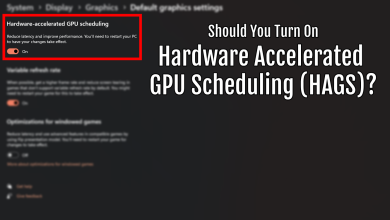
Modern motherboards have the option for BIOS flashback, which allows you to update your BIOS without entering the system. Get a working PC and download the required BIOS revision. After renaming the BIOS properly, store it inside a USB Flash Drive and enter the BIOS to, well, update your BIOS.
6) Faulty Memory
If none of the steps worked for you so far, we’re entering into the realm of uncertainty—and possible hardware failure. Memory is quite resilient; however, being electronic, it too shall fail someday. An easy way to verify if your memory is faulty or not is to borrow a working memory kit from a friend or fellow.
You may also try individual DIMMs as explained in the reseating method above. If 1 DIMM works and the other doesn’t, you have a faulty memory kit. If both don’t work, the next step is to get access to a working kit.
Now try the working memory modules and check to see if the error persists. If, for some reason, you still get the same issue, even with a working kit, there are 3 possible culprits then.
7) Dead CPU, PSU, or Motherboard
Assuming you’ve tried out a working memory kit with your PC and you still see that annoying DRAM light, the issue might be with your other components. Let’s start with the easiest to replace, your PSU.
↪ Power Supply Unit
It is very much possible that your PSU got damaged due to excessive voltage/current and is unable to supply ample power to the memory. Try another Power Supply or use your current supply in another PC.
↪ CPU
Next up is the CPU. If you have access to a processor supported by your motherboard/socket, check to see if the system boots with that CPU. The CPU features memory controllers which are responsible for communicating with the RAM. In rare cases, this section of your CPU could be damaged, rendering it useless.
↪ Motherboard
The last resort is to swap all your components to a different motherboard. If your PC boots normally, you require a motherboard replacement. Again, as with the PSU, random voltage/current spikes or even ESD can severely damage the motherboard.