BEST GUIDE: Download and Use Winamp Skins
If you were around back when the Windows Operating System started gaining traction, there are a few programs and applications that you would absolutely remember. Among these programs is Winamp – the all in one media player for Windows. Winamp is not only one of the oldest but also one of the best media players available for the Windows OS. With a sleek and stylish User Interface, a graphic equalizer and the ability to play almost all kinds of media – be it audio or video – Winamp has a lot to offer. Winamp provides clean, enjoyable sound, a pretty small learning curve for new users and a versatile and feature-rich user experience overall.
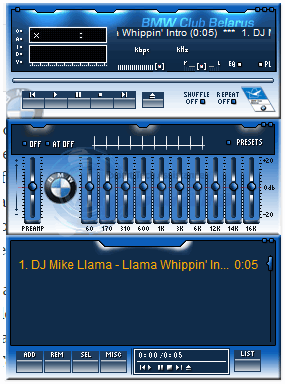
However, there are ways that you can make Winamp even more exciting, and one of the best ways to do so is by downloading and applying a skin you adore to your favorite media player to make it even more your style. Changing the appearance of Winamp by applying a skin to it is a pretty simple process as all it involves is downloading a skin you like, installing it and then using it.

To download and install a Winamp skin, you need to:
Go to a website that hosts Winamp skins that you can download. If you don’t know where to go, just click here and you will be taken to a gallery that contains over 500 stylish, fun and completely stable skins for Winamp.
Choose a skin you like and download it.
The skin you chose will be downloaded as a ZIP file. Once the skin has been downloaded, unzip the ZIP file to a temporary folder using a compression program such as WinRAR.
If you downloaded a classic Winamp skin, the ZIP file will have contained a .wsz On the other hand, if you downloaded a modern Winamp skin, the ZIP file will have contained a .wal file or a folder with a myriad of files inside it. If the ZIP file contained a .wsz or .wal file, simply double-click on the file to launch it, click on Yes and the file will be automatically copied to the appropriate directory (C:\Program Files\Winamp\Skins\). If the ZIP file contained a folder with a heap of files inside of it, however, you will have to manually move the folder full of files to the following directory:
C:\Program Files\Winamp\Skins\
Once you have completed the steps listed above, you will have successfully downloaded and installed a Winamp skin of your choosing. Now comes the next part – applying the skin you downloaded and installed to Winamp. To do so, you need to:
Launch Winamp.
If you see an Options button in the toolbar at the top of the media player, click on it, click on Skins in the contextual menu, browse to the skin you want to apply, select it and click on Open (or something similar) to confirm the action.
If you do not see an Options button in the toolbar at the top of the media player, right-click on an empty space inside the media player’s window, click on Skins in the resulting menu, browse to the skin you want to use, select it and click on Open (or something along those lines) to confirm your selection.
As soon as you successfully perform Step 2 or Step 3 (whichever applies to your case), the skin of your choosing will be applied to Winamp and the media player’s appearance will change to your liking.