How to Fix DISM Error 1392 on Windows
Some Windows users are reporting that they’ve recently done a DISM scan that ultimately resulted in the 1392 error code. This issue is confirmed to occur on Windows 7, Windows 8.1, and Windows 10.
After investigating this particular issue, it turns out that this particular issue is always related to some kind of system file corruption that is affecting your OS’s ability to identify and replace corrupted system files.
Even though the underlying cause is the same, the fix that you should follow is dependent on a couple of different scenarios that your PC might be dealing with.
Now that you know the reason why you are seeing this error code, here’s a list of verified methods that other affected users have successfully used to fix the issue:
Method 1: Running a ‘CHKDSK Forceofflinefix’ scan
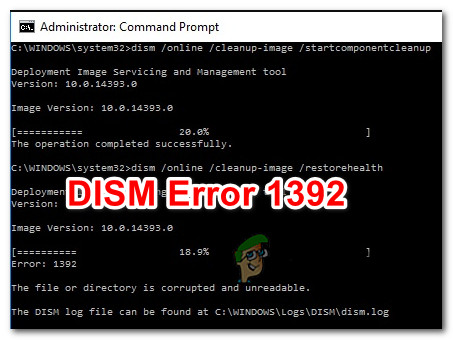
If the DISM (Deployment Image Servicing and Management) utility has previously thrown the 1392 error code, it’s clear that you’re dealing with some kind of corruption issue. One of the quickest ways to fix this problem is to run a ‘/offlinescanandfix‘ scan on the affected volume with the CHKDSK (Check Disk) utility.
What this will essentially do is it will run an offline scan on the specified volume that triggered the 1392 error and fix errors that were previously flagged for corruption. Several affected users have confirmed that this method was the only thing that allowed them to get rid of the 1392 error without having to reset every associated OS file.
If you haven’t tried this yet, follow the instructions below to run a CHKDSK Forceofflinefix scan on the affected drive:
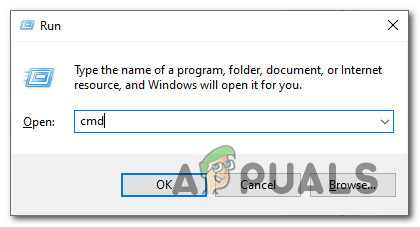
- Press Windows key + R to open up a Run dialog box. Inside the run box, type ‘cmd’, then press Ctrl + Shift + Enter to open up an elevated Command Prompt. When you are prompted by the UAC (User Account Control), click Yes to grant admin access.

Opening an Elevated Command Prompt - Inside the elevated Command Prompt, type the following command and press Enter to initiate an Offline Scan with the Check Disk Utility:
chkdsk /offlinescanandfix
- Wait patiently until the operation is complete, then restart your computer after the process is finished.
- Once your computer boots back up, run another DISM scan and see if the issue is now fixed.
In case the DISM scan is still ultimately triggering the same 1392 error, move down to the next potential fix below.
Method 2: Running a Full SFC Scan
If you haven’t done this already, the next step you should take is to run a full scan using another built-in tool called SFC (System File Checker). There’s a lot of similarities between DISM and SFC, but the major difference is that SFC doesn’t require an internet connection in order to complete the scan.
So if the reason why you’re seeing the 1392 error is because of a corrupted system file that’s involved in facilitating the download of ‘healthy system files’, going this route might help you avoid the issue altogether.
Some users dealing with the same issue have confirmed that the issue was finally resolved after they run a full SFC scan and allowed the utility to replace the corrupted instances with healthy files from the locally stored archive.
If you’re looking for steps that will allow you to run a Full SFC scan, follow the instructions below:
- Press Windows key + R to open up a Run dialog box. Next, type ‘cmd’ and press Ctrl + Shift + Enter to open up an elevated Command Prompt. When you are prompted by the UAC (User Account Control), prompt, click Yes to grant admin access.

Opening the elevated Command Prompt - Inside the elevated Command Prompt, type the following command and press Enter to initiate a full SFC scan:
sfc /scannow
- Wait patiently until the operation is complete, then restart your computer and do another DISM scan to see if the process is still interrupted abruptly by the 1392 error.
If the issue is still not resolved, move down to the next potential fix below.
Method 3: Running the long DISM Version (Windows 10 Only)
If you already tried both the potential fixes above and you’re still seeing the same 1392 error while running DISM scans, one potential fix is to run a more thorough scan using the long version of the Deployment Image Servicing and Management utility.
By taking the time to create a compatible installation media and mounting it on your computer before initiating a long DISM scan, you will give it heightened permissions and capabilities that will hopefully allow it to fix the system file corruption without the need to refresh every OS component.
If you haven’t tried this yet, follow the instructions below:
Note: The instructions below are only applicable to Windows 10 users. If you’re using an older version, move down to the next method below.
- Open your default browser and navigate to the Windows 10 download page. Once you are inside, click on the Download tool now button (under Create Windows 10 installation media).
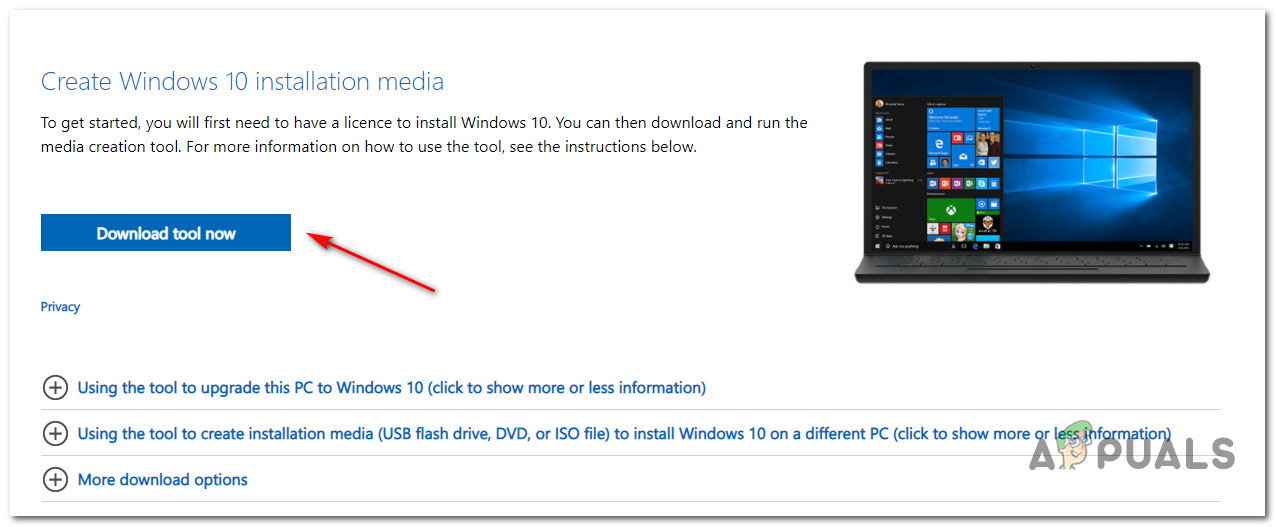
Download Win 10 iso - Wait until the MediaCreationTool is downloaded, then double-click on it and click Yes at the UAC (User Account Control) when prompted to do so.
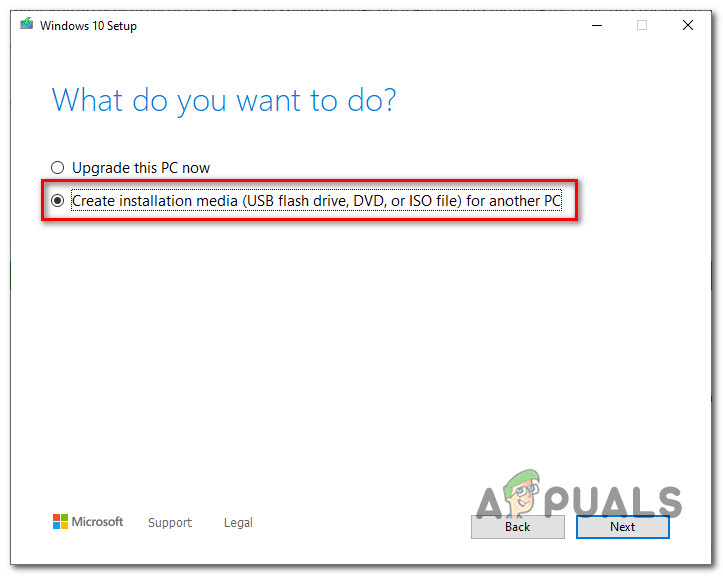
- Next, wait patiently until the app is finished with initializing, then accept the ToS and choose to Create installation media (USB flash drive, DVD, ISO file) for another PC) before clicking Next.
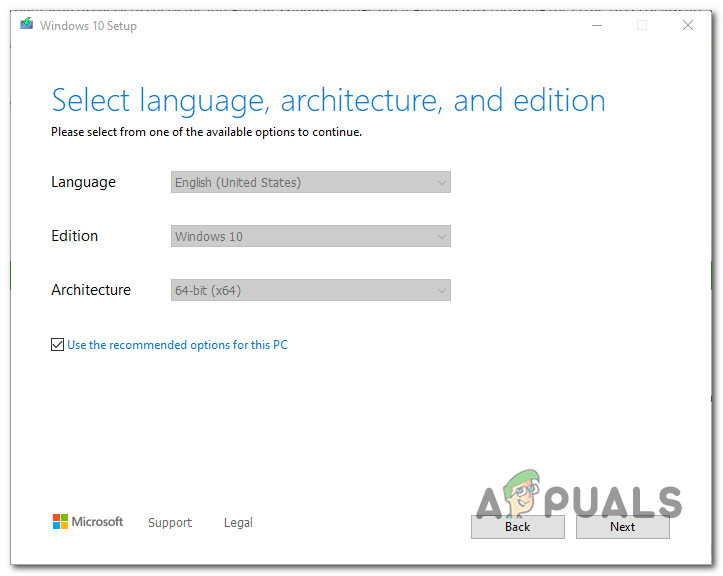
Creating an Installation Media using Windows 10 Setup - At the next step, uncheck Use the recommended options for this PC and adjust the Language, Edition, and Architecture to make it specific to your current OS version in case the options already selected are incorrect. Once you’ve done that, click on Next once again.
Creating the correct installation media - At the next prompt, choose ISO file from the options available to you and click on Next once again.
- As soon as you click Next, you’ll see a Select a path popup that you need to use in order to select a viable location for the .ISO file that you are about to create. After you select the correct location, hit Next one final time and wait until the ISO is successfully created.
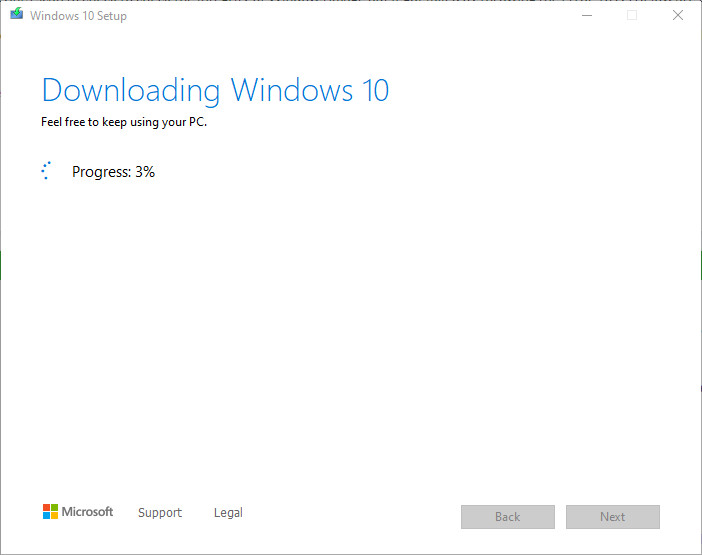
Downloading and Creating Windows 10 Note: This utility will start by downloading the latest Windows 10 build before turning it into an ISO, so depending on your Internet connection, respect this operation to last a couple of hours.
- Once the ISO is successfully created, close the Windows 10 setup utility, then use File Explorer to navigate to the location where you created the ISO and double-click on it to mount it on your computer. Click Yes at the confirmation prompt.
- Once the Windows 10 installation media is successfully created and mounted, press Windows key + R to open up a Run command, then type ‘cmd’ inside the text box and press Ctrl + Shift + Enter to open up an elevated command prompt.
Opening an elevated Command Prompt - Once you’re inside the elevated CMD prompt, type the following command by being mindful of the placeholder that needs to be replaced:
DISM /Online /Cleanup-Image /RestoreHealth /source:WIM:X:\Sources\Install.wim:1 /LimitAccess
Note: Replace X with the drive letter where the iso is located. If you have it in a default location, you’ll most likely find it on the C:/ drive.
- Wait patiently until the long DISM version scan is performed, then restart your computer at the end of it.
Note: Keep in mind that this operation will take longer than a standard DISM operation, so depending on the side of your disc and if you’re using SSDs or HHDs, this might take several hours. - Once the long DISM version scan is completed, restart your computer and see if the issue is now resolved.
If you still end up encountering the 1392 error code while running a regular scan, move down to the next potential fix below.
Method 4: Refreshing every Windows Component
If none of the potential fixes above have worked in your case, it’s almost certain that you’re dealing with some kind of system file corruption that cannot be solved conventionally. In this case, your only options are to reset every system file belonging to your operating system to ensure that no corrupted instance is causing the 1392 error.
And depending on the time on your hands and the importance of the files you are currently starting on the OS drive, you have 2 options at this point:
- Repair install – If you have a lot of important files on your C:\ drives and you are short of time, this operation will probably is probably the best choice for you. A repair install (A.K.A. in-place repair) will refresh the vast majority of Windows components without touching any personal files (including apps, games, personal media, user preferences, etc.). But the main drawback of this method is that it doesn’t solve any case of system file corruption and you’ll need compatible installation media in order to get it started. (You already have it if you followed Method 3)
- Clean install – This is the easiest procedure out of the two. You don’t need compatible installation media as you can get this operation started directly from the GUI menus of Windows. However, unless you back up your data in advance you will lose anything personal that’s currently being stored on the OS drive.


