How to Disable Windows Aero
httoWith Windows Vista, Microsoft replaced its old Luna interface with a User Interface it dubbed Windows Aero – Aero was a User Interface that focused heavily on aesthetics and eye candy, and at the dusk of Vista’s short-lived reign as Microsoft’s premier Operating System for computers, it also carried over the Windows 7, Vista’s successor. Windows Aero came with a bunch of aesthetically pleasing and overall “pretty” features – from translucent windows and title bars to a translucent taskbar and live thumbnails. While Windows Aero did manage to create a much more pleasing experience for users of Windows Vista and Windows 7, it also turned out to be quite the resource hog.
Users would face all kinds of lag when using Windows Vista and Windows 7 with Aero enabled on older, clunkier computers with relatively light graphics processors. Windows Aero was a very graphics-heavy User Interface for its time, requiring computers to have a significantly large amount of graphics processing power to run it smoothly. That being the case, most users who hated how resource-heavy Aero was or simply wanted to get the most out of their hardware (when playing games – where every single frame counts – for example), wanted to disable Aero.
Thankfully, you can get rid of Aero and its computer resource hogging tendencies on both versions of the Windows Operating System that come with Windows Aero to begin with. In addition, on both Windows Vista and Windows 7, users who want to get rid of Windows Aero have the option to either disable Windows Aero everywhere throughout their computer or disable it for certain applications only (which will automatically disable Aero whenever these applications are running).
How to disable Windows Aero for specific programs
Disabling Windows Aero for specific programs ensures that the User Interface is temporarily switched off, freeing all of the resources it usually hogs. This option is especially optimal for users who want to disable Aero to get the most performance out of their computers while running specific applications such as a video editor or a game. If you would like to disable Windows Aero for a specific program on either Windows Vista or Windows 7, you need to:
- Locate and right-click on the executable (.EXE) file for the application or program you want to disable Windows Aero for.
- Click on Properties in the resulting context menu.

- Navigate to the Compatibility tab.

- Enable the Disable desktop composition option by checking the checkbox located directly beside it.

- Click on Apply and then on OK to have your changes saved.

Once you do so, every single time you launch the application(s) you do this for, Windows will automatically disable Aero as soon as the application is launched. Aero will remain disabled for however long the application keeps running, and Windows will turn Aero back on when the application is closed.
How to disable Windows Aero in its entirety
The simplest way to disable Windows Aero throughout the entirety of Windows Vista or Windows 7 is to simply switch to a basic Windows theme instead of a Windows Aero theme. When you do so, all of the visual effects and features Windows Aero has to offer will be neutralized, and the User Interface will be changed to a very basic and minimalistic Windows interface. To disable Windows Aero in its entirety, simply:
On Windows Vista
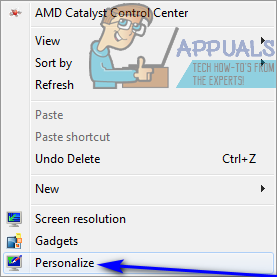
- Right-click on an empty space on your Desktop.
- Click on Personalize in the resulting context menu.
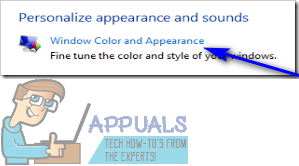
- Click on Window Color and Appearance.
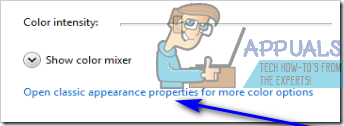
- Locate the Open classic appearance properties for more color options link at the very bottom and click on it.
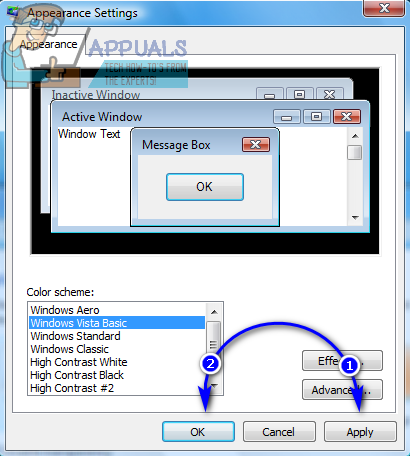
- In the Appearance Settings window that opens up, open the dropdown menu located directly underneath the Color scheme: option and click on Windows Vista Basic to select it.
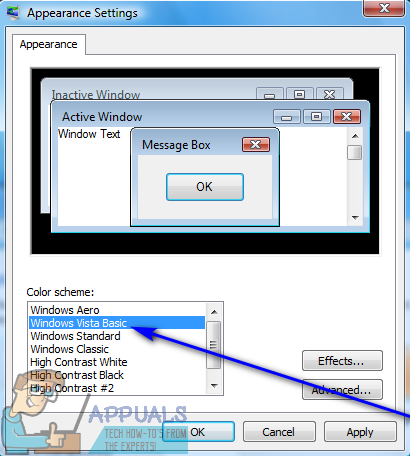
- Click on Apply.
- If asked whether you would like to keep the changes, click on Keep changes.
- Click on OK.
You should now see that all aspects of the Windows Aero interface have been replaced by elements of the Windows Vista Basic theme, a theme that is not only simple but also uses significantly less resources as comapared to Windows Aero.
On Windows 7
- Right-click on an empty space on your Desktop.
- Click on Personalize in the resulting context menu.
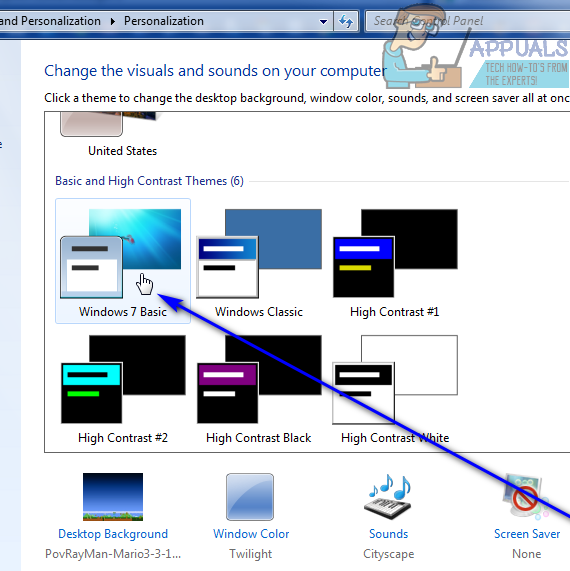
- Under Change the visuals and sounds on your computer, scroll down until you hit the Basic and High Contrast Themes section.
- Click on any theme of your choosing under the Basic and High Contrast Themes section to select it – while Windows 7 Basic is the one most people choose to opt for, any of these themes will undoubtedly get the job done. As soon as you select a theme under the Basic and High Contrast Themes section, Windows will apply it to your computer. It might take a few moments for the theme to be applied, so be patient.
- Once the Windows Aero theme has been replaced with a basic or high contrast theme, simply close the Personalization window.
You will see that Windows 7 is now sporting the theme you just selected for it, and you will no longer see any aspects or features of the Windows Aero User Interface anywhere on your computer.