How to Enable or Disable Check Boxes to Select Items in Windows 11
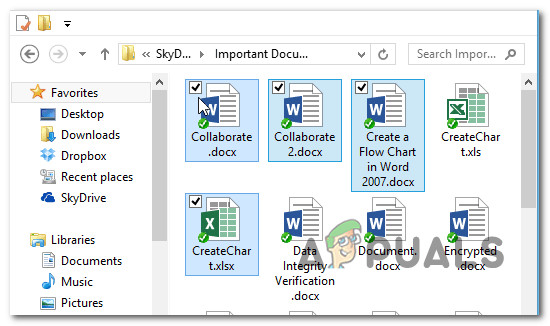
Windows 11 gives you the ability to select multiple items in whichever order you want inside File Explorer and the desktop. By implementing checkboxes, the user can now hover with the pointer over each item to reveal the selection check box.
But keep in mind that this feature is not enabled by default on Windows 11. It might be, but only if you had this feature enabled on your previous Windows version that you migrated from.
In what follows, we’ll go through 3 different ways that will allow you to enable or disable the use of checkboxes to select files, folders and drives on Windows 11:
- Enable or Disable Selection Checkboxes via Command Bar on Windows 11
- Enable or Disable Selection Checkboxes using the Folder Options menu on Windows 11
- Enable or Disable Selection Checkboxes using a .BAT file on Windows 11
Enable or Disable Checkboxes via Command Bar on Windows 11
- Press Windows key + E to open up File Explorer. You can also open it by clicking on the dedicated item.
- Inside the File Explorer window, use the ribbon bar at the top to click on View.
- From the View context menu, expand the Show sub-menu, then click on Item checkboxes to enable the selection checkboxes on Windows 11.
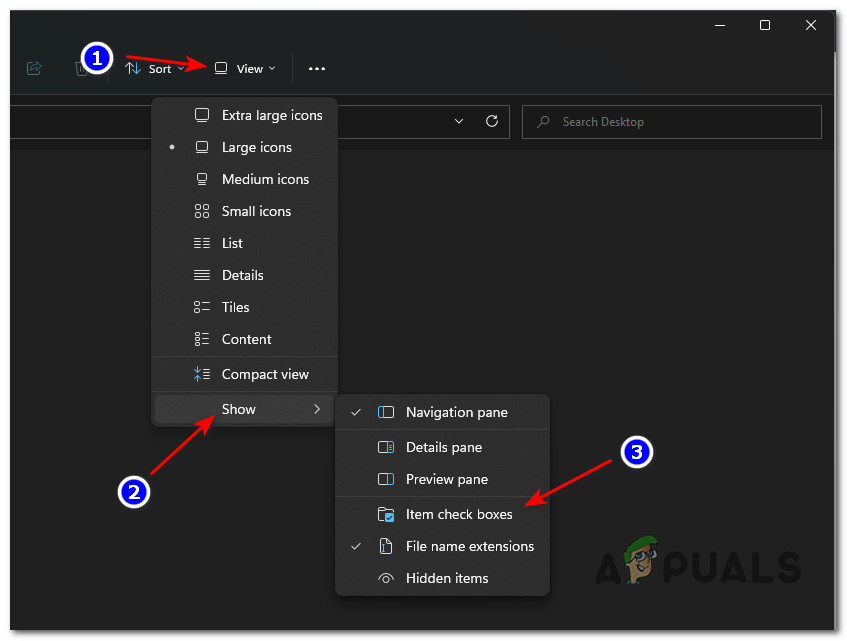
Enabling the Item Selection Check Boxes via Command Bar
Enable or Disable Checkboxes using the Folder Options menu
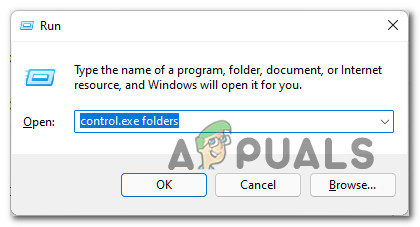
- Press Windows key + R key to open up a Run window. Inside the prompt that just appeared, type ‘control.exe folders’ inside the text box and press Enter to open up the File Explorer Options.
Open the Folder Control menu - Once you’re inside the File Explorer Options menu, access the View tab from the ribbon menu at the top.
- Inside the View tab, scroll down through the Advanced Settings menu and locate the Use check boxes to select items checkbox.
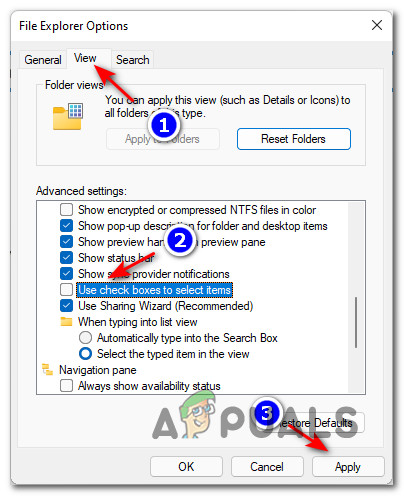
Enabling or Disabling the use of selection checkboxes from Folder Options - Check or uncheck the Use check boxes to select items box depending on if you want to enable the checkbox selection functionality.
- Click on Apply to save and enforce the changes. You should see the functionality becoming available as soon as you save the modifications.
Enable or Disable Checkboxes by creating a .BAT file
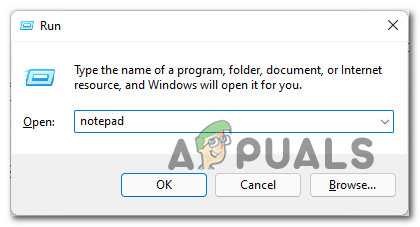
- Press Windows key + R to open up a Run dialog box. Next, type ‘notepad’ inside the text box and press Ctrl + Shift + Enter to open up a notepad window with admin access. If you’re prompted by the User Account Control, click Yes to grant admin access.
Accessing the Notepad screen - Once you’re inside the empty Notepad box, paste one of the following codes, depending if you want to enable or disable the use of selection checkboxes on Windows 11:
Turn ON The use of Checkboxes to Select Items:

REG ADD "HKCU\SOFTWARE\Microsoft\Windows\CurrentVersion\Explorer\Advanced" /V AutoCheckSelect /T REG_DWORD /D 1 /F
taskkill /f /im explorer.exe
start explorer.exe

Turn OFF the use of Checkboxes to Select Items:

REG ADD "HKCU\SOFTWARE\Microsoft\Windows\CurrentVersion\Explorer\Advanced" /V AutoCheckSelect /T REG_DWORD /D 0 /F
taskkill /f /im explorer.exe
start explorer.exe
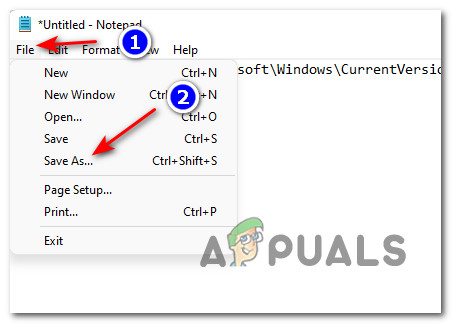
- Once the code is successfully pasted, click on File (from the ribbon bar at the top). Next, click on Save As from the context menu that just appeared.
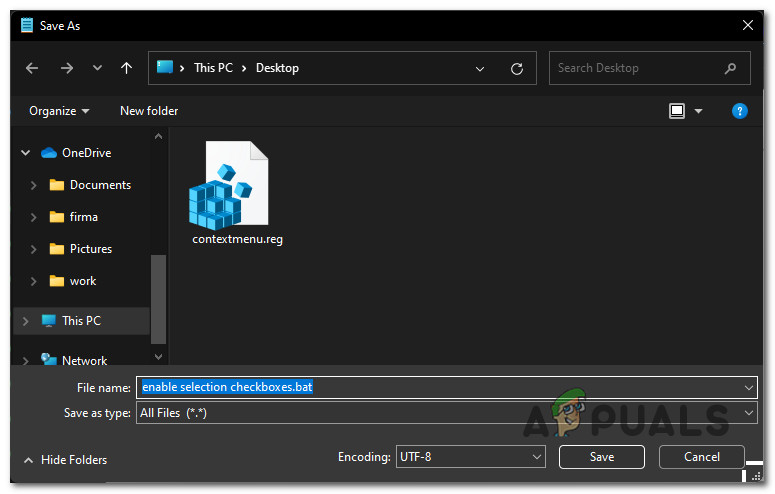
Saving the .BAT file - Next, use the Save As menu to make the file save on a convenient location (we saved it on our desktop for ease of access), then change the Save as type drop-down menu to All files.
- Next, name the file however you want, but make sure it ends with .bat before clicking Save to generate the file.
Enable the Selection Checkboxes - Once the .bat file is successfully generated, navigate to the location where you previously saved it, right-click on it and choose Run as Administrator from the context menu that just appeared.
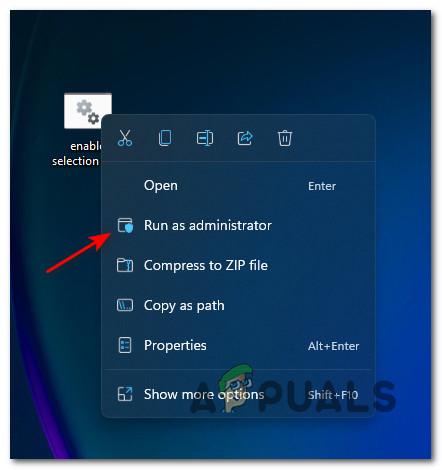
Running the bat file with admin access Note: Depending on your security preferences, you might need to Unblock the file prior to running it.
- Wait until the .bat file is successfully processed, then you should restart your computer in order to allow the changes to take effect.


After the latest update they will not go away. Tried all methods. Who uses check boxes anyway?