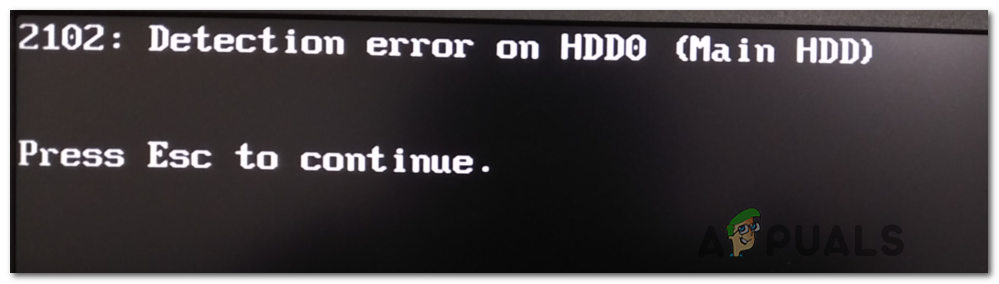
How to Fix ‘Detection Error on HDD0 (Main HDD)’ in Lenovo Devices?
Detection Error on HDD0 (Main HDD) on a Lenovo device indicates that the system BIOS is unable to communicate with the hard drive, suggesting a potential hardware failure.
The most common cause of this error is a faulty connection between the hard drive and the motherboard, or the hard drive itself may be failing. Additionally, this issue might be caused by a BIOS glitch, an incomplete system update, or a mismatch between the Chipset Driver and Intel RST driver.
In this article we will discuss different solutions to fix this error.
1. Remove the Battery or CMOS Battery
This error may originate from a glitch associated with the CMOS or laptop battery, which can occur after hardware changes or an unexpected system shutdown. These issues can lead to incorrect BIOS/UEFI settings, often caused by conflicting overclocking data
1.1. Removing the Laptop Battery
- Unplug the laptop from the power outlet and disconnect the power cable.
- Flip the laptop to view its bottom.
- Locate the battery latch on the underside and unlock it to release the battery. You may need to pull gently once unlocked.
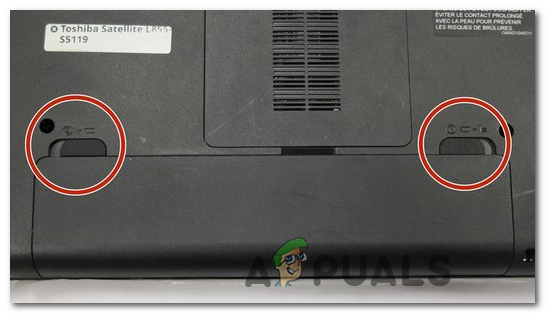
Unlocking the battery latches Note: The procedure varies among manufacturers but usually involves sliding the latch and holding it until the battery comes free.
- After waiting a full minute with the battery removed, reinsert it and turn on the laptop to verify if the issue is fixed.
1.2. Removing the CMOS Battery
- Shut down the computer and disconnect it from all power sources. Turn off the power supply unit (PSU) switch on the back.
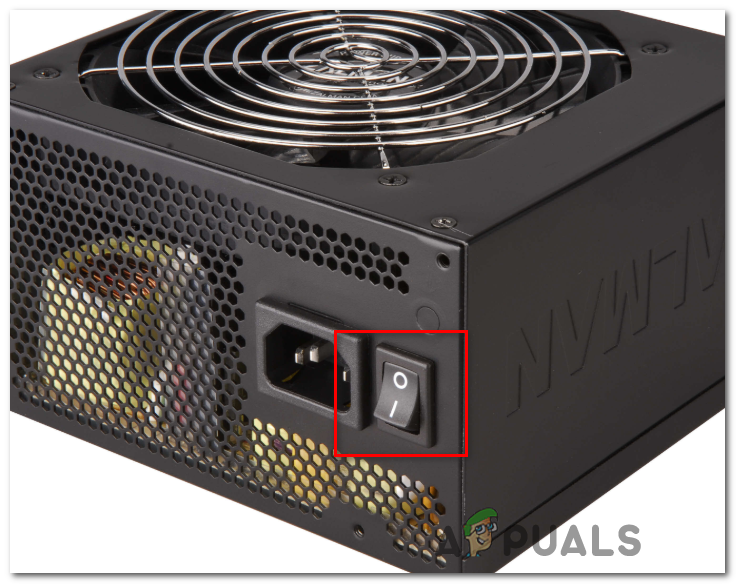
Switching off the PSU - Gently remove the slide cover, preferably while wearing a static wristband for grounding.
- Locate the CMOS battery near the SATA/ATI slots on the motherboard and carefully remove it using a fingernail or a non-conductive tool.
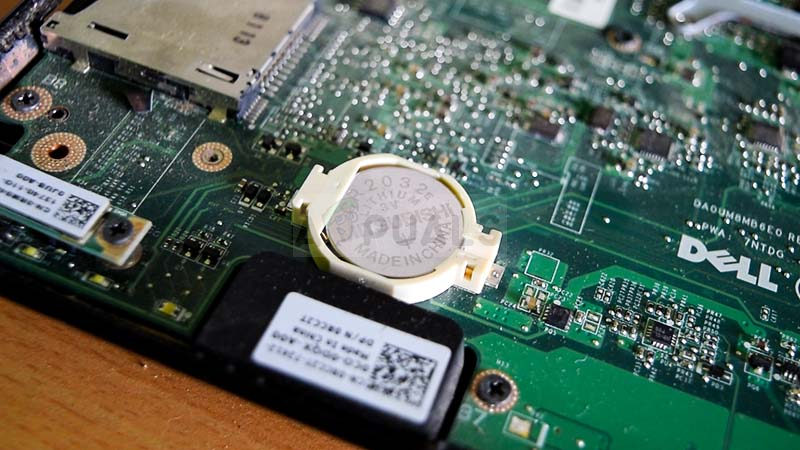
Removing the CMOS battery - Leave it out for a full minute before reinserting it into its slot.
- Replace the cover, reconnect the power, and power on your computer to see if the startup issue persists.
2. Make Sure That the HDD Connection is Solid
Ensure that the HDD connection is secure to resolve the issue. A loose connection between the hard drive and the motherboard can lead to the error message. Firmly reconnecting the HDD can fix this problem by ensuring proper communication between the hard drive and the motherboard, allowing the BIOS to detect the HDD without any issues.
- Power down and unplug your computer.
Optional: Use an anti-static wrist strap to prevent static damage to internal components. - Open the case to access the HDD; if there are two, focus on the one with the OS.
- Disconnect the data and power cables from the HDD and motherboard.
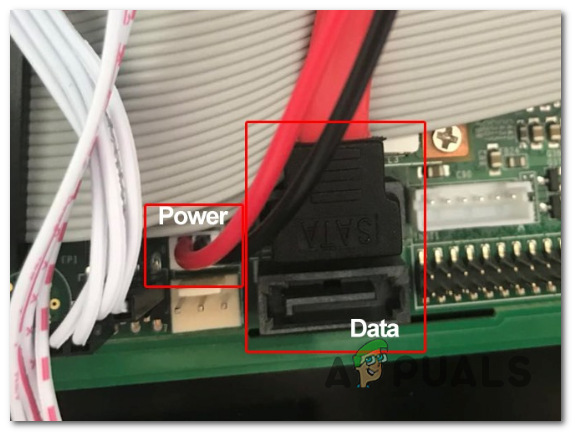
Example of a SATA port/cable - Clean the ports on both sides and replace any cables if necessary.
- Reconnect the HDD firmly, close the case, and power up to check if the error is resolved.
3. Enable UEFI Boot Mode
UEFI replaces the older BIOS system, offering better compatibility with newer hardware and faster boot times. Enabling UEFI can help the system bypass legacy compatibility issues that may prevent proper detection of hard drives. It ensures better communication between the motherboard and the drive, reducing errors that occur with older BIOS modes.
- Turn on your PC and repeatedly press the Setup key (commonly F2, F4, F6, F8, Del, or Esc) during the initial startup screen.
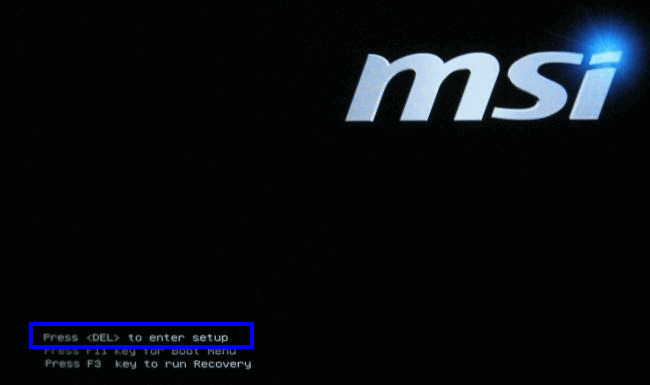
Prompt to enter setup - In BIOS, navigate to Advanced Settings and locate Boot / Legacy Boot Priority under Boot Settings.
- Set the priority to UEFI.
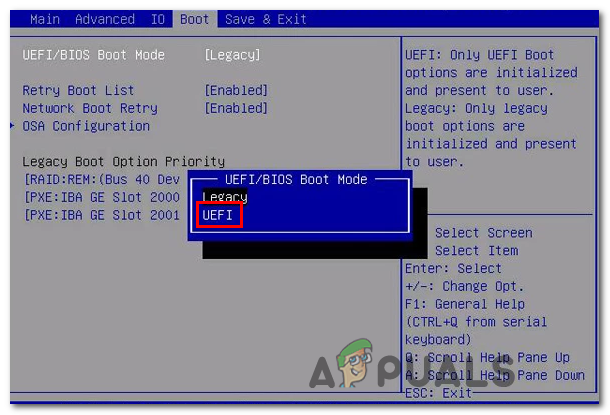
- Save the changes, exit BIOS, and reboot to check if the issue is resolved.
4. Update Lenovo’s HDD Firmware (If Applicable)
Lenovo laptop users, particularly those with ThinkPads, might encounter this error due to an incompatibility between the Chipset Driver and the Intel RST driver. Lenovo offers a hotfix to address this issue, which involves updating the firmware. It’s recommended to apply this update to prevent potential data access problems and ensure optimal system performance.
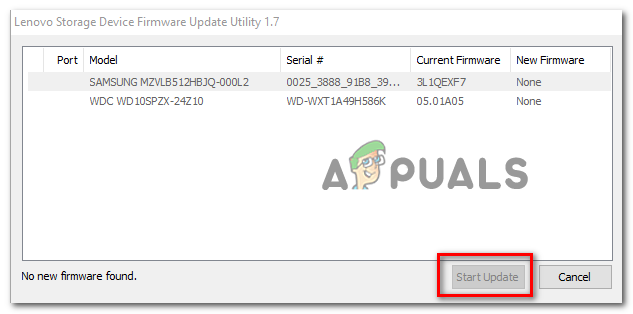
Download Lenovo’s auto-updater using this link, extract it, launch fwwbinsd.exe, grant admin permissions, select the problematic drive, and click Start update.
Reconnect the HDD to the original computer to see if the error has been resolved.
5. Wake the Drive Manually from Hibernation
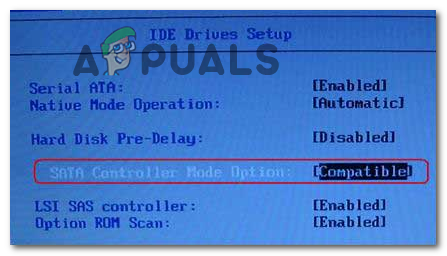
If the error occurs when a storage device gets stuck in Hibernation, you can resolve it by switching the BIOS SATA controller mode to Compatibility, which can wake the drive. Once normal functionality is restored, revert the mode back to AHCI.
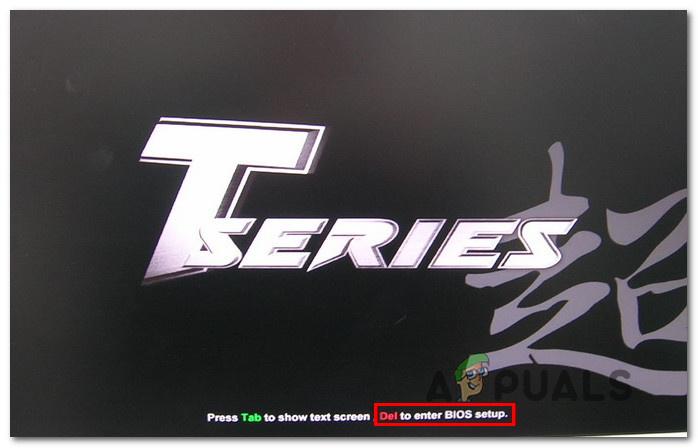
- Power on the computer and press the Setup (BIOS key) to access BIOS settings.
Entering BIOS settings - Navigate to the Devices or SATA Controller section and switch the mode to Compatible to wake the drive.
Waking the computer from hibernation - Save changes, reboot, and reenter BIOS to switch the SATA Controller back to AHCI.
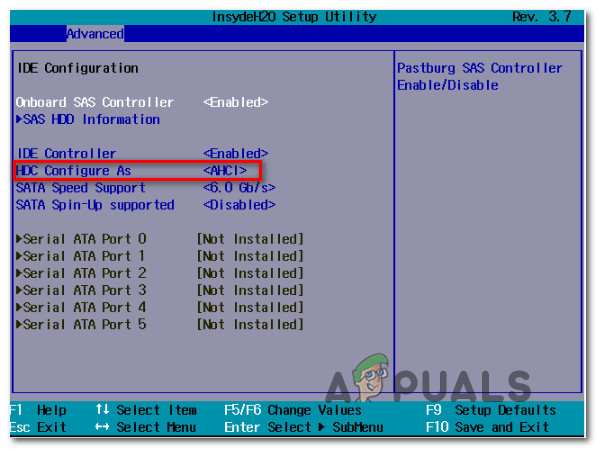
Switching from IDE to AHCI - Save and restart to complete the process.
6. Update BIOS
If none of the solutions work and you’re using a Lenovo laptop, the issue might be due to a BIOS glitch. BIOS updates often improve communication between hardware components like the hard drive controller. These updates can resolve detection errors by ensuring the motherboard’s firmware correctly identifies and interfaces with the HDD.
To learn how to update BIOS check our article here.


Thanks Kevin. This happened with my ThinkPad. While I had it open to d/c the cmos battery I reseated the SSD just for the sake of it. Your first recommendations worked. 😀 Thanks.