Fix: DaVinci Resolve “GPU Initialization Failed” Error
The error “GPU Initialization Failed” in DaVinci Resolve occurs when the software fails to access a required graphics API, such as OpenGL, CUDA, Vulkan, or in some cases, DirectX. These APIs act as a bridge between the software and your GPU, enabling critical tasks like rendering, real-time playback, and memory allocation. When Resolve fails to initialize the required graphics API, it cannot communicate with the GPU, which results in a crash or a blank interface on launch.

This issue is commonly triggered by an outdated or unsupported GPU, but other contributing factors include corrupted drivers, battery saver mode, misconfigured power settings, or recent Windows updates that conflict with GPU APIs.
In multi-GPU systems, Resolve may mistakenly default to the weaker integrated GPU instead of the dedicated one. This guide walks through all confirmed solutions, starting from the simplest fixes to more advanced methods.
1. Update Windows
An outdated version of Windows may lack critical components such as updated DirectX, Visual C++ redistributables, or media frameworks required for DaVinci Resolve to function properly. Keeping your system updated ensures all GPU-related APIs and software dependencies are installed, which could prevent the “GPU Initialization Failed” error.
Note: This step is essential because missing graphics APIs or runtime libraries are a confirmed cause of GPU initialization errors in DaVinci Resolve.
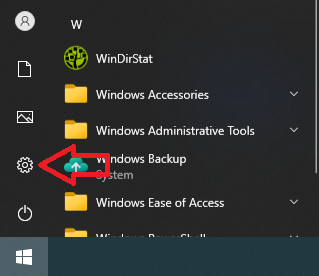
- Click the Start Menu and select the Settings gear icon.
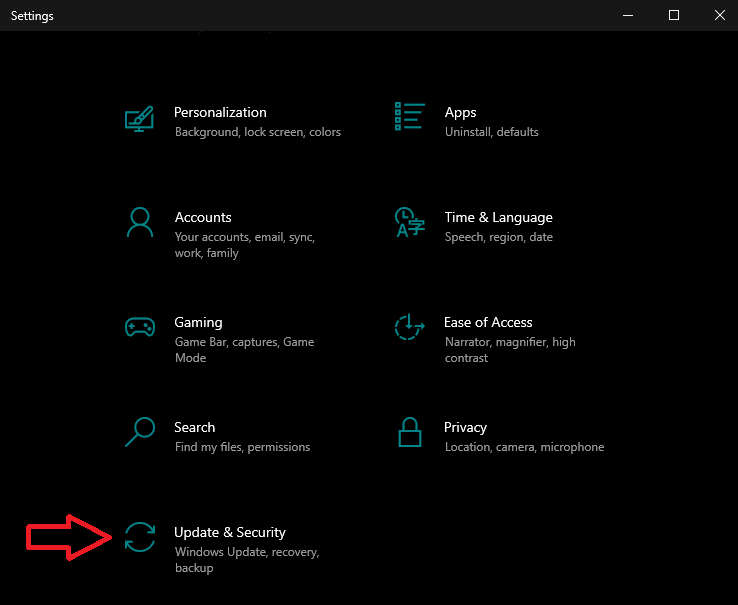
- Go to:
- Update & Security (Windows 10)
- Windows Update (Windows 11)
- Click Check for updates and wait for Windows to scan.
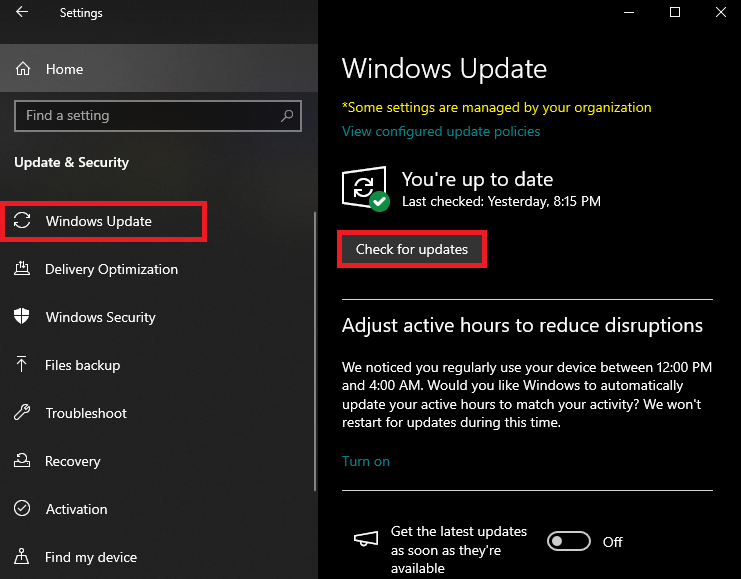
- If updates are available:
- Select Install now
- Restart your PC when prompted
- Open DaVinci Resolve after restarting to check if the error is fixed
2. Switch to Studio Drivers
Nvidia Game Ready drivers are optimized for gaming performance but aren’t always the best fit for creative tools like DaVinci Resolve.
Studio Drivers, on the other hand, are specifically tested and certified for stability with professional software and provide enhanced support for GPU-accelerated APIs such as CUDA, OpenCL, and OpenGL. Switching to Studio Drivers can resolve initialization issues.
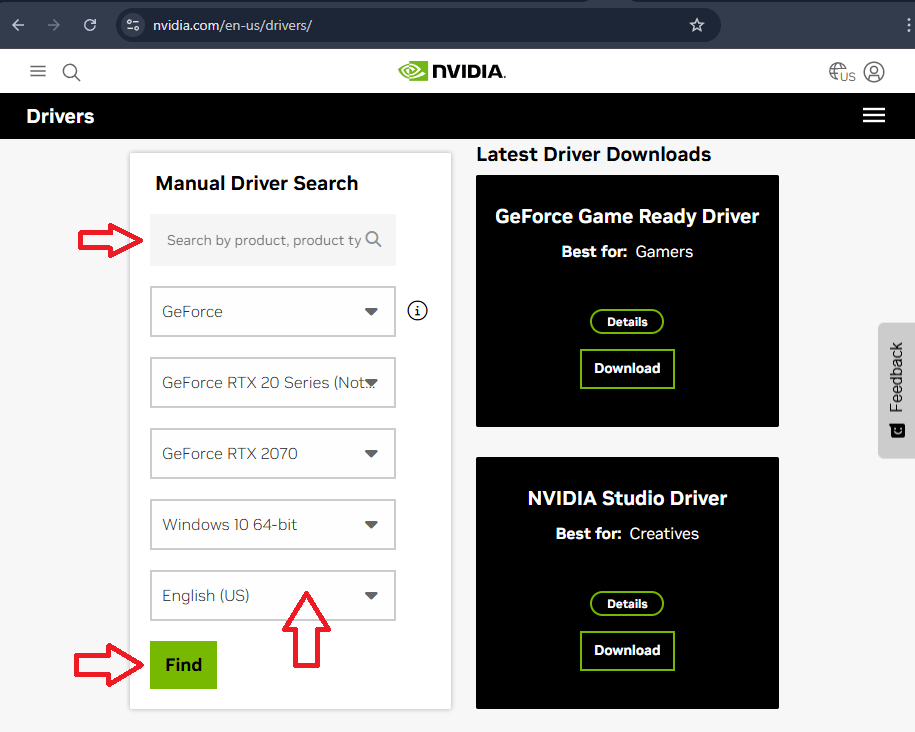
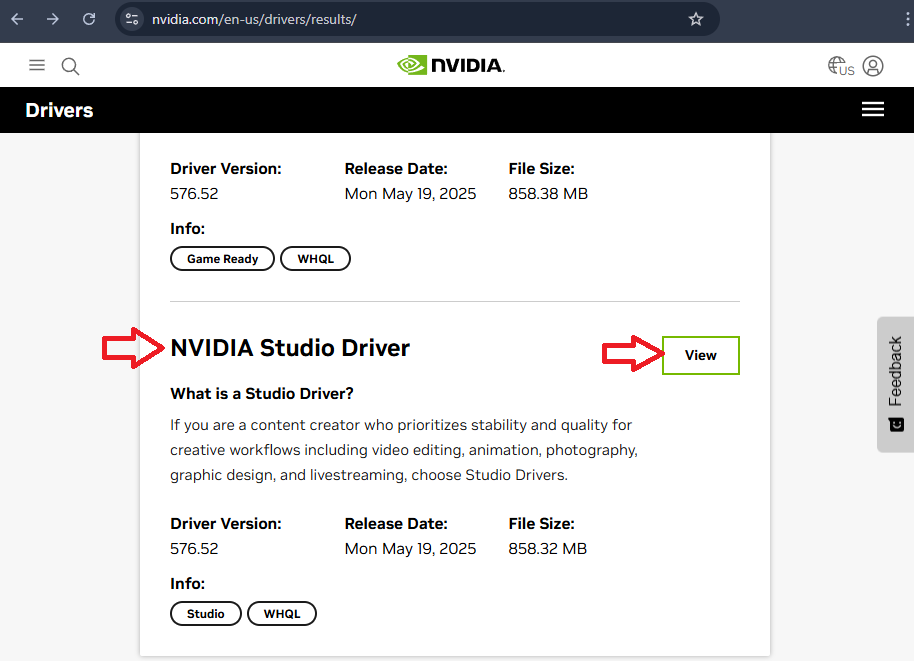
- Open your browser and navigate to the Nvidia Drivers webpage.
- Use the drop-down menus or search box to enter your GPU model and select the appropriate product type, series, and model. Then click Find.
- On the results page, locate the Studio Driver section and click the View button.
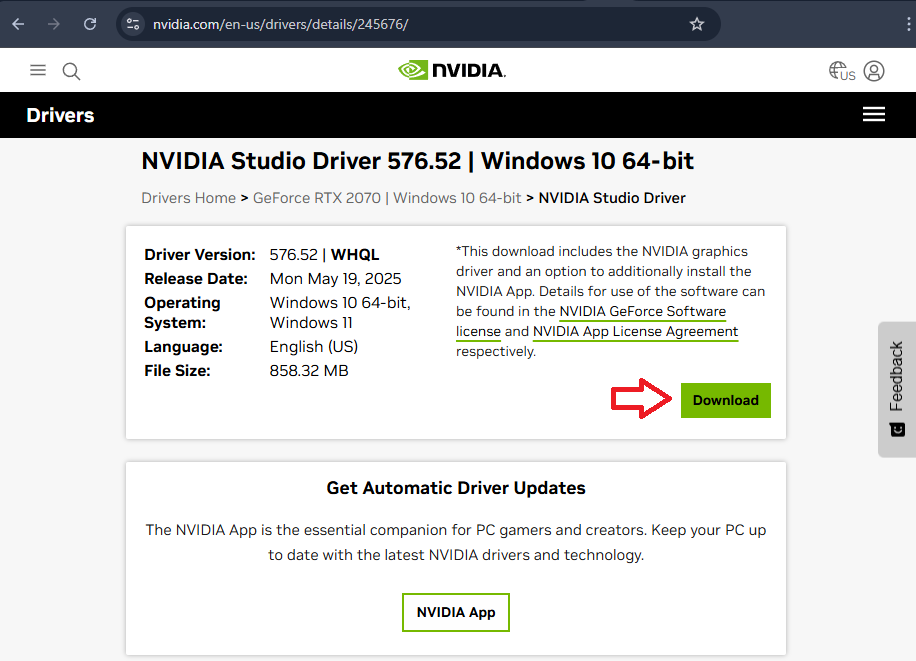
- Click Download on the next page.
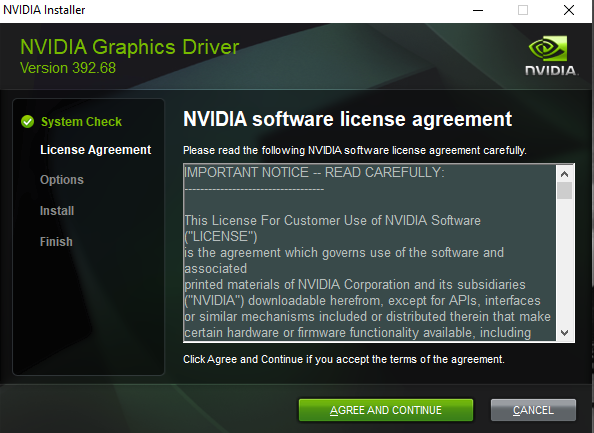
- Launch the downloaded executable file and select Agree and Continue.
- Choose the Custom installation option.
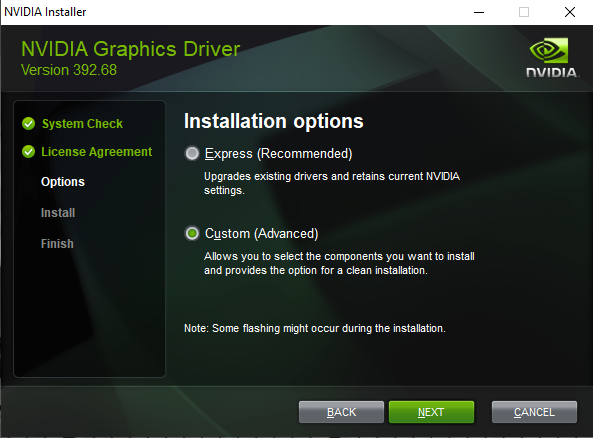
- Under the Options menu, check the box for Perform a clean installation (This option removes remnants of old driver files and registry entries.)
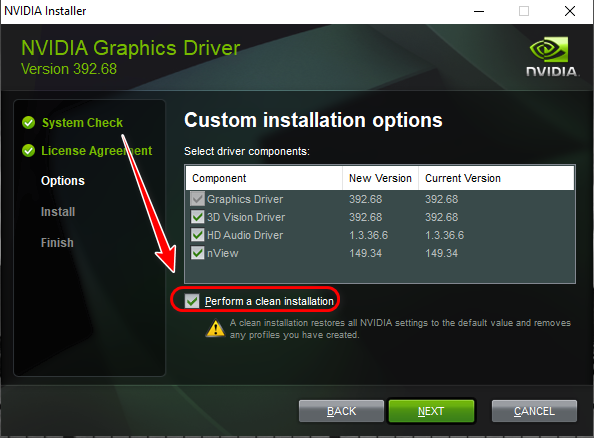
- Complete the installation by following the on-screen instructions.
Note: After switching to Studio Drivers, it’s recommended to temporarily disable automatic driver updates in Windows to prevent the system from reinstalling Game Ready drivers.
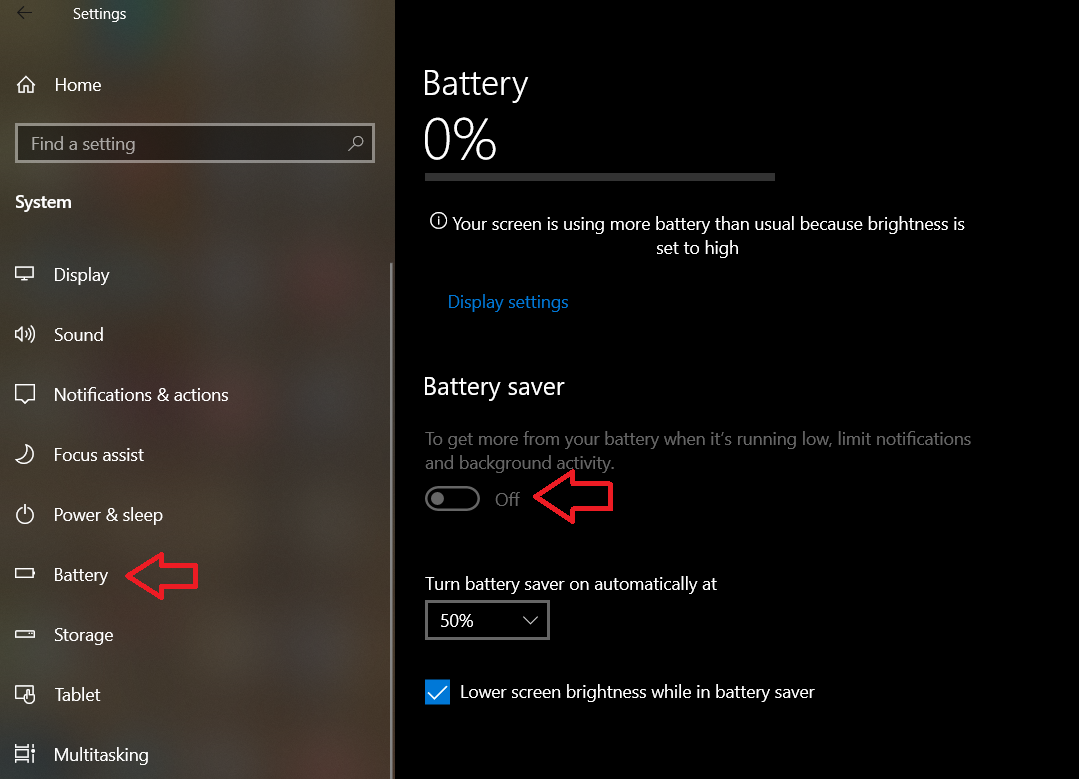
3. Turn Off Battery Saver
Battery Saver mode restricts system performance by enforcing low-power profiles. On some systems, this may cause Windows or GPU drivers to prioritize the integrated GPU over the dedicated GPU.
Since integrated GPUs may lack proper support for modern APIs like CUDA or OpenGL, DaVinci Resolve may fail to initialize GPU acceleration properly.
Disabling Battery Saver allows the system to allocate full power to the discrete GPU, improving compatibility and performance.
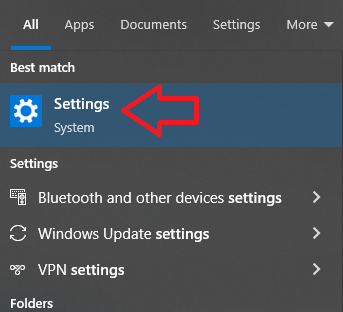
- Click on the Start button, search for Settings, and open it.
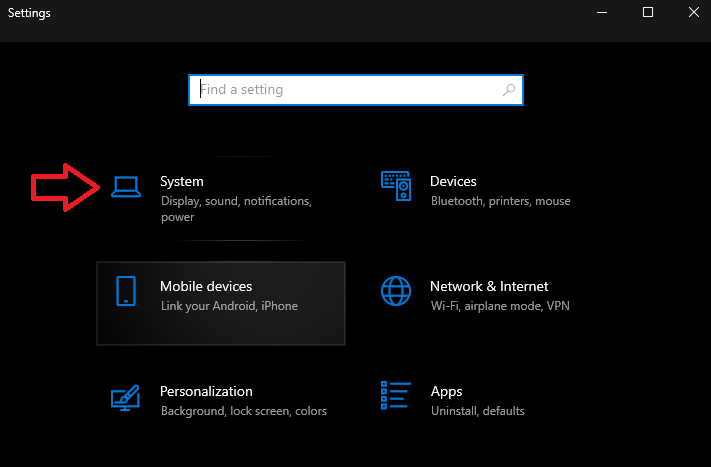
- In the Settings window, click on System.
- Go to the Battery tab from the left sidebar, and toggle off the Battery Saver option.
4. Downgrade DaVinci Resolve to a Compatible Version
Newer versions of DaVinci Resolve often introduce increased hardware requirements, which can make older GPUs or lower-end systems incompatible, leading to GPU initialization errors. Installing an older version that aligns with your system’s capabilities may resolve this issue.
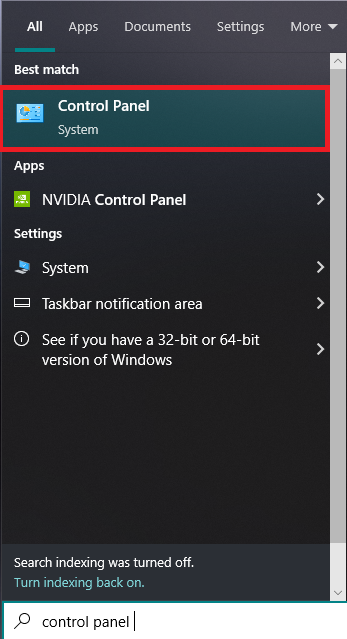
- Click on the Start menu, search for Control Panel, and open it.
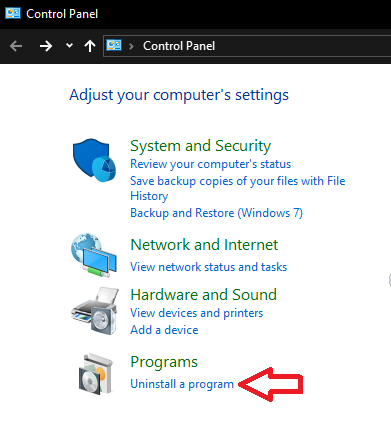
- Under the Programs section, click on Uninstall a program.
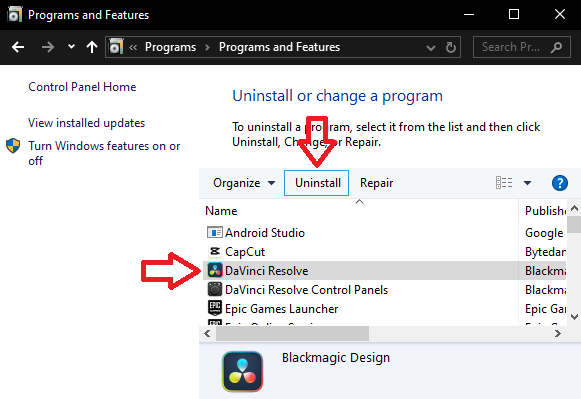
- Select DaVinci Resolve from the list, then click Uninstall.
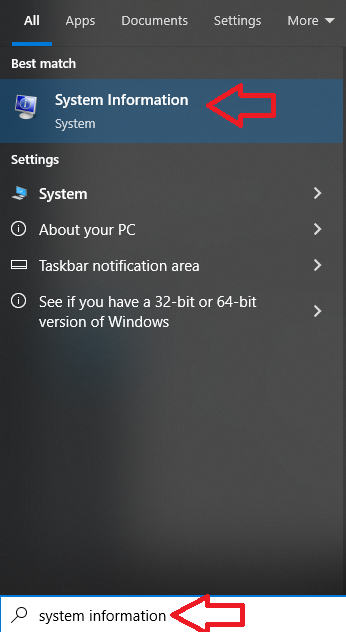
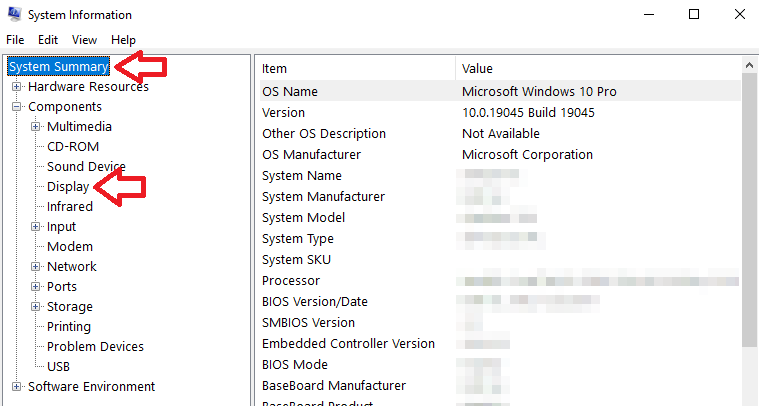
- To check your hardware specifications, open the Start menu, search for System Information, and select it.
- Review your System Summary for CPU, RAM, and navigate to Components > Display for GPU details.
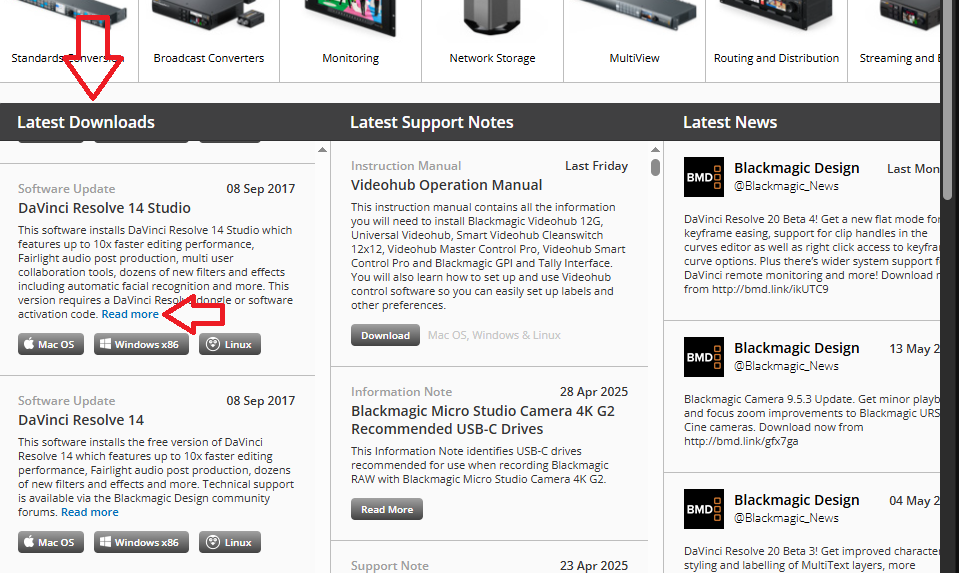
- Now visit the Blackmagic Design Support Page.
- Scroll down to the Latest Downloads section to find older versions of DaVinci Resolve.
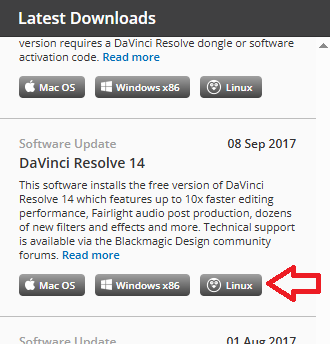
- Click Read More under the desired version to view its system requirements in the PDF file.
- Once you’ve identified a version compatible with your specs, click the appropriate Download button.
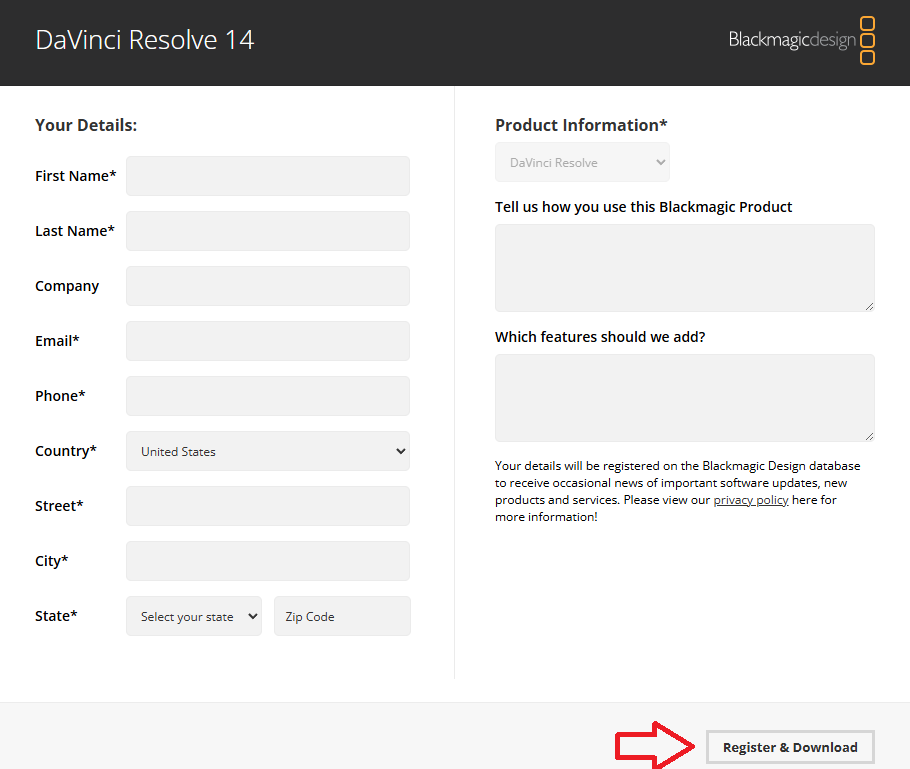
- Fill in the required details and click Register and Download.
- After downloading, extract the ZIP file, run the setup, and follow the on-screen instructions to install the selected version.
If none of the above steps resolve the issue, consider checking for GPU hardware failure or testing Resolve on a different system. Always keep backups of your projects before making changes to your setup.


