How to Create your Own Custom Photoshop Panels using Configurator Reloaded
Adobe Photoshop is an incredibly powerful tool widely used by many for a variety of reasons. We could talk about Photoshop’s awesomeness and it might just take up a whole day. But, that’s not what we’re here for. We have a very specific question in mind today. How can you make your own custom panel in Photoshop? Adobe Photoshop’s vast library of different tools that are put at your disposal can sometimes be overwhelming. These tools are categorized into different panels that you can move around, relocate, hide etc.
With all the tools that Photoshop offers, it is given that not always are you going to be using all of them. In this huge library and a plethora of different tools, there are some that you almost always are going to be using on a regular basis. Whether it is a complex project or a simple one, some tools are always going to be used. Having to navigate to them separately can be a tedious task, especially when you have to do it over and over again. By using Configurator Reloaded, you can customize and create your very own panel for Adobe Photoshop. You can arrange those panels and add whichever tool you like so that your most important and frequently used options always close to you.
Getting things started

First and foremost, you will need to download Configurator Reloaded from here. The downloadable file is a .zip one containing a setup for both Mac OS and Windows. After installing the one that you need, you will need to close all Adobe applications and restart them.
Next, navigate to Window > Extensions and enable Configurator Reloaded from there.
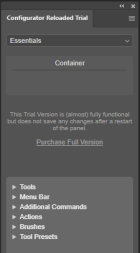
Once that’s done, you’ll immediately see a new panel pop up where by default, there may be a couple of containers. Now that we have all that set up, we can start customizing and building our own panels.
Building your own panel
Before you being dragging the tools onto your new panel, you must first create a container. To do that, click on the top right corner of the Configurator Reloaded panel and click “Add Container”. Adding a container will make a new space in the panel where you can drop your tools and have them arranged in a sorted and orderly manner.
Once you create a container, you can start dragging and dropping the tools that you want. As you can see, Configurator Reloaded already has categorized all the different tools that Photoshop has. You can navigate through them and find the ones that you want. Once you have them, click and drag them onto the container space which you have just now created.
You can create multiple containers onto the Configurator Reloaded panel. For simplicity and to keep things organized, rename the containers according to what kind of tools you have in them. This will allow you to remember where you need to look for when you’re trying to find one specific tool.
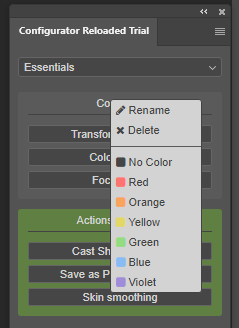
To rename a container, right click on it and you’ll see an option for renaming. Along with that, Configurator Reloaded also lets you choose custom colours for the containers that you have built. These colours can serve as a visual aid for you as you can categorize the types of tools according to particular colours as well.
Creating a customized panel for your Photoshop is incredibly easy thanks to Configurator Reloaded. It is a simple tool that is going to come in handy when you need to have your Photoshop tools sorted out for improved efficiency. With this guide, you’ll have gotten it down and are now ready to make your own panel so that you can get right to business and spare as little time finding the tools as possible.
Verdict
Configurator Reloaded’s trial version lets you have all the accessibilities however, your panel is not saved when you exit Photoshop. This little app is worth investing in and will save you a lot of time when you’re working in Photoshop.


