How to Create an Email Group in Outlook in 7 Easy Steps
Are you looking for an efficient way to email multiple recipients simultaneously in Outlook? You’re in the right place. This comprehensive guide will walk you through creating an email group in Outlook. By setting up an email group, you can send messages to many contacts at once, eliminating the need to select each contact manually.
We’ll cover how to set up an email group in the latest version of Outlook, as well as Outlook 2007, 2010, 2016, and 2019. Additionally, you’ll discover how to do this on Outlook in Microsoft 365 or Exchange, and through the Outlook mobile app.
This guide will also highlight the advantages of creating email groups for your professional and personal needs. Follow along to enhance your email efficiency and organization in Outlook.
What is an Email Group in Outlook?

Outlook’s email group, also known as a contact group, is essentially a list of email addresses that allows you to send emails to multiple people at once. This negates the need to enter every email address individually whenever you wish to send a group email.
Simply type the name of the email group, and Outlook will automatically send your email to everyone included in that group.
Differences between contact group, contact list, email group, and Distribution Lists
In Microsoft Outlook, the terms contact group, contact list, email group, and distribution list are often interchangeable. They serve the same purpose and are used in similar ways.
Interestingly, on the Microsoft Office support site, the term “Contact Group” is more commonly used instead of “Distribution List” in recent posts. In the Outlook app, you’ll find “Contact Group” used in the Windows version and “Contact List” in the Mac version.
In earlier versions (2007 or prior), it was known as a Distribution List. It was termed “Contact Group” in 2010, and presently, it is referred to as an email group. These terms appear in the app’s menus, its ribbon, and even in its help guides. As we navigate through the following steps, “Email Group,” “Contact Group,” and “Contact List” will be the terms most frequently encountered.
Create Email Group or Contact Group in Outlook
This section will detail the steps to create an email or contact group in Outlook for nearly all of its versions, enabling you to send messages to multiple recipients with a single click. These methods simplify managing group communications.
1. Create Email group in Outlook’s latest version
The following steps apply to the latest version of Outlook, whether you’re using the beta version on Windows, the standard app on MacOS, or the Outlook website. Here’s what you need to do:
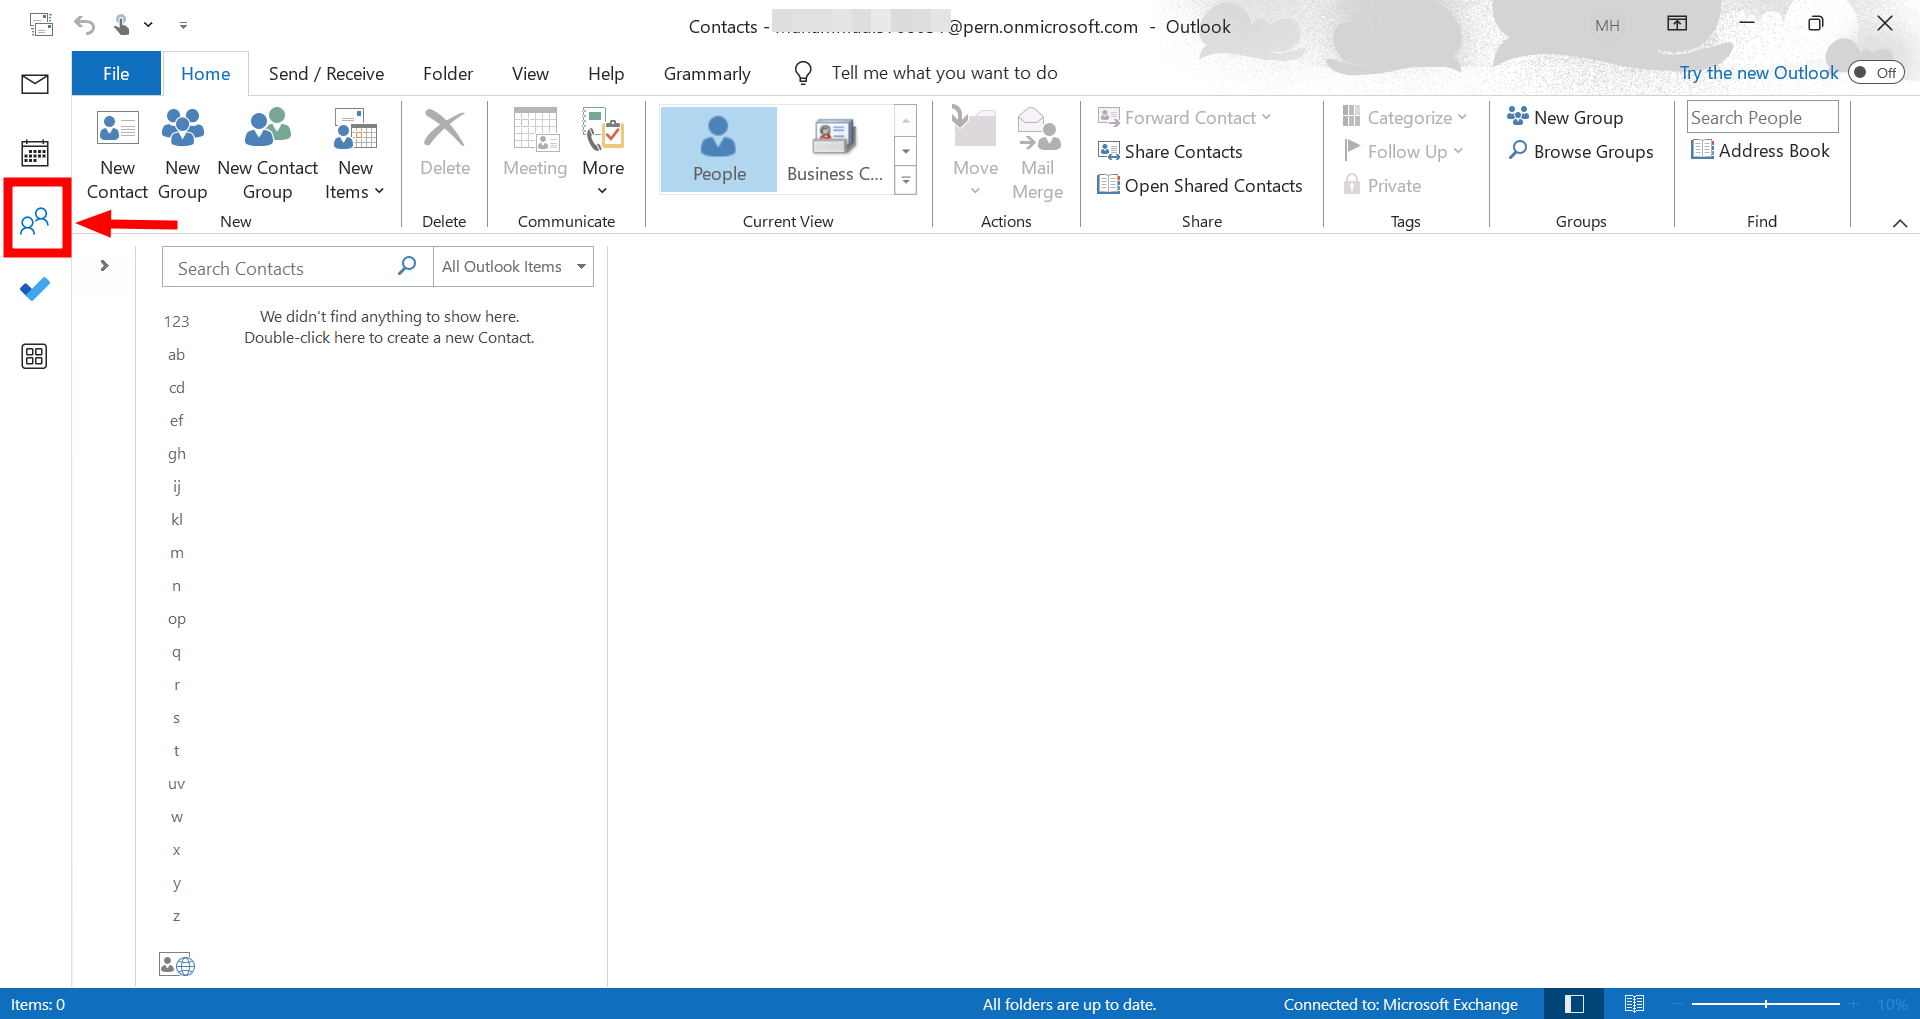
- Click on “People” on the Navigation bar.

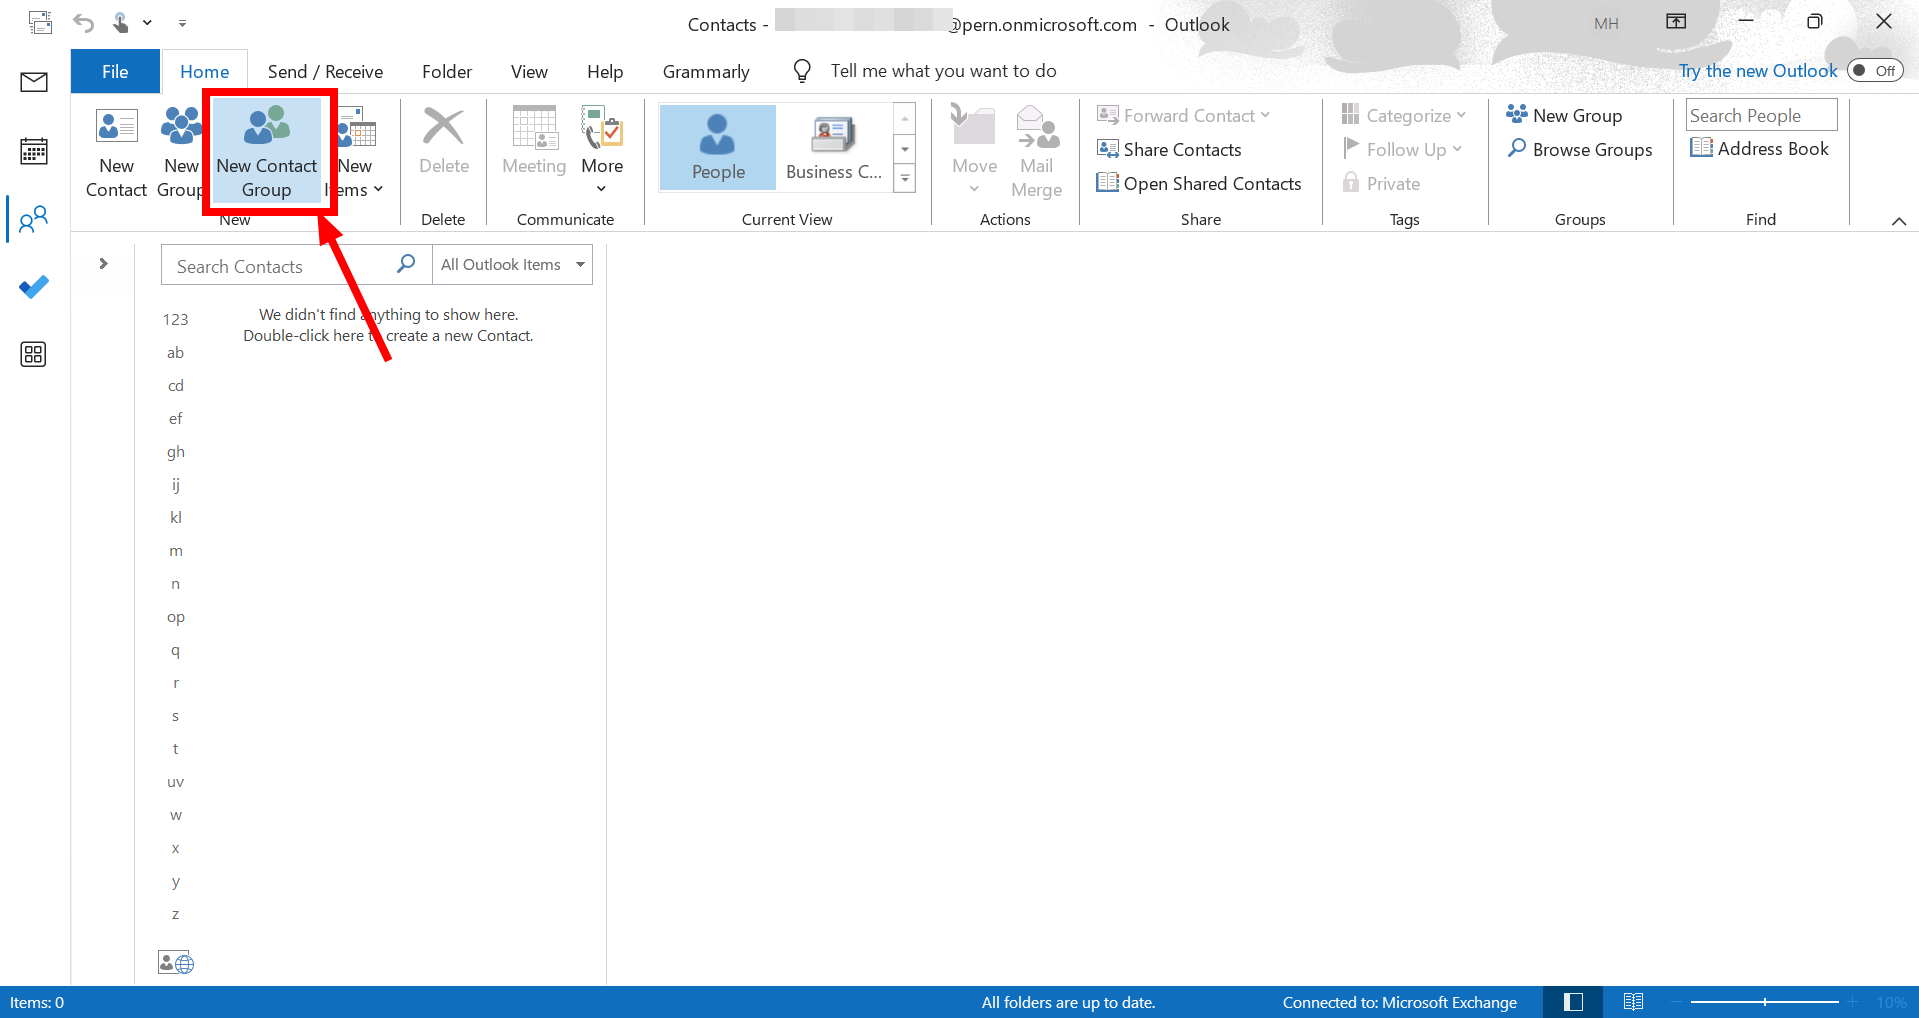
Click on People - Go to Home and click on “New Contact Group.”
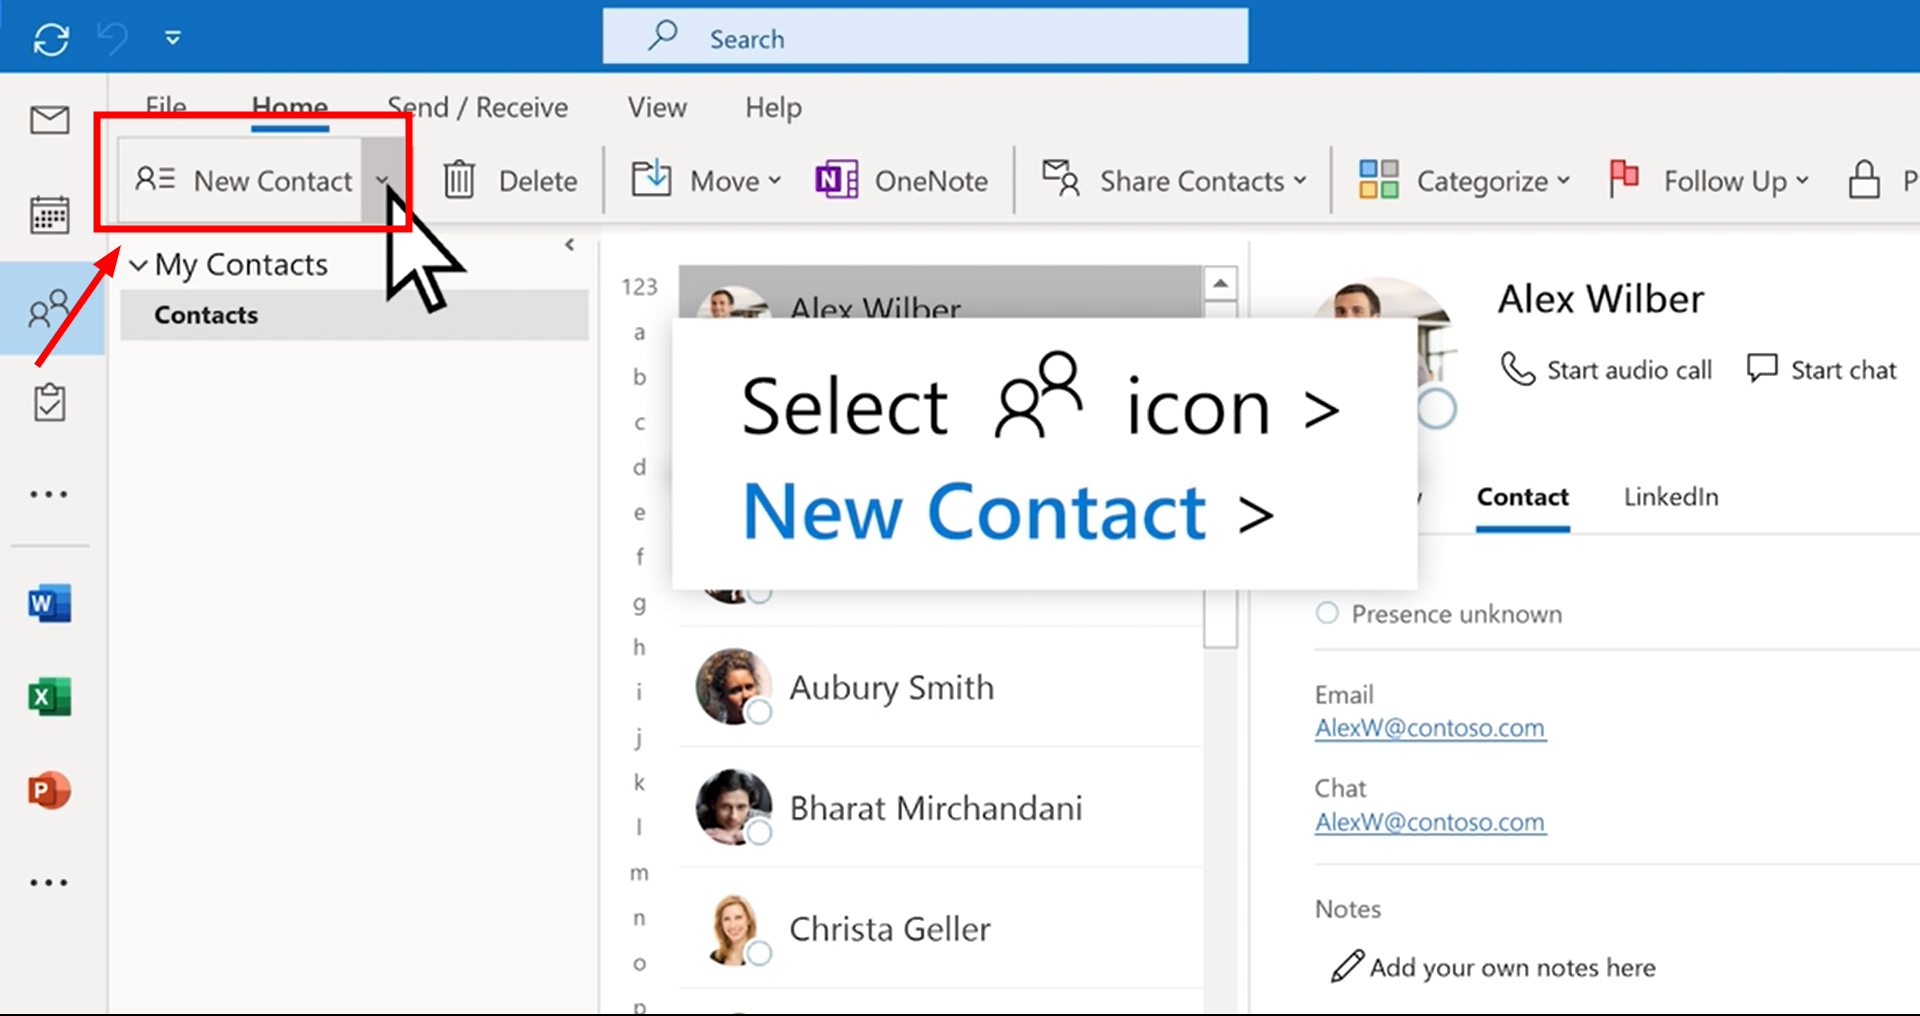
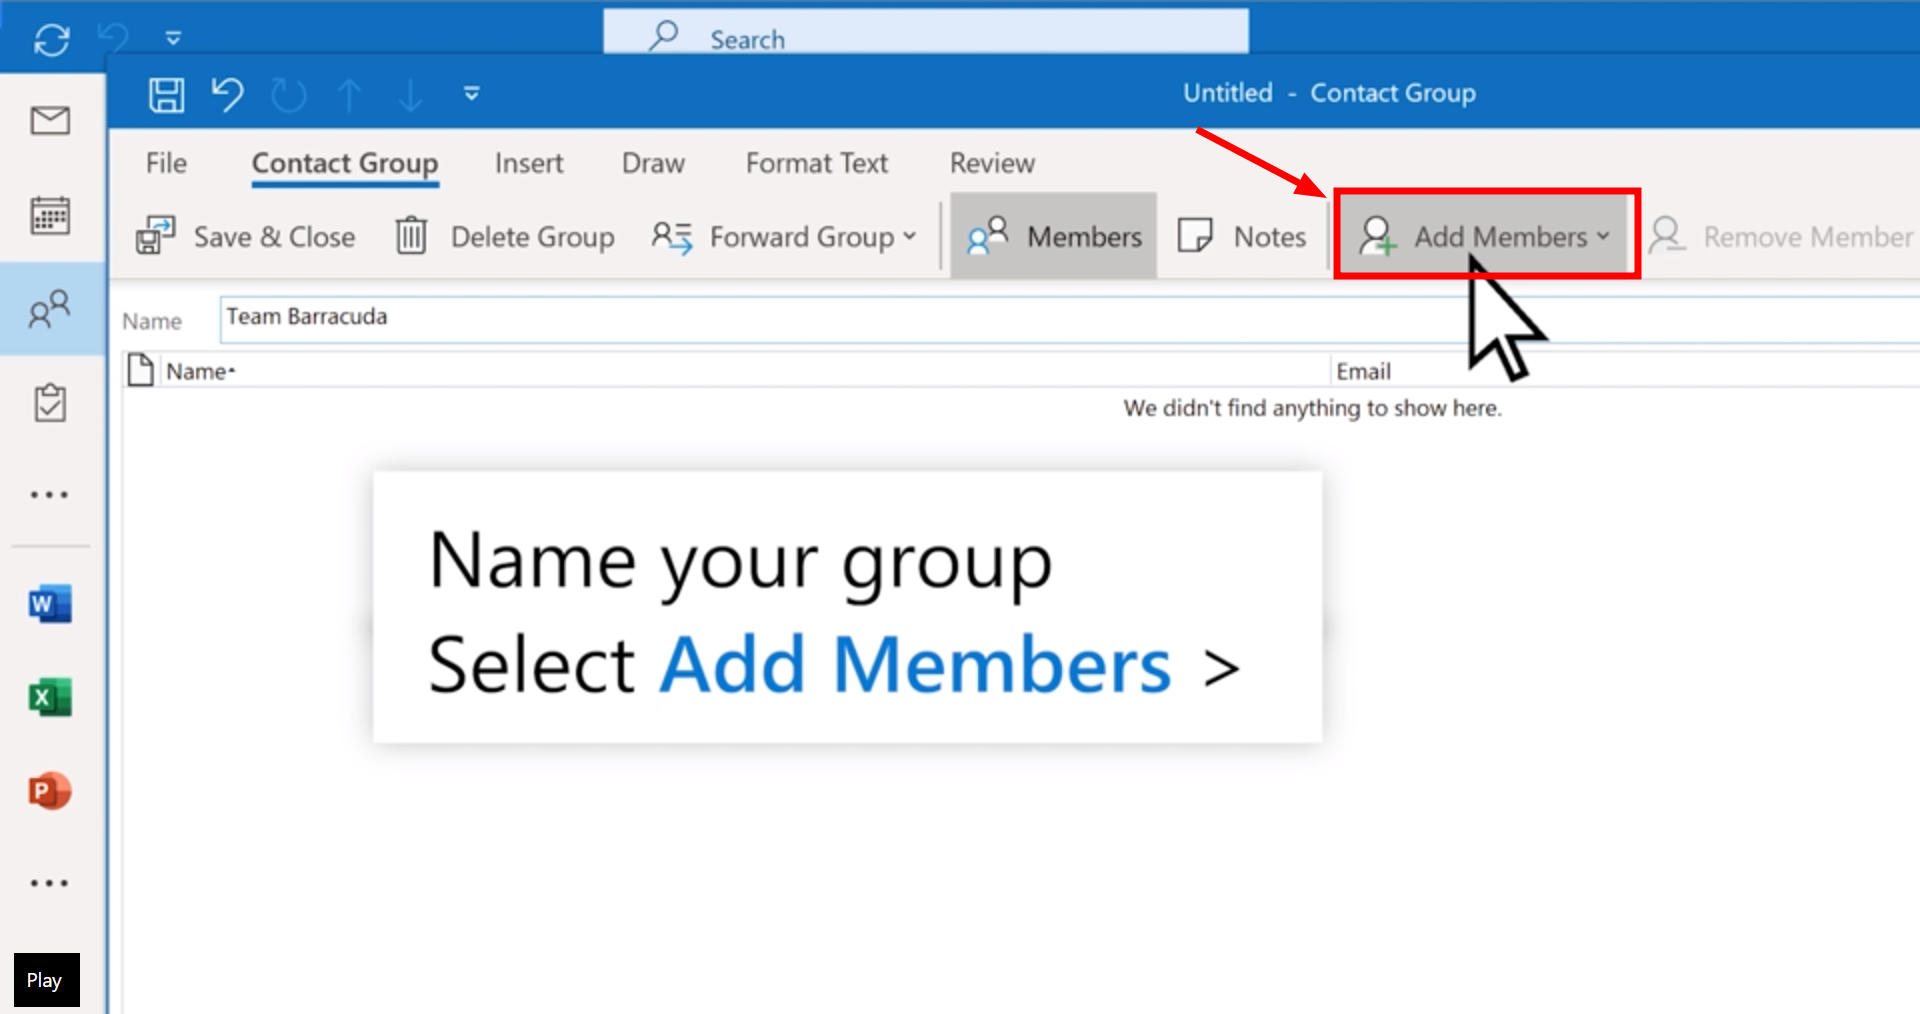
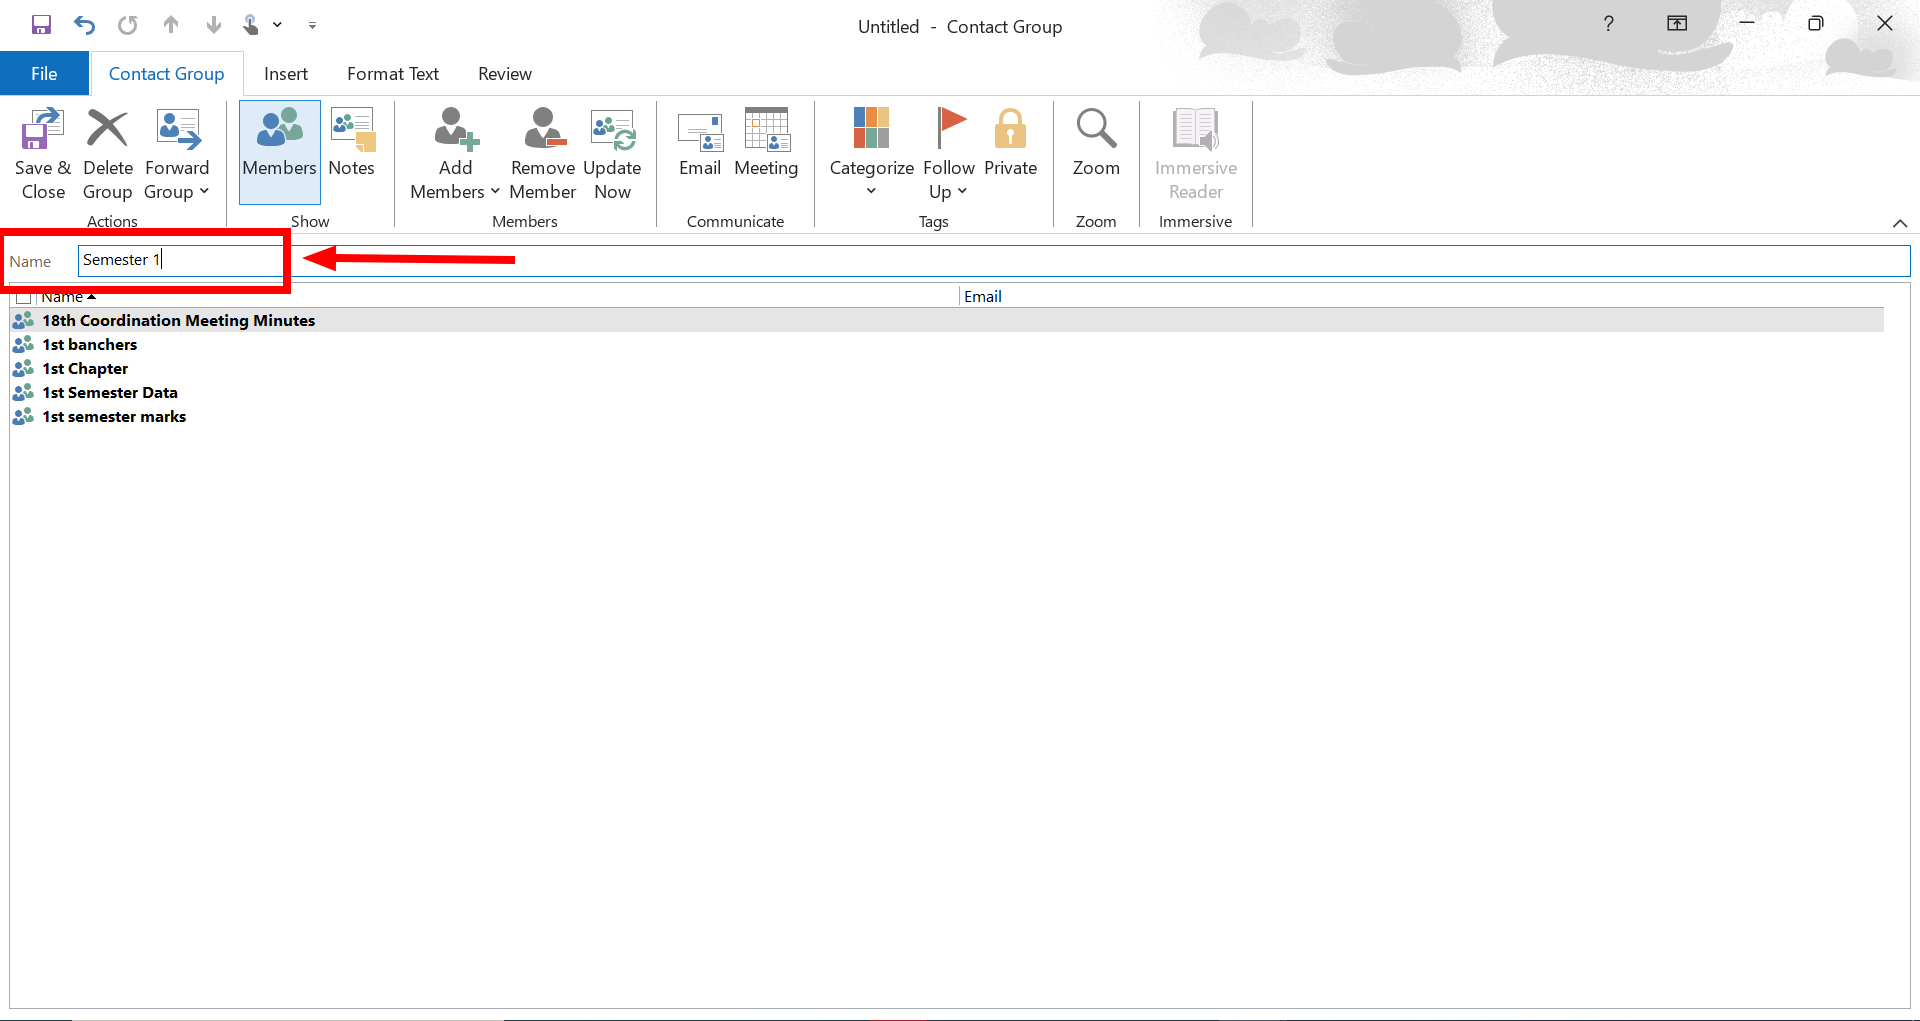
Click on New Contact Group - In the box that appears, type a name for your group.
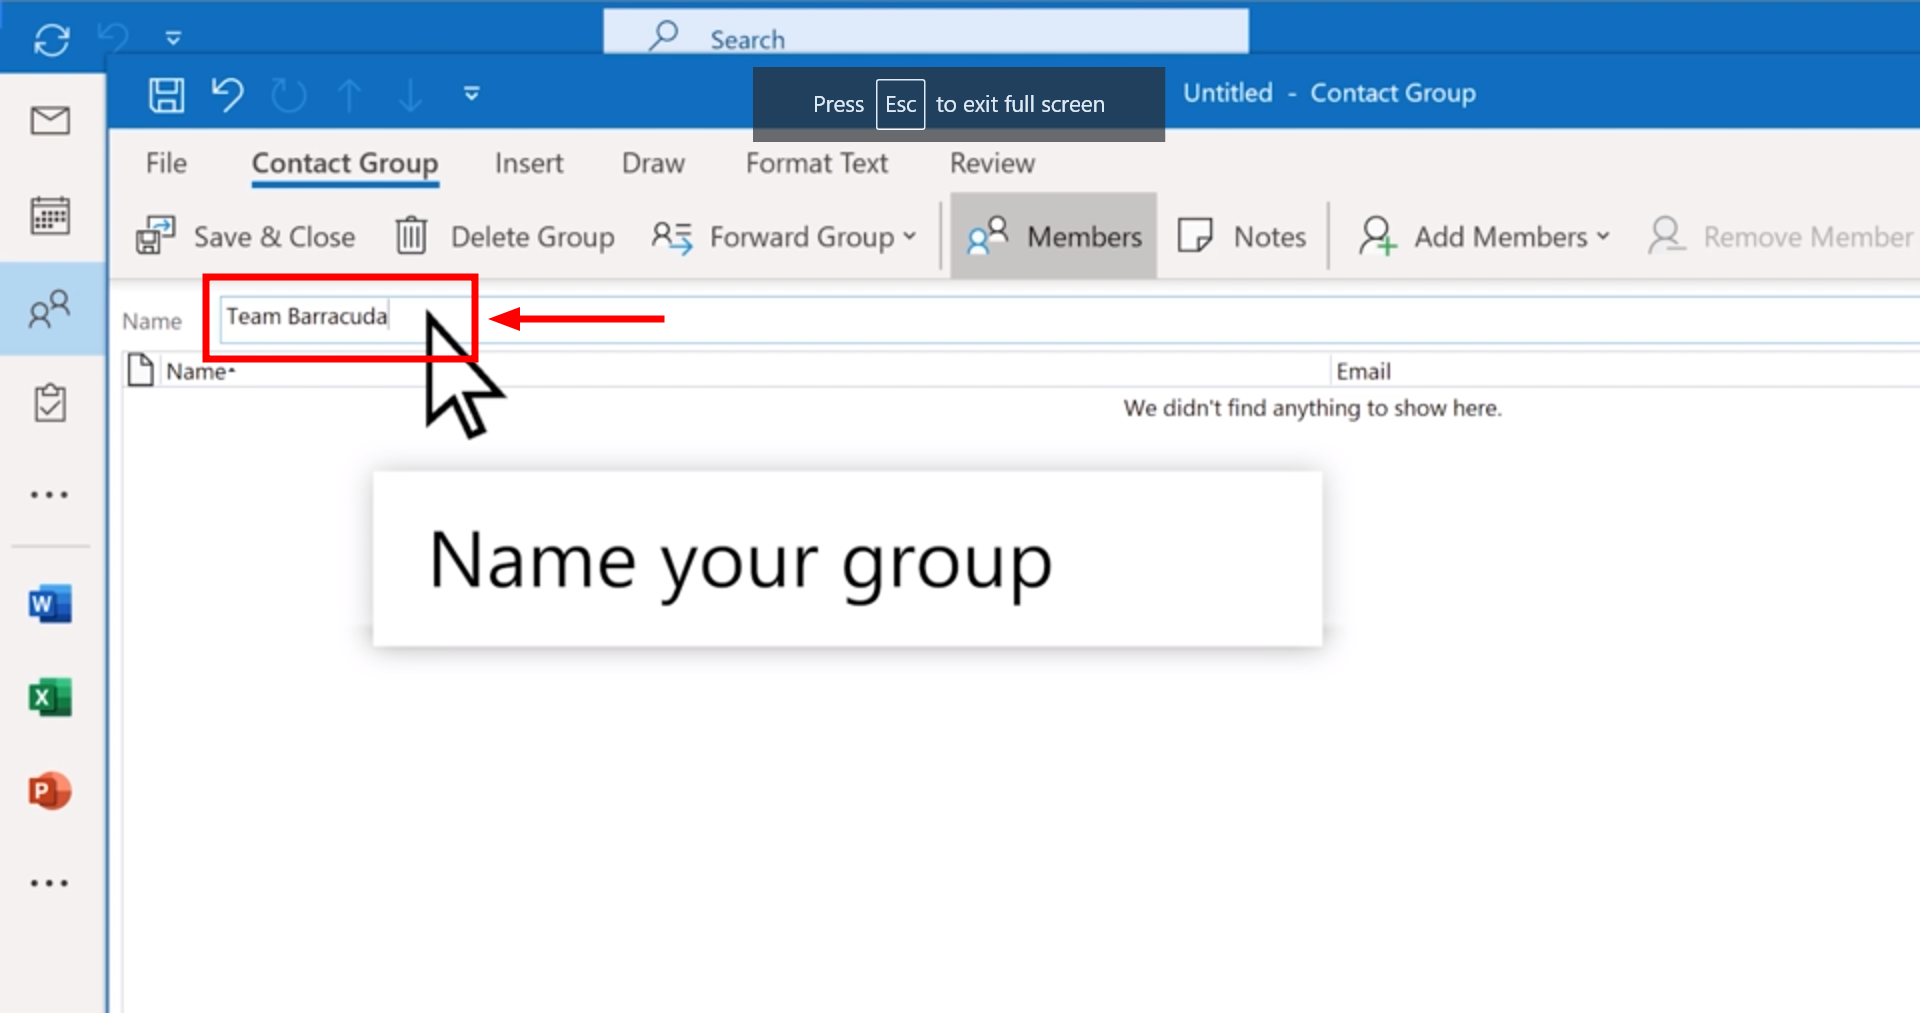
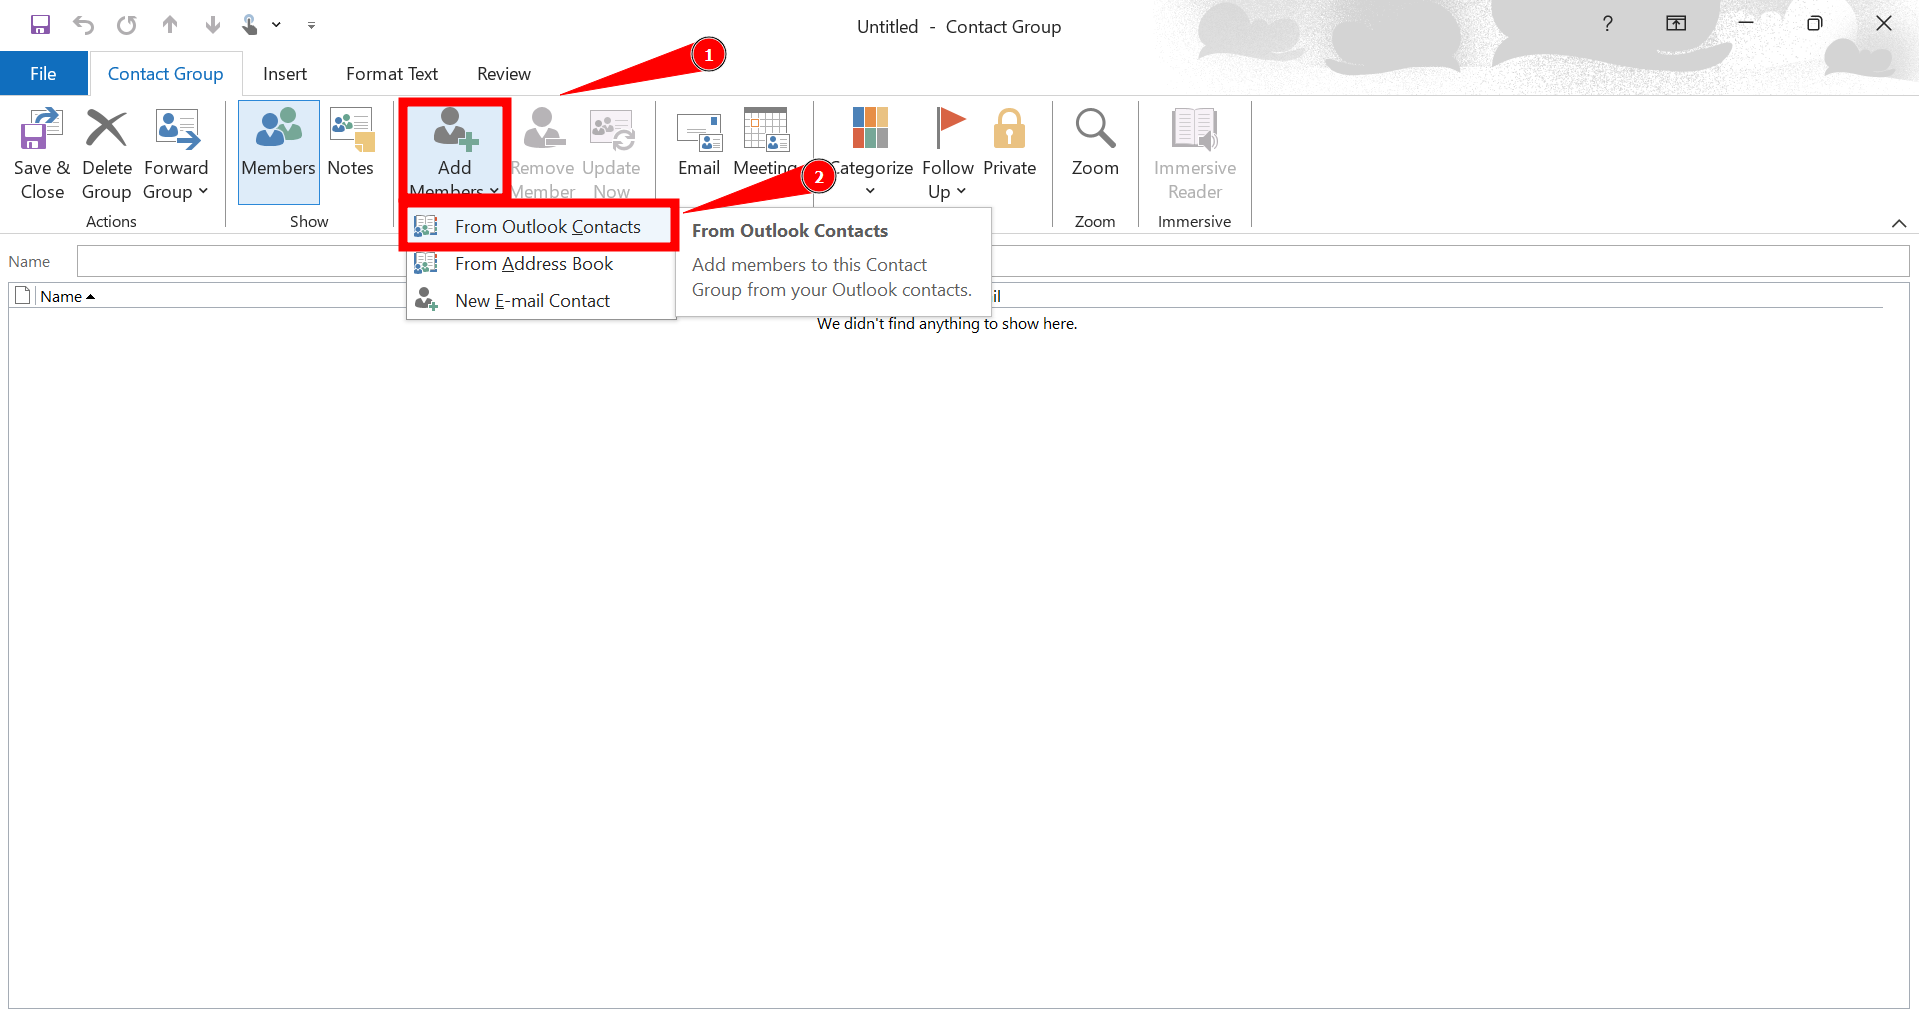
Type a name for your group - Then select “Add Members.”
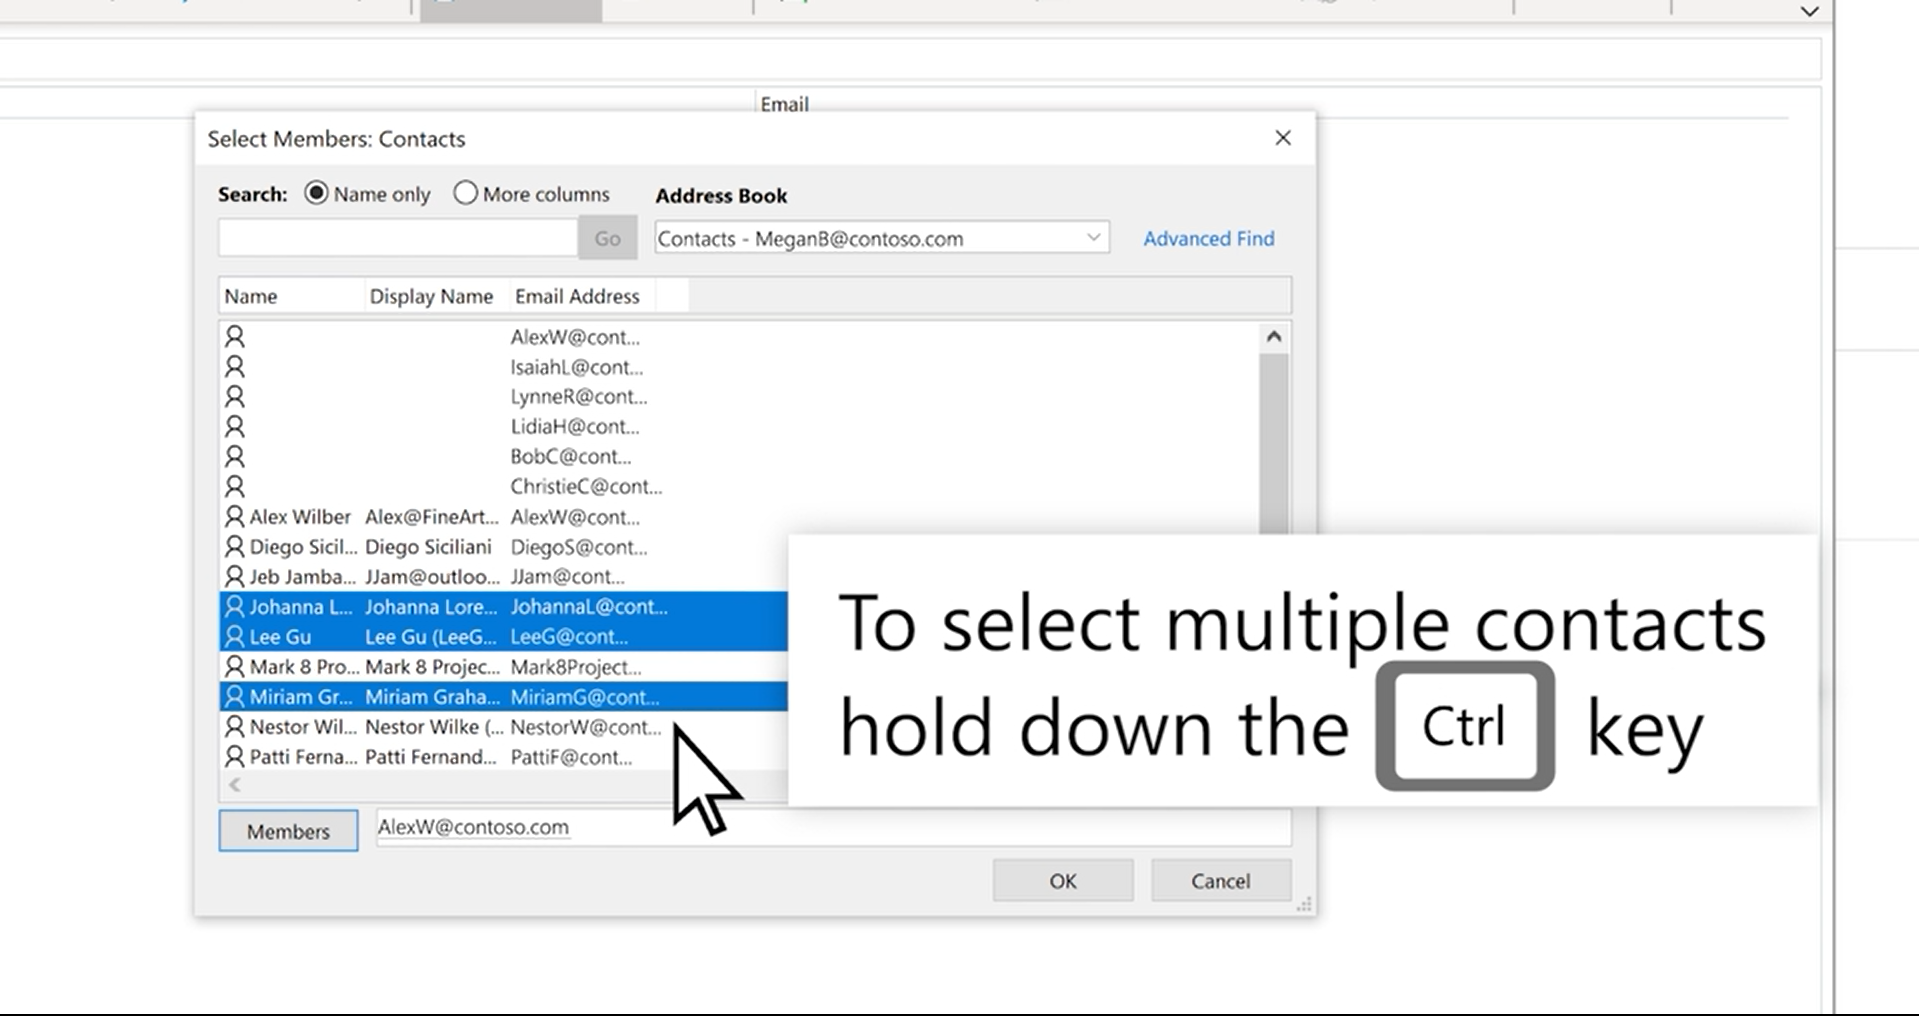
Then select Add Members - Choose “From Outlook Contacts.”

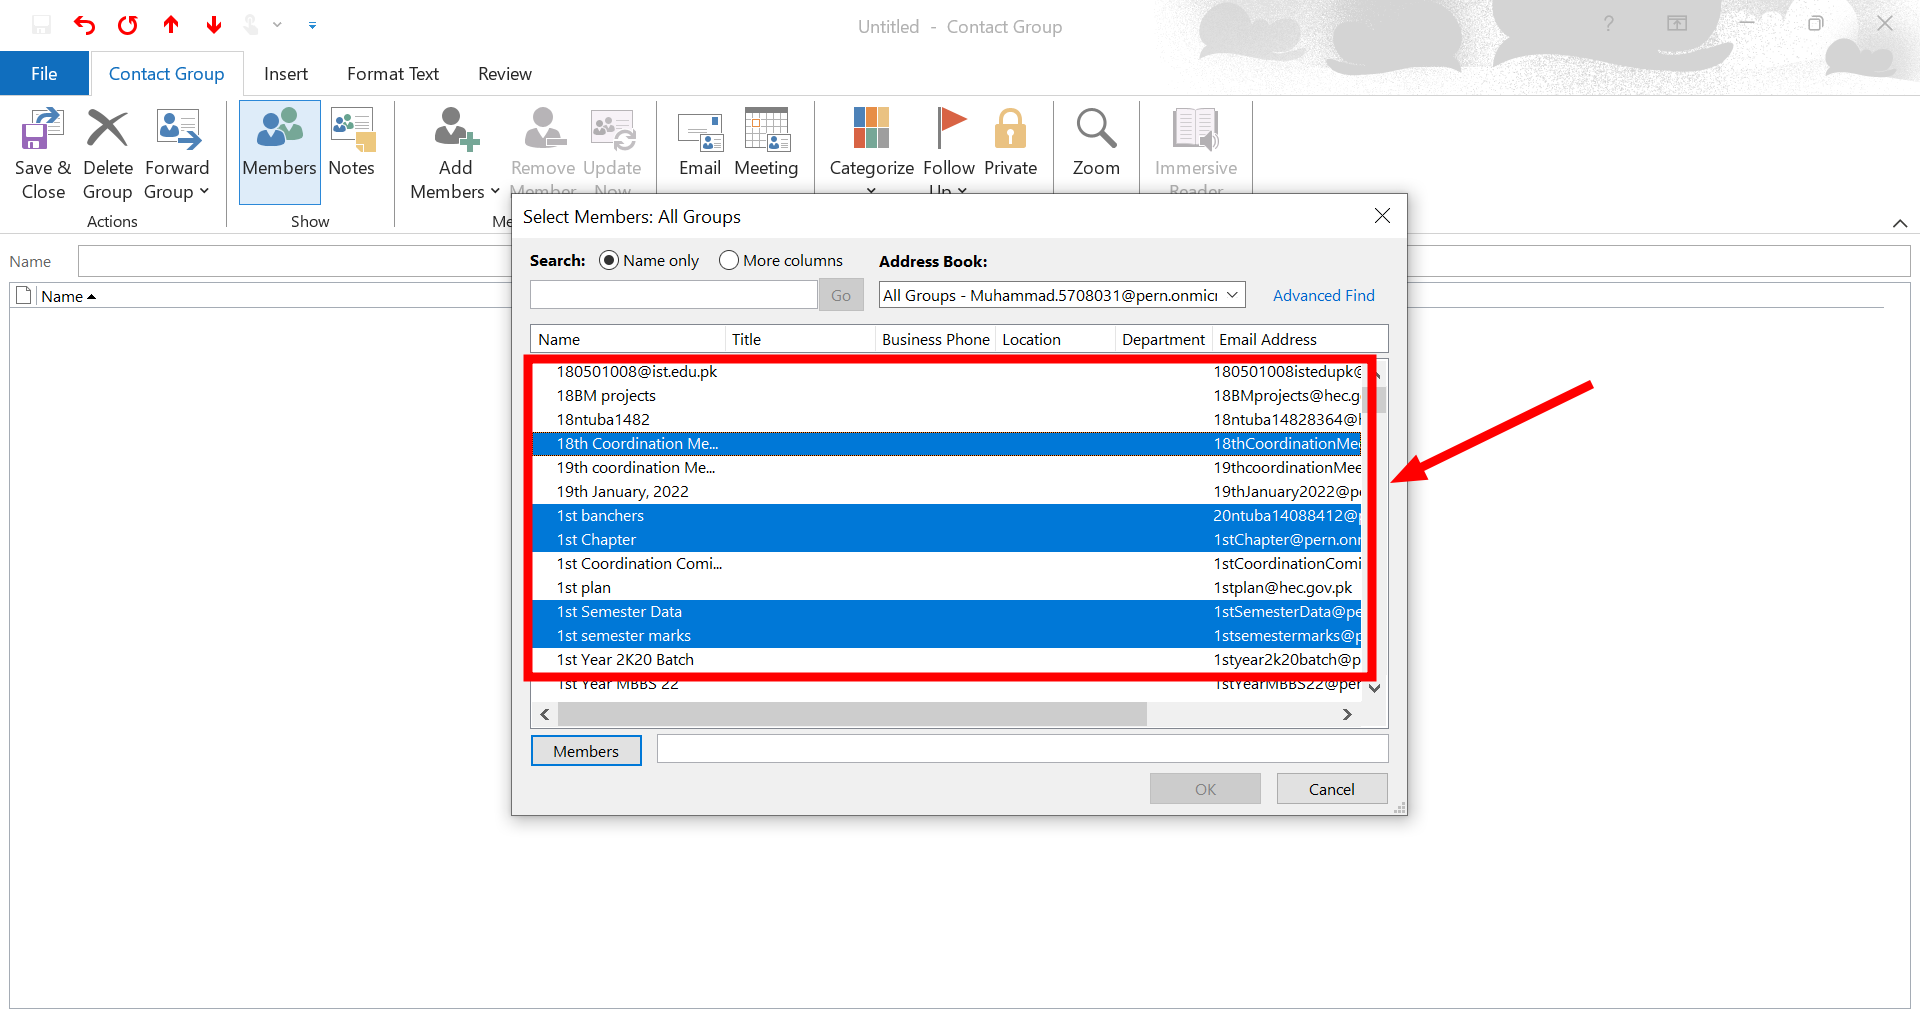
Select From Outlook Contacts - Add individuals from your address book or contacts list, and click “OK.” To select multiple contacts at once, hold the Ctrl key while clicking.
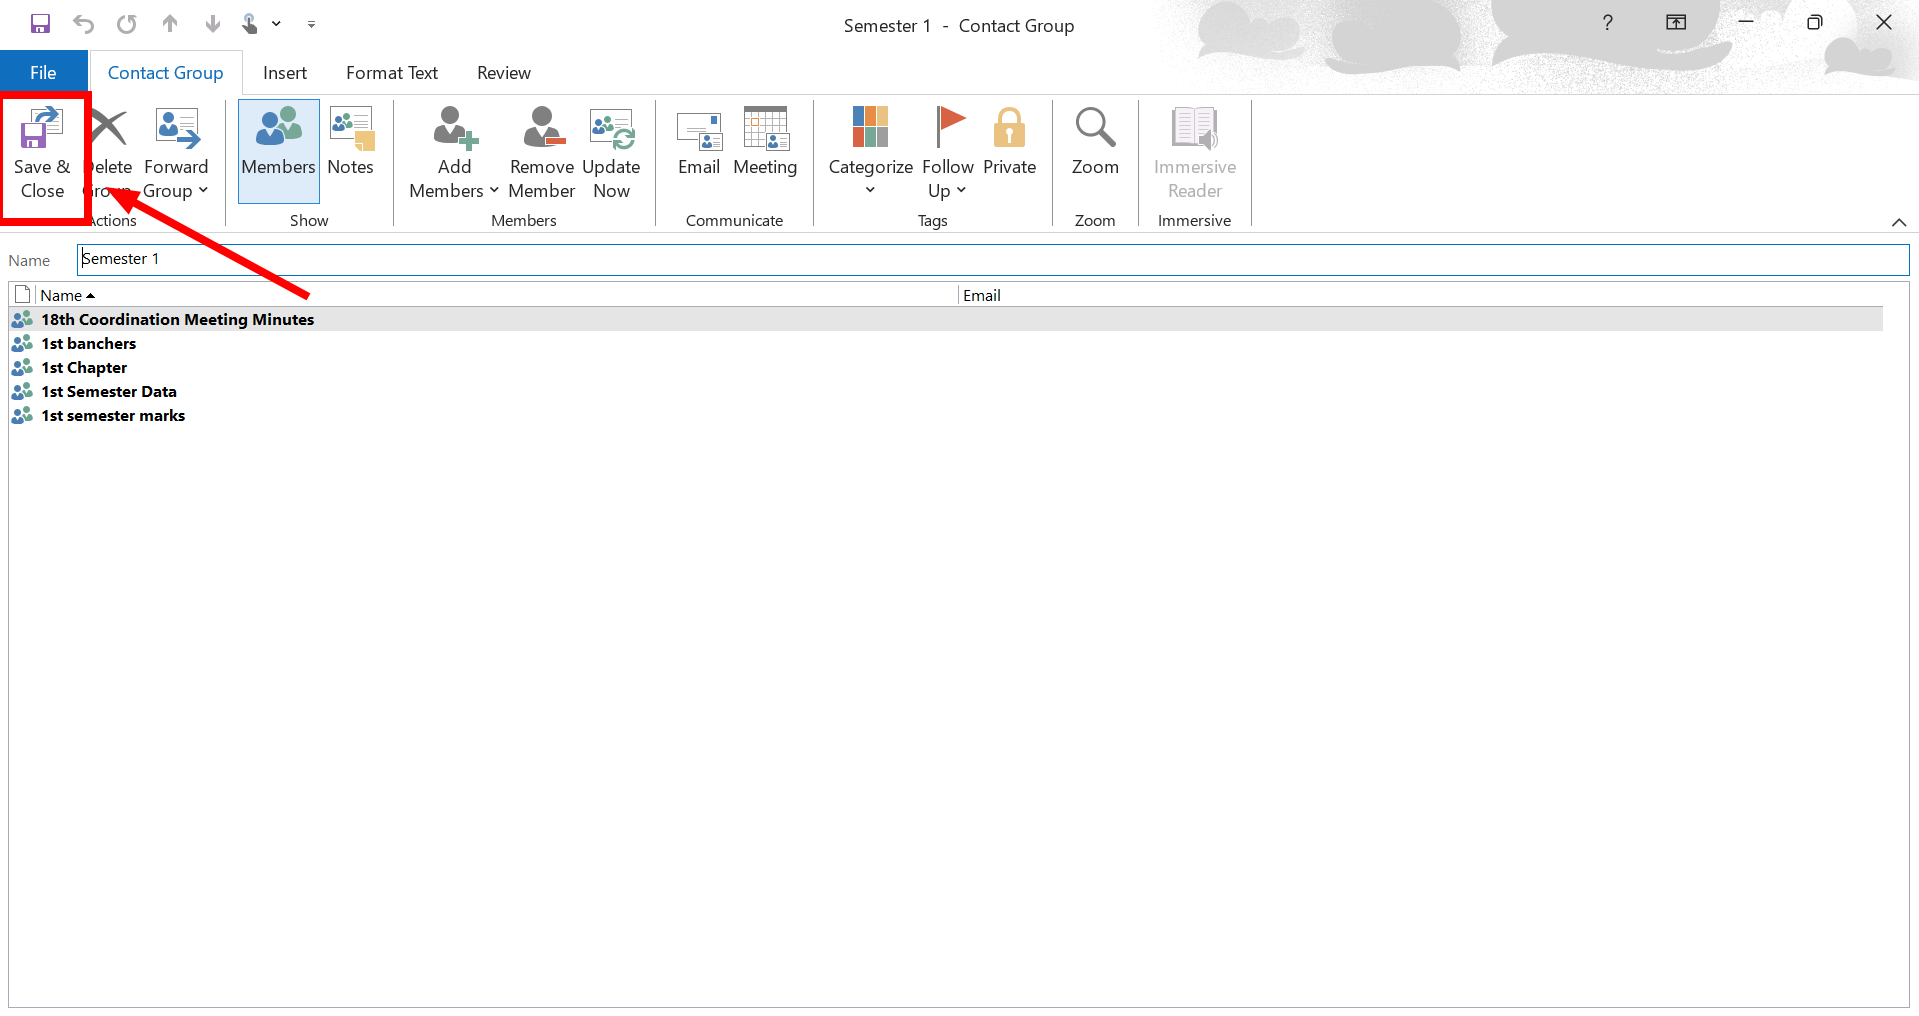
Click OK - Click “Save & Close.”
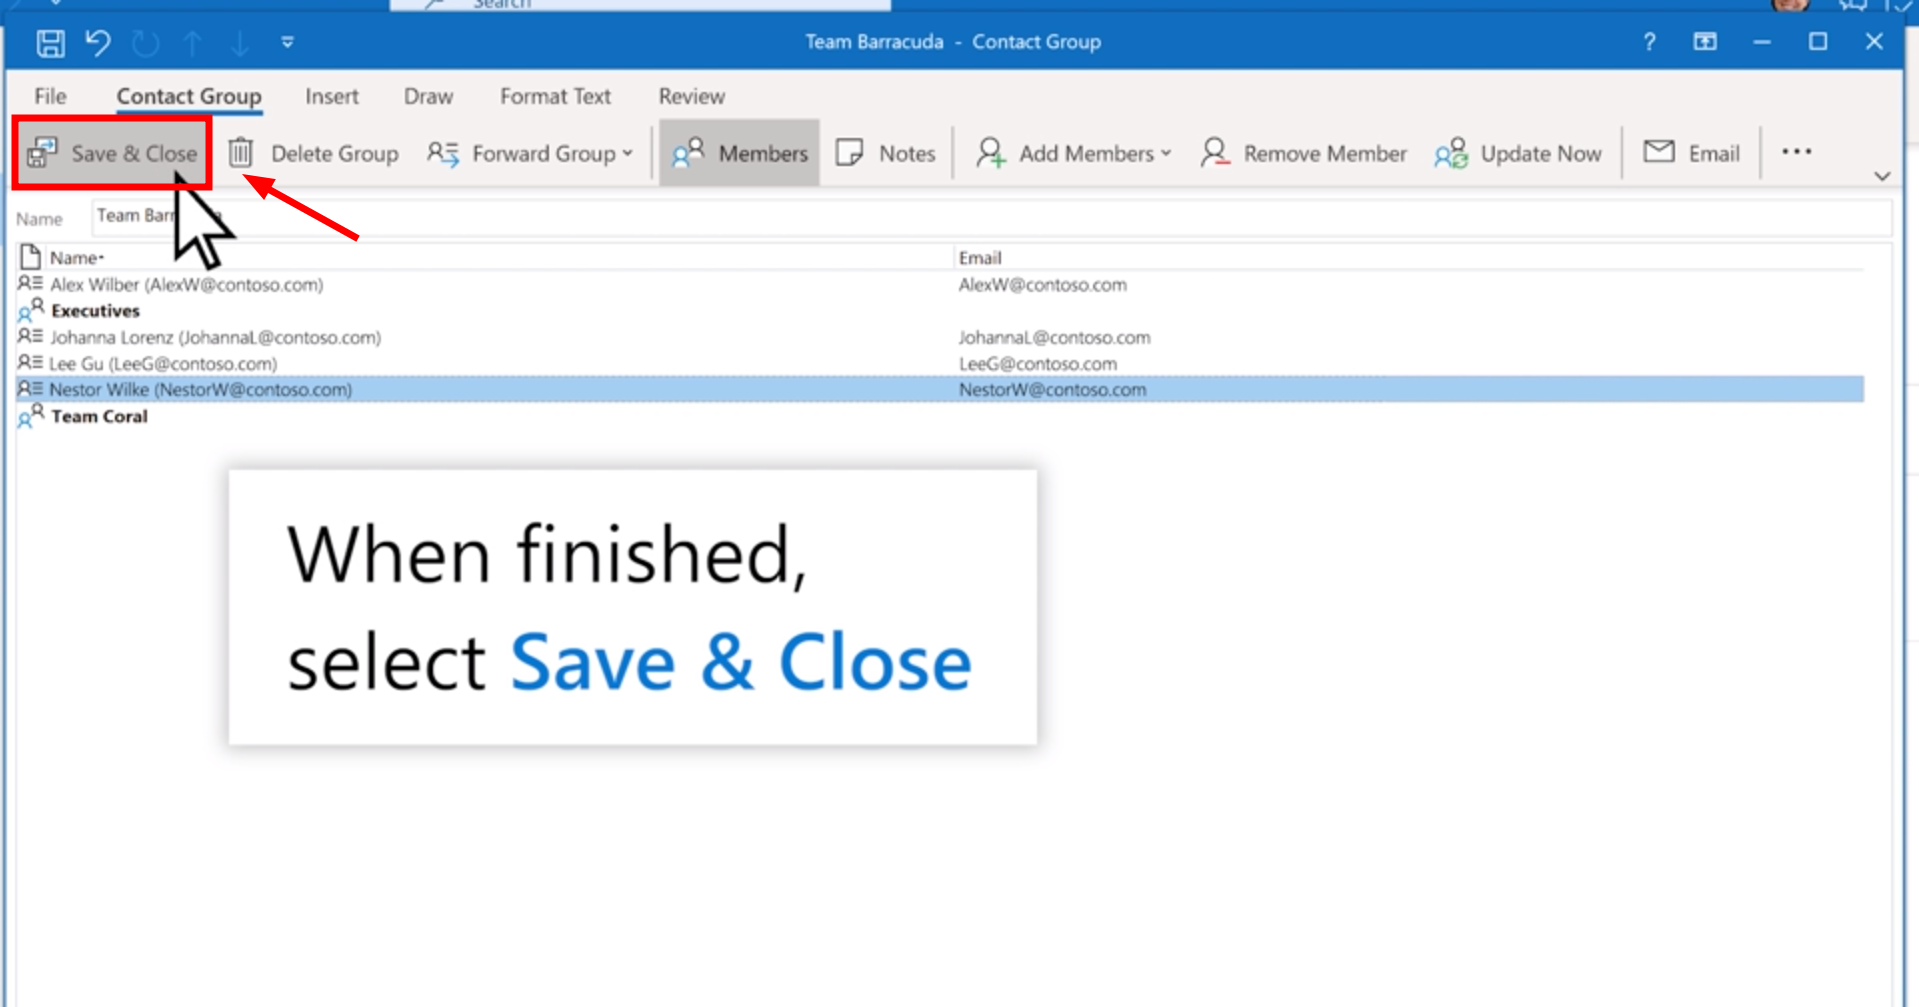
Click Save and Close
2. Send an Email to a Contact Group
After creating the contact or email group, follow these steps to send an email:
- Go to Home, then select “New Email.” Click on “To” and input the name of your contact group.

Click on To - Select the group name to add it to the “To” field, then click “Send.”
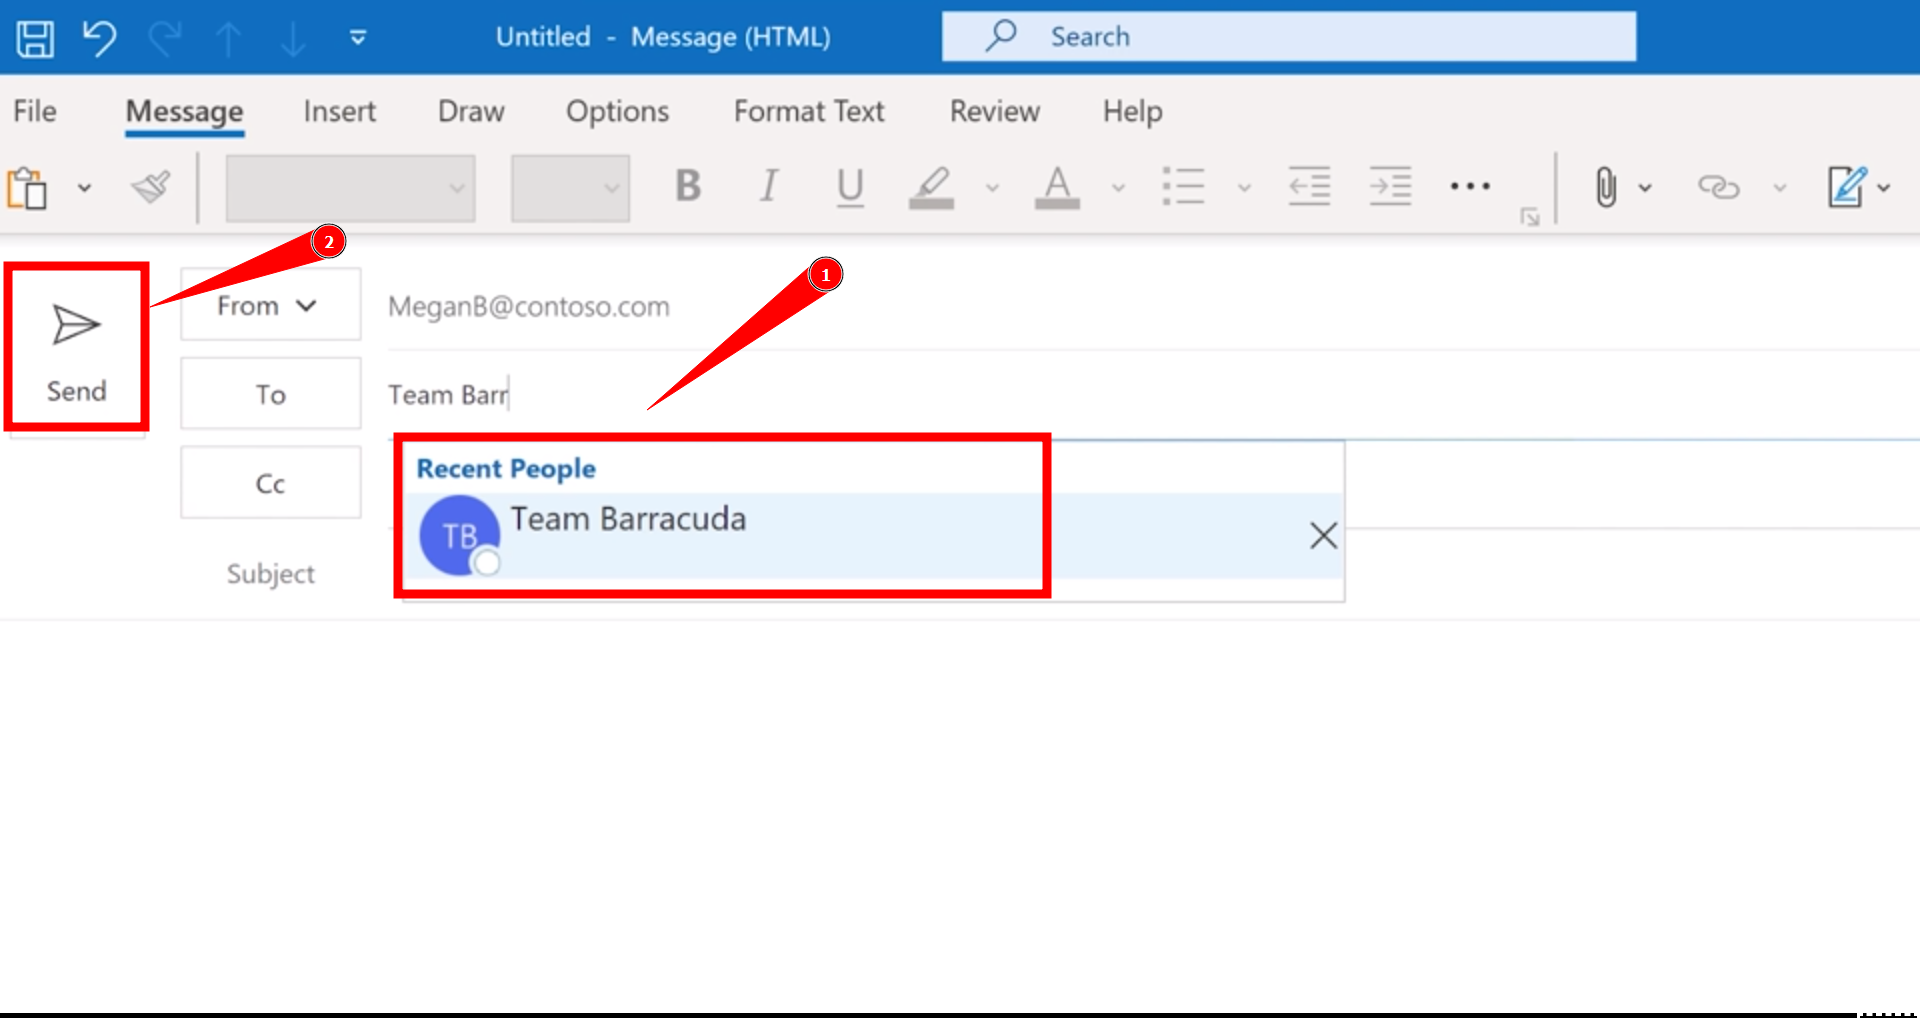
Click Send
3. Create Email Group in Outlook 2016 and 2019
If you are using slightly older versions of Microsoft Outlook (2016 or 2019), follow these steps to create an email group:
- Open Outlook and click the “People” icon at the lower-left corner of the navigation pane.
Click on the People icon - Navigate to the Home tab and select “New Contact Group.”
Choose ‘New Contact Group - Click “Add members” and opt for “From Outlook Contacts.”
Click on Add members - If you wish to add multiple contacts at once, hold the CTRL key while choosing each email contact from your address book.
Press and hold the CTRL - Name your group, ensuring you’ve included all the contacts you need.
Name your group - Under the Contact tab, click “Save & Close.”
Click Save and Close
4. Create Email Group in Outlook using Microsoft 365 or Exchange
Creating an email group in Outlook with Microsoft 365 or Exchange involves a slightly different approach. In Office 365 Outlook, only authorized administrators can set up groups in the Admin Center, which is accessible online.
To create a contact group, you need to use Exchange Online or the Microsoft 365 Admin Center.
- Open the Microsoft 365 Admin Center and locate “Active Teams & Groups.”

Look for Active Teams Groups - Select “Add a Group.”

Click on Add a Group - Choose the type of group to create. Typically, select “Microsoft 365 (Recommended)“.
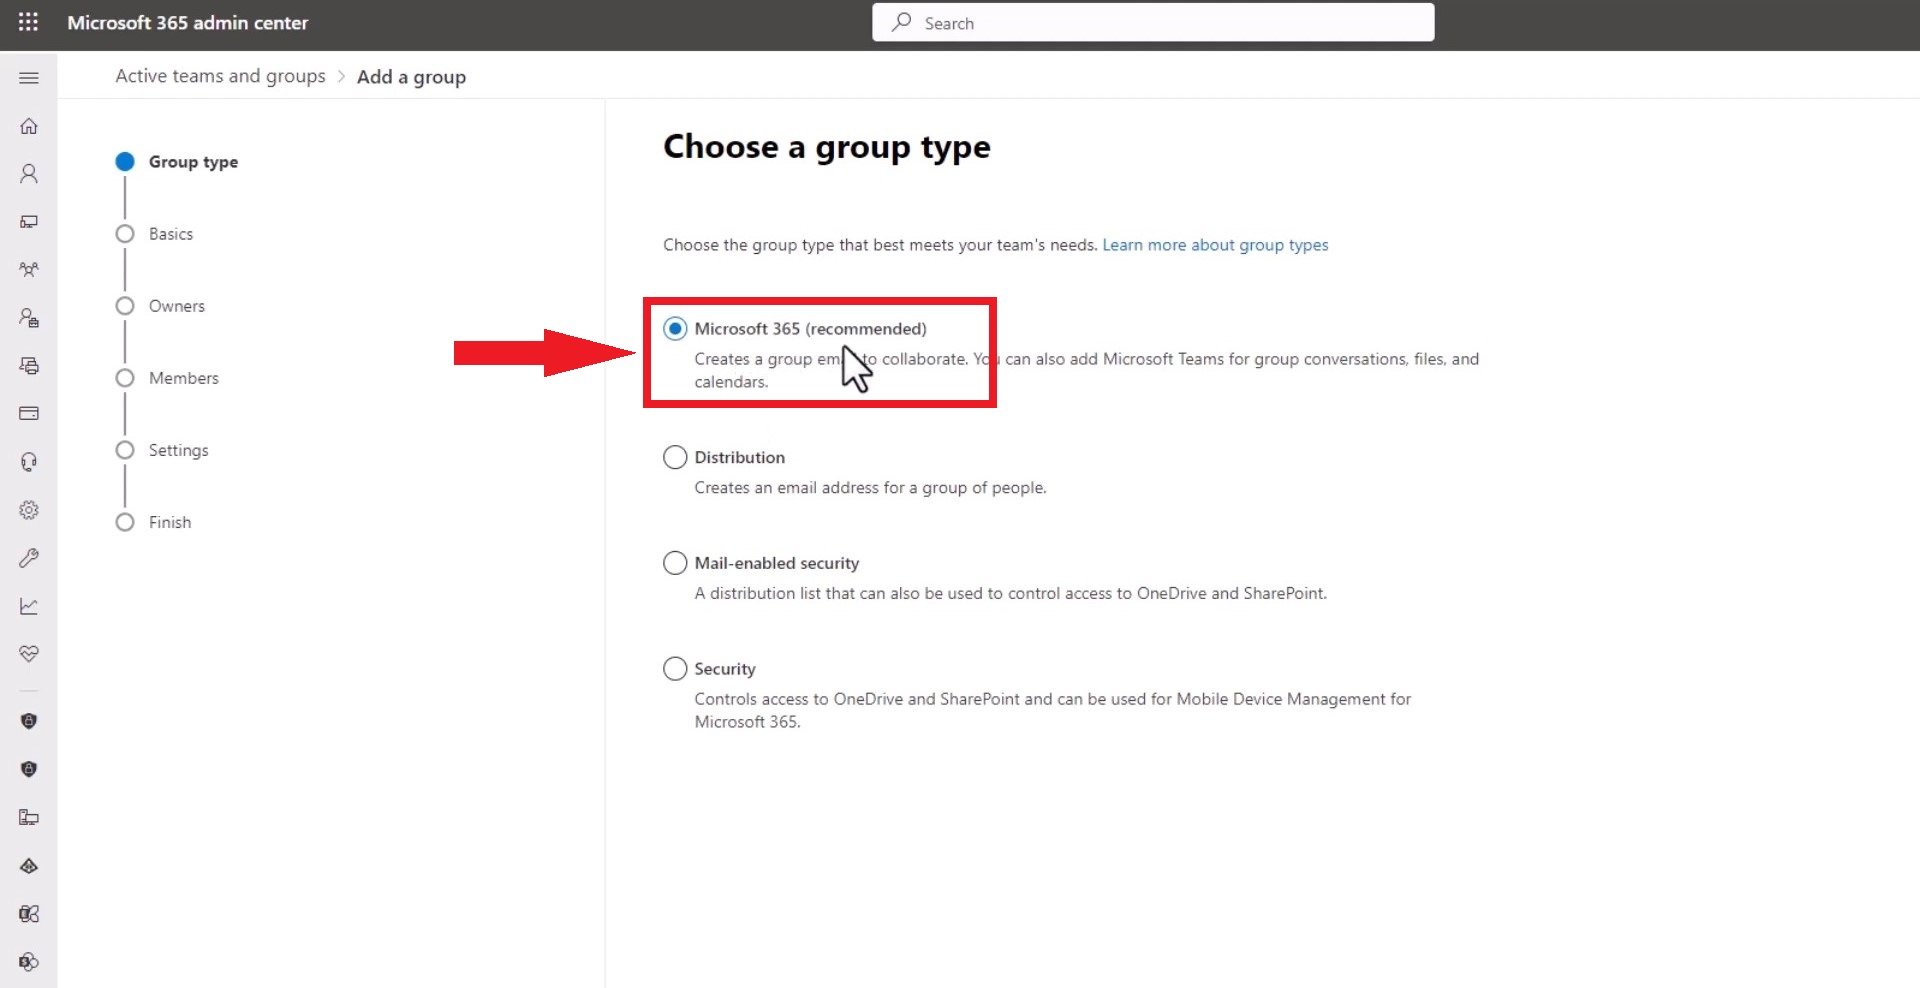
Select the type of group - Assign a name to your group.
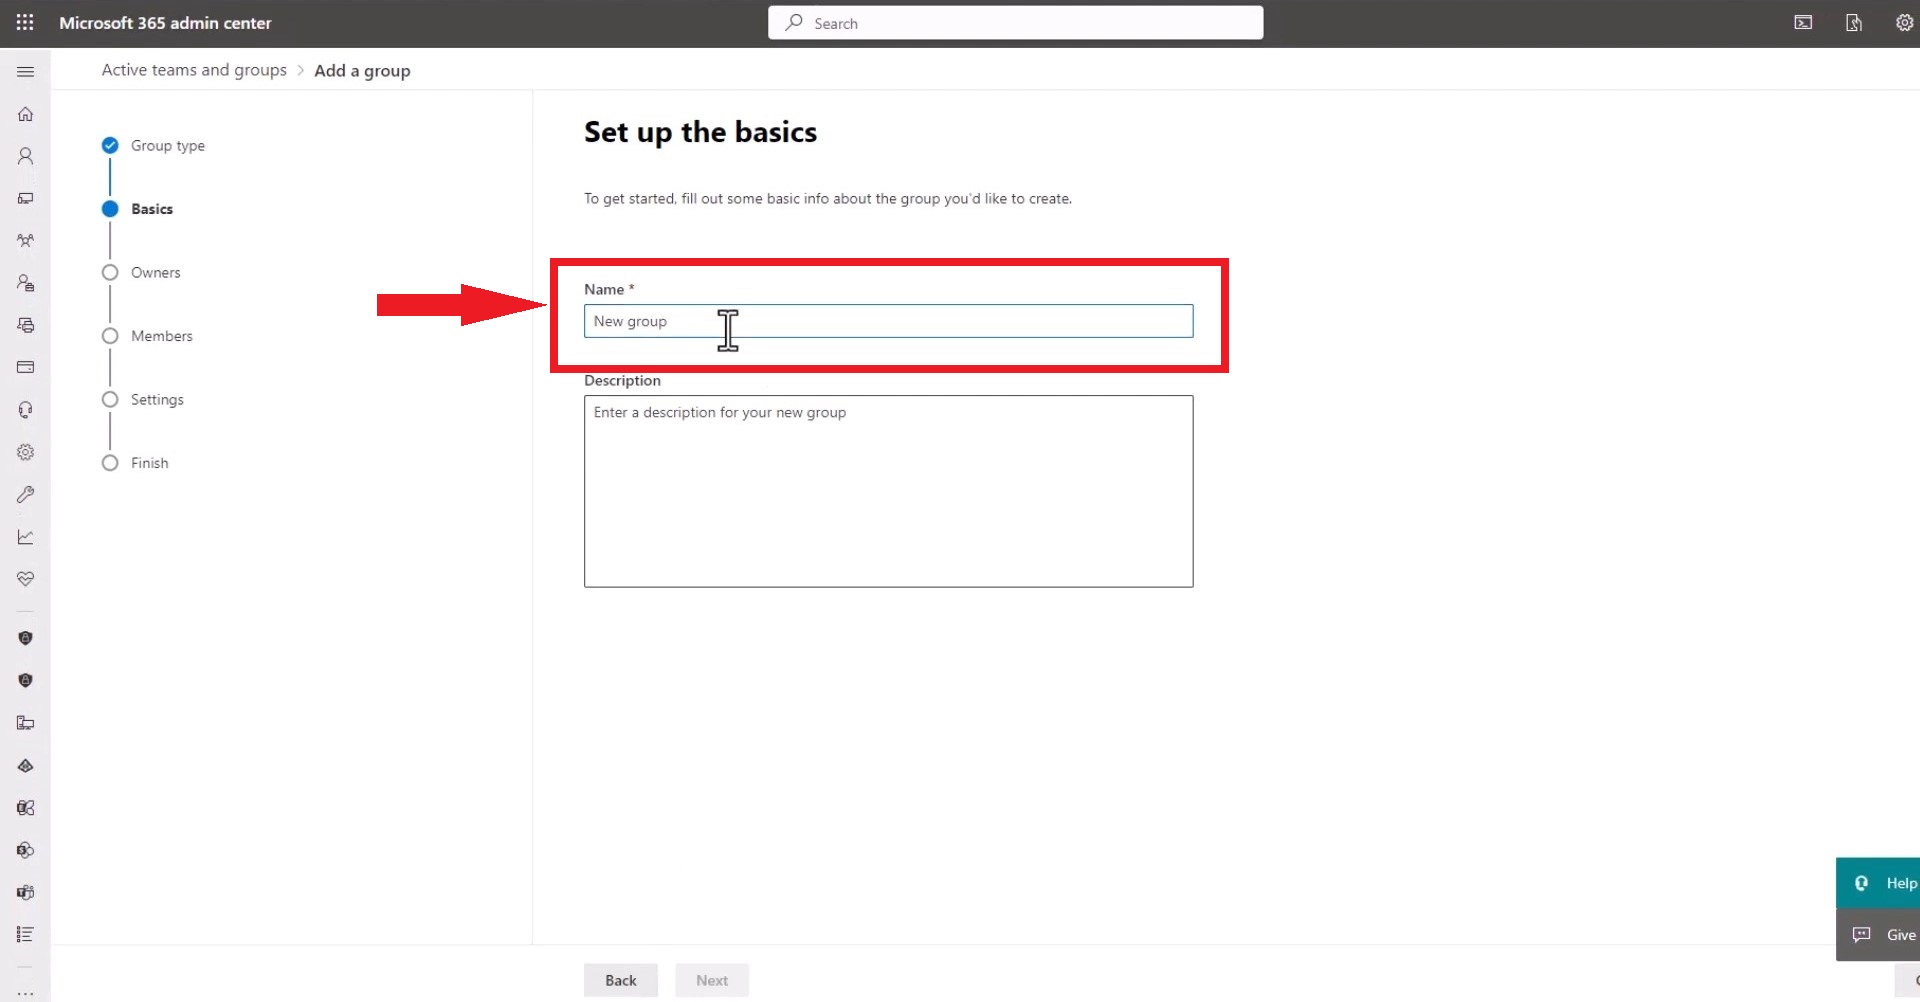
Name your group. - Next, click “Add Owners.” Owners can manage members, change the group’s name, and more.
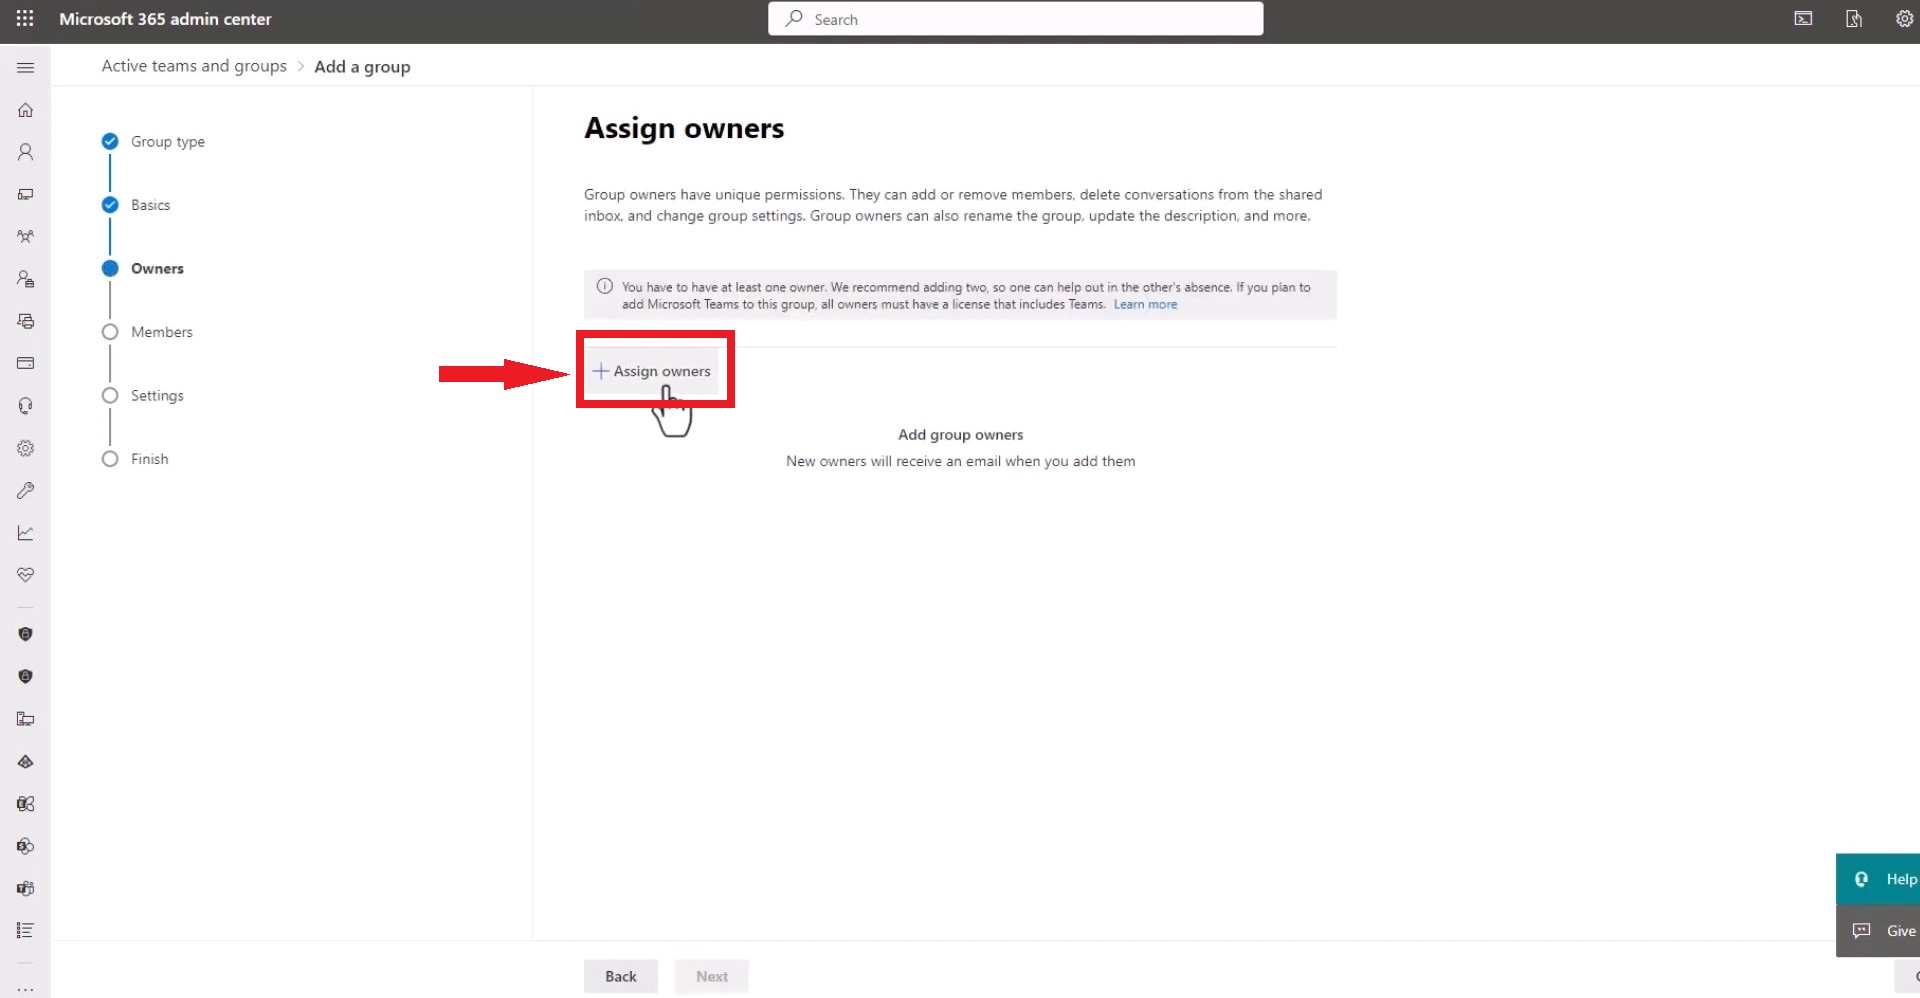
Click Add Owners - Add members to your group.
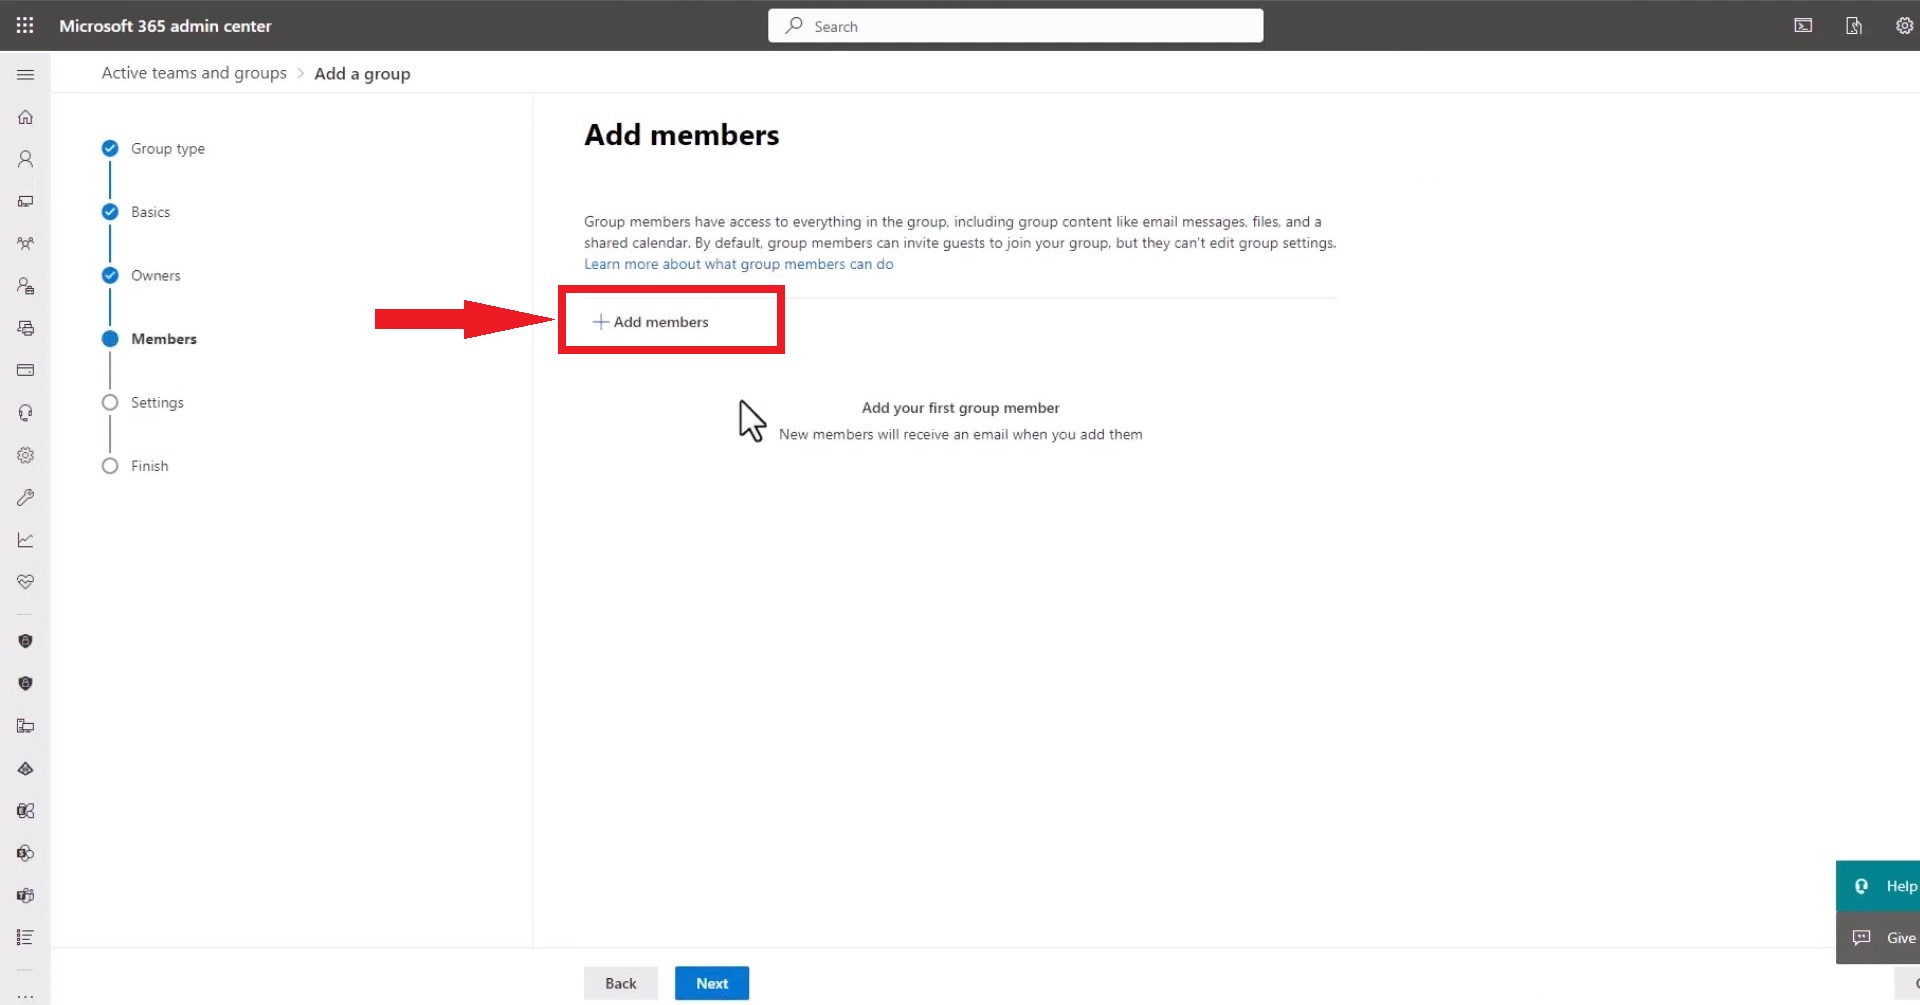
Add members to your group - Create an email address for the group.

Create an email address for the group - Click on “Create group.”
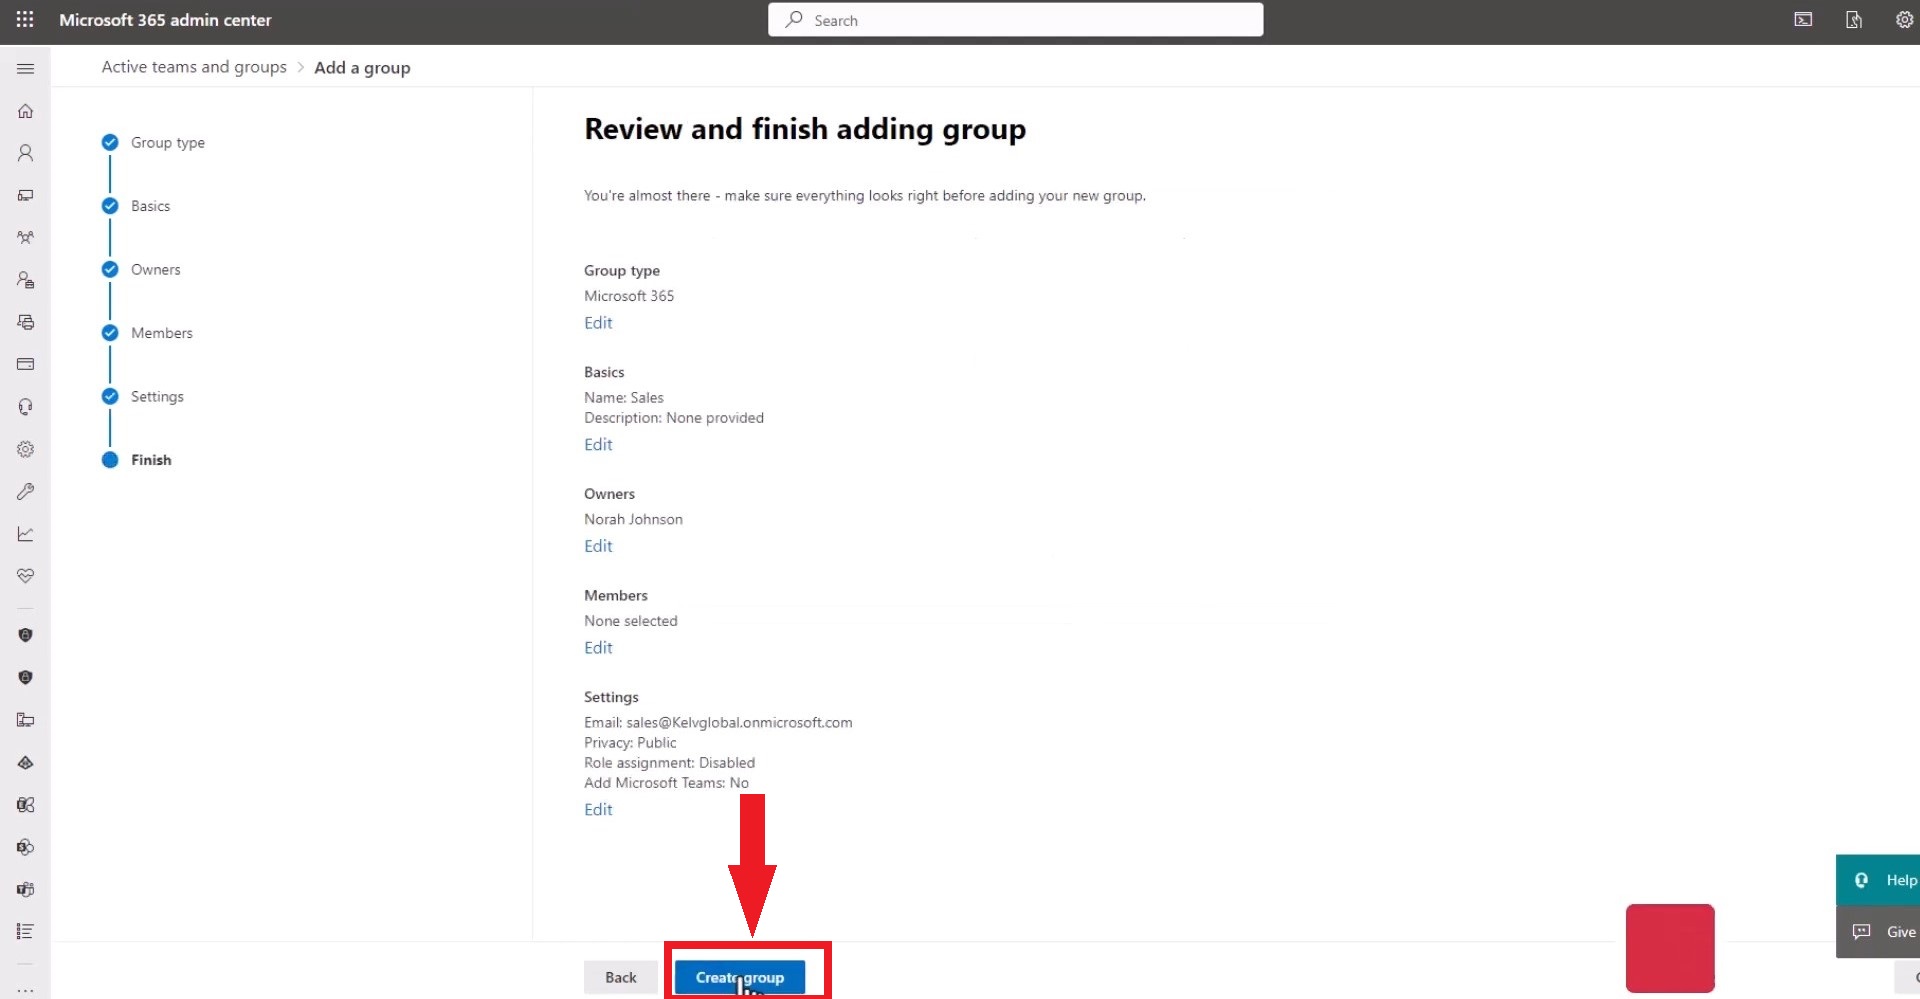
Click on Create group
This email group will be accessible to everyone in your organization. In Exchange Online, you can create a distribution group by navigating to Recipients > Groups and following these instructions.
Images sourced from KELVGLOBAL ICT.
5. Create email group in Outlook mobile app
If you frequently manage your emails on mobile, here’s how to create an email group in the Outlook mobile app.
- Open the Outlook mobile app and select “Groups” from the folder pane.
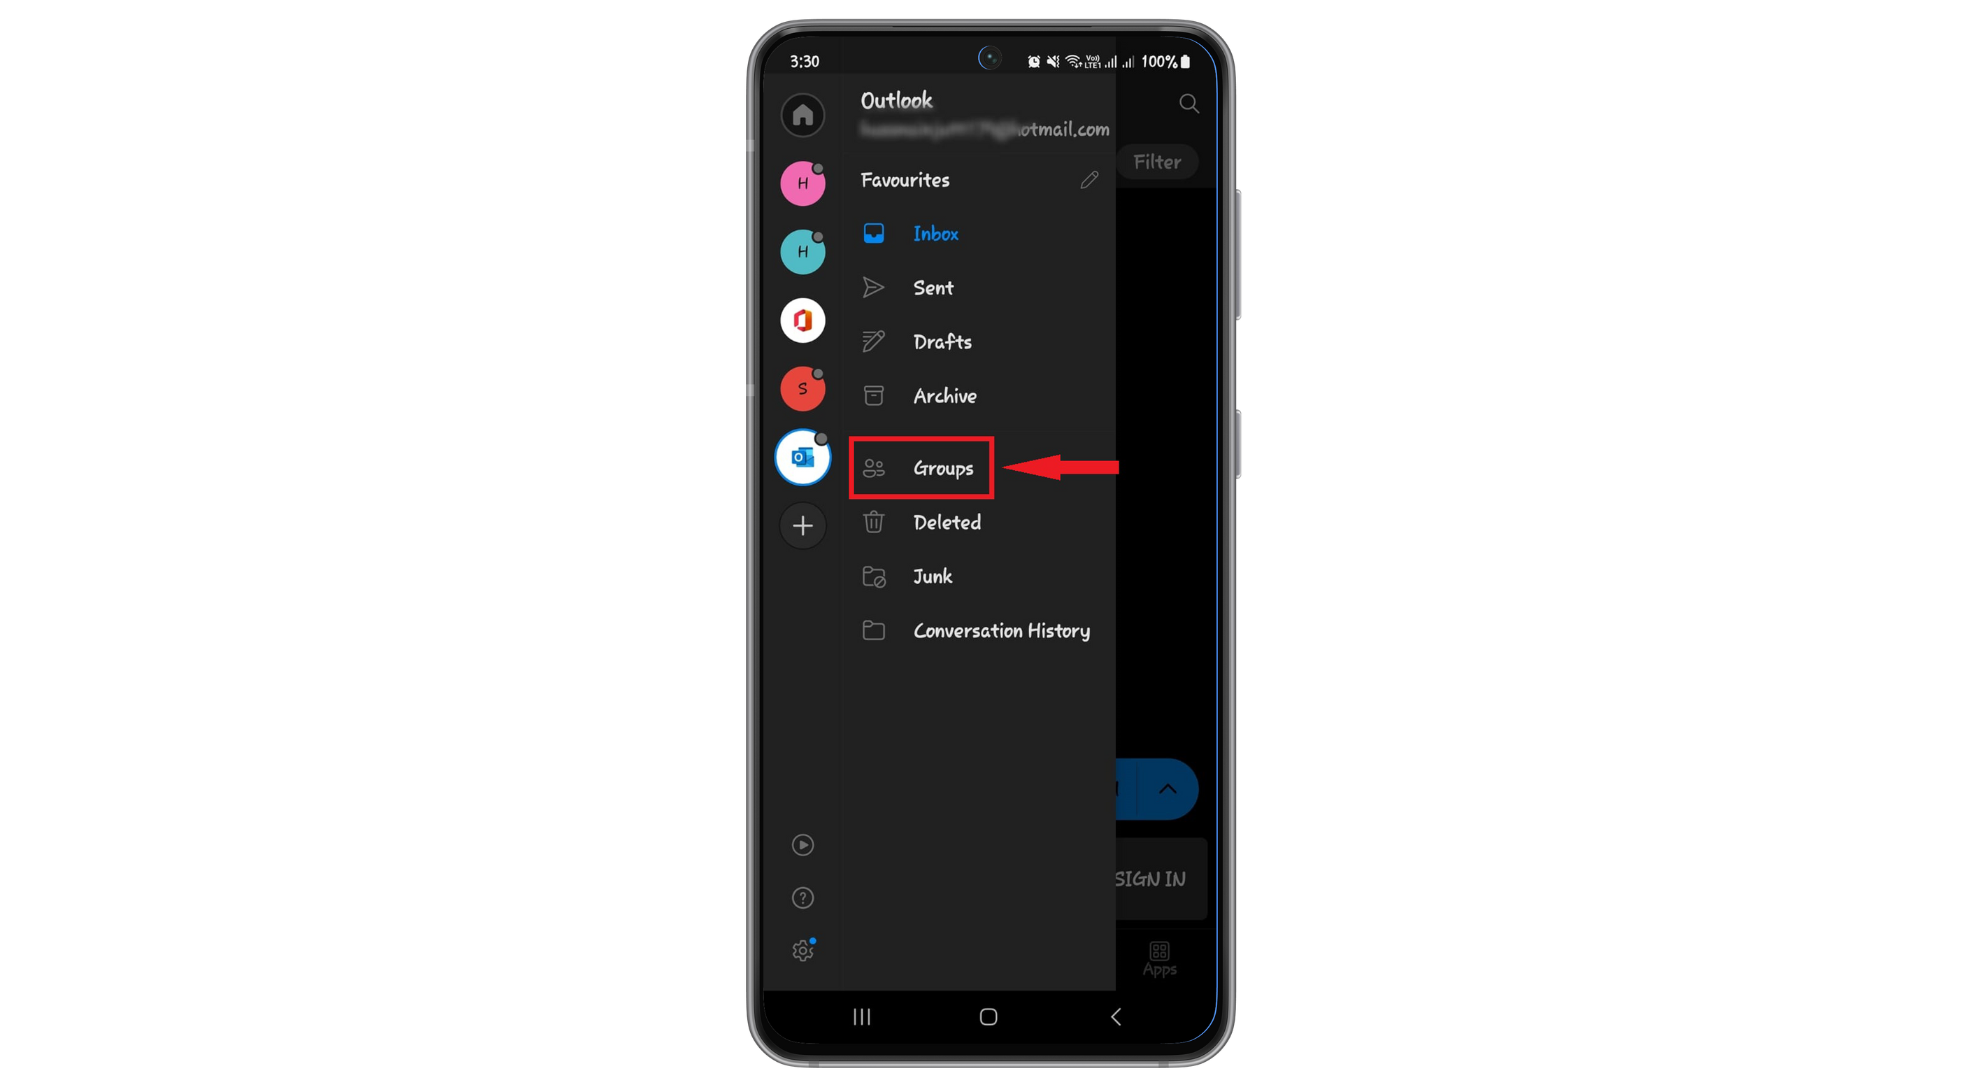
Select Groups - Click the Groups header, then click “+ New Group.”

Tap New Group - On the New Group page, name the group, add email addresses in the “Add members” area, and select “Create.”
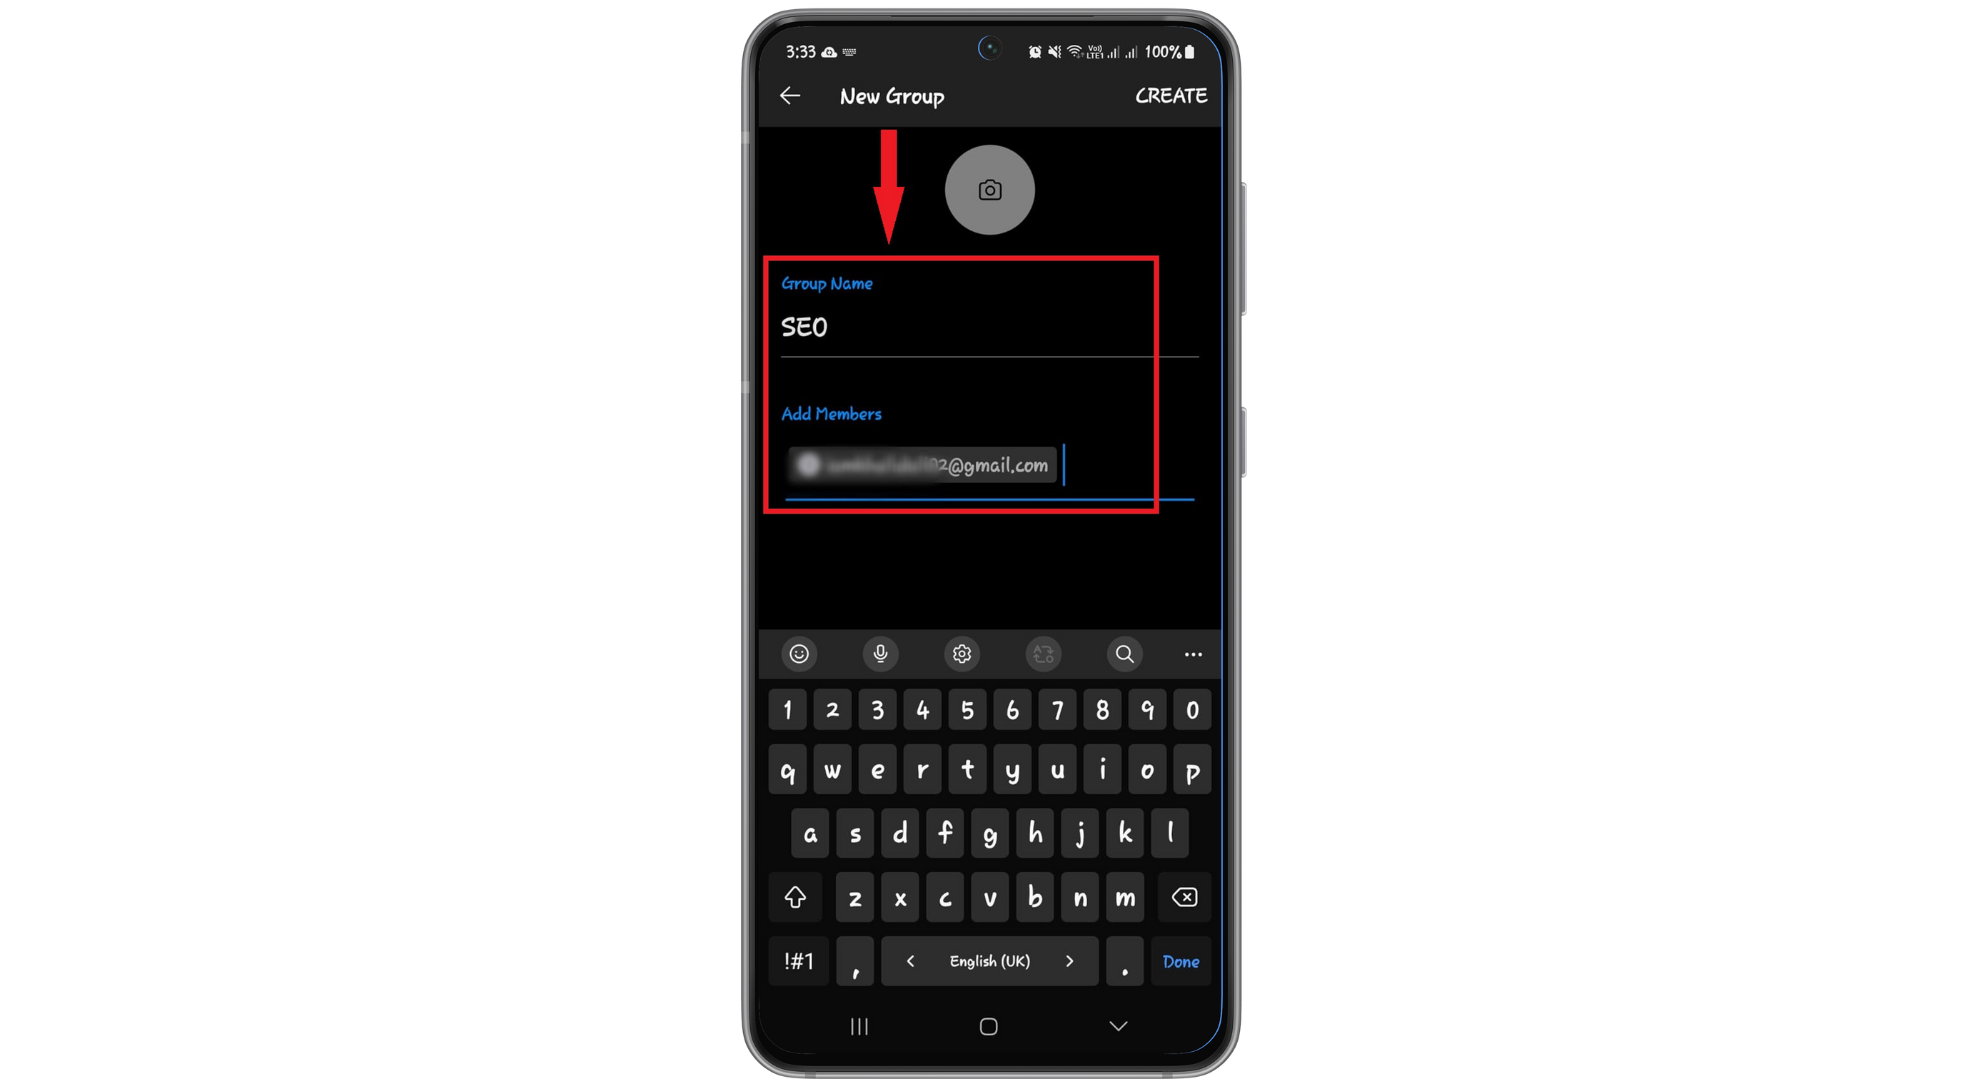
Tap Create - A welcome email will appear in your newly created group inbox.

Group Created
6. Create Email Group in Microsoft Outlook 2010
In the latest versions of Microsoft Outlook, creating email groups has evolved. If you’re using an older version, don’t worry—whether known as Distribution Lists, Contact Groups, or simply Groups, the steps are consistent. Here’s what you need to do:
- Open Microsoft Outlook and go to the Contacts tab.
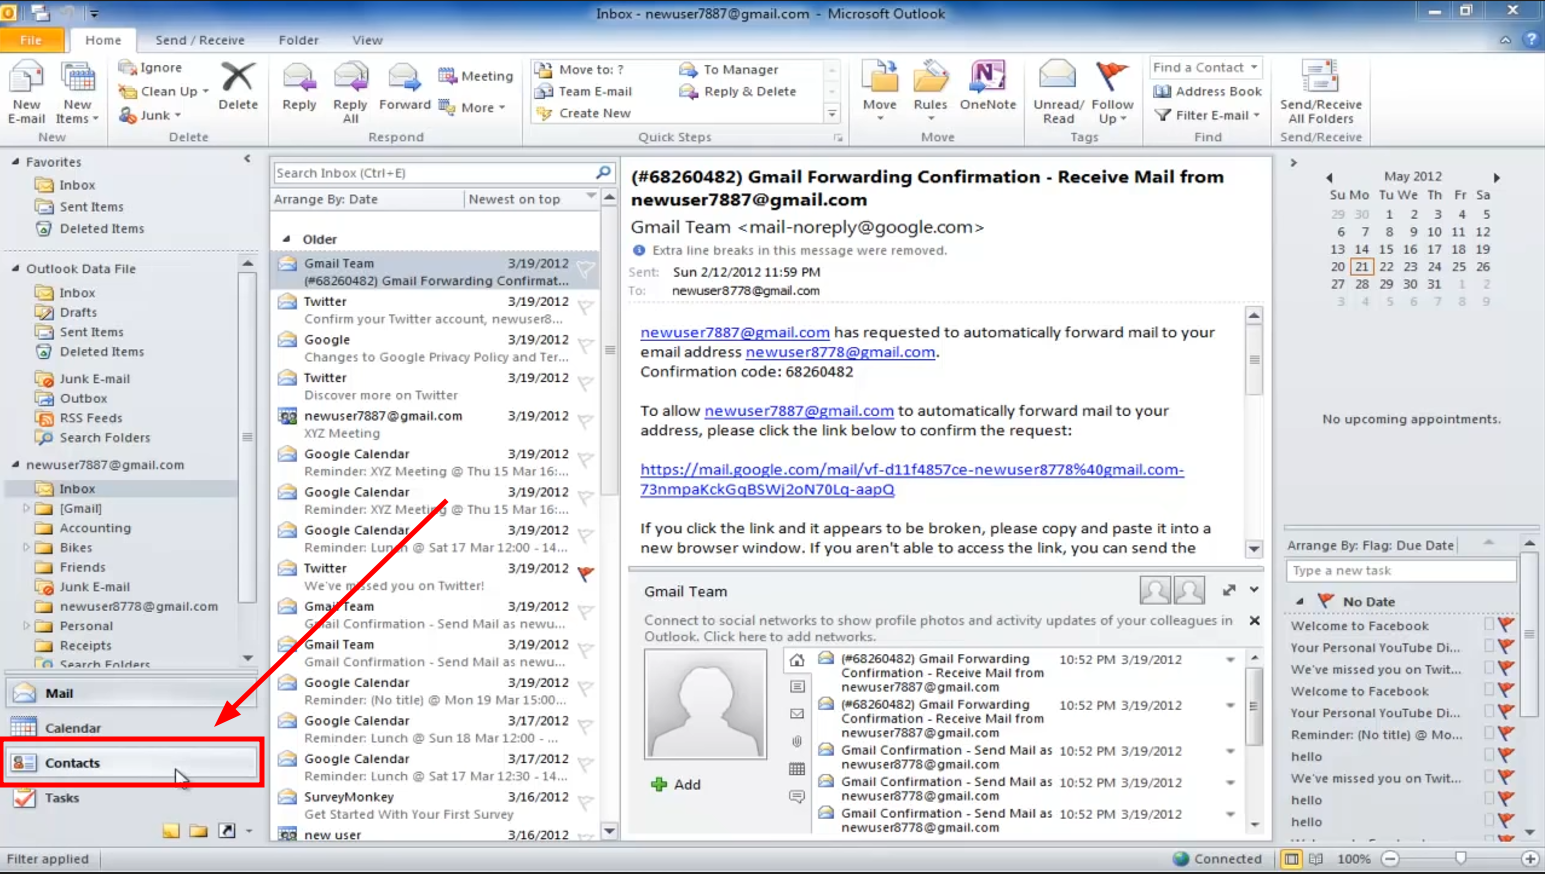
Click on Contacts tab - Select “New Contact Group.”

Click New Contact Group - Provide a name for the new contact group, such as “Office Staff.”
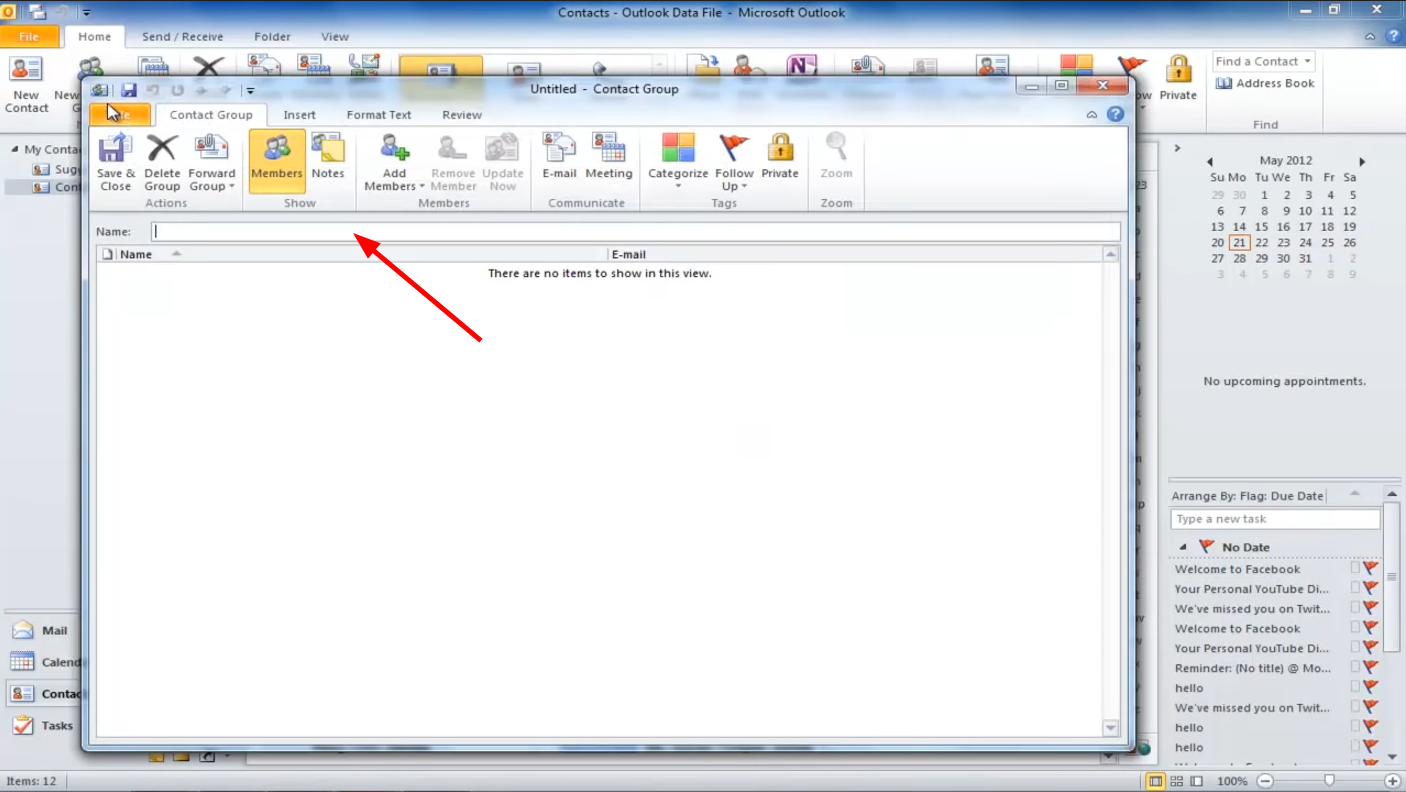
Add a name to group - Select “Add Members” to include individuals in the group.

Click on Add Members - Choose the source for adding members: “Email Contact” for manual entry or “Add Members from Outlook Contacts” for existing contacts.
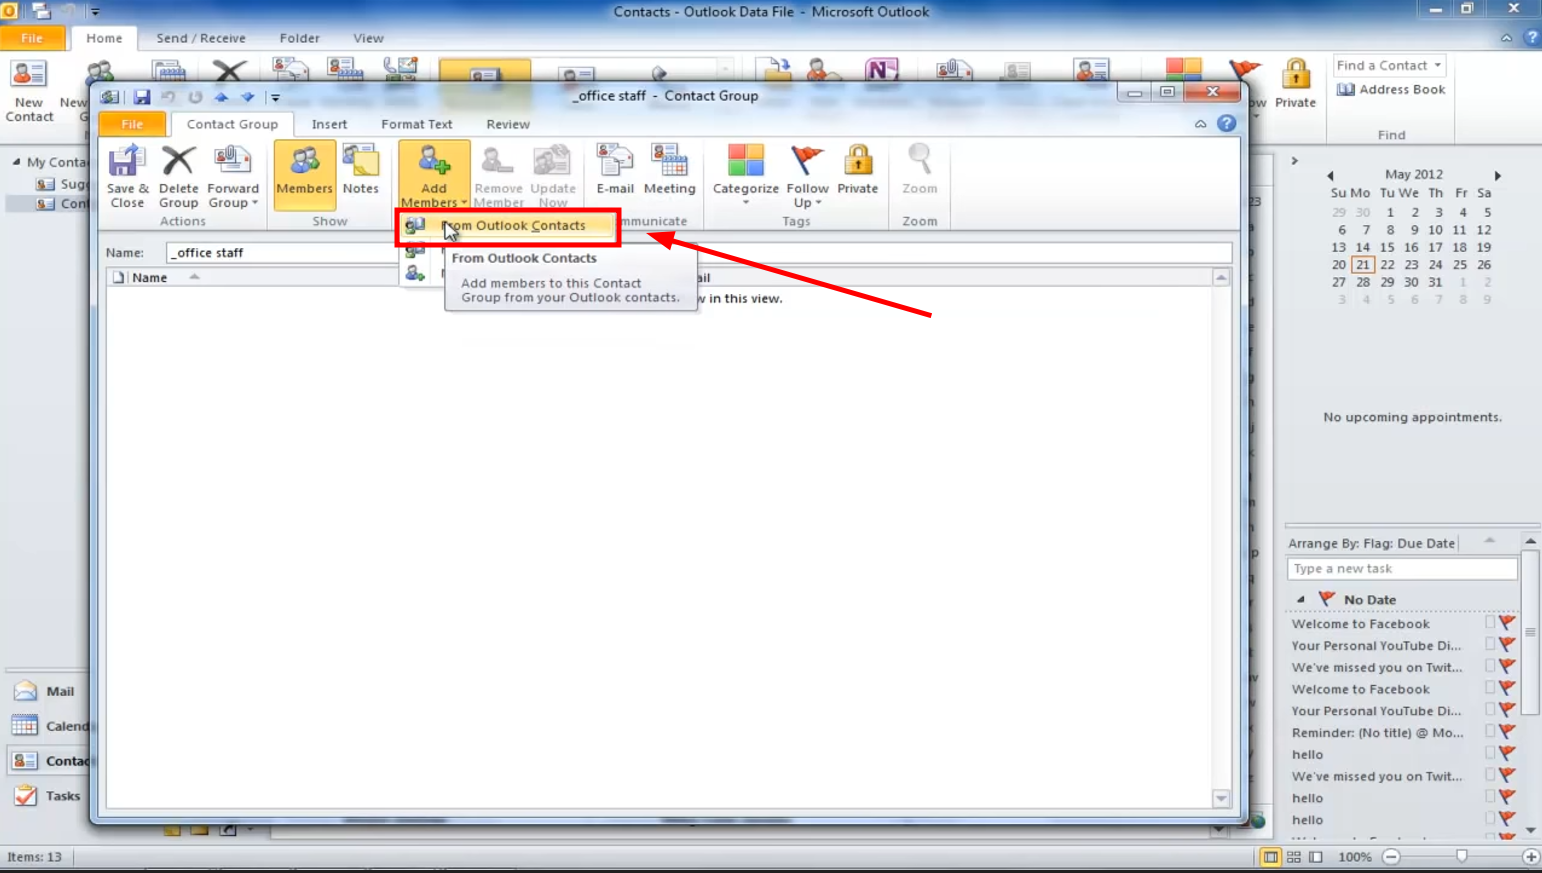
Click From Outlook Contacts - If selecting from Outlook contacts, double-click on the individuals’ names you wish to add. Confirm selections with “OK.”
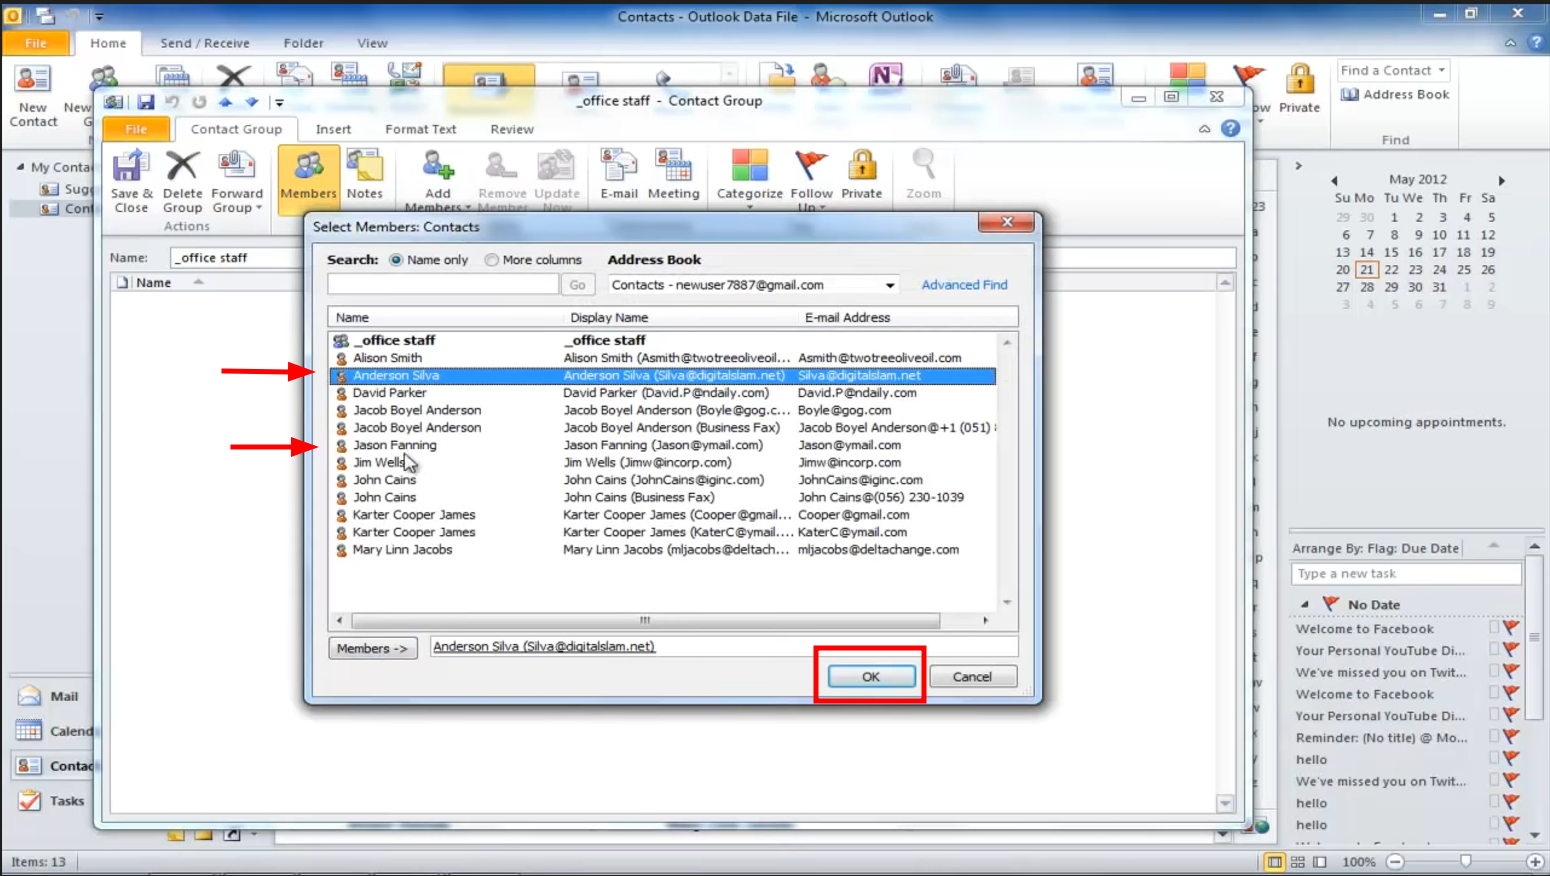
Click OK - Select “Save and Close” to finalize the creation of the new contact group.

Click Save & Close - Contact group is successfully created.
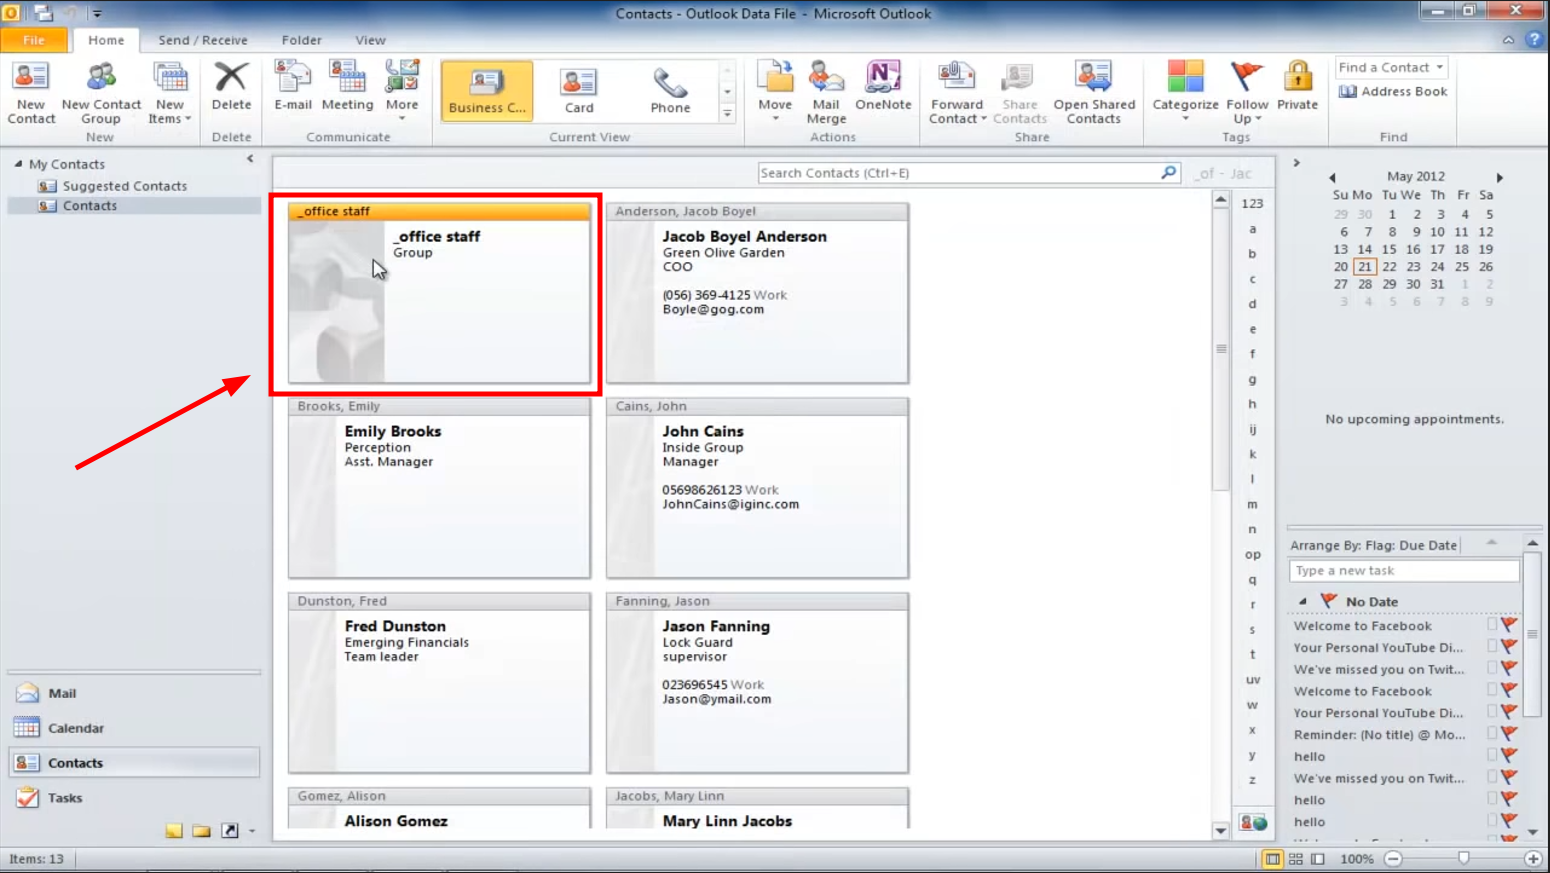
Contact Group Created
Why Do you Need to Create Email Groups?

Utilizing email groups in Outlook offers numerous advantages beyond the convenience of messaging multiple recipients at once. Here are some compelling reasons to incorporate email groups into your communication strategy:
- Time-saving: Skip the hassle of manually adding individual email addresses each time you need to send a group email. A single click on the email group streamlines the process, saving both time and effort.
- Better organization: Management of contacts is simplified by categorizing them into specific email groups. Separate groups for colleagues, friends, family, or any other category can streamline your contact management.
- Reducing errors: Email groups greatly reduce the risk of inadvertently omitting someone from important group communications, ensuring that your messages are delivered accurately and to all intended recipients.
- Efficient communication: Email groups facilitate quick message dissemination to large groups, making them essential for distributing updates, announcements, invitations, and more effectively.