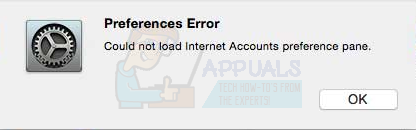
Fix: Could not load Internet Accounts preference pane
This error usually troubles the mac users who have recently upgraded to Yosemite or Sierra. After you are done with the whole upgrade process, you might have some troubles with the Mail and its preferences. When you go to Mail “Accounts” Preferences, you will see an error “Preferences Error Could not load Internet Accounts preference pane”. This problem also comes with, but not always, with the iCloud System preferences problem as well. If you go to Apple menu > System preferences and then select iCloud you might see an error like “Preferences Error Could not load iCloud Accounts preference pane”. Although it doesn’t always have to be true but most of the users saw both of these errors together. You might also be able to access these settings while signed in as a guest user which means this error will be presented only if you are signed in with your own account. This can be a huge problem because this error won’t let you use your Mail properly which can be a big deal for a lot of people.
The main issue arises because of the upgrade. When you upgrade to Yosemite/Sierra, there are some files that gets corrupted which then creates these problems for users. That is why, most solutions revolve around either deleting or renaming specific folders or files. That type of file or folder you need to remove depends on the type of problem you are facing. So, try each and every method given below until the problem is solved. And, if nothing works, then your last resort is to reinstall the OS which definitely solves the problem despite being really time consuming.
But, before you try the methods given below, try the tips given below first.
- Many users have said that closing and reopening System Preferences solves the problem. So, before diving deep into the solutions given below, try to quit System Preferences and open them again.
- For some users, simply restarting the system also solved the problem so try that as well. It won’t cost you anything but if it solves your problem then you won’t have to go through a huge process.
Method 1: Sign out and Sign back in
For a lot of users, the problem get solved if you sign out of your iCloud and then sign back in. This has something to do with the refresh connection with iCloud but the exact reason of why this works is not known. However, the good thing is that it works for plenty of people.
Here are the steps to signing out and then signing back in to iCloud
- Open Apple menu
- Select System Preferences
- Select iCloud
- Select Sign out
- Once you are signed out, sign back in by following the steps from 1-3 and then enter your credentials.
Once you are signed back in, try to check the Mail preferences again and see if the problem is there or not.
Method 2: Deleting Folders
The problem is also solved by removing some of the folders at specific paths. The reason this works is because there might be a few bad files in those folders that might be causing this issue. So, deleting them solves the problem because when you restart your computer, your system will automatically replace those files with fresh ones.
Here are the files that you need to delete and the steps involved in this procedure
- Firstly, close the preference panel. Make sure it isn’t just minimized, it should be closed. Just simply close the system preferences. Just to be on the safe side, close all applications
- Go to this address/Library/Preferences/Containers.
- Locate the folder named apple.internetaccounts
- Select the folder apple.internetaccounts, hold Command key and press Delete (Command + Delete)
- Now, go to this address /Library/Preferences.
- Locate the folder named apple.internetaccounts.plist
- Select the folder apple.internetaccounts.plist, hold Command key and press Delete (Command + Delete)
- Now reboot
Once your system is rebooted, your problem should be solved. This isn’t a hack but a permanent solution so you won’t have to worry about this problem anymore.
Method 3: Deleting NotesV2 files
This method is similar to method 2 given above but you will have to delete some specific files in this method. The method is targeted to delete the NotesV2 files that might be causing the iCloud issue. This is because those files will lock the database which will prevent notes to open and, therefore, cause these problems with iCloud. Most of the users have solved their “could not load preferences” problem be deleting these files.
The steps for locating deleting these files are given below
- Firstly, close the preference panel. Make sure it isn’t just minimized, it should be closed. Just simply close the system preferences. Just to be on the safe side, close all applications
- Go to this address /Library/Preferences/Containers /com.apple.Notes/Data/Library/Notes/.
- Locate the file named storedata-shm
- Select the file storedata-shm, hold Command key and press Delete (Command + Delete)
- Locate the file named storedata-wal
- Select the file storedata-wal, hold Command key and press Delete (Command + Delete)
If that doesn’t work then do this
- Go to this address /Library/Preferences/Containers.
- Locate the folder named apple.Notes
- Select the folder apple.Notes, hold Command key and press Delete (Command + Delete)
Now reboot and check whether the problem is solved or not.
Method 4: Move V2 Folder and Accounts
Another solution that might work for you is moving your V2 folder that can be found in your mail folder and then deleting the account that is causing the issue. This way, your system automatically create new folder with new data. You can then move your V2 folder back to its original location and that’s it. This solves the problem for a lot of users.
Here are the steps for this procedure
- Close Mail just to make sure that the System Preferences isn’t open
- Go to this location /Library/Mail/
- Locate a folder named V2
- Select the folder named V2, hold down the mouse or trackpad button and drag your mouse to the desktop. Now release the button.
- Now you should be able to open the Internet Accounts preference pane in System Preferences
- Re-start Mail and it should work fine now.
- Now there will be a fresh copy of that V2 folder in its place and your Mail will work fine now. You can either continue to use it but if you want your settings and email back then select the V2 folder (that you just moved to the desktop), hold down the mouse or trackpad button and drag your mouse to this location /Library/Mail. Now release the button.
- Close the Mail and reopen it. Your old messages and settings should be back and you shouldn’t have any problems with the System preferences as well
If it asks, replace the files in the destination and you should be fine.
If this doesn’t work for you then do the following
- Close Mail just to make sure that the System Preferences isn’t open
- Go to this location /Library/Mail
- Locate a folder named V2
- Select the folder named V2, hold down the mouse or trackpad button and drag your mouse to the desktop. Now release the button.
- Go to Mail by clicking the Mail icon from the Dock at the bottom of your screen
- Select Preferences then select Accounts
- Click the account that you are having troubles with
- Click the minus (-) symbol on the bottom left. This will remove all the data of those accounts.
- Click Remove
- Repeat steps 7 and 8 for all the accounts with the problem
- Once you are done, close the window and restart Mail.
Your problem should be solved now. You can setup your Mail with your accounts just like you did before.
Method 5: Clean Install
Unfortunately, your last solution is to do a clean install of Yosemite/Sierra. This might be a time consuming procedure but it will solve the problem. Don’t forget to back up your data with Time Machine before doing a clean install.
Also, there are a couple of things that you need to keep in mind when doing a clean install of the OS.
Do not do anything once your OS is installed. Do not use FindMyMac or iCloudKeyChain. Also, DO NOT use Time Machine to restore your data once you are done with the clean install. Users have reported to experience problems when they use these. Start the Yosemite/Sierra once it is installed and then use the Migration Assistant to import your old files and settings.
Once you are done importing your data, you should be fine and the problems should be gone.
/Library/Preferences/Containers does not exist??