[FIX] Core Isolation Memory Integrity Fails to Enable
Memory Integration of Core Isolation is an excellent security feature but you may fail to enable it if the WD driver is hindering the mechanism of Core Isolation. The full error message is:
Core Isolation Memory Integrity Fails to Enable Because of Incompatible Driver ‘WDCSAM64_PREWIN8.SYS’
The issue arises when the user tries to enable the Memory Integration of Core Isolation but fails and when he reviews the incompatible drivers, he finds out the issue is created by the WD driver. The issue is not limited to a particular system manufacturer and a message as below is mentioned:
wdcsam64_prewin8.sys

Driver date: 11/29/2017

Driver version: 1.2.0.0

Published name: oem16.inf
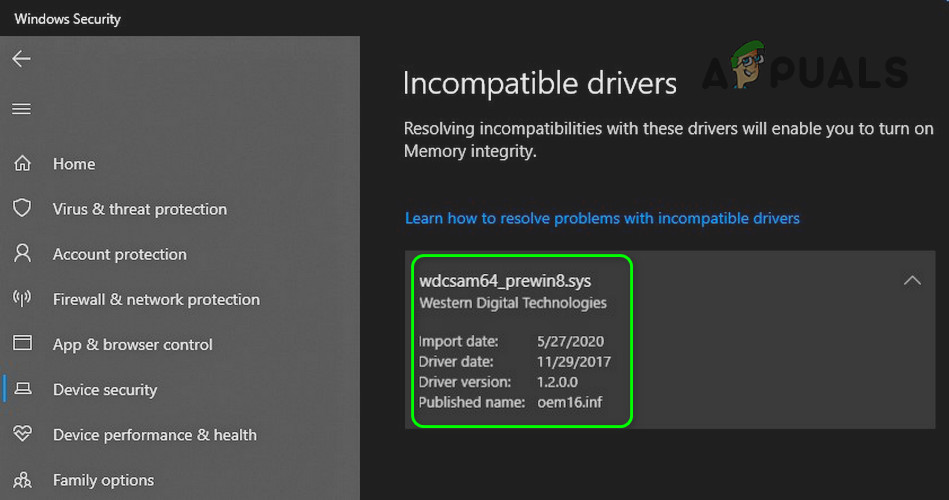
Before moving on with the solution to enable Core Isolation, make sure that virtualization is enabled in your system’s BIOS (you may have to enable SVM in the Overclocking page of the BIOS, if available).
Solution: Uninstall the Problematic WD Driver and Remove it From the DriverStore
The issue could be a result of a corrupt driver of your WD storage device (mainly external). In this case, removing the corrupt driver may resolve the problem.
- Power off your system and connect every hardware (especially the WD storage drive) that is used with the system.
- Then power on your system (it is better to clean boot your system) and log in using an administrator account.
- Then right-click on the Windows button and in the Quick Access menu, choose Device Manager.
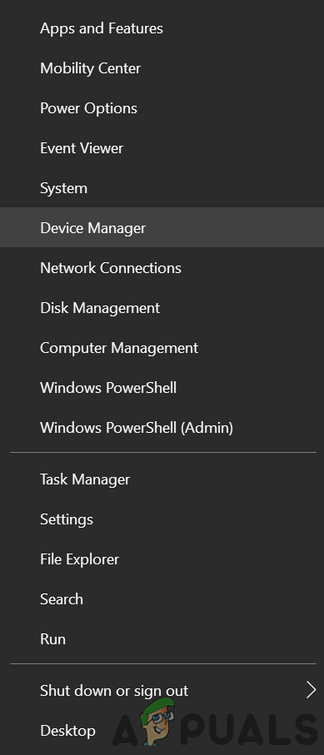
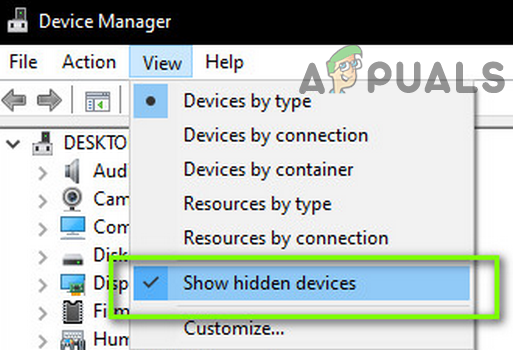
Open Device Manager - Now expand the View menu and choose Show Hidden Devices.
Show Hidden Devices in the Device Manager - Then disable the WD Ses Device (under WD Drive Management). Also, make sure to disable any WD Device under Storage Controller, Disk Drives, and Other Devices (either active or hidden).
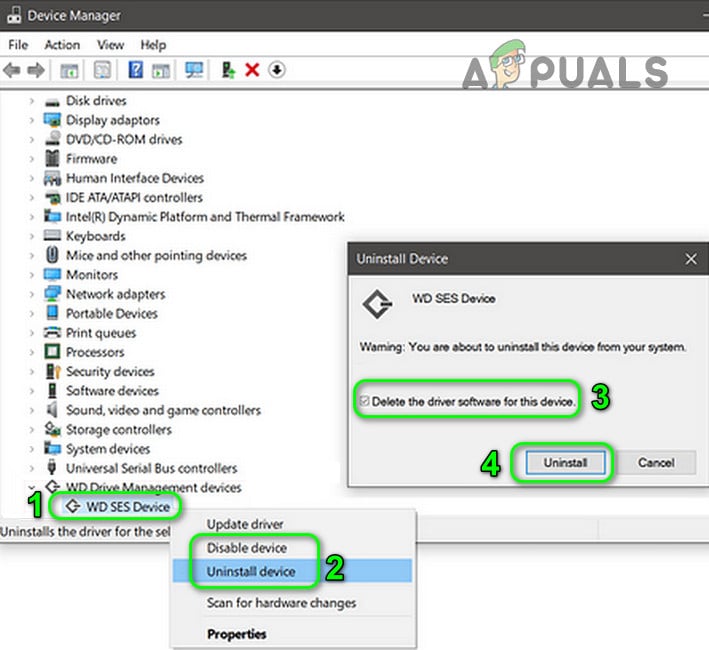
Disable and Uninstall the WD Ses Device - Now uninstall all the WD devices (disabled in the last step) and when uninstalling, do not forget to check-mark “Delete the Driver Software of This Device.
- Then right-click on the Windows button and choose Apps & Features.
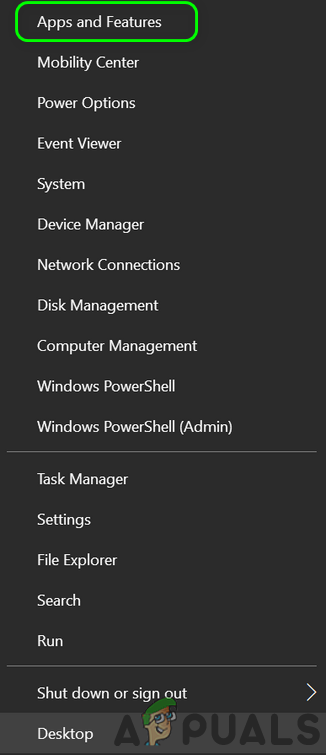
Open Apps & Features - Now uninstall any apps belonging to WD (like Smartware, WD Backup, etc.).
- Then right-click on the Windows button and choose File Explorer.
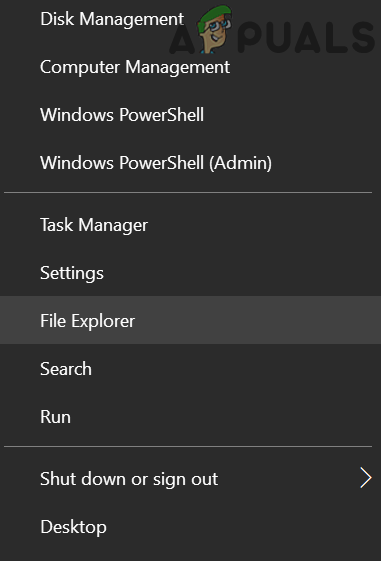
Open the File Explorer - Now navigate to the following path (where C is your system drive):
C:\Windows\System32\DriverStore\FileRepository\wdcsam.inf_amd64_7ce69fc8798d6116
- Then take the ownership (from the System account to your user account) of the wdcsam64_prewin8.sys file (make sure to give yourself full control) and if you cannot take the ownership, then try to take the ownership in the safe mode of your system.
- Now delete the wdcsam64_prewin8.sys file and repeat the same to any other folder starting from WDCSAM.INF in the FileRepository folder.
- Then search for wdcsam64_prewin8.sys in the File Explorer search (while This PC is selected) and delete all the files brought out by the search.
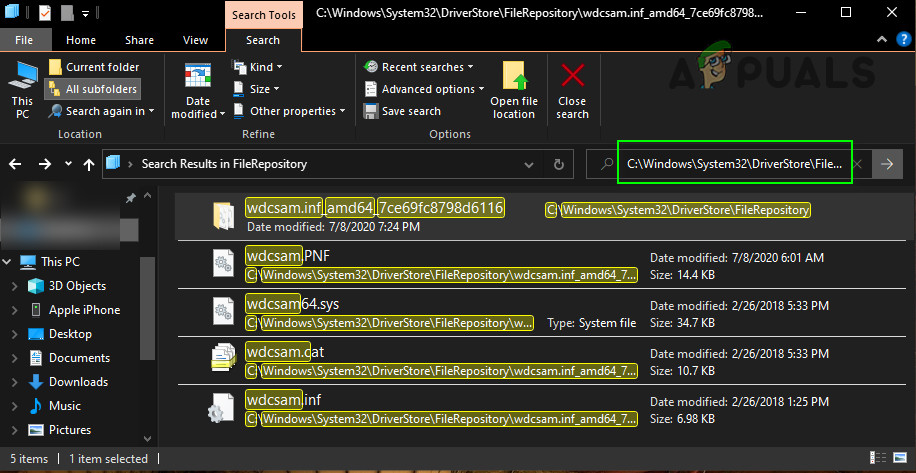
Search for wdcsam64_prewin8.sys File - Now check if Core Isolation can be enabled.
- If not, power off your system and remove all the devices that are not essential (especially, WD storage devices).
- Then power on your system and check if the Core Isolation can be enabled.
If the issue resurfaced, then try to remove any hidden WD devices from the Device Manager, and hopefully, you could enable the Core Isolation without any issue.
If the issue is still there, then you can use Autoruns to identify if any of the startup items is creating the issue. Keep in mind, once you enabled Core Isolation, then you can use the WD device after reinstalling its driver.


