How to Copy a DVD in Windows 7
Sometimes people need multiple copies of the same DVD, and making copies of one single DVD can befuddle computer users who only have a single CD/DVD drive on their computers to work with. Is it actually possible to clone a DVD if your computer only has one CD/DVD drive? It certainly is, and it’s also no rocket science. There are a plethora of different third-party applications out there that can make copies of DVDs pretty easily, but why go through the trouble of finding, downloading and installing a third-party application for a task the Windows Operating System can do well enough on its own?
Windows 7 and its in-built DVD burning utility is more than enough for you to make multiple copies of a single DVD, you don’t need to go hunting for third-party programs for the job, programs that are often riddled with at least adware (if not something much more dangerous such as malware). Windows 7’s default disc burning utility is admittedly quite the basic program with a very short list of features. However, it is more than capable of getting the job done as far as creating copies of one DVD is concerned. If you would like to make copies of a DVD on Windows 7, you need to:
- Copy ALL of the contents of the source DVD to a directory on your computer. For convenience’s sake, simply create a new folder on your Desktop with a fitting name and copy all of the files and folders on the source DVD over to this folder.
- Remove the source DVD from your computer’s CD/DVD drive and insert the DVD you want to turn into a copy of the source DVD. It is recommended that you use a blank DVD.
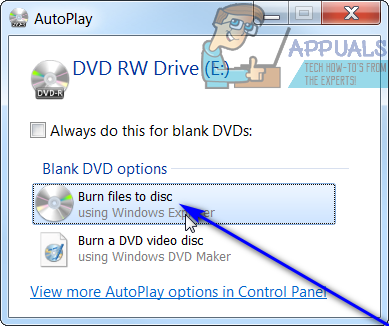
- Wait for Windows to detect the DVD you just inserted and gain access to it. As soon as Windows 7 detects the DVD you put in, a Windows AutoPlay dialog will appear on your screen asking what you want to do with the DVD. When this happens, click on Burn files to disc.
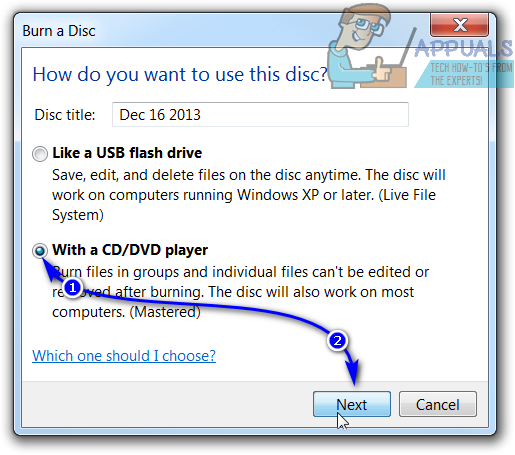
- Type a fitting name for the DVD into the Disc title: field and choose the With a CD/DVD player option by clicking on the radio button located right next to it.
- Click on Next.
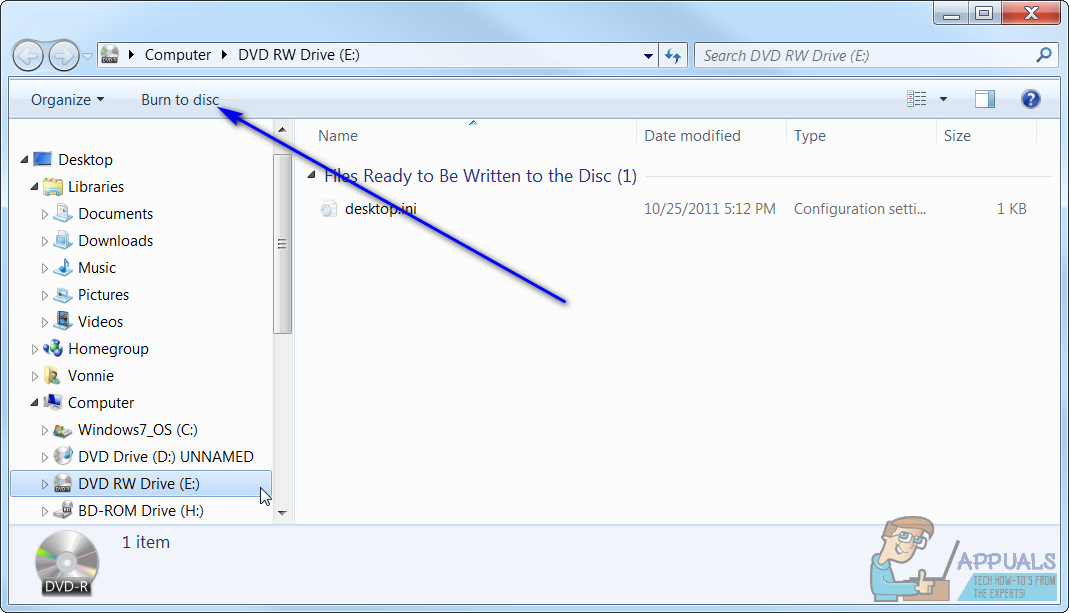
- Move over the files you copied from the source DVD to your computer to the destination DVD. These files, once copied over to the destination DVD, will show up under the Files Ready to Be Written to the Disc section.
- Click on Burn to disc and follow any onscreen instructions or prompts you see.
- All that is left for you to do now is wait for the files to be successfully written to the DVD.
Once Windows is done writing the files to the DVD, you will have an exact copy of the source DVD. If you want multiple copies of the source DVD, you can simply repeat the process listed and described above as many times as you want to have as many copies of the source DVD as you like.