Fix: This computer doesn’t meet minimum requirements
The error message ‘This computer does not meet the minimum requirements for installing the software’ is often due to the presence of an external graphics card which, as a result, disables the integrated GPU. Other than that, a wrong driver or incorrect OS version can also result in the said error message. The error pops up when you are trying to either update or install a driver for your Intel GPU which comes integrated with the chipset.
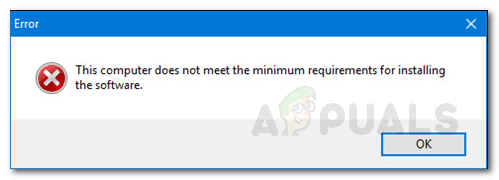
In some cases, the users are not even able to see the card under the Display Adapters entry in the Device Manager. This usually refers to a restriction imposed by the BIOS configuration. Various motherboards often disable the integrated graphics card in the chipset when an external video card is attached to the system. However, that’s not supposed to occur all the time. We will be looking into the causes of the error message in more detail down below. Therefore, without further ado, let us get into it.
What causes the “This Computer does not meet the Minimum Requirements for Installing the Software” Error Message?
We went through several user reports to have a better grasp over the said error message and prepared a list of various causes which are mentioned below.
- Graphics Card Disabled in the BIOS Configuration: The error message pops up if you have an external video card attached to the system in which case some motherboards automatically disable the integrated graphics card in the chipset. However, the presence of an external video card is just a probability and not a defined scenario.
- Wrong Driver: Another cause of the said error message can be the implementation of an entirely wrong driver. What this means is that the driver that you are trying to install on your system varies from the one supposed for your graphics card.
- Incorrect OS Version: If you do not already know, every version of the Windows operating system has a different driver available which is specifically developed for that version of the Windows OS. For example, if you are running Windows 10 and the driver that you have downloaded is supposed to be for Windows 7 or 8, then, in such a scenario, you are very likely to see such an error pop up. Another thing to note is the architecture of your operating system, for example, you won’t be able to install a 32-bit version of the driver on a 64-bit operating system.
How to Fix the ‘This Computer does not meet the Minimum Requirements for Installing the Software’ Error Message?
Now that you are aware of the causes of the error message, let us get into the solutions that you implement to resolve the issue.
1. Use Intel Driver and Support Assistant
The first thing you should do if you face the said error message is to download the Intel Driver and Support Assistant utility that will scan your system configuration and install the required drivers for you automatically. This can be helpful when you are not sure of your integrated graphics card model or anything of the sort. To download the tool, just head to this link and click the Download Now button. This will start downloading the Intel Driver and Support Assistant tool.
Alternately, you can check the model of your graphics card. Once you have your graphics card model, you can head to this link and download the right driver manually.
2. Install the Driver Manually
The error message pops up when you are trying to install the driver by running the setup file of the driver. You can work around the error message by installing it manually via the Device Manager. Installing a driver manually is not always recommended, however, in this scenario, you can safely do so.
Before you get on with installing the driver manually, make sure you have the right driver downloaded on your system. Afterward, follow the instructions given below:
- Press the Windows Key + R to open up the Run dialog box.
- Once it opens up, type in devmgmt.msc and then press the Enter key.
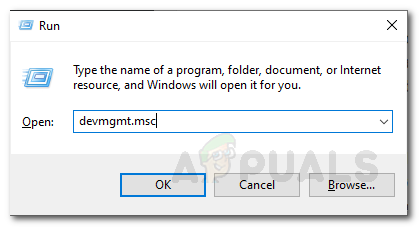
Opening Device Manager - This will open up the Device Manager window.
- Now, expand the Display Adapters entry, right-click on your graphics card and then select Properties from the drop-down menu.
- Then, switch to the Driver tab and click the Update Driver button.
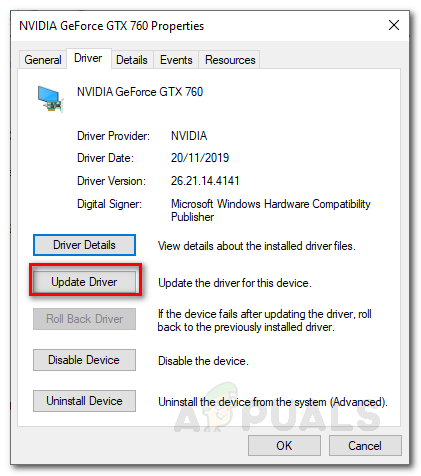
Display Adapter Properties - Click the ‘Browse my computer for driver software’ option.
- Afterward, click on the ‘Let me pick from a list of available drivers on my computer’ option.
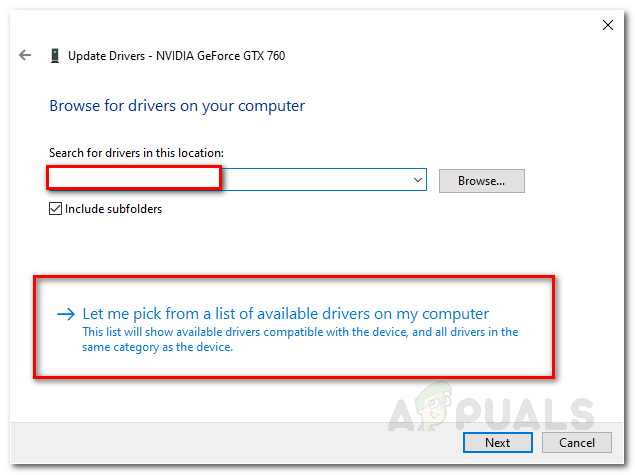
Updating Graphics Driver Manually - Click the Have Disk button and then browse to the folder you have your driver. Go to the Graphics directory and select the .inf file. If you do not have a Graphics directory, no worries, just select the .inf (this will be the one meant for your display adapter) file and click Open.
- After that, click Next and if you are popped up with a message, just hit Yes.
- Wait for the driver to be installed.
If you do not have an Intel Graphics entry under Display Adapters, then follow the next solution.
3. Enable Integrated Graphics
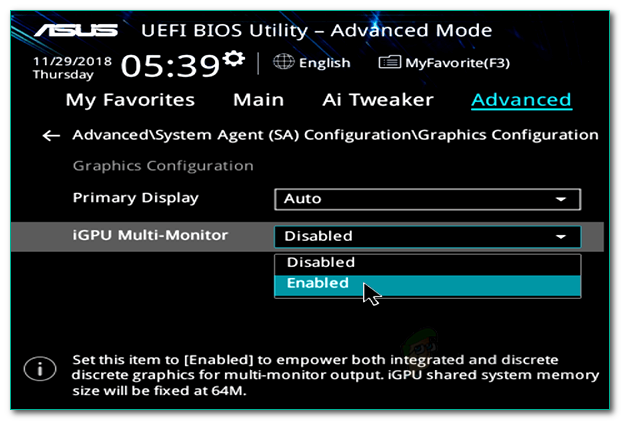
As it happens, some motherboards are programmed to automatically disable the integrated graphics card when you have an external video card attached. However, in some scenarios, that may not be the case and your integrated card might still be disabled. In such a scenario, you will have to enable the integrated graphics card from the BIOS.
Enabling your integrated graphics might vary from manufacturer to manufacturer due to which we can’t provide a defined set of instructions. However, to give a rough idea, it usually is found in the Advanced tab of your BIOS settings usually called IGD Multi-Monitor, iGPU Multi-Monitor or Intel Integrated GPU. Different manufacturers have different defined keys for booting into BIOS, so you will have to look it up on Google.
